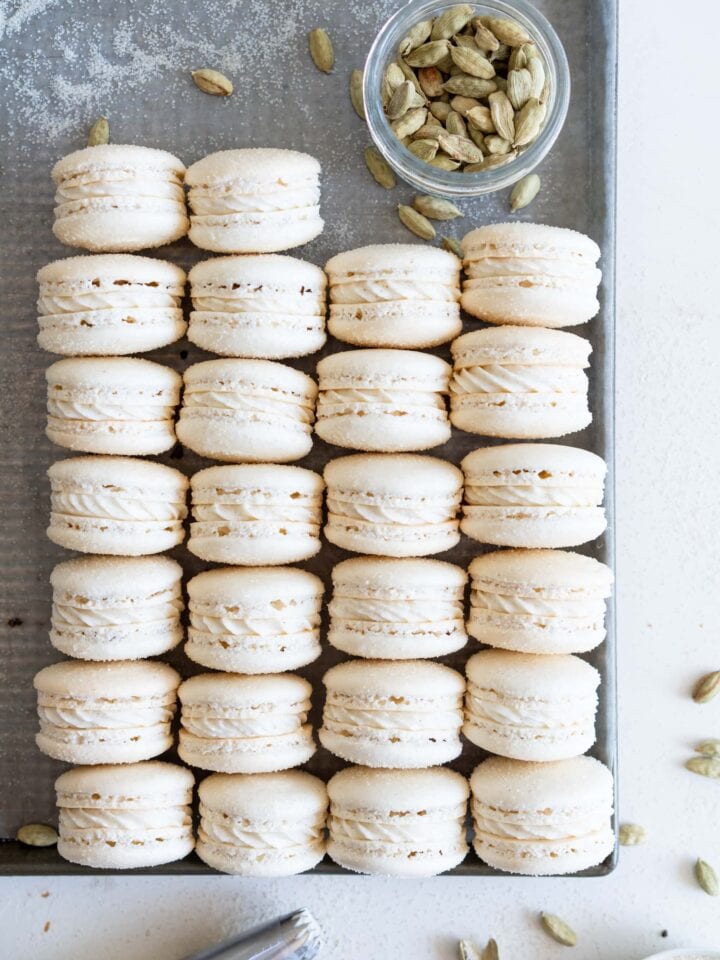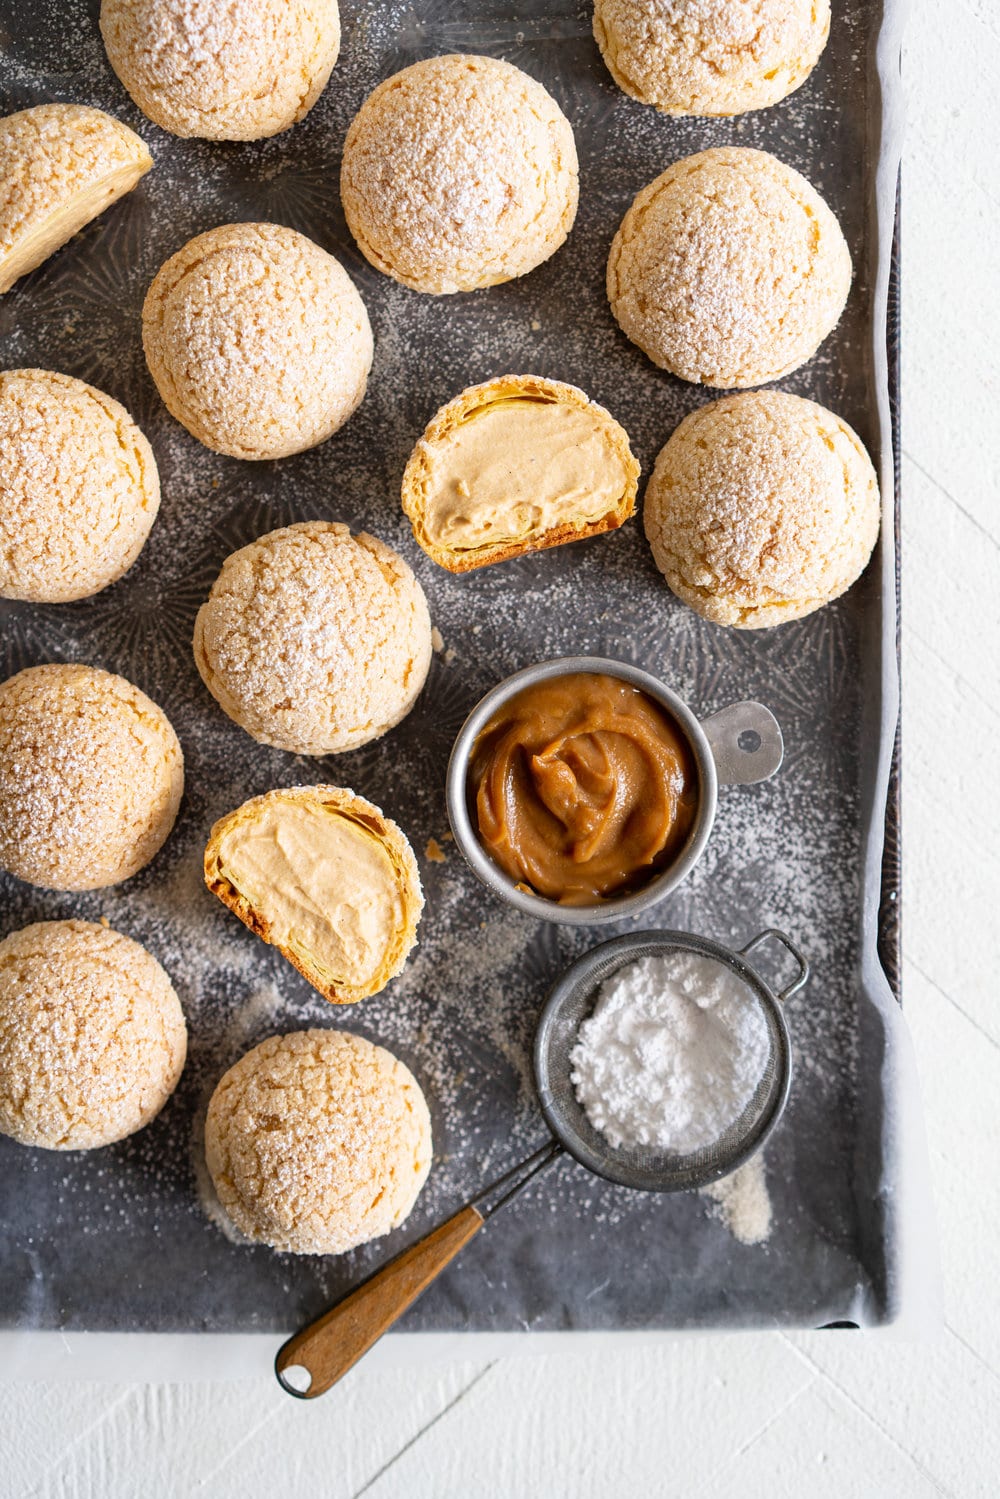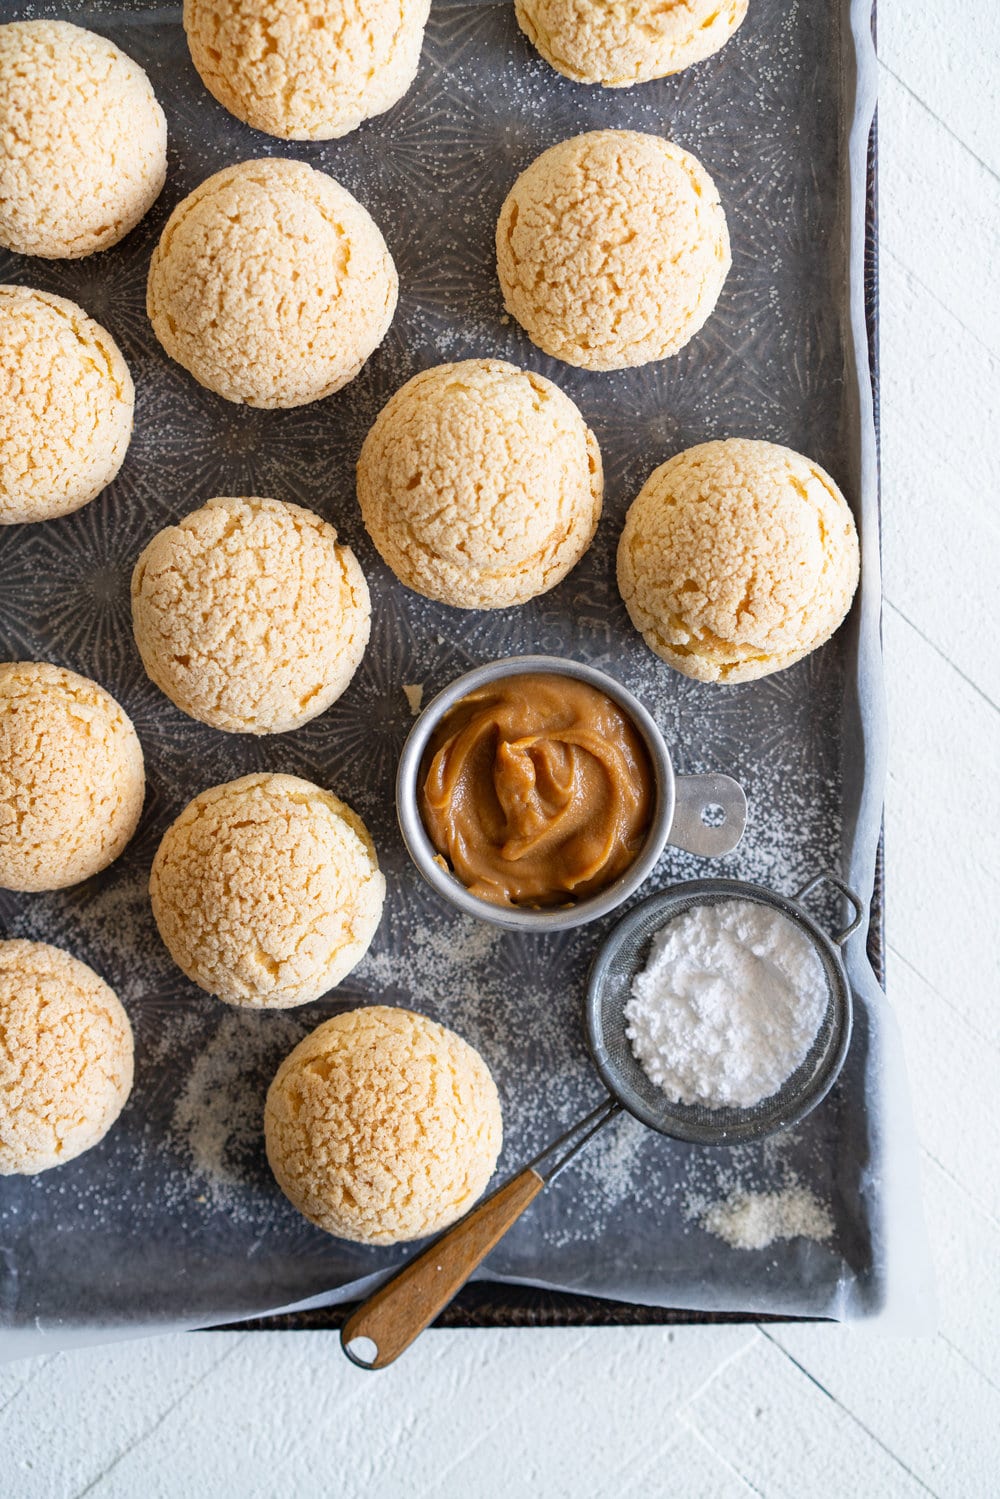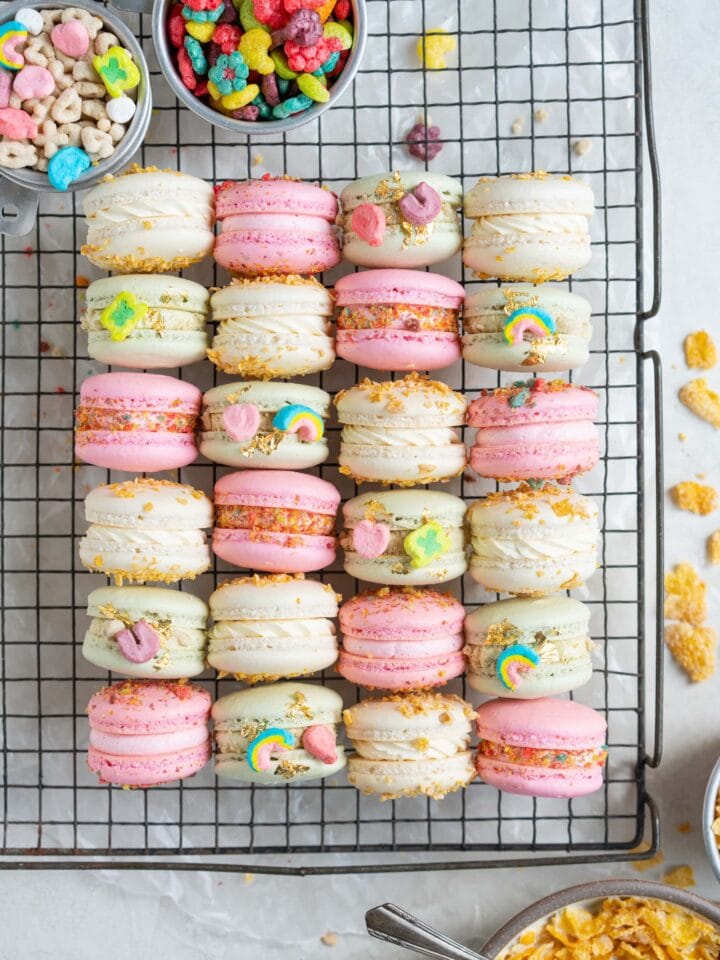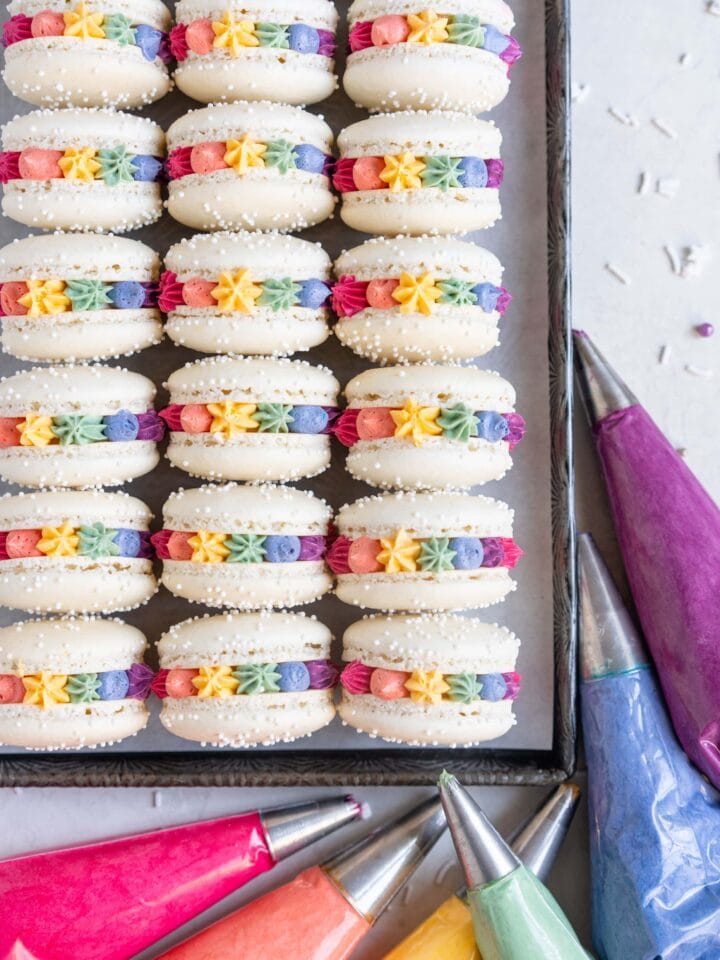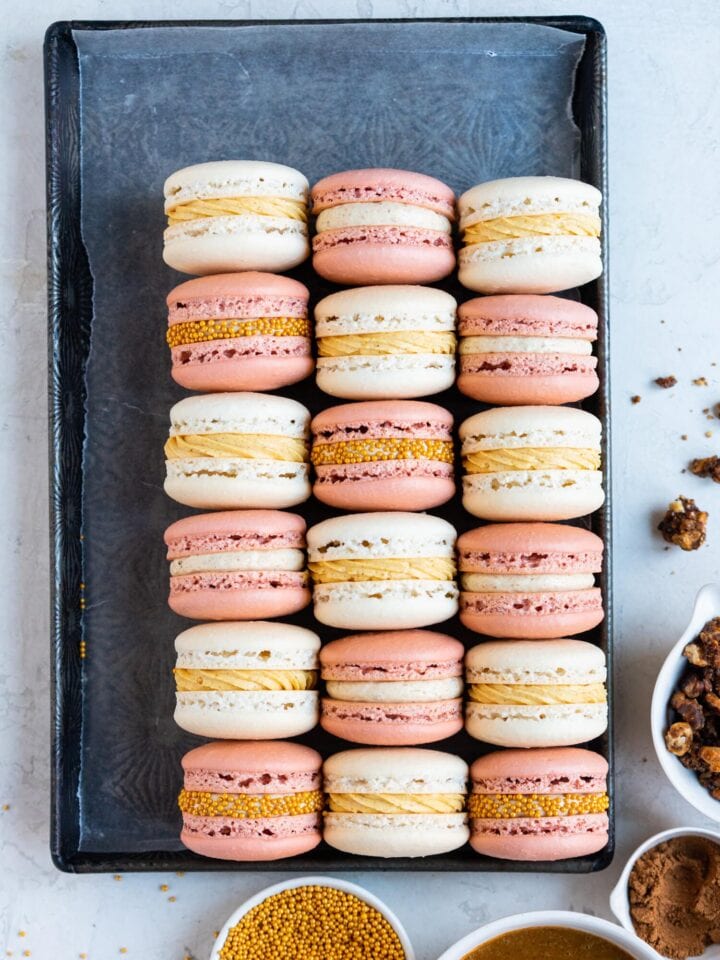
Spiced Pumpkin French Macarons and Walnut Praline French Macarons. These are thanksgiving inspired macarons, with a walnut praline swiss meringue buttercream and a spiced pumpkin Swiss meringue buttercream, these easy, no-fail French macarons are a perfect addition to your holiday dessert table.


Spiced Pumpkin Macarons and Walnut Praline Macarons
Hi hi! Happy Monday! I just wanted to pop on and share my latest collab with Jase - these Spiced Pumpkin and Walnut Praline Macarons! These are the perfect buffer between Thanksgiving and Christmas - a little bit of spice, and a little bit of sparkle.
We decided that instead of a monthly recipe like we used to do, we would instead switch to seasonally relevant recipes as the holidays and seasons come around. We started the macaron a month to really try and hone our skills and nail these tricky little things, and I think that it is safe to say that we achieved that!
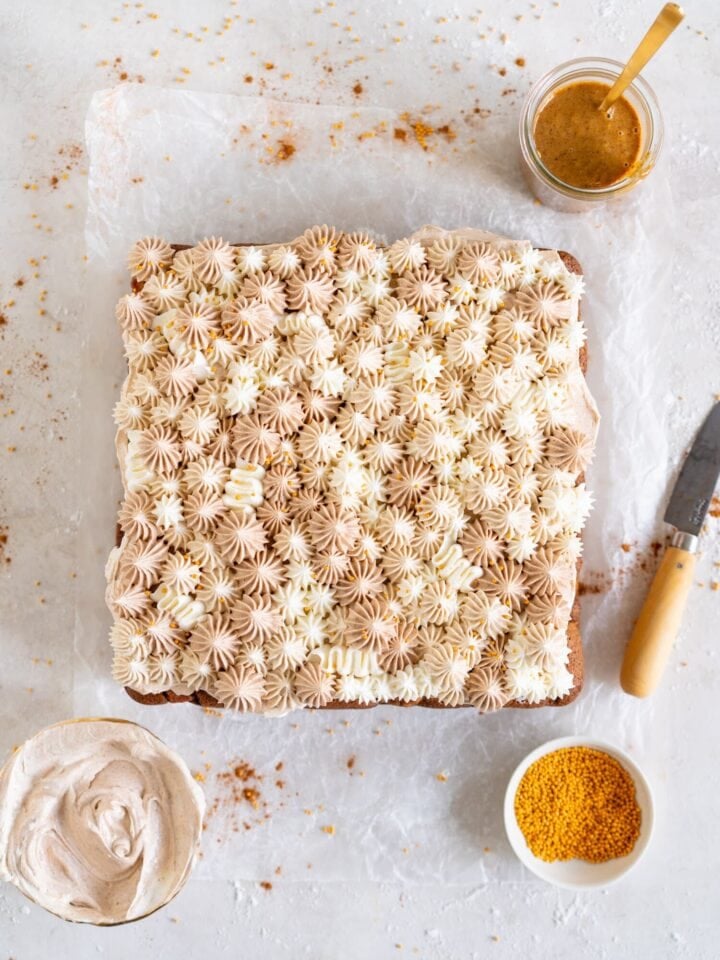
Walnut Praline Swiss Meringue Buttercream
We experimented with a new component which I think has firmly cemented itself into our repertoires - walnut praline Swiss Meringue Buttercream. We made a praline (which is basically just caramelising the nuts and then blending them into a paste), and mixed it through some buttercream, which made the most amazing toasty flavoured walnut buttercream.
Spiced Pumpkin Macaron Filling - Swiss Meringue Buttercream
For the second flavour we stirred a little reduced pumpkin puree through the buttercream along with some pumpkin spice, which made a beautifully subtle pumpkin flavoured buttercream, which is seasonal AF! These pumpkin Macarons are so good and super super easy. Both of these would be perfect on your holiday table or in your christmas treat line up!
A few wee tips for Spiced Pumpkin Macarons and Walnut Praline Macarons
- I have included recipes for both types of macarons - each recipe will make about 24 macarons.
- The macs have the same base shell recipe - we added some ‘warm brown’ for the walnut praline flavour.
- We cooked down the pumpkin puree just slightly to help concentrate the flavour. This is an optional step but works well to help drive through the pumpkin flavour in the buttercream. This is an optional step but helps to remove the moisture a little too to help keep the consistency of the buttercream.
- All my macaron tips and tricks are in this post!
For more Macaron recipes, Check out:
- Hundreds and Thousands Macarons
- Vanilla Bean French Macarons with Strawberry Buttercream
- Christmas Macaron Box
- S'mores Macarons
❤️ Made this recipe and love it? ❤️
I would LOVE for you to leave me a review and star rating below to let me know how you liked it! Also, please make sure to tag me on Instagram!
Answers to your baking questions
Over the years, many of you have asked me questions about:
- baking in grams
- adjusting oven temperatures
- what kind of salt to use
- and many more!
I've curated and answered them all for your easy reference in this frequently asked questions post!