


Hi! I am writing this to you from a cute little coffee shop up in Rhinebeck - a few friends and I have escaped for a little mid-week work holiday. For some reason getting work done while you’re tucked away in a little air bnb (we got one with a pool, it is dope) is so much more satisfying than working at home. Don’t get me wrong, I love both, but it’s real cute up here.
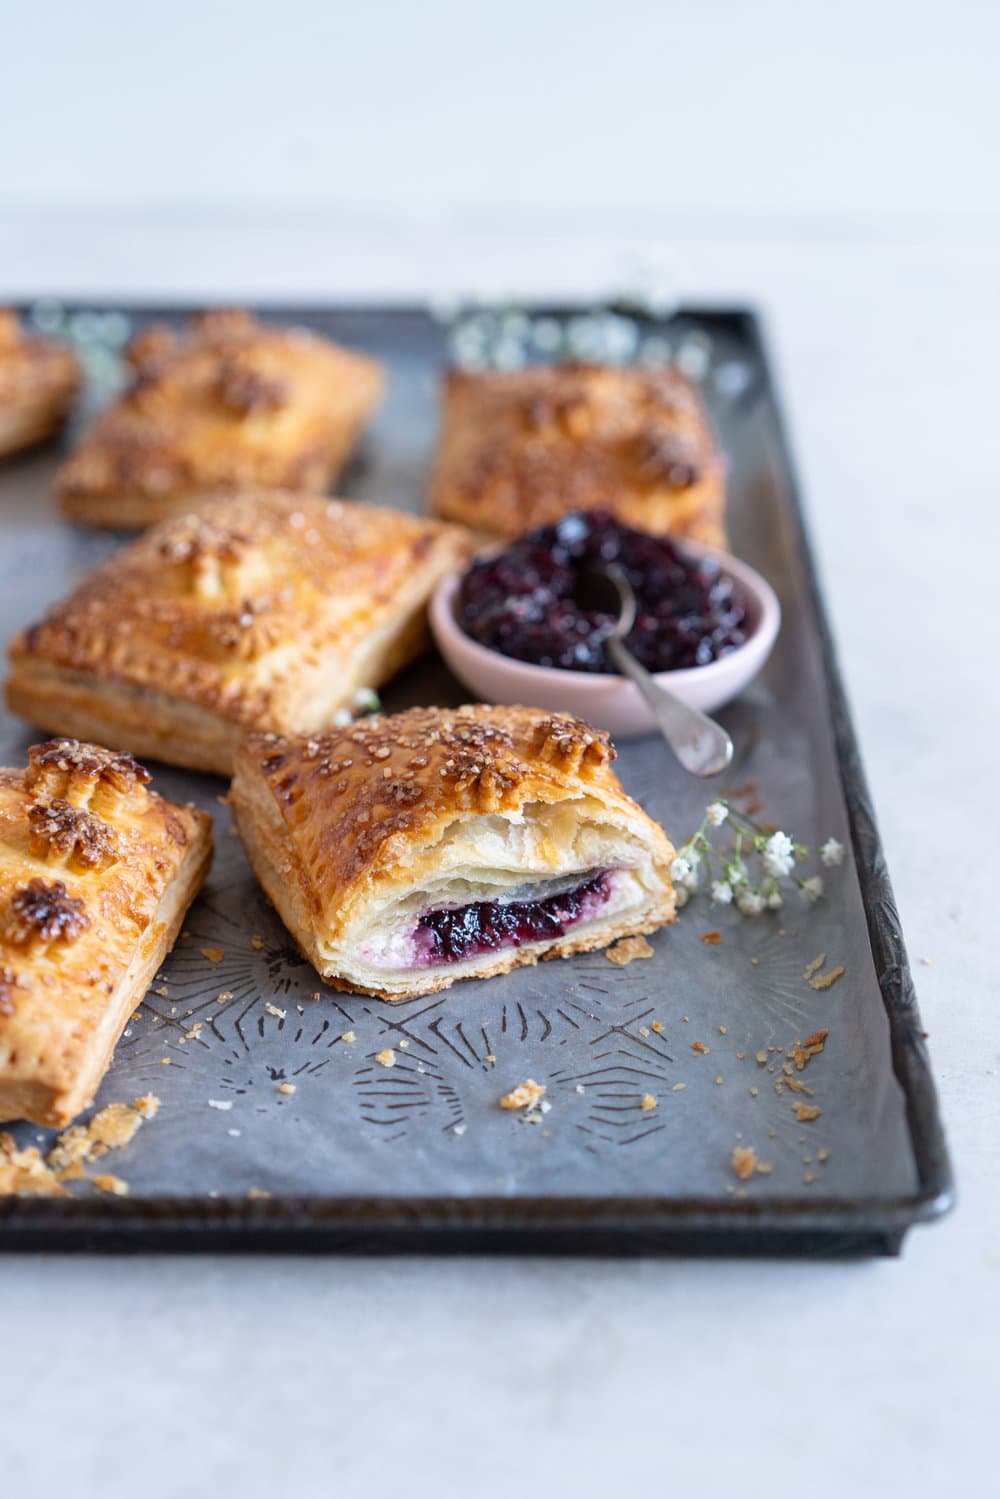
I made these just before we left for Canada as a way to use up a couple of things in my fridge - a brick of cream cheese, and half a jar of jam. I had some pie dough in the freezer, so I whipped up these little hand pies, and ohhhh man. I used the cream cheese to act as a bit of a dam to hold in the filling, and the combination of vanilla bean flavoured cream cheese, and sweet mixed berry jam filling is just so good. I didn’t add any additional sugar to the cream cheese, and the super flaky pie dough isn’t sweet, so the jam centre is so, so good against the slightly tangy cream cheese. These are crazy easy to make - they have serious pop tart vibes, and can very easily be scaled up to make a bunch. You could also do them as little circle hand pies rather than the rectangles, and another great thing about them is that you can freeze them ahead of time, store them in an airtight container in your freezer, and bake them off as you need.
Use whatever flavour of jam you like in these - I used mixed berry, but they would also be so, so good with a stone fruit jam or anything berry. You could also use a store bought puff pastry - this is a choose your own adventure here, you can make as many or as few components as you like.
A few wee tips:
- A pie dough trick I learnt from my friend Erin that is now firmly in my repertoire : After you mix the dough and shape it into discs, rest it in the fridge for about an hour, and then roll it out on a floured surface into a rectangle, fold it in thirds like a letter, then roll again and repeat the folding. Then you shape it into a disc by folding the edges under, rewrap tightly in plastic, and rest for at least two hours before using. What this step does is make the dough homogenous and therefore easy to work with, but also adds layers through the rolling and folding - the same way puff pastry is laminated. It is definitely an optional step but from my experience it makes the world of difference when it comes to rolling out the dough and getting a nice even crimp or lattice work.
- These come out of the oven HOT. Like, take skin off the inside of your mouth hot. Make sure you let them cool down before you eat it. You’ve been warned.
- I used homemade jam to make these because I had it on hand, but store bought is great too!
- I added a couple of flowers I cut out from some excess pie dough. To make these I like to roll out the scrap dough and freeze briefly on a baking sheet, then cut out the shapes with pastry stamps - I have these and love them!
❤️ Made this recipe and love it? ❤️
I would LOVE for you to leave me a review and star rating below to let me know how you liked it! Also, please make sure to tag me on Instagram!
Answers to your baking questions
Over the years, many of you have asked me questions about:
- baking in grams
- adjusting oven temperatures
- what kind of salt to use
- and many more!
I've curated and answered them all for your easy reference in this frequently asked questions post!

Mixed Berry and Cream Cheese Hand Pies
- Yield: Makes about 9 hand pies 1x
Description
Mixed Berry and Cream Cheese Hand Pies
Ingredients
Pie Dough
- 375g (2 ½ cups) all-purpose flour
- Pinch of Salt
- 2 tsp (8g) sugar
- 225g (2 sticks) cold unsalted butter, cut into cubes
- 240g (1 cup) cold water
- 1 cup ice
- 60g (¼ cup) Apple cider vinegar
Egg wash
- 1 egg whisked with 1 tablespoon water
Filling
- 225g full fat cream cheese, at room temperature
- ½ tsp vanilla bean paste
- ½ cup mixed berry jam or jam of your choice (I used this recipe)
Egg wash
- 1 egg whisked with 1 tablespoon water
- Turbinado (raw) sugar to finish
Instructions
PIE DOUGH
- Place flour, sugar and salt into a large bowl. Cut butter into chunks, and add to the flour. Toss lightly to coat. Working quickly, using a pastry blender or your fingers, cut the butter into the flour mixture until there are only large pea-sized chunks left. You want a few lumps of butter remaining to keep the pastry nice and tender.
- Combine ice, water and cider vinegar in a bowl. Sprinkle a few tablespoons of the ice water into the flour and butter mixture, and using a stiff spatula or your hands, mix in well. Continue adding water a tablespoon at a time ( I normally need about 8-10 tbsp) until you have a dough that holds together well, but is not too wet. Squeeze together with your fingertips to make a homogenous dough. Shape into two rectangles, and wrap in plastic wrap. Rest in the fridge for at least two hours, or preferably overnight. (See notes for rolling out dough during resting period)
FILLING AND ASSEMBLY
- In a small bowl, combine the cream cheese and vanilla bean paste. Transfer to a piping bag fitted with a round tip.
- On a lightly floured surface, roll out the pie dough into a large rectangle. If you are worried about it getting too warm and soft, you can cut it in half and do this in two parts. Using a ruler and a sharp knife or pastry cutter, cut the pastry into 3" x 4" rectangles (7cm x 10cm). You should get approximately 18 rectangles. Place the cut rectangles carefully onto a parchment paper lined baking sheet, and refrigerate for 10 mins to help firm up the pastry slightly.
- Remove the pastry rectangles from the fridge and match up into pairs. Lightly brush the edges of one piece of pastry with egg wash, then pipe a rectangle of the cream cheese mixture, and fill the centre with two teaspoons of jam. Top with a second piece of pastry, pressing down lightly around the edges to seal, ensuring that there are no air bubbles. Transfer to a parchment lined baking sheet, then use the tines of a fork to press down around the edges to help seal. Repeat with the remaining rectangles of pastry until all the hand pies are assembled. Add decorations using pie stamps by stamping out rolled out scrap pastry.
- Place the baking sheet in the freezer and freeze for 30-40 minutes, or until the dough becomes very firm. If you are planning on freezing them for a longer period of time, freeze solid then transfer to an airtight plastic bag.
- While the pies are in the freezer, preheat the oven to 425°f / 220°c. Remove the pies from the freezer. Using a sharp knife, cut a cross in the top of each pie, brush with egg wash, and sprinkle with additional raw sugar. Bake for 25-35 minutes, until the pies are deeply golden brown and the juices are bubbling. Remove from the oven and allow to cool. Serve warm or at room temperature. Store leftovers wrapped in foil at room temperature. Reheat in the oven to help keep the pastry crispy.