
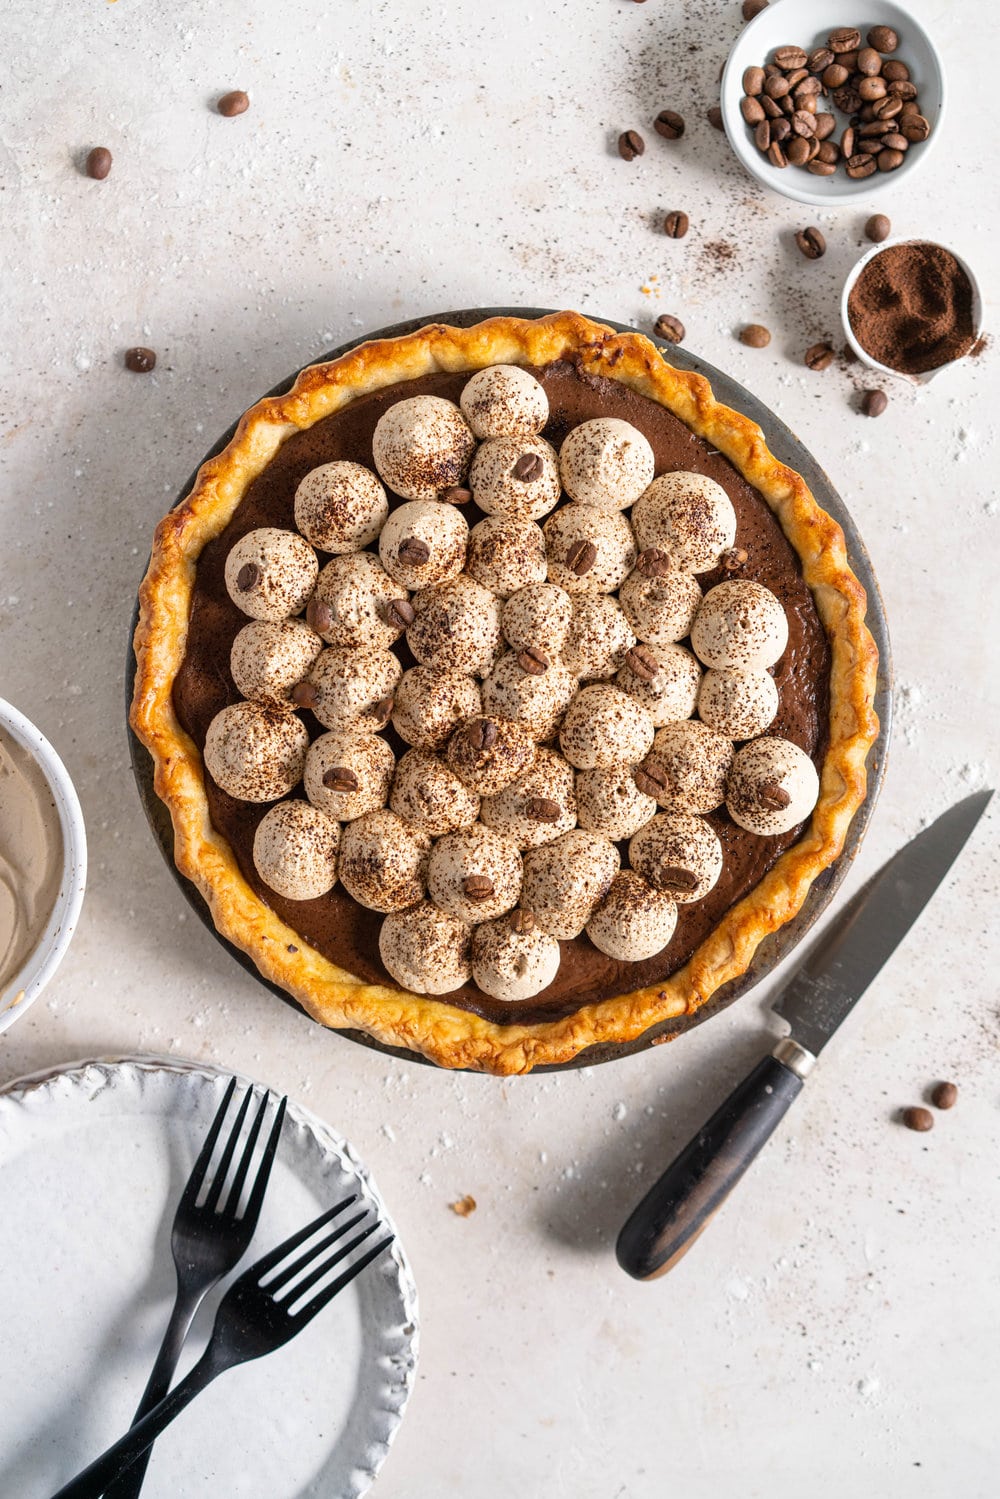
Mocha Cream pie with espresso whipped cream - a crispy blind baked pie crust is filled with a mocha pudding filling and topped with clouds of espresso flavoured whipped cream, before being finished off with coffee beans and espresso powder. This pie is super simple to make and is a coffee lover's dream.


Mocha Cream Pie
Hi hi! Sorry it has been a wee bit quiet around here - I had big plans to post lots this week while we are on holiday on Vancouver Island, but I’ve been having too much of a good time hanging out with family, reading books, baking (there’s still rhubarb here!!), and taking things a bit slow, which is such a nice change from our regular life back in Brooklyn. It’s been so nice to catch up on sleep and to just have some days where we can relax a little. I honestly can’t remember the last time I had more than one day off in a row - I absolutely love what I do, both here and the studio, but we aren’t at all good at that work life balance thing. Maybe we will get there one day, but for now, it’s so nice to have some time off, even though I do miss my cat.
I hauled ass big time to get some stuff shot before I left so that I would have things to work on while I am here, so I will hopefully get myself a teeny bit ahead of schedule on blog content and can keep posting regularly!
The Process behind Mocha Cream Pie
The credit for this pie goes to my sweet friend Chelsea, who is an amazing baker, makes THE most incredible cakes, and is in the process of sowing the seeds for starting her very own sweet shop! We text back and forth all the time, and when I mentioned recently that I was feeling a little uninspired and didn’t have many ideas of what to bake to get some content, she sent through a big list of ideas she has had floating round in her head and goes “here, I don’t have the time for these but here’s some ideas!”. Dream friend.
One of the things on her list was a cold brew pie, which I immediately decided I had to make! I took my fave chocolate cream pie and infused the pudding with coffee, making a mocha filling, which I set into a blind baked pie crust. The whole thing then got finished off with mounds of fluffy espresso whipped cream, which pairs so nicely with the chocolate coffee filling. This one is a winner - my sister who apparently doesn’t like coffee, had two slices.
Tips for the best Pie Crust
A pie dough trick I learnt from my friend Erin that is now firmly in my repertoire : After you mix the dough and shape it into discs, rest it in the fridge for about an hour, and then roll it out on a floured surface into a rectangle, fold it in thirds like a letter, then roll again and repeat the folding. Then you shape it into a disc by folding the edges under, rewrap tightly in plastic, and rest for at least two hours before using.
What this step does is make the dough homogenous and therefore easy to work with, but also adds layers through the rolling and folding - the same way puff pastry is laminated. It is definitely an optional step but from my experience it makes the world of difference when it comes to rolling out the dough and getting a nice even crimp or lattice work.
The pie dough recipe makes a double crust - so enough for two pies. You might as well make the extra while you are at it in my opinion - pie dough freezes well, tightly wrapped, for at least a few months, or lasts a few days in the fridge. Defrost overnight if using from frozen.
A few wee tips for Mocha Cream Pie
- There are two different quantities of milk in the recipe - 750g in the recipe, and 650g in the directions. The additional milk is to account for the absorbtion of the coffee. You will need 650g of coffee infused milk in the pie filling!
- When you are par baking your pie crust, chill your crust in the fridge rather than the freezer if you can - a longer chill in the fridge is preferable to a short chill in the freezer
- I like to give this at least a few hours to set up - overnight if you can, otherwise 3-4 minimum. Make sure that the pie is completely cold before you add the cream.
- There is 70% dark chocolate in this, which gives you a dark chocolate pie - feel free to mix in some milk chocolate too to lighten things up a little if needed.
- I like to whip the cream for things like this by hand as it gives me so much more control, as opposed to in a stand mixer - you want peaks that just hold, that will be a good piping consistency.
- I use this espresso powder, but finely ground instant coffee would work too. You can always dissolve the coffee in a little bit of the cream before adding to the rest if you only have larger granules of coffee.
- I would have topped this with chocolate covered espresso beans but I didn’t have any (I composted mine after one too many times of having them for a quick snack at 5pm and then staying awake half the night because they are STRONG) so I used regular coffee beans.
- If you don't want to make this a mocha cream pie and just a regular chocolate cream pie, use this filling!
For more Chocolate and Coffee Recipes, Check out:
- Chocolate Hazelnut Cream Puffs
- Mini Banana Bundt Cakes with Coffee Salted Caramel
- Espresso Honey S'mores
- Chocolate, Espresso, and Rye Babka
❤️ Made this recipe and love it? ❤️
I would LOVE for you to leave me a review and star rating below to let me know how you liked it! Also, please make sure to tag me on Instagram!
Answers to your baking questions
Over the years, many of you have asked me questions about:
- baking in grams
- adjusting oven temperatures
- what kind of salt to use
- and many more!
I've curated and answered them all for your easy reference in this frequently asked questions post!

Mocha Cream Pie with Espresso Whipped Cream
- Prep Time: 1 hour
- Cook Time: 45 minutes
- Total Time: 1 hour 45 minutes
- Yield: One 9" pie 1x
- Category: Pie
- Cuisine: American
Description
Mocha Cream pie with espresso whipped cream - a crispy blind baked pie crust is filled with a mocha pudding filling and topped with clouds of espresso flavoured whipped cream, before being finished off with coffee beans and espresso powder. This pie is super simple to make and is a coffee lover's dream.
Ingredients
Pie Dough
- 375g all-purpose flour
- Pinch of Salt
- 2 tsp sugar
- 225g cold unsalted butter, cut into cubes
- 240g cold water
- 1 cup ice
- 60g Apple cider vinegar
- Egg wash - 1 egg whisked with 1 tablespoon water
Mocha Filling
- 750g whole milk
- 85g coarse ground fresh coffee
- 120g heavy cream
- 250g chopped dark chocolate
- 150g sugar
- 30g corn starch
- ¾ tsp salt
- 135g egg yolks
- 2 tsp vanilla bean paste or extract
- 40g unsalted butter, at room temperature
Espresso Whipped Cream
- 265g heavy cream, cold
- 2 Tbsp powdered sugar (plus more to taste)
- ½ tsp vanilla bean paste
- 1 ½ tsp espresso powder
- To Garnish: extra espresso powder, coffee beans (optional)
Instructions
PIE DOUGH
- Place flour, sugar and salt into a large bowl. Cut butter into chunks, and add to the flour. Toss lightly to coat. Working quickly, using a pastry blender or your fingers, cut the butter into the flour mixture until there are only large pea-sized chunks left. You want a few lumps of butter remaining to keep the pastry nice and tender.
- Combine ice, water and cider vinegar in a bowl. Sprinkle a few tablespoons of the ice water into the flour and butter mixture, and using a stiff spatula or your hands, mix in well. Continue adding water a tablespoon at a time ( I normally need about 8-10 tbsp) until you have a dough that holds together well, but is not too wet. Squeeze together with your fingertips to make a homogenous dough. Shape into two discs, and wrap in plastic wrap. Rest in the fridge for at least two hours, or preferably overnight. (See notes for rolling out dough during resting period)
- Once the dough has rested, unwrap one disc and place on a lightly floured surface. Roll out to ¼” (6mm) in thickness, turning the dough 45˚ often as you are rolling to keep it even. You want the circle to be slightly larger than your pie tin. Transfer to a 9” pie tin, and arrange to ensure that the dough is well settled.
- Trim the dough using scissors or a sharp knife, leaving about one inch excess around the edges. Gently tuck the dough under and onto itself, to give you a neat folded edge. Chill in the fridge for 15-20 minutes, then remove from the fridge and crimp as desired. Dock all over with the tines of a fork, then chill for a further 30 minutes, or freeze for 20 minutes or until solid.
- While the crust is in the fridge, preheat the oven to 425˚f / 220˚c. Cut a piece of parchment slightly larger than the pie dish. Line with the parchment paper and fill with pie weights or dried beans, filling right to the bottom of the crimps.
- Place the pie tin on a baking sheet, and place in the oven. Bake for 20 minutes, or until the edges are slightly golden brown. Remove from the oven, remove the parchment paper and beans, and brush the edges and crust with egg wash. Return to the oven and bake for a further 15 to 20 minutes, until evenly golden.
- Remove from the oven and allow to cool completely on a wire rack.
MOCHA FILLING
- Place the milk in a medium saucepan. Heat over low heat until just shy of a simmer, and then add the coffee. Cover, and steep for 15 minutes. Strain through a fine mesh sieve, and weigh the infused coffee milk. Top up to 650g if needed (see notes). Clean and dry the saucepan, and return to the stove. Add the coffee milk, cream, and chocolate. Place over medium low heat, and whisk until combined and the chocolate has melted. Bring it to a very gentle simmer.
- While the chocolate is melting, in a medium bowl, whisk together the sugar, corn starch, and salt. Add the egg yolks and vanilla bean paste and whisk until well combined - it will look like it is not going to come together, but keep whisking!
- Remove the chocolate milk mixture from the heat, and, whisking the egg mixture constantly, pour about half of the chocolate mixture over the egg mixture. Whisk until well combined, then return to the saucepan with the remainder of the chocolate mixture. Return to a medium low heat, and, stirring constantly with a silicone spatula, heat until the mixture thickens and comes to a boil, approximately 4 minutes. You want to see a few large bubbles in the centre of the saucepan. Remove from the heat and stir in the butter, mixing until well combined.
- Strain the pudding mixture directly into the cooled pie shell, and smooth with an offset spatula. Place a piece of plastic wrap directly against the surface of the filling to prevent a skin forming. Leave to stand at room temperature for about 45 minutes, then transfer to the fridge to completely chill - 4 hours or overnight.
ESPRESSO WHIPPED CREAM
- Place all ingredients into a large bowl and whip with a whisk until medium peaks form (you can do this in a stand mixer but you will need to keep a very close eye).
- Transfer to a piping bag fitted with a round attachment. Pipe blobs on top of the chilled cake, then sprinkle with espresso powder and garnish with whole coffee beans (optional)
Notes
Pie Filling Recipe adapted from ‘The Fearless Baker’
Comments
Katie Nelson says
I'd like to make this pie without the chocolate in the pudding, but I know that helps set the pie. Is there a way to adjust the recipe so that the pie still sets?
Erin says
Hi! it's a chocolate pudding recipe, so it's developed around it. I would look for a vanilla cream pie filling rather than trying to remove chocolate from this recipe.
Erin says
Hi, yes you use 750g of milk to make the infusion, then you strain and use 650g of the infused milk. There is a note about this in the recipe notes There are two different quantities of milk in the recipe - 750g in the recipe, and 650g in the directions. The additional milk is to account for the absorption of the coffee. You will need 650g of coffee infused milk in the pie filling!
I hope that this makes sense?
Mari says
I made this for Thanksgiving this year for my chocolate and coffee loving boyfriend, and it was a hit! I actually scaled down the recipe to 1/4 and made 2 mini pies from it (having the recipe in grams makes this WAY easier), and it was the perfect amount for a dinner for 2. I used 2% milk in a pinch and it worked wonderfully. If I could, I would have also made some of the other pie recipes on Erin's site, I have yet to come across a recipe I didn't like on here.