

Think you can't bake the most buttery, flaky pie crust home? Think again, because yes you can! Learn how to make the most perfectly flaky and tender all-butter pie crust in your own kitchen using a series of simple, easy folds, a technique called lamination. It's my secret for an ultra-flaky pie crust that's easy to work with, doesn't crumble, or leak. Made without vegetable shortening, my homemade pie crust has been tested, and perfected over many, many months. It's foolproof!
Hi hi! I am just popping in to share this ultimate guide to making your own homemade all-butter pie crust! Making pie dough from scratch can be a little intimidating.
But I promise with this guide as a resource and a couple of steps, we will have you making your own perfect pie crust in no time at all. Having one pie crust recipe is such a huge time saver. You can make it ahead of time, pop it into the freezer for later, and tick it off your list.
This is the entire inside of my brain on pie crust in one post, so buckle up - it may take a wee while to read but I promise that it is worth your time.
This is a bit of a resource, so I have broken down the post into the following sections - feel free to click on the sections which will jump you around the post.
- What you will learn
- Why I really rate this pie crust recipe
- Important ingredients and why I use them
- All butter pie crust vs shortening pie crust
- Making pie by hand vs using a food processor
- The secret to a flaky pie crust: Laminated pie dough
- Step-by-step instructions for all butter pie crust
- I screwed my pie crust up so you don't have to
If you have made pie crust before and it has flopped - this is the post for you. I’ve got you - and will hold your hand every step of the way, including touching on as many troubleshooting steps and possible pinch points as I possibly can to help you along the way.
Homemade pie crust is super easy to make once you get the hang of it. It is great to make in bulk and store ahead so that you have frozen pie dough ready to go whenever you need.
Pie dough that is easy to work with is a dream. It just takes a couple of sneaky extra steps to give you a super smooth, homogenous but flaky pie crust.
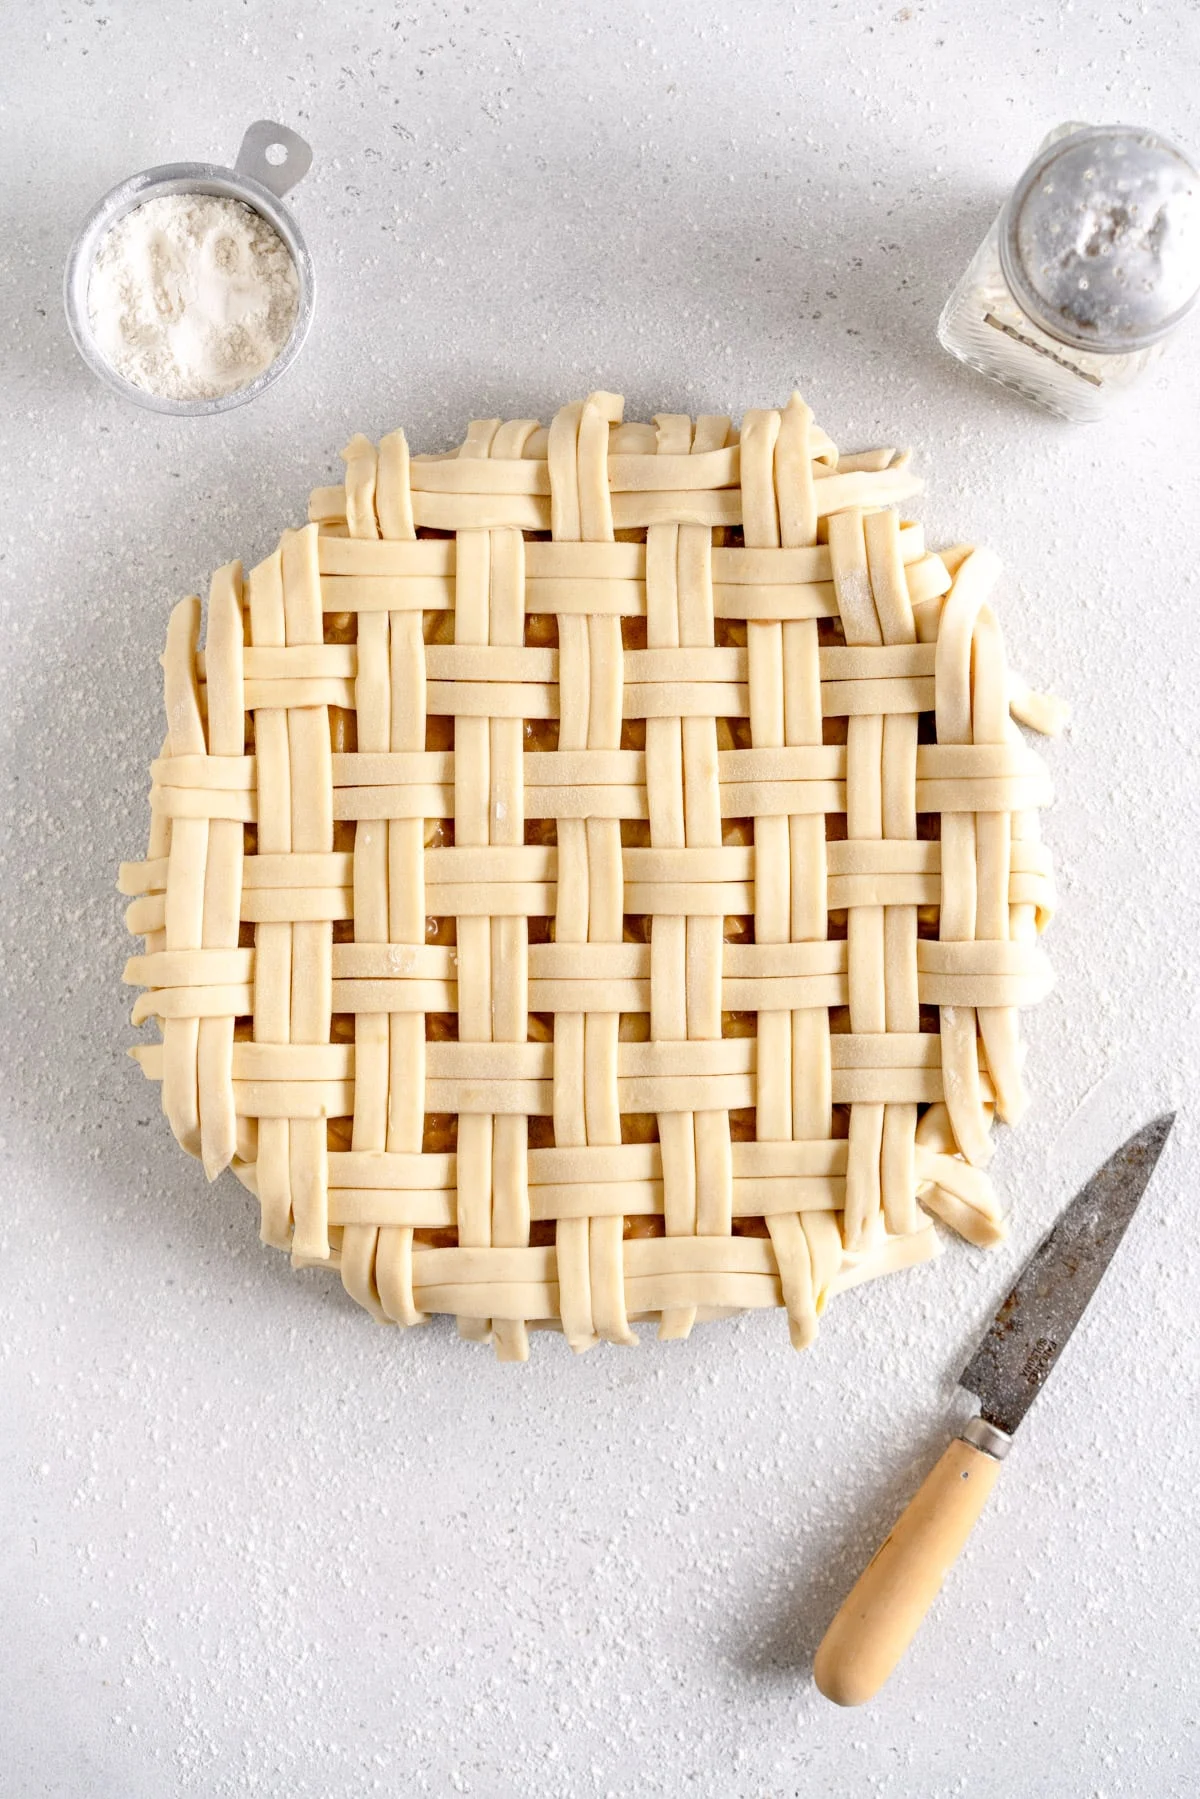
It settles well into the pie pan, and gives a lovely sturdy bottom crust. This is the go to method that I have been using for years and the recipe that I use to make detailed lattices. It works great for blind baking, par baking, and for baking sturdy double crust pies.
My sneaky step is a series of quick folds to the pie crust once it has been in the fridge resting for about an hour. This is a five minute step, but I promise that it makes such a huge world of difference and gives you pie crust that is super easy to work with and bakes up beautifully and flaky.


What You Will Learn
In this pie crust tutorial, we will cover allll of the basics that I have learnt / taught myself over the years of being a baking blogger, with step-by-step instructions.
I will cover ingredients that I use, how to mix the pie crust, how to perform the laminations, and how to store and freeze your pie crust for making ahead and using at a later date.
While it may seem like a lot of information, you are welcome to pick and choose what you need and what suits you! If you have questions please feel free to leave them in the comments section below and I will get back to you as soon as I can.
Making pie crust from scratch does take a little bit of practice, but I promise you that with practice comes confidence and you’ll be whipping up pies in no time at all!


Why I Really Rate this Pie Crust Recipe
I'm from New Zealand and when we say we 'rate' something - it means that we love it. I have been there- you are super excited to make pie, but get stuck on the most crucial part - a good crust.
I have made this all-butter pie crust hundreds of times, and I promise you, we can make it work for you.
There are a few steps but they are all super manageable and you can break up the workload, and you will be a super confident pie crust maker in no time! Here’s why I love this crust and I think you will too:
- Easy to make with no fancy equipment. This crust comes together with no fancy equipment, I just use my hands to make it.
- Super consistent. A huge benefit of weighing ingredients is that you can weigh the amount of water that you put into the pie crust, meaning you can make large quantities of the crust and have it all be the same consistency, so whether you’re using it from fresh or taking it from the freezer, you know it will work for you.
- Great to make ahead. I often make a bunch of pie crust all at once, and then store it in the freezer. Well wrapped it stores for up to 3 months and handles the same regardless of whether it is fresh or has been frozen.
- Super easy to work with and won't fall apart on you. I know that a lot of people get intimidated by pie crust - rolling it out, using it to make lattices or single crusts. The lamination step that I include in my recipe gives you a super homogenous dough that is still flaky and light, and really easy to work with - it works particularly well for things like lattices as it holds together so well.
- Minimal leakage in the oven. A big issue that people can have with their pie crust is that it leaks butter in the oven. This is usually because the crust hasn’t been properly mixed and the butter chunks are too large, meaning that the butter seeps out in the oven. The lamination helps to prevent this. It can also come from the butter chunks being too big and the pie crust also being too wet, meaning that it all flops in the oven and you end up with a pie crust that is both shrunken and has leaked butter.
- Blind Bakes like a dream. I love using this pie crust recipe for blind baking - it makes the process super easy and streamlined.
If you are after information on blind baking a pie crust, check out my post: How to blind bake pie crust for all my tips and tricks!

Important Ingredients and Why I Use Them
Pie crust doesn’t have that many ingredients, so it is important that you use ones that are of good quality.
This is where you splurge on the good butter - an all butter pie crust really sings with butter flavour.
- Butter. It’s not an all butter pie crust without all butter. No shortening here. I have made pie crust all around the world with all sorts of butters and they all work, but a good quality butter (one that people accuse you of being mustard, IYKYK), is good here. Make sure it is super cold though before you start working - butters with higher percentages of butterfat do get softer quicker and stay softer so you want them to be nice and cold.
- Flour. I use All-purpose flour (also called plain flour) for my pie crust. Gluten is a dirty word when it comes to making pie crust, so you want to use a lower protein content flour rather than something which develops more gluten like a bread flour / high grade flour.
- Salt. Just a wee bit - if you are using salted butter, you can leave it out.
- Apple Cider Vinegar. Adding vinegar to your pie dough helps prevent gluten formation and keep it tender. Some recipes will also use vodka. This is a totally optional addition, and you are welcome to use all water here if you like.
- Ice water. It is really important to keep everything nice and cold when you are making pie crust. Ice cold water helps with that.
No Sugar In Your Pie Crust?!
If you have made my pie crust in the past you will notice that in the updated version, there is no sugar. I haven’t used sugar in my pie crust in years even though it is written in the recipe.
The reason why? I’m lazy. I often can’t be bothered getting it out of the cupboard, so I don’t. And the pie crust is great without it and I actually love how savoury it is, and also means I can grab a disc of dough from the freezer and use it for either a sweet or savoury pie.

All-butter pie crust vs Shortening Pie Crust
I make my pie crust using only butter as the source of fat. Other pie recipes may use shortening, or lard, or a mix of butter and shortening. I much prefer butter as it has an amazing flavor, and is something that I always have in the house.
I prefer to use unsalted butter for my pie crust recipe. It means that I can control the amount of salt in the recipe. If you only have salted butter this is fine too, just hold back on the added salt in your mixture.
Pie Crust by hand vs food processor
It is super common to make pie crust in the food processor. This method works great, and if you do it this way, go for it!
When you make the dough in the food processor you use the machine to pulse the butter into the flour, which serves the same purpose as shingling it in with your hands. However, I prefer to make it by hand for a few reasons:
- Much easier to get the moisture content right. When you are making pie crust by hand, you can see exactly how it is reacting to the water added, particularly toward the end of the process where you sprinkle in the water a tablespoon at a time. It is quite easy to accidentally over hydrate a pie dough made in the food processor, as you can't see or feel it coming together as well.
- You run the risk of over working the dough. Again, it is harder to see what is happening when you make pie crust in the food processor, so it is much easier to over work the crust by mistake, resulting in a tough crust.
- Cleaning the food processor sucks. That's all I have to say on that.

Pie making equipment
The thing I love about making pie crust from scratch is that it requires limited equipment - a digital scale is a must obviously, but aside from that you don't need many things!
- Mixing Bowl. I prefer something on the larger side so that nothing flicks out while I am working.
- Pastry Blender or pastry cutter. This is a totally optional tool. I know that some people love to use it, but I do my pie crust by hand. Either works here, the purpose of the blender or using your hands is to incorporate the butter into the flour.
- Plastic wrap. This isn't equipment as such, but it is important to have on hand to wrap the pie crust to prevent it from drying out. I have tried ziploc bags and other wrapping materials and nothing works quite as well.
- Rolling Pin. A pie making essential - my favourite rolling pin for making pie is a french style rolling pin.
The secret to a flaky pie crust - laminated pie dough.
I use a little tip that my baking bestie Erin Mcdowell taught me - to laminate my pie dough after making it but before rolling it out for use. What this does it pops a few layers within the pie dough. This makes it homogenous and easy to work with but also still nice and flaky.The lamination is what makes my pie crust recipe really easy to work with. Lamination basically means giving the dough a series of folds, the same way that you would for a puff pastry.
I do my folds all in one go, after the pie dough has been mixed and rested in the fridge for about an hour. I do three rounds, then shape the dough into discs or the shape that you need.

Laminating the pie crust is not kneading it - you are adding in layers. It makes the butter pieces smaller and in layers within the pie crust so that when it hits the hot oven, the butter will create steam, which in the tiny little layers, makes flakes in your pie crust. As I mentioned earlier, the pie crust is much less likely to leak butter in the oven as you don’t have large pieces of butter within the dough.
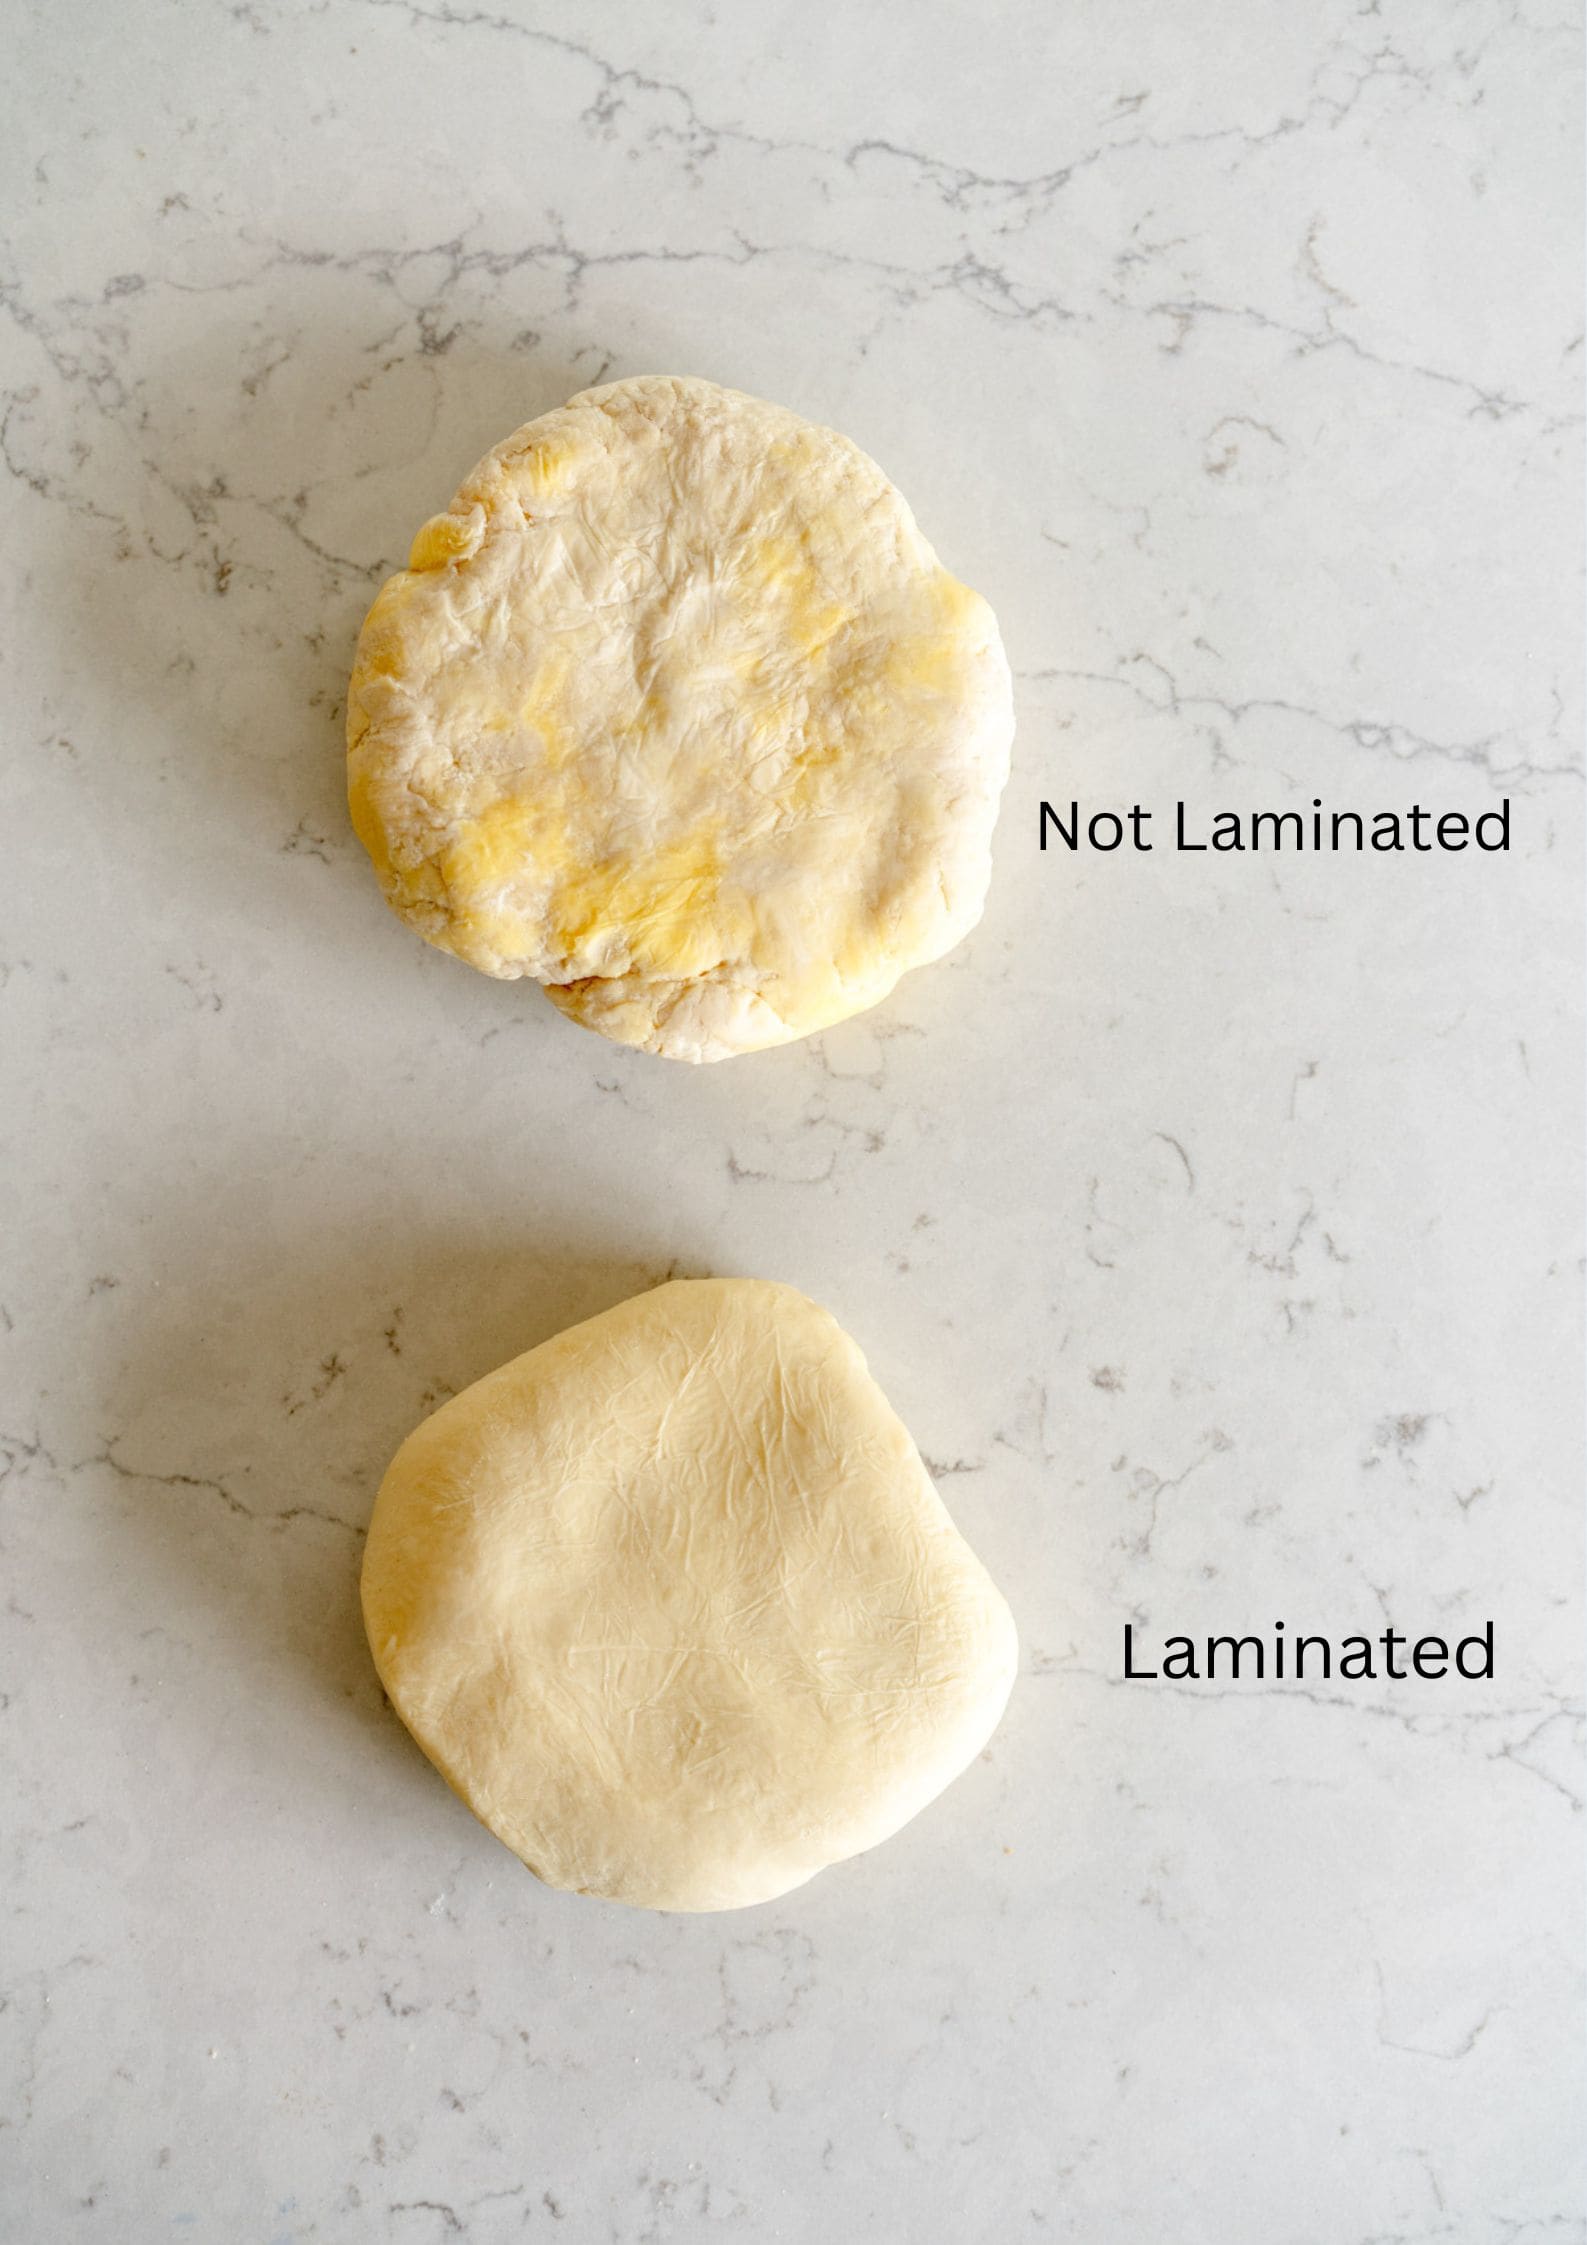
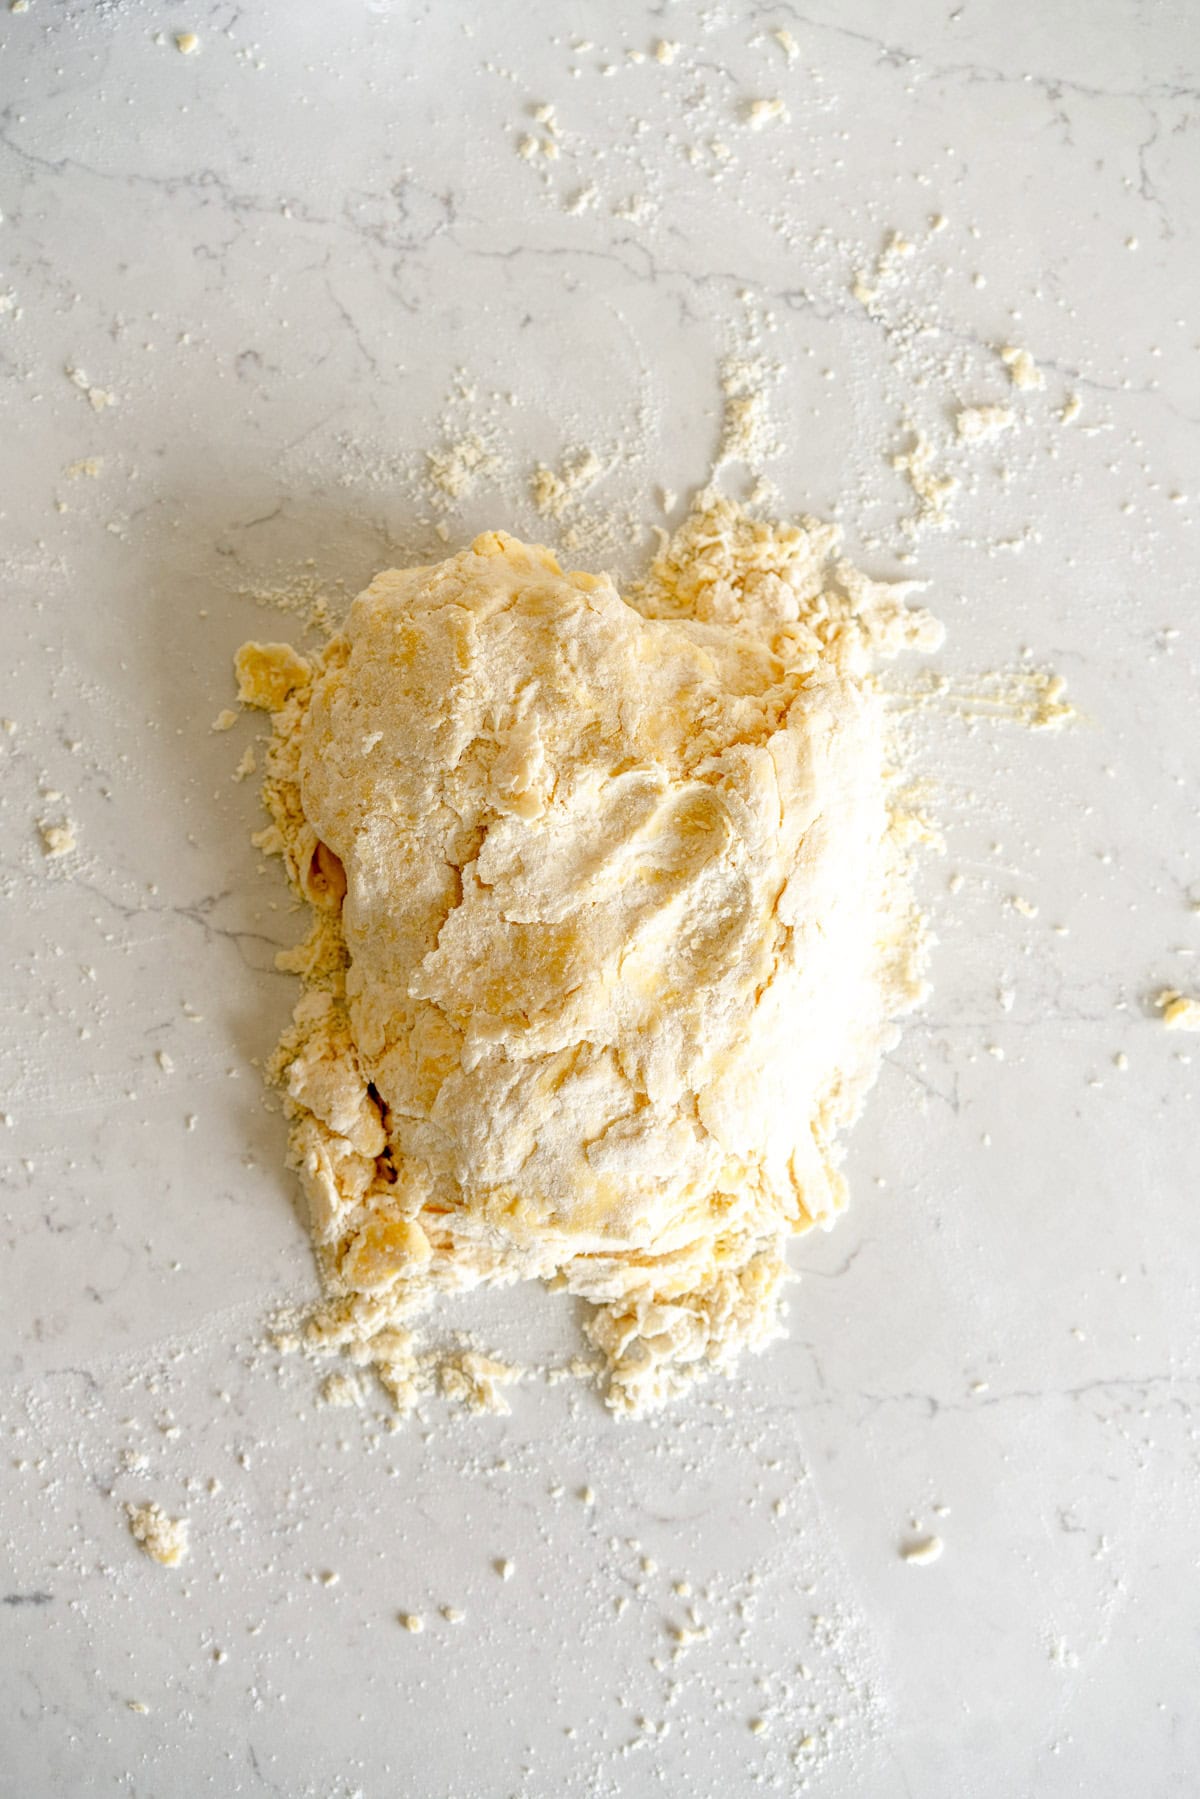
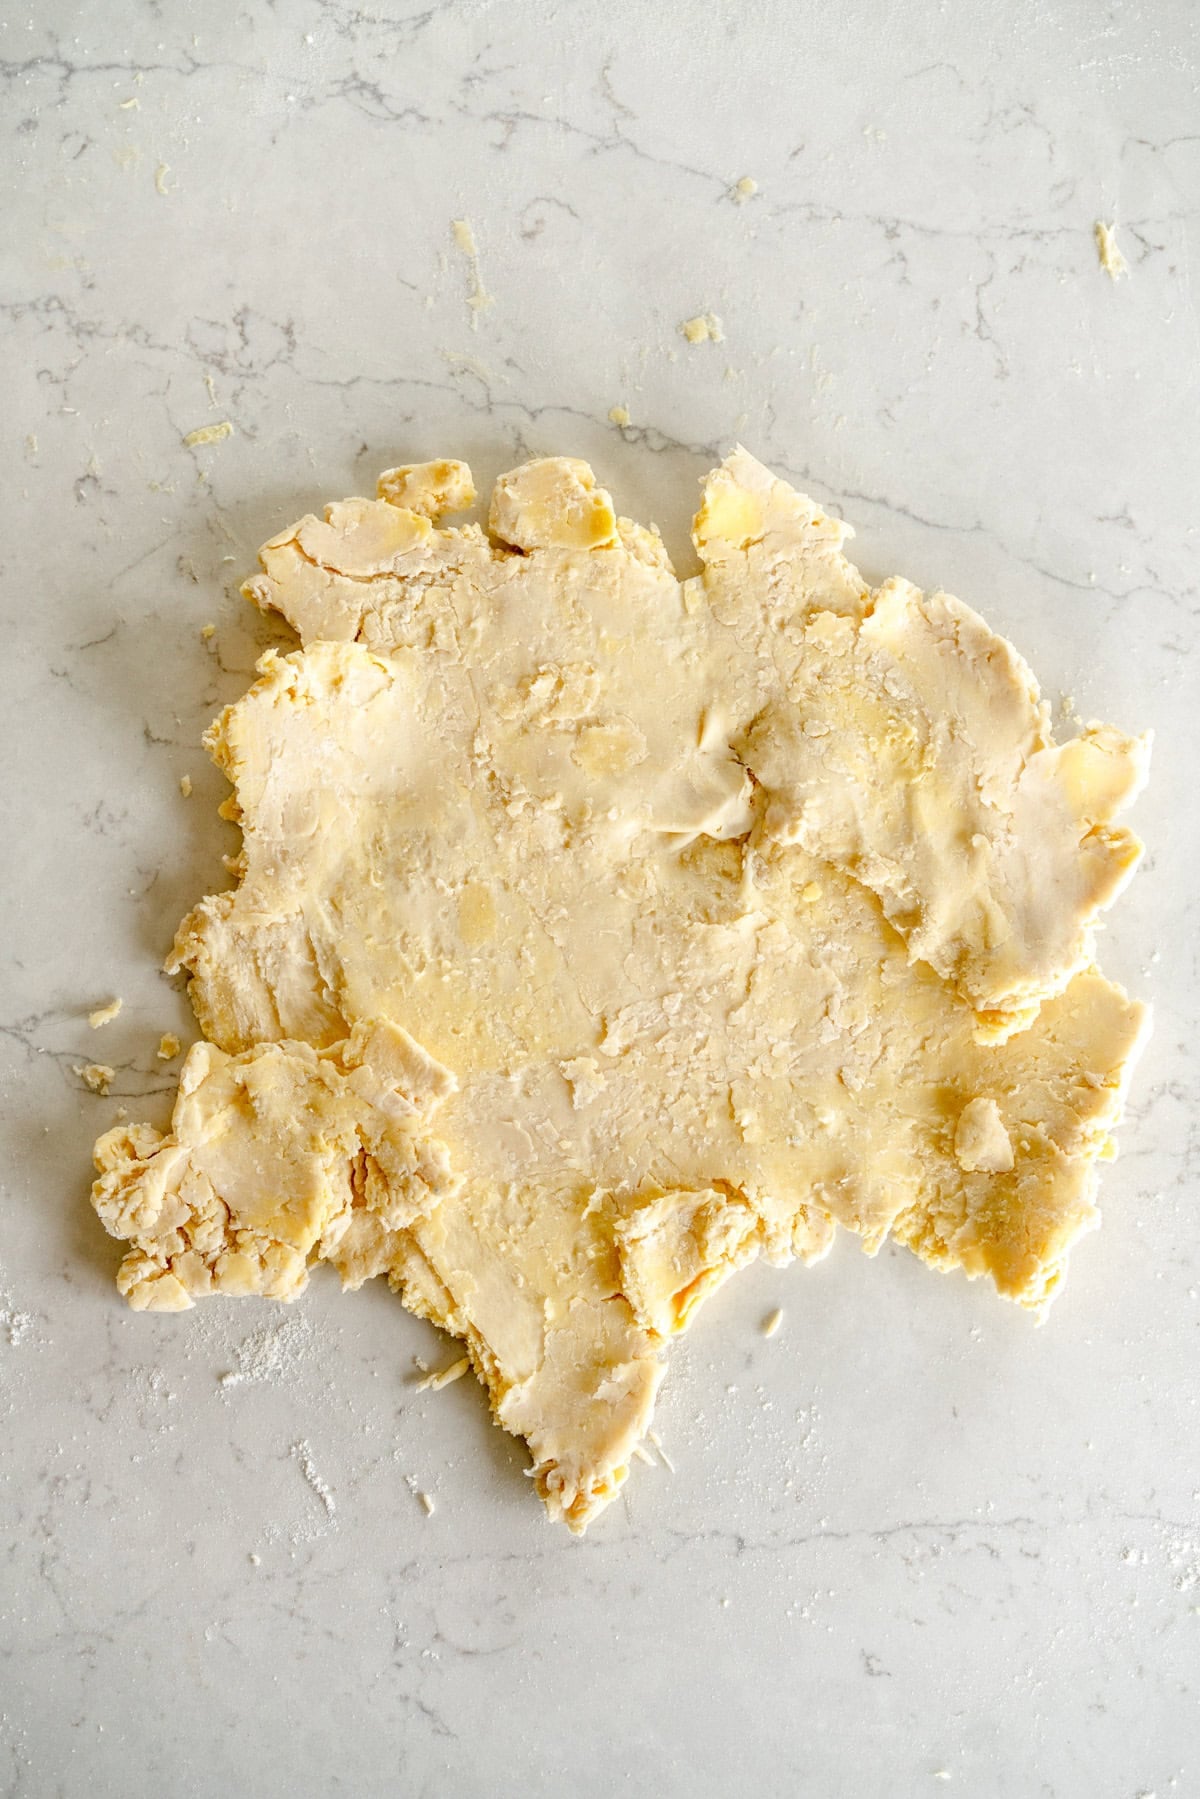
While laminating your pie crust is an optional step, I really recommend it, especially if you are new to pie crust. You can see in the image below the difference between the two crusts - the top one has not been laminated and still has large butter chunks, while the bottom one has had a series of laminations / folds performed, and is much more homogenous.
Step-by-step Instructions for all butter pie crust:
This may seem like a lot of steps but I promise you that once you get the hang of it you will be making homemade pie crust like a pro! Here are my top tips:
- Plan ahead. Pie crust works best if you are able to make it ahead of time so that it can rest overnight. The minimum rest period that it needs is 2 hours, but you will get best results if you are able to leave it to rest overnight.
- Keep everything cold. Make sure you have cold butter, and ice cold water. This helps to stop the butter from melting and means your dough is nice and easy to work with.
- Don't work it too much. Gluten is a bad word when it comes to making homemade pie crust. You don't want to develop too much gluten in the crust by over working it. Be gentle when mixing your liquid in. The laminations is adding folds to the dough rather than kneading it - like rough puff pastry.
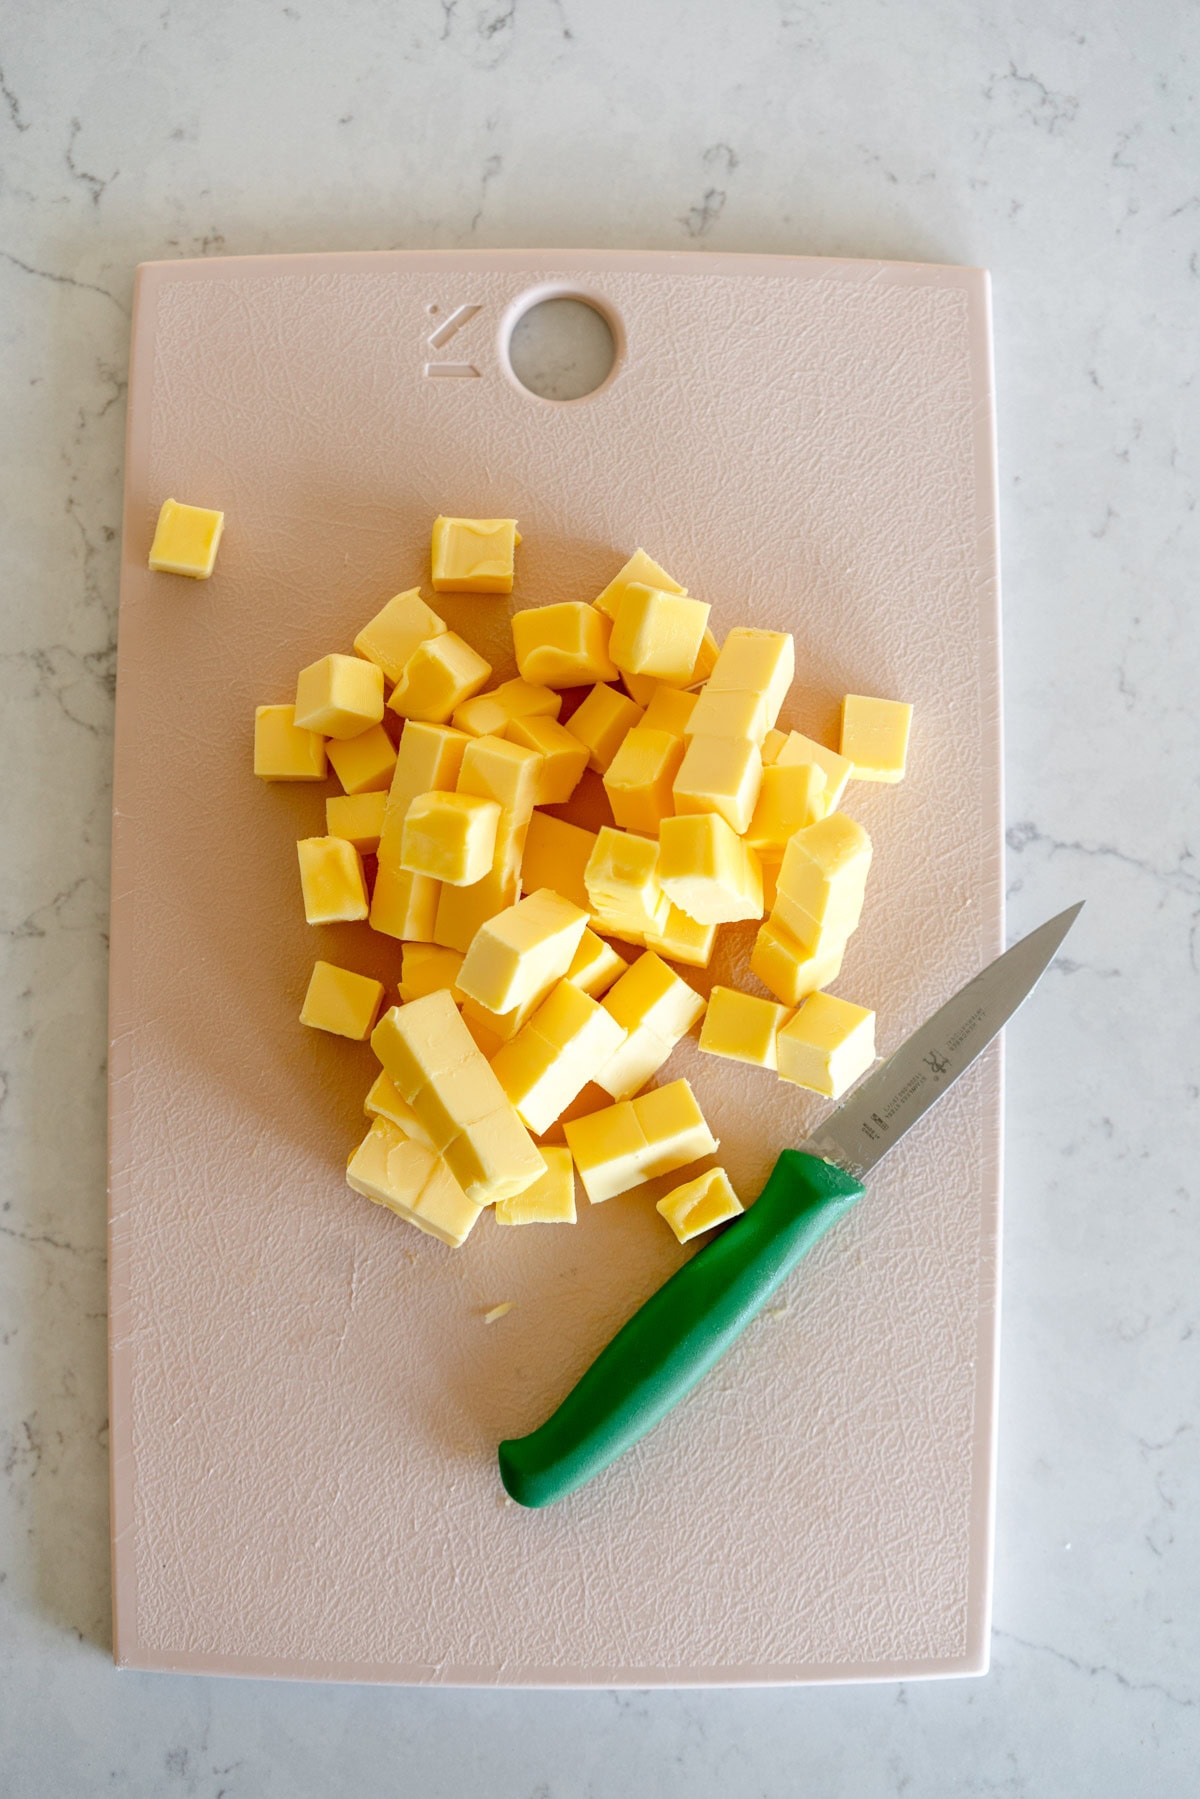
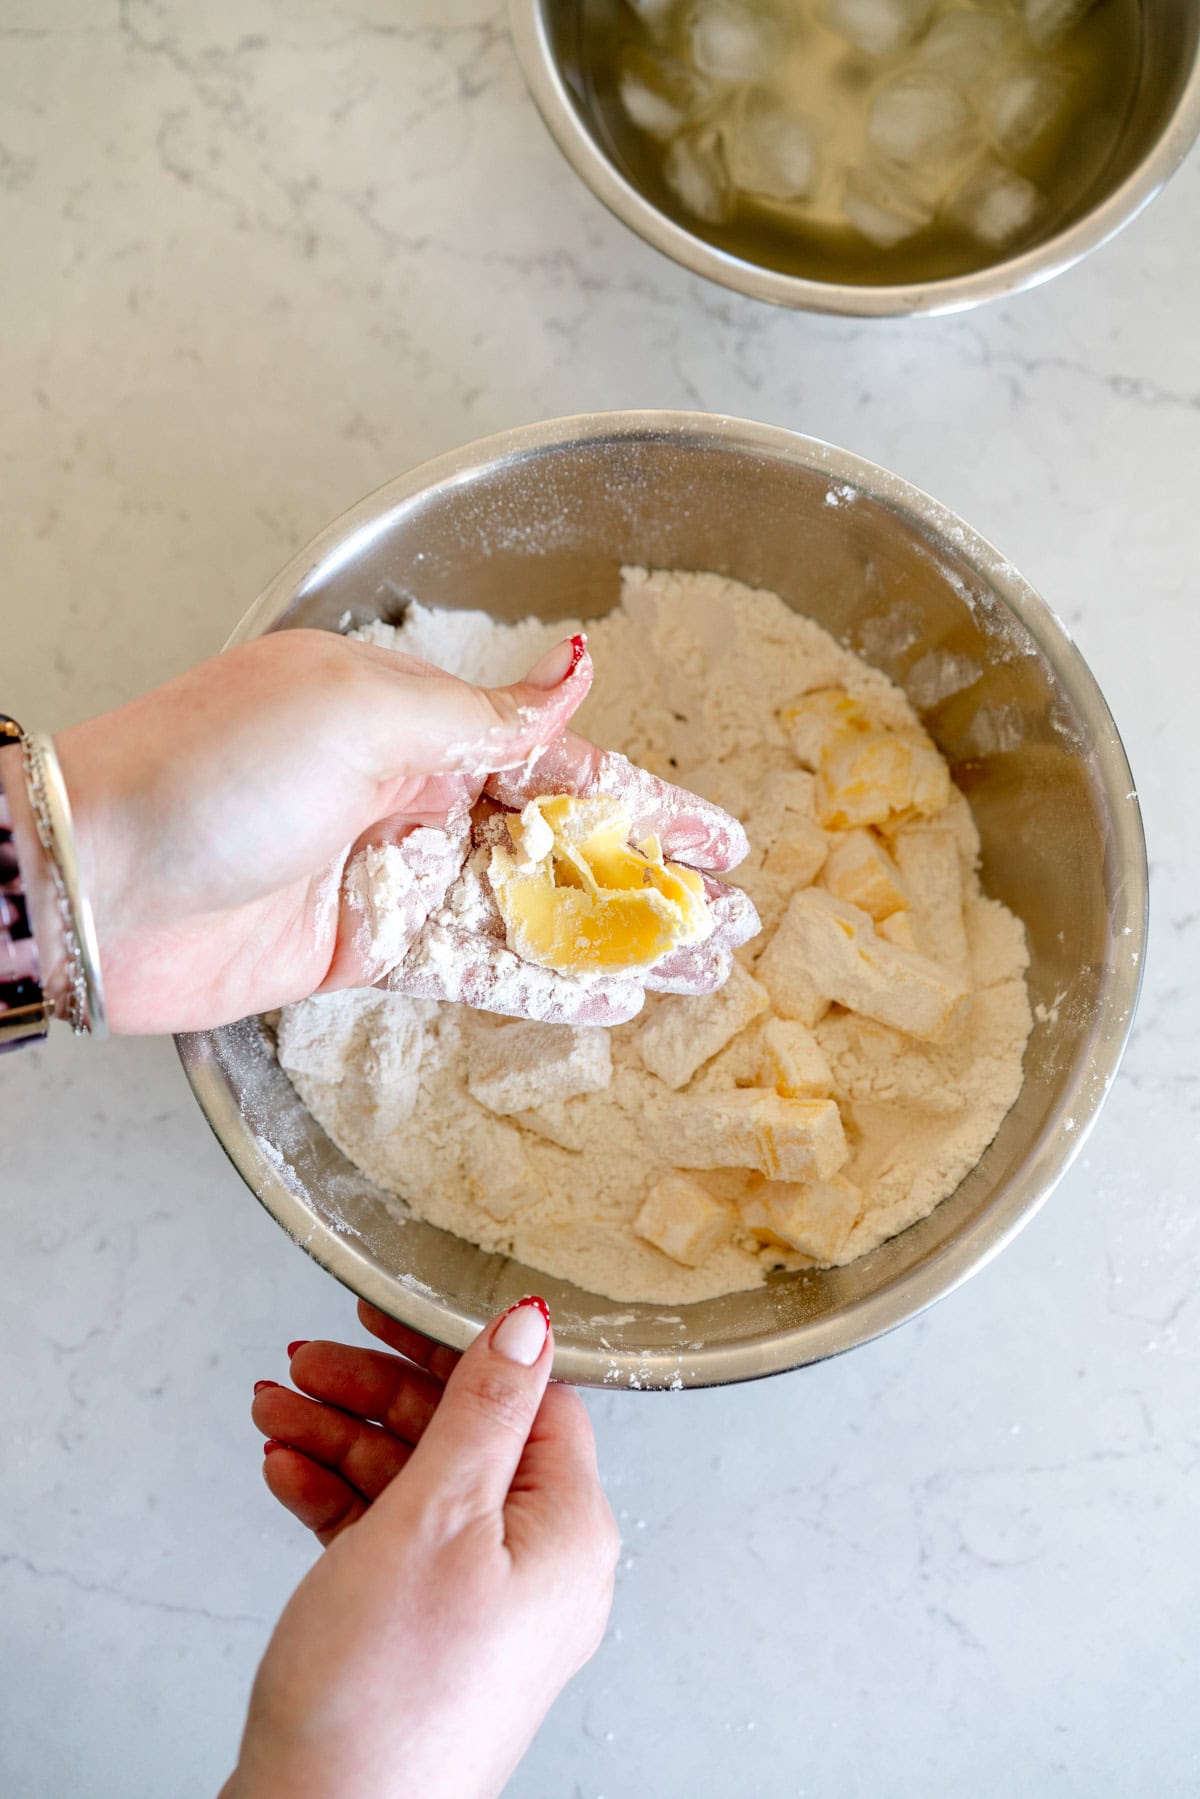
Step 1: Cut your butter
You want to make sure that everything is kept super cold. If you are cutting up lots of butter, cut it and then pop it back into the fridge until you are ready to use. I like to cut mine into cubes - you can see in the image how large I cut them.
Step 2: Prepare your dry and wet ingredients
Weigh your flour and salt into the bowl, and fluff together to combine. Mix the ice, water, and apple cider vinegar together in a bowl or measuring jug. Note that you will have a little more liquid than you will use in the pie crust - if you are worried about wasting vinegar you can make up less of the mixture if you need to. If you are doubling the pie crust recipe, you may only need to make up one batch of the liquid.
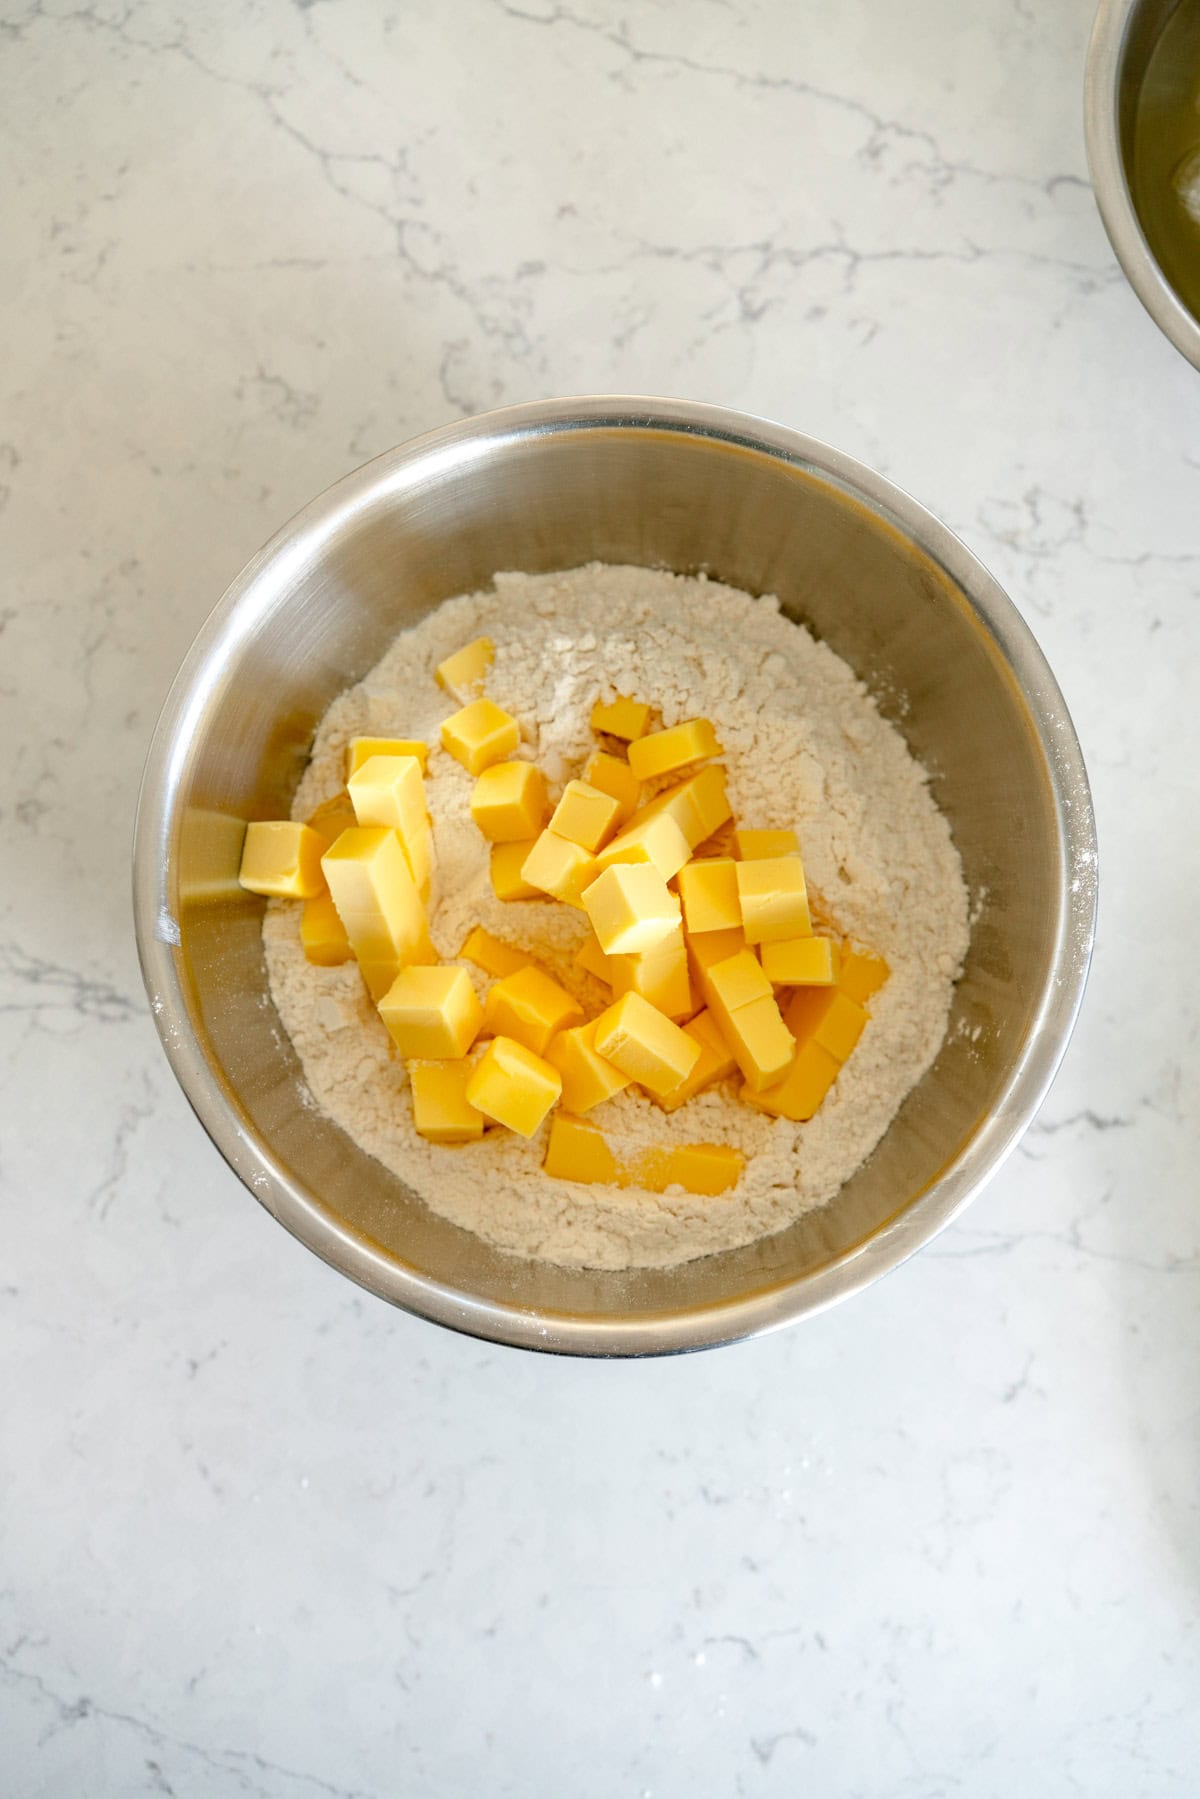
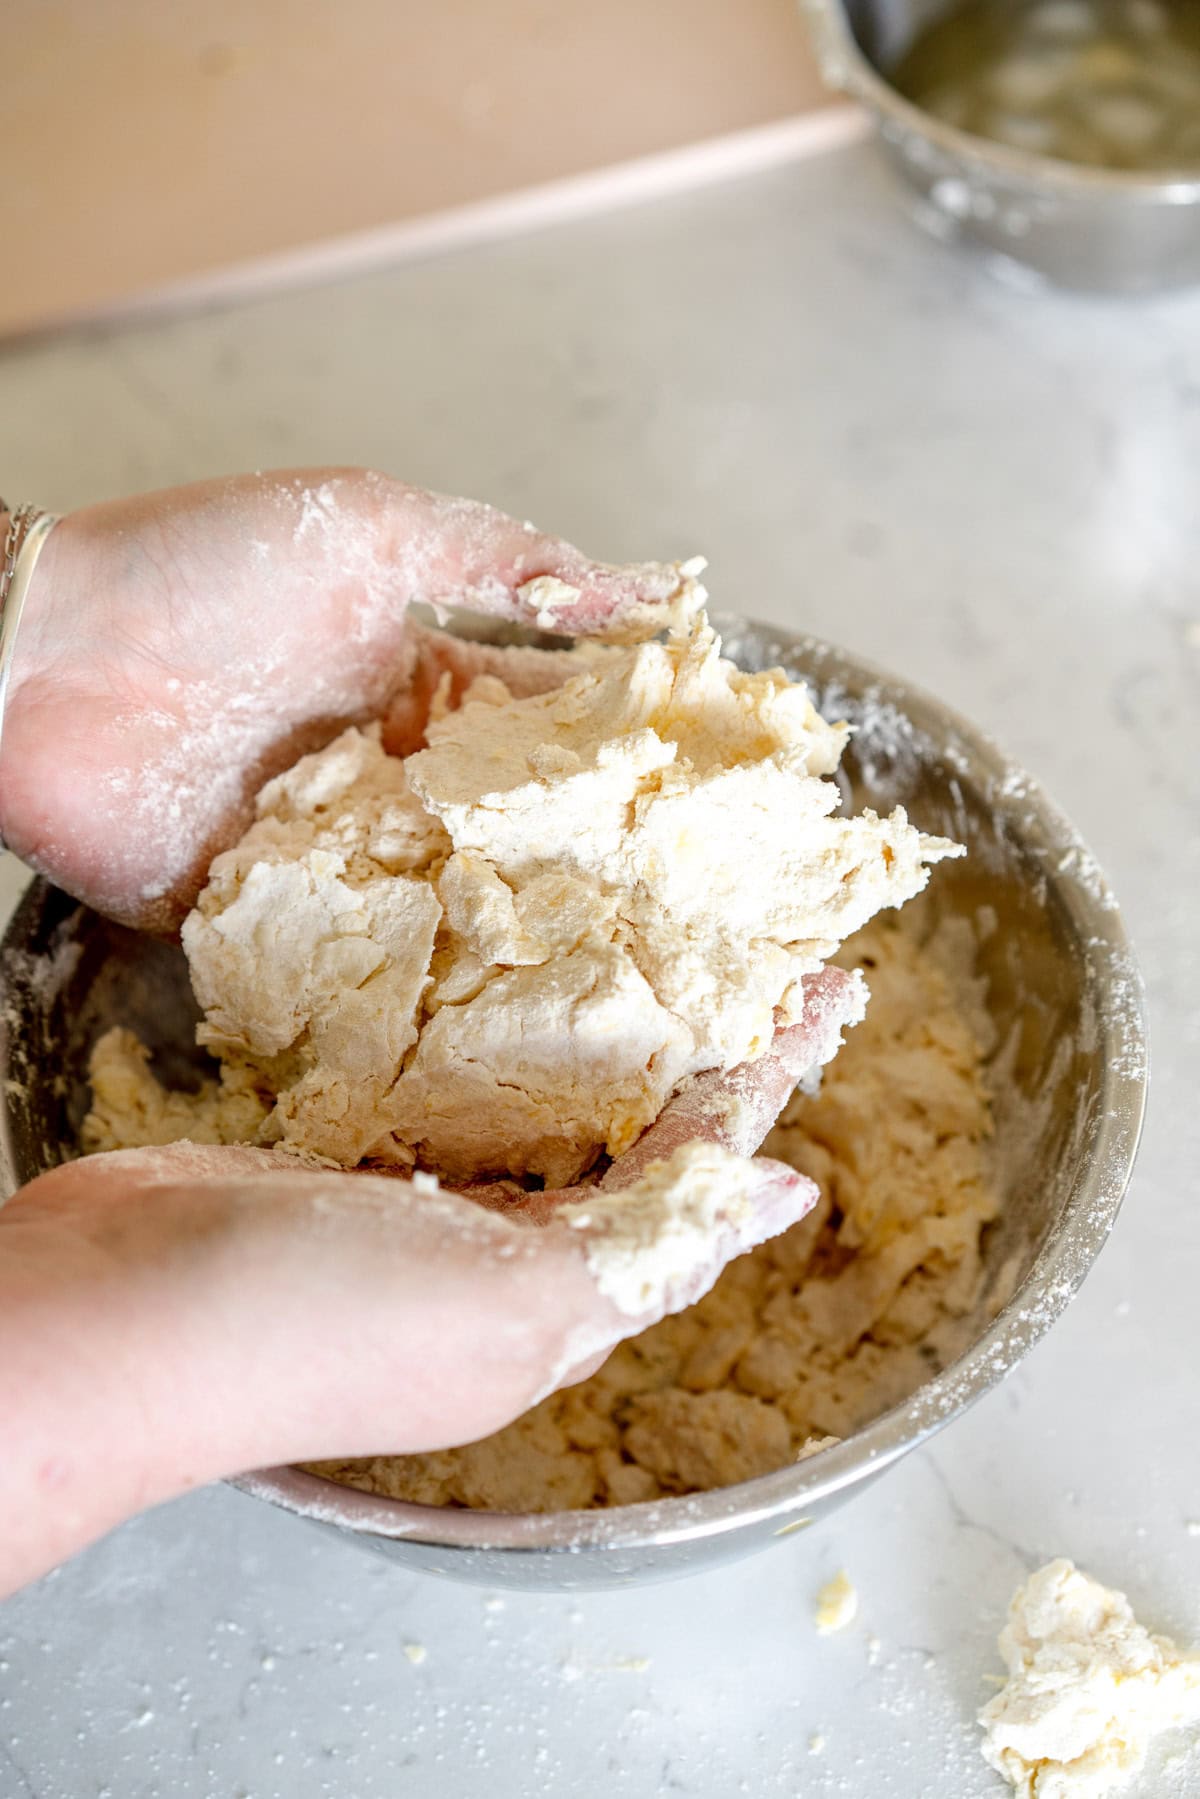
Step 3: Incorporate the butter
Add the butter to the flour bowl and toss it to combine so that each piece is covered in butter. Now you are going to use your fingers to incorporate the butter into the flour - you want to use your thumb and finger to squish the butter between them so that it flattens out into shingle shapes. I like to start with all the pieces of butter over one side of the bowl and as I flatten them, place them on the other side so I know which pieces have been done.
I find it necessary to only give each piece of butter one squish, but if you feel like it needs more, by all means go ahead.
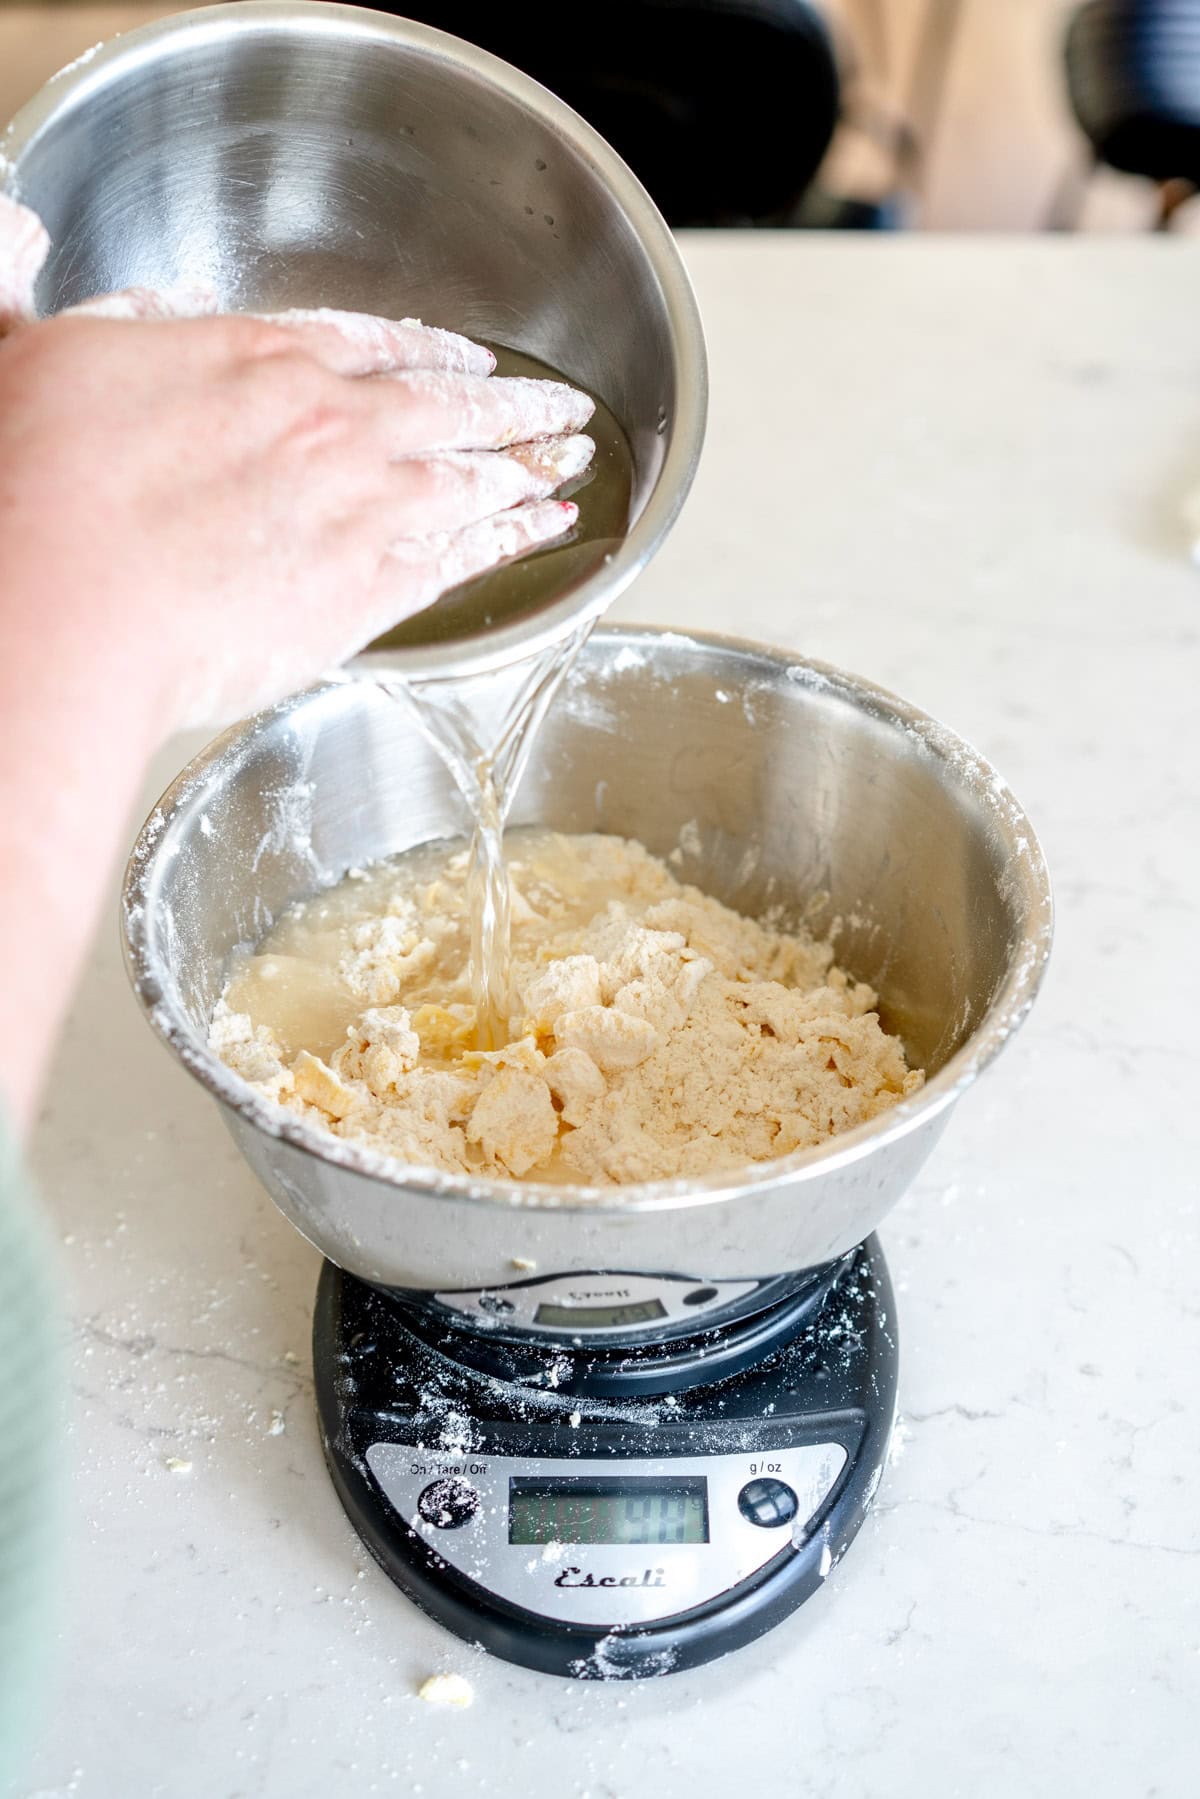
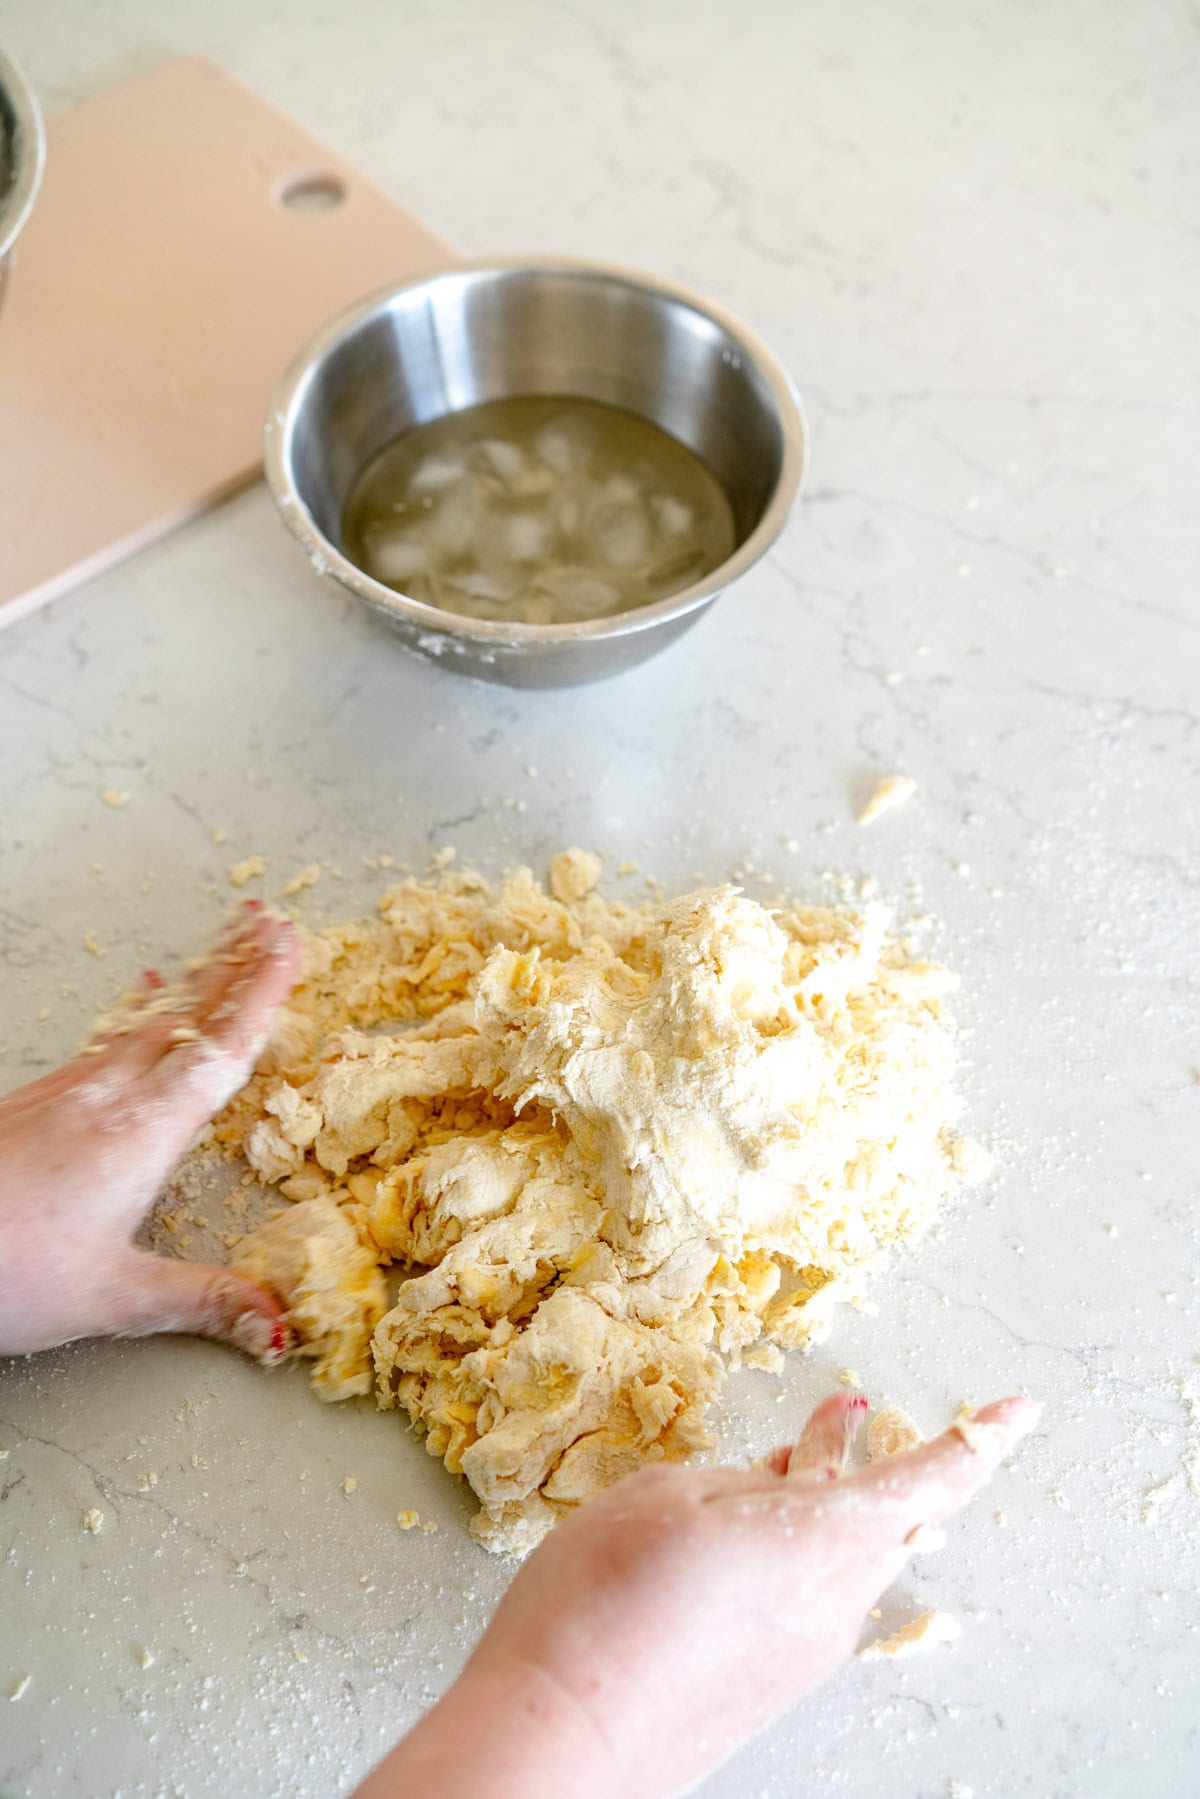
Step 4: Add in the liquid
Now you are going to add in the water / apple cider mixture. I like to start with 120g of liquid (do not add the ice). Pour it into the bowl and then do a tossing motion with your hands to incorporate the water. See how the pie crust is feeling and if it still needs more liquid (mine almost always does), add more water in. If there are any particularly dry patches you can hold the more hydrated pie crust to the side and add the water directly to the dry patches.
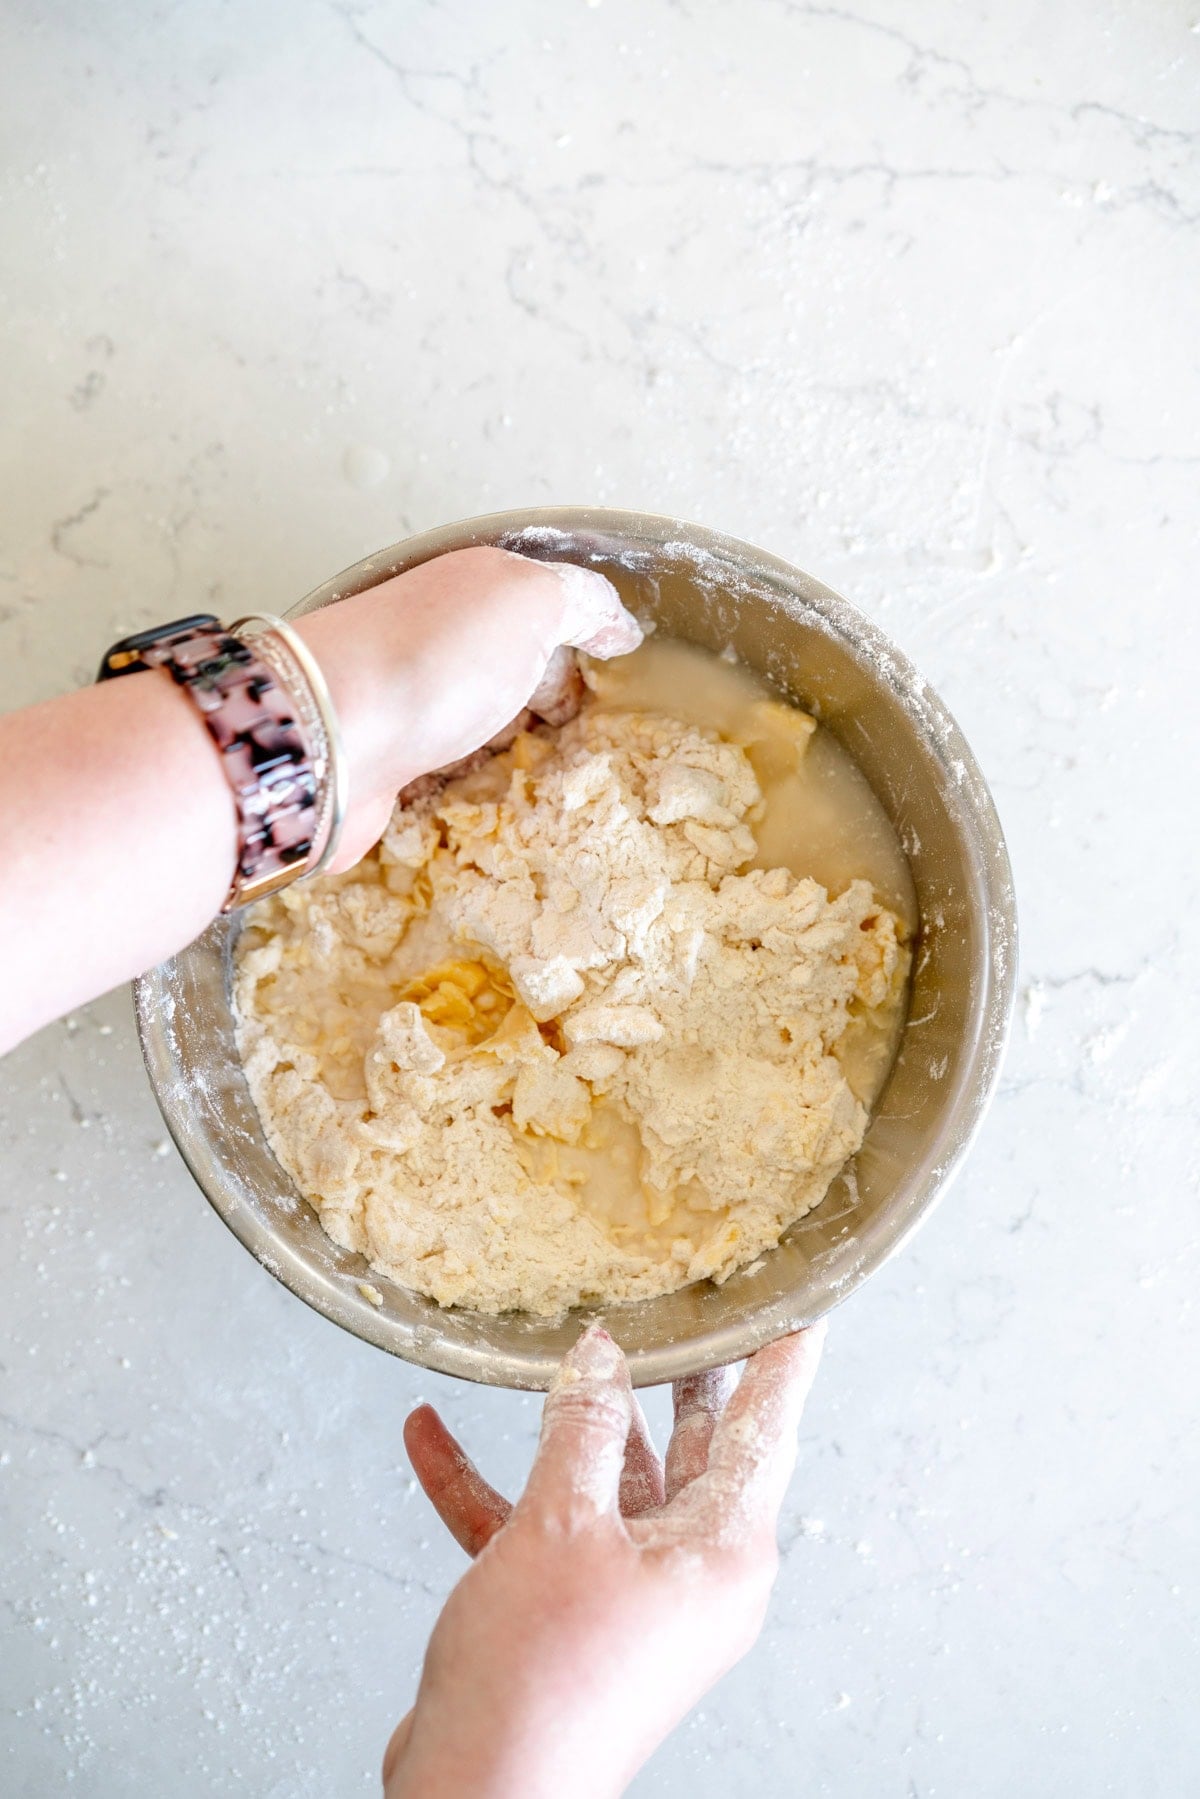
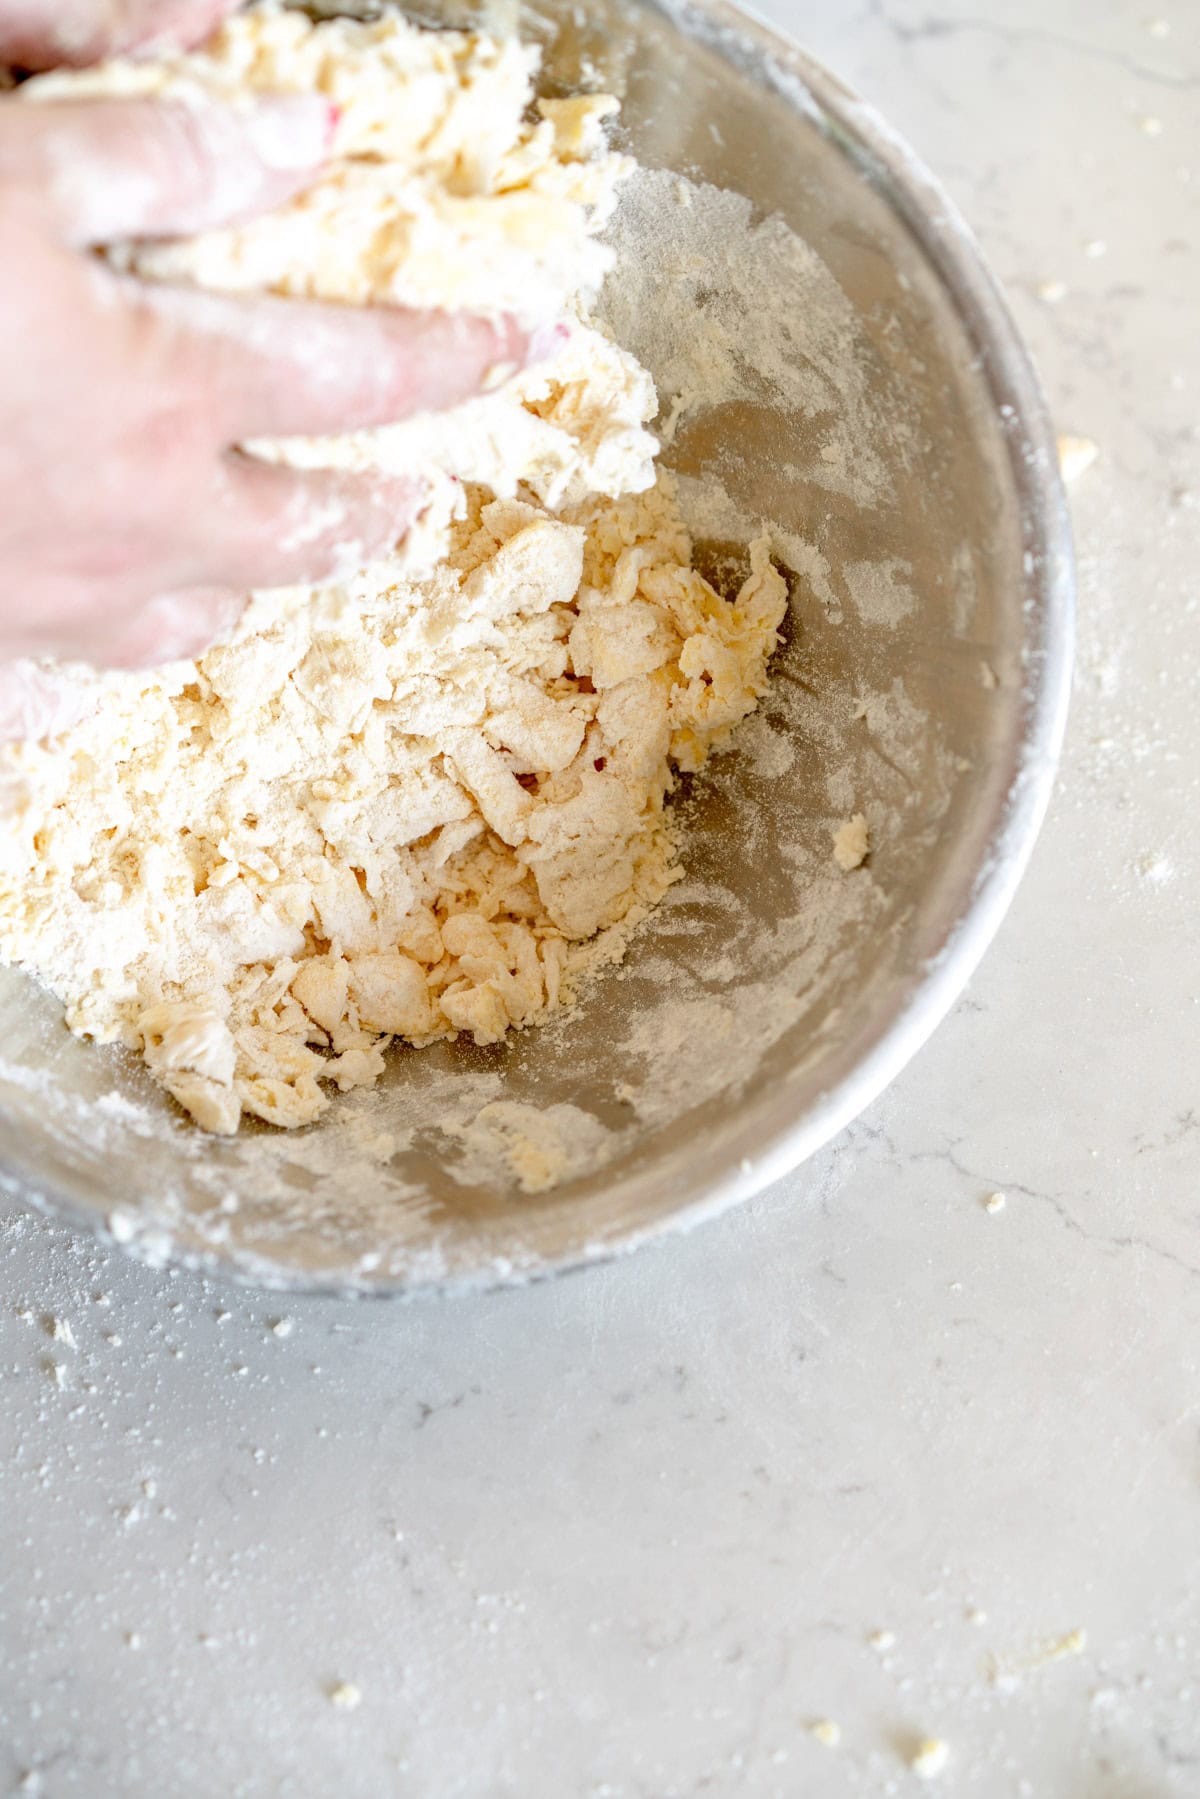
Keep tossing the mix with your hands, squeezing gently to bring the crust together. At no point do you want to knead the dough too much, as you do not want to develop gluten which can make your pie crust tough. Squeezing and pressing together is ok but you don’t want to knead it like you do bread.
You are looking for a dough that holds together well, but is not too wet. Remember it is going to rest in the fridge where the flour will hydrate. You can see in the images that the dough is not completely wet, but holds together well.
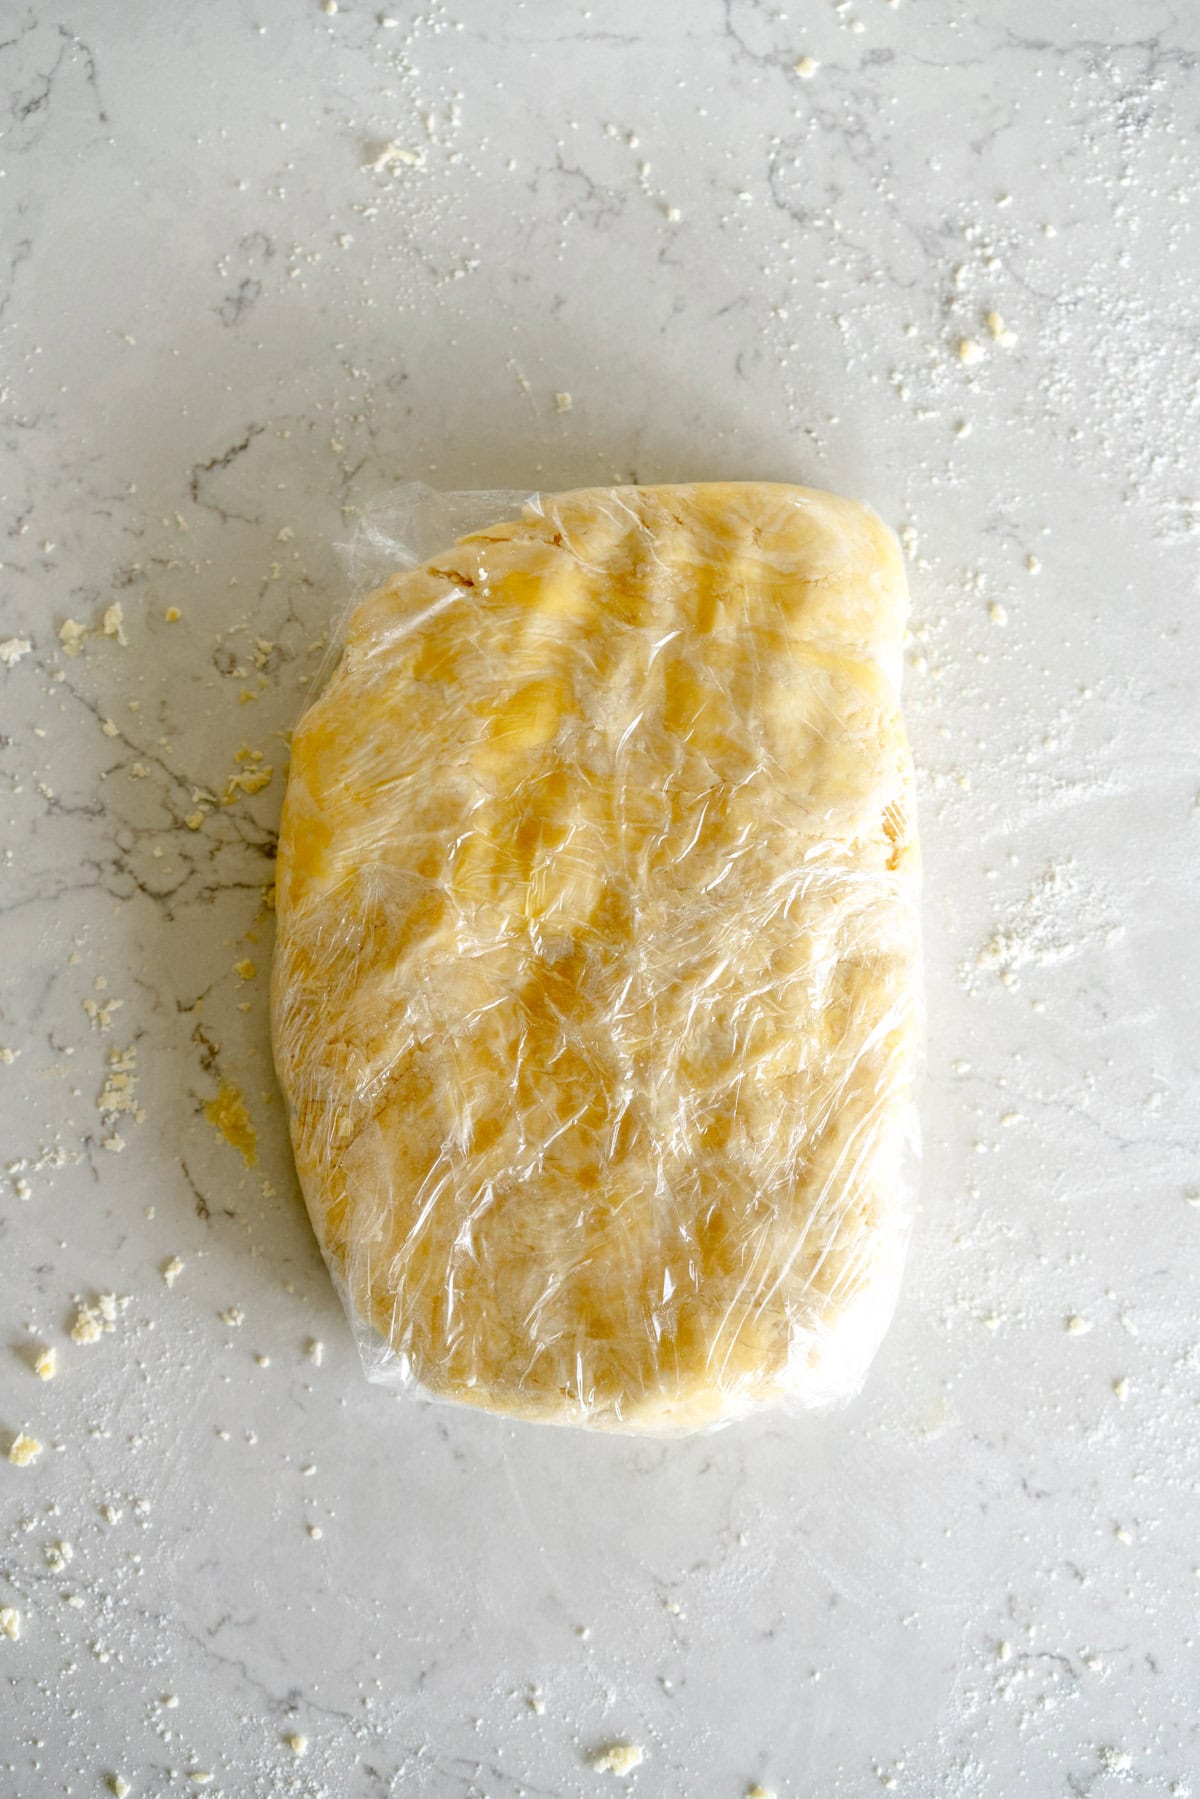
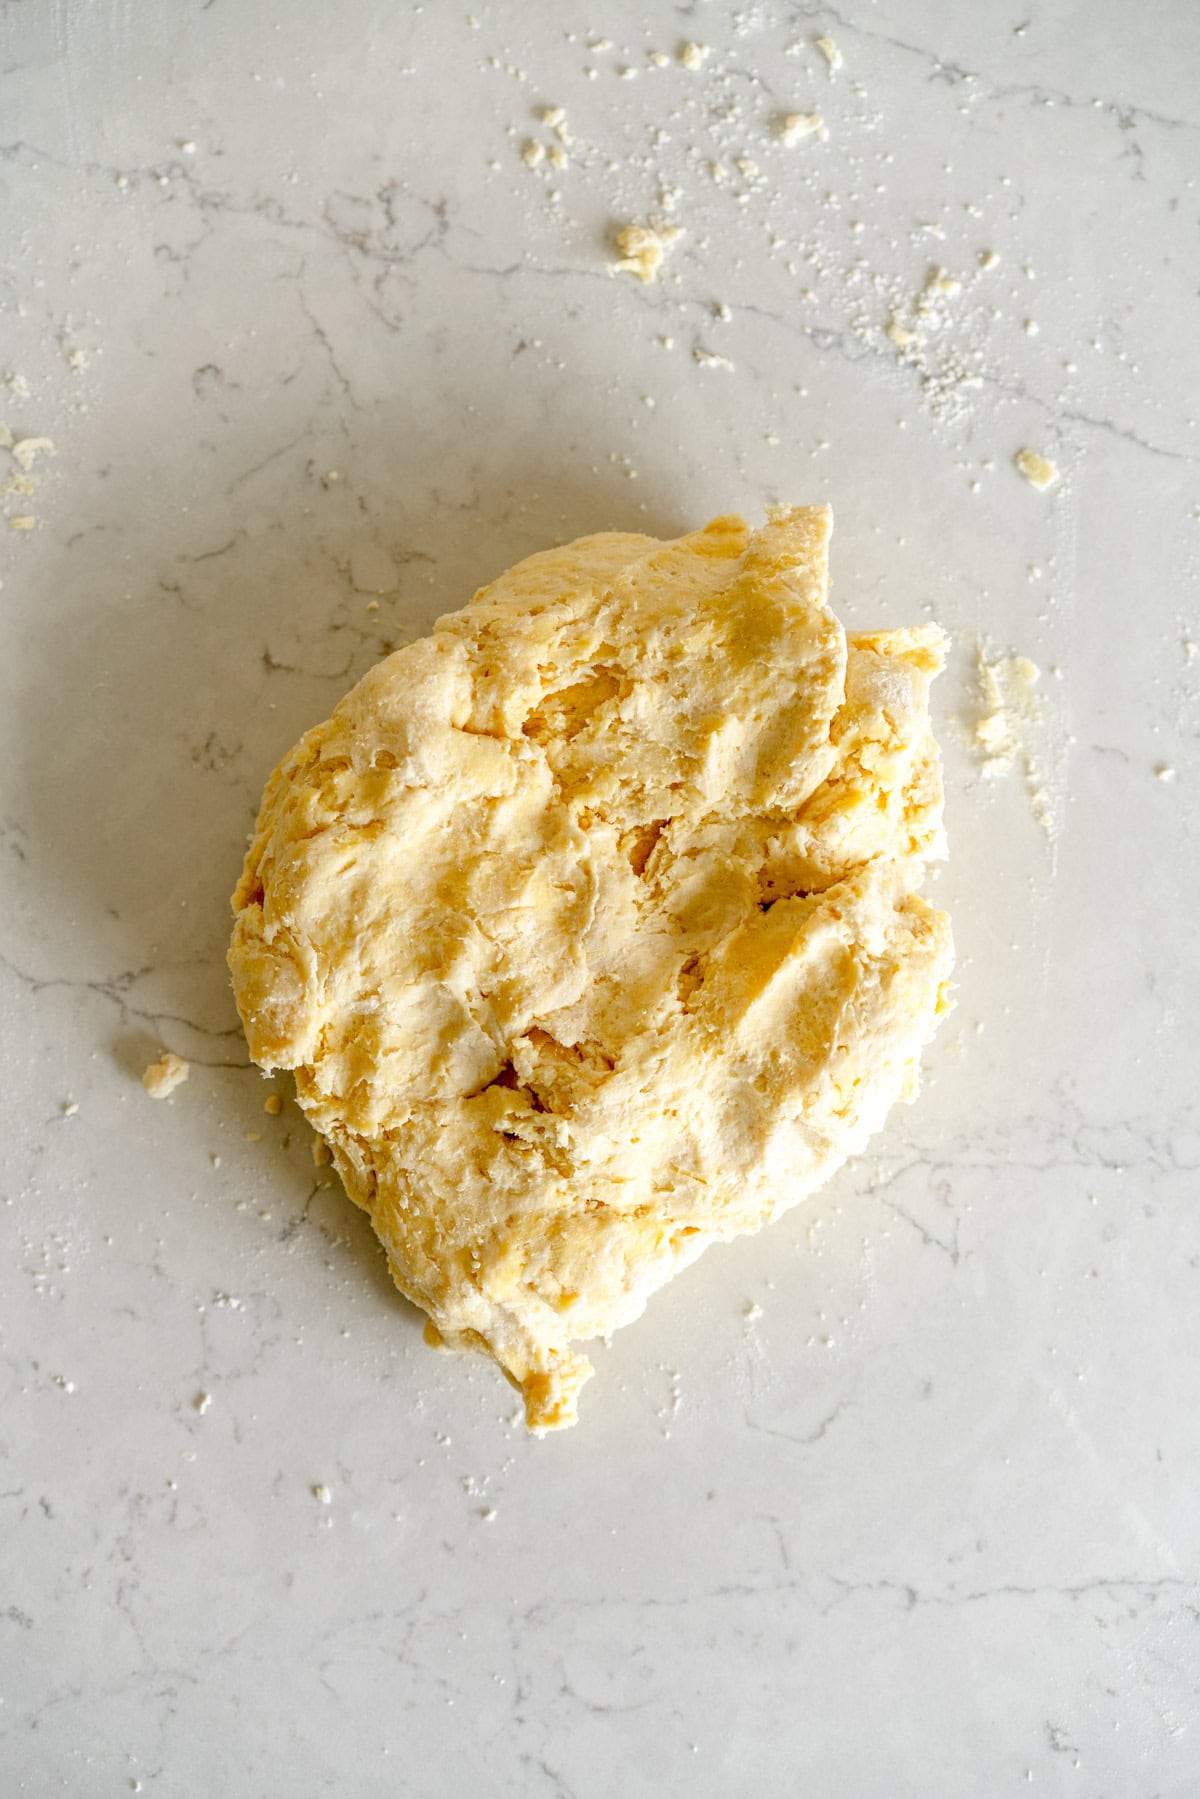
Step 5: Bring the dough together
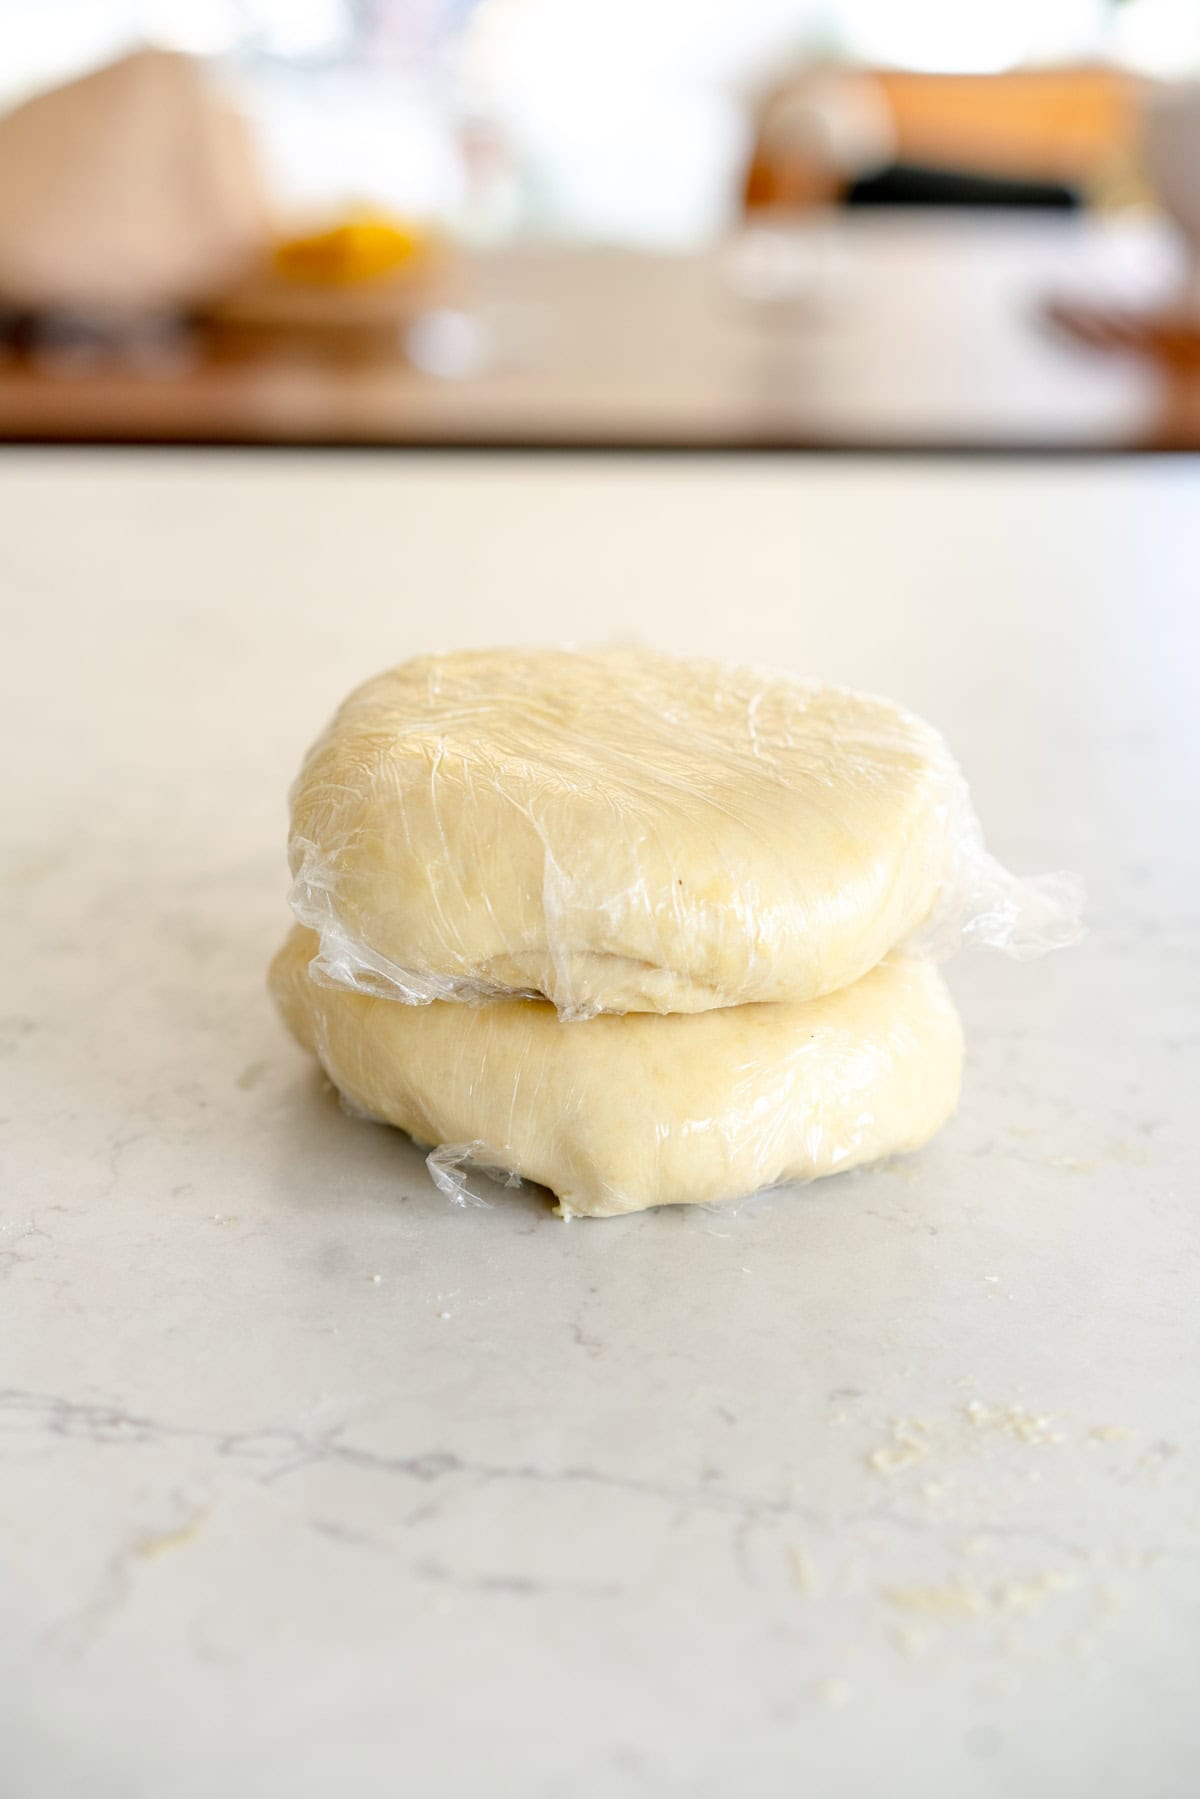
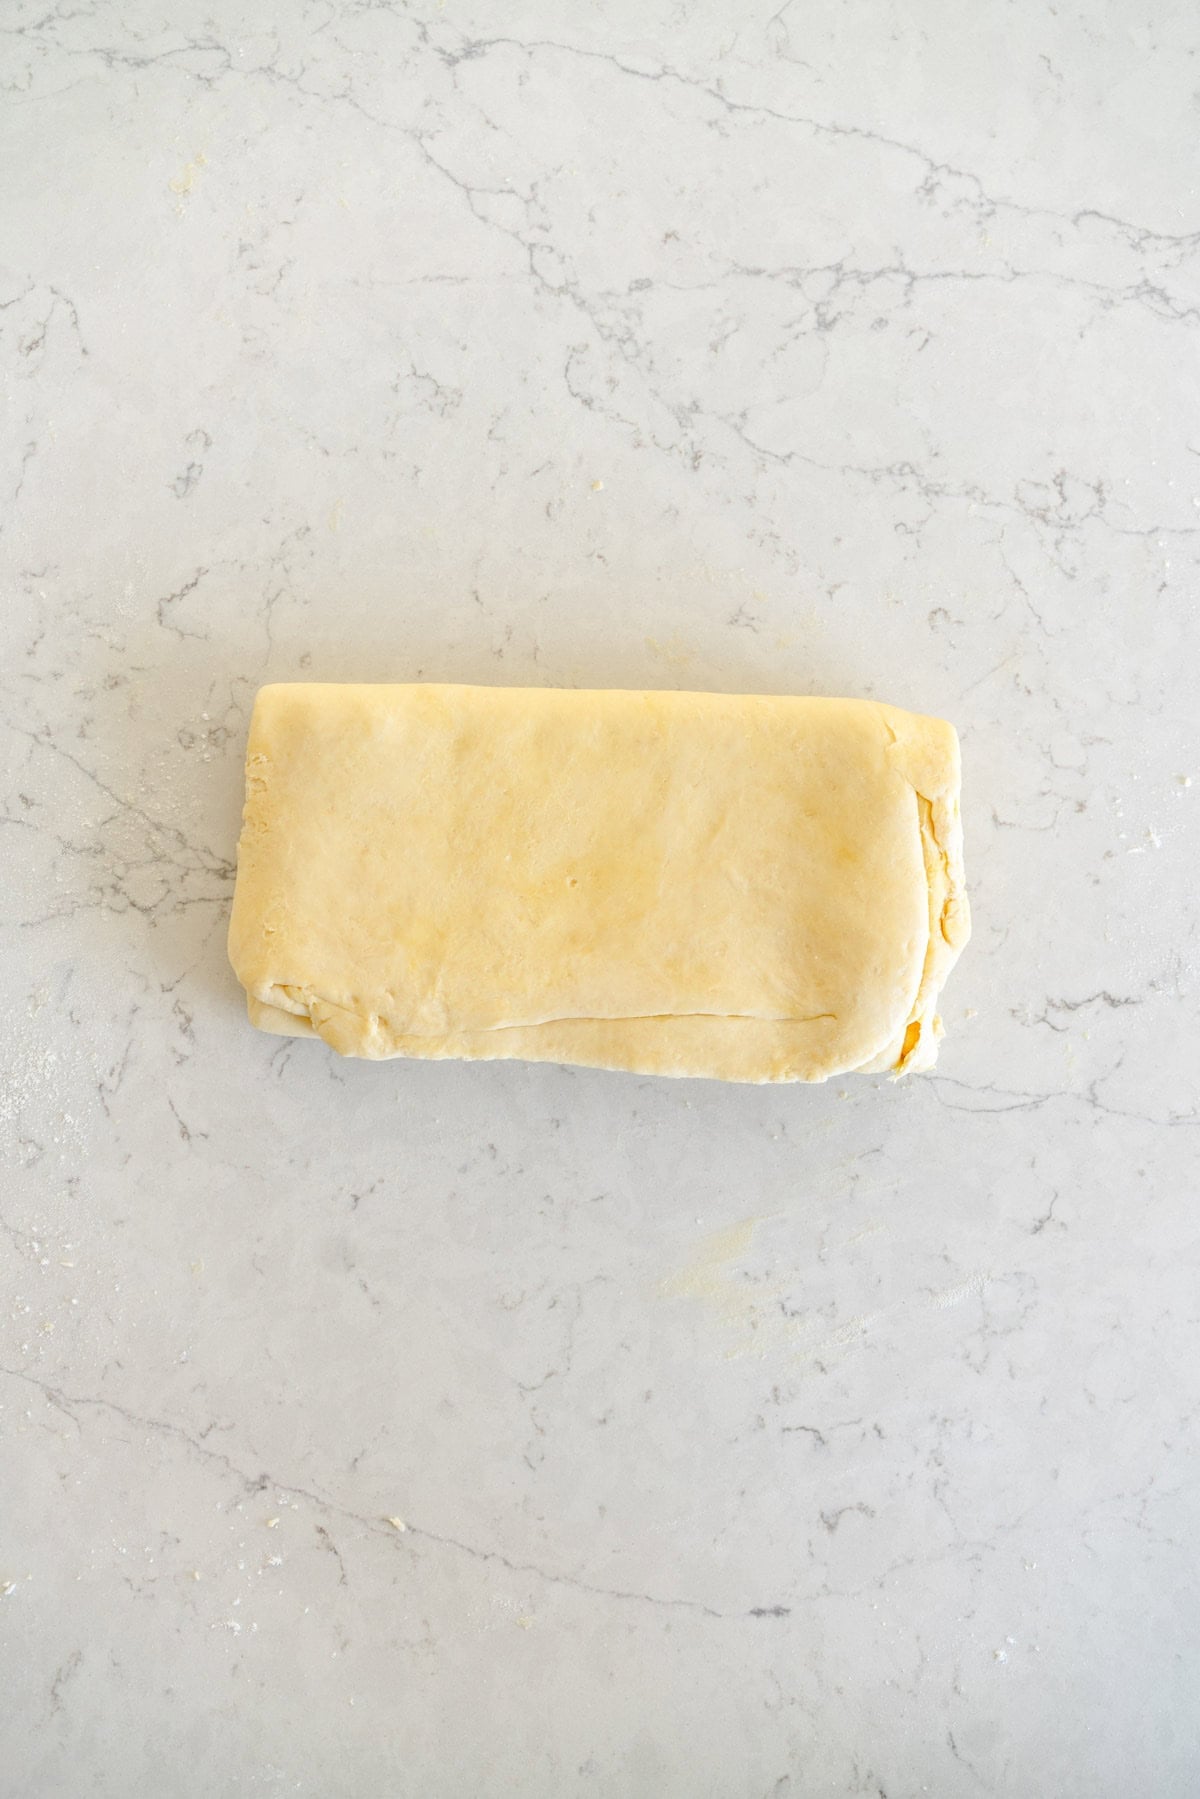
Turn the dough out onto a work surface (no need to flour), and gently press it together with your hands. I like to shape mine into a flat rectangle at this stage as it makes rolling out the dough for lamination a little easier. Wrap the dough in plastic wrap and rest in the fridge for an hour before doing the laminations. This gives the dough some time to relax and for the flour in the recipe to hydrate.
Step 6: Laminate the pie crust
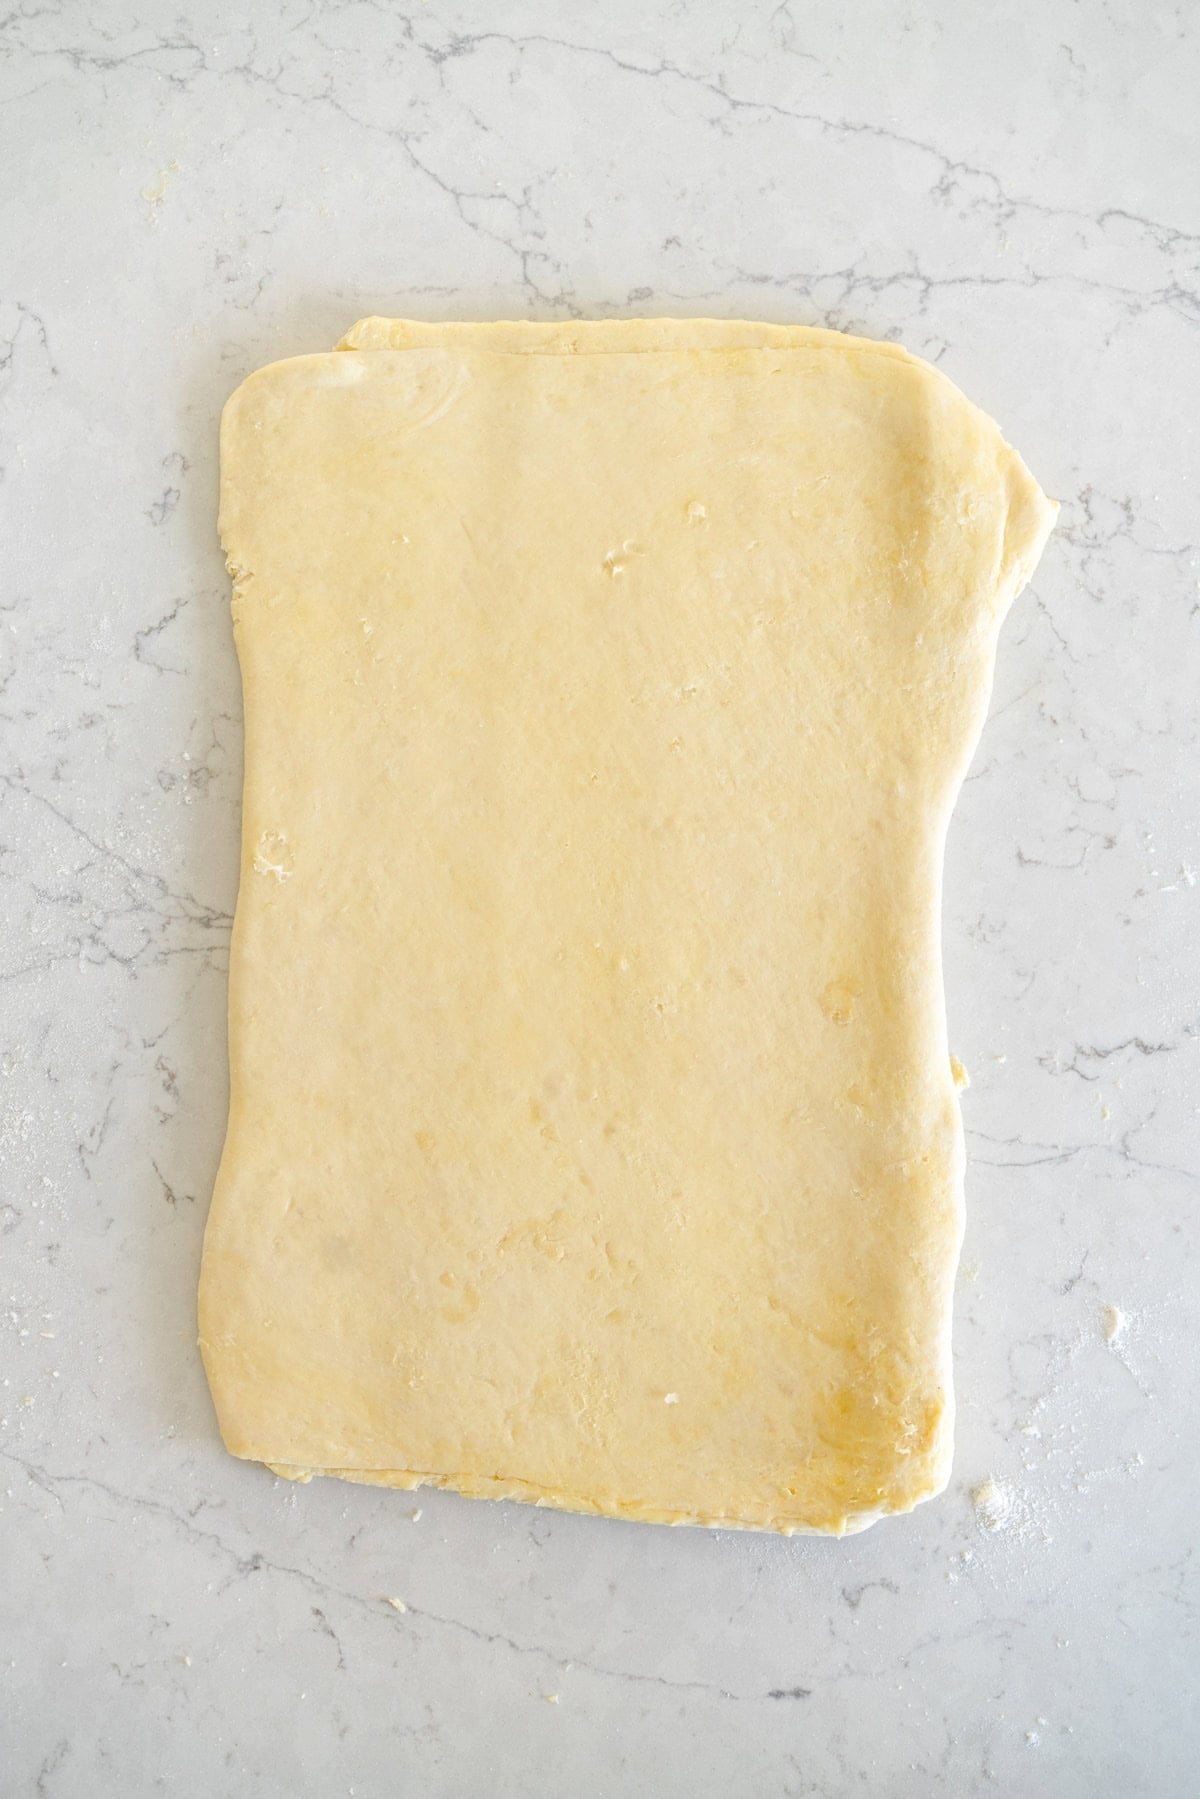
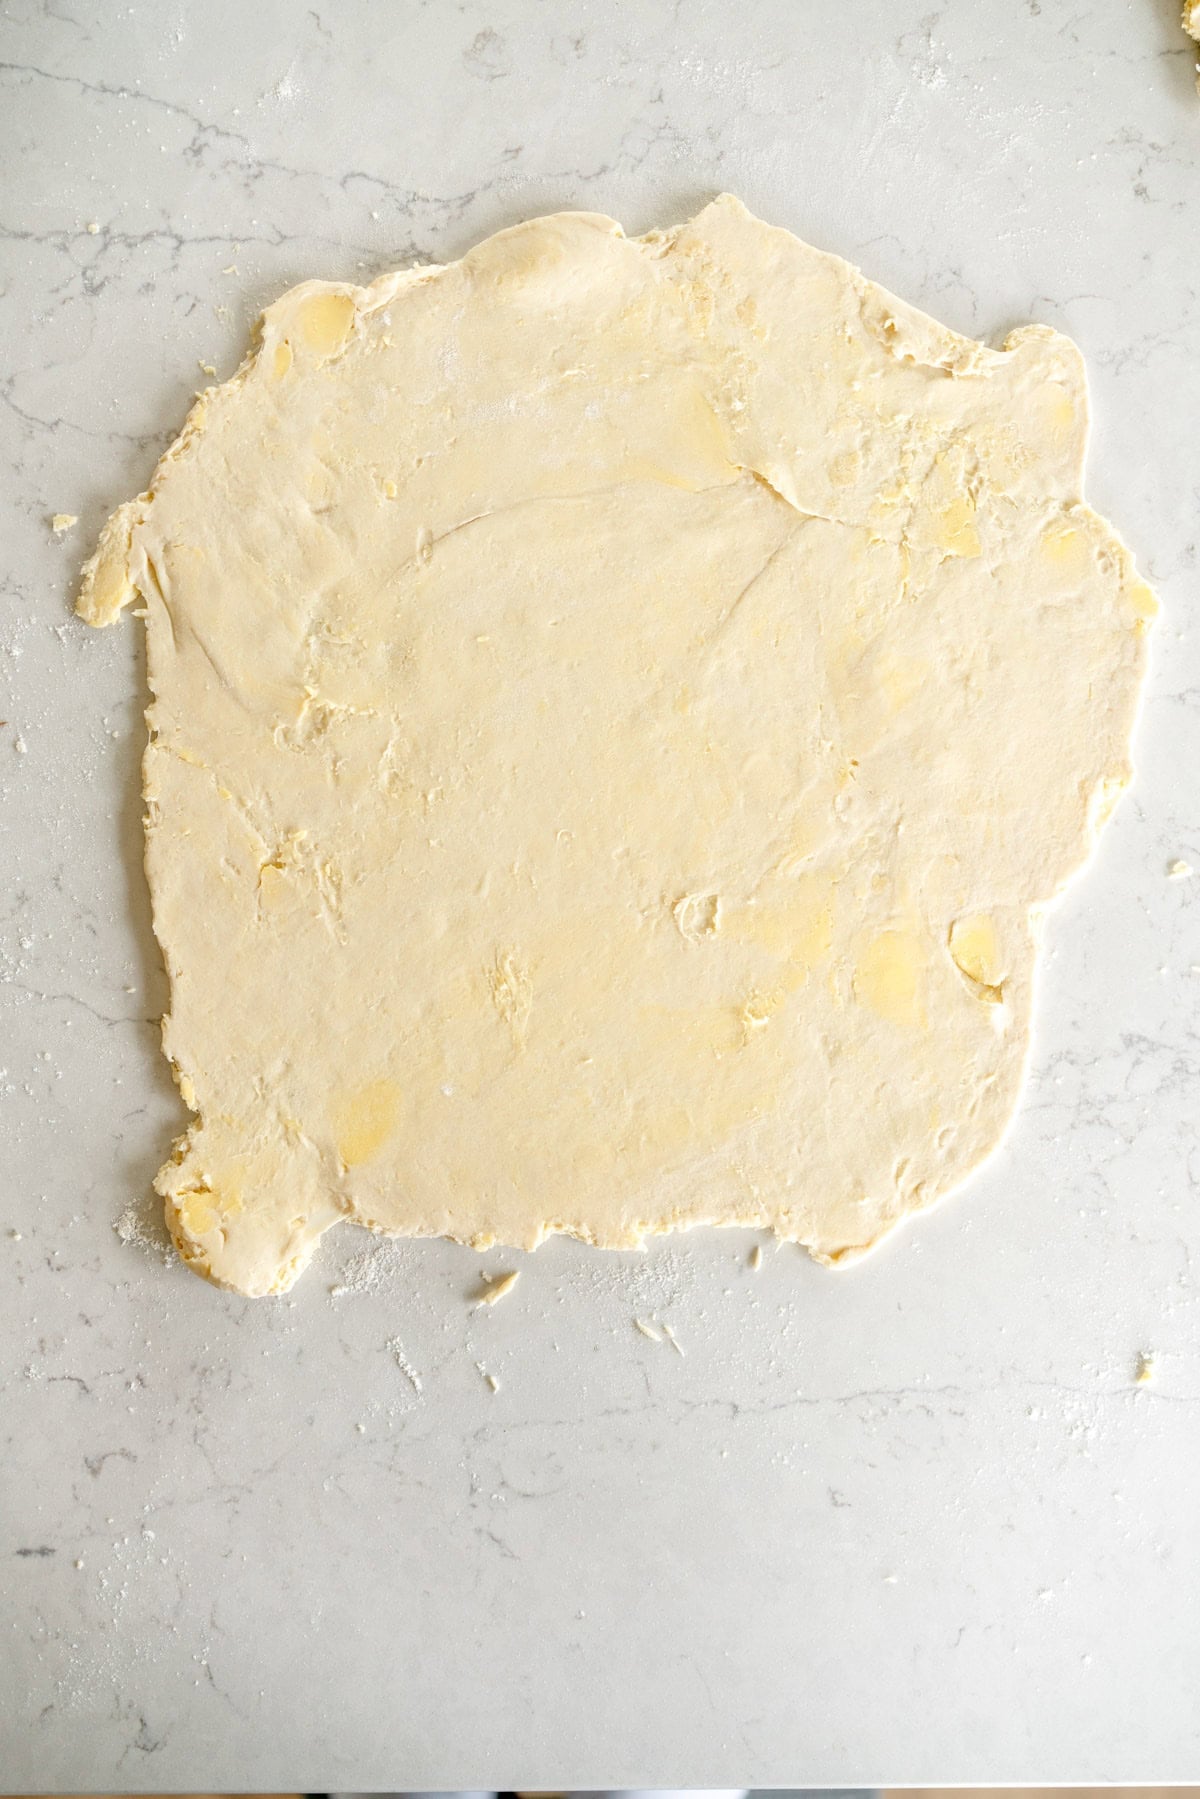
Now you are going to perform three sets of laminations (it’s just a fancy name for folding, don’t let it intimidate you!), essentially rolling out the dough into a rectangle, folding it up, then doing it two more times. I like to use a lightly floured surface, which especially helps if your pie dough is a little over hydrated or has some sticky spots.
Here is how you perform each fold:
1. Roll the dough out into a rough rectangle shape (it doesn’t have to be perfect). I aim for about 35x25cm (about 14x10 inches).
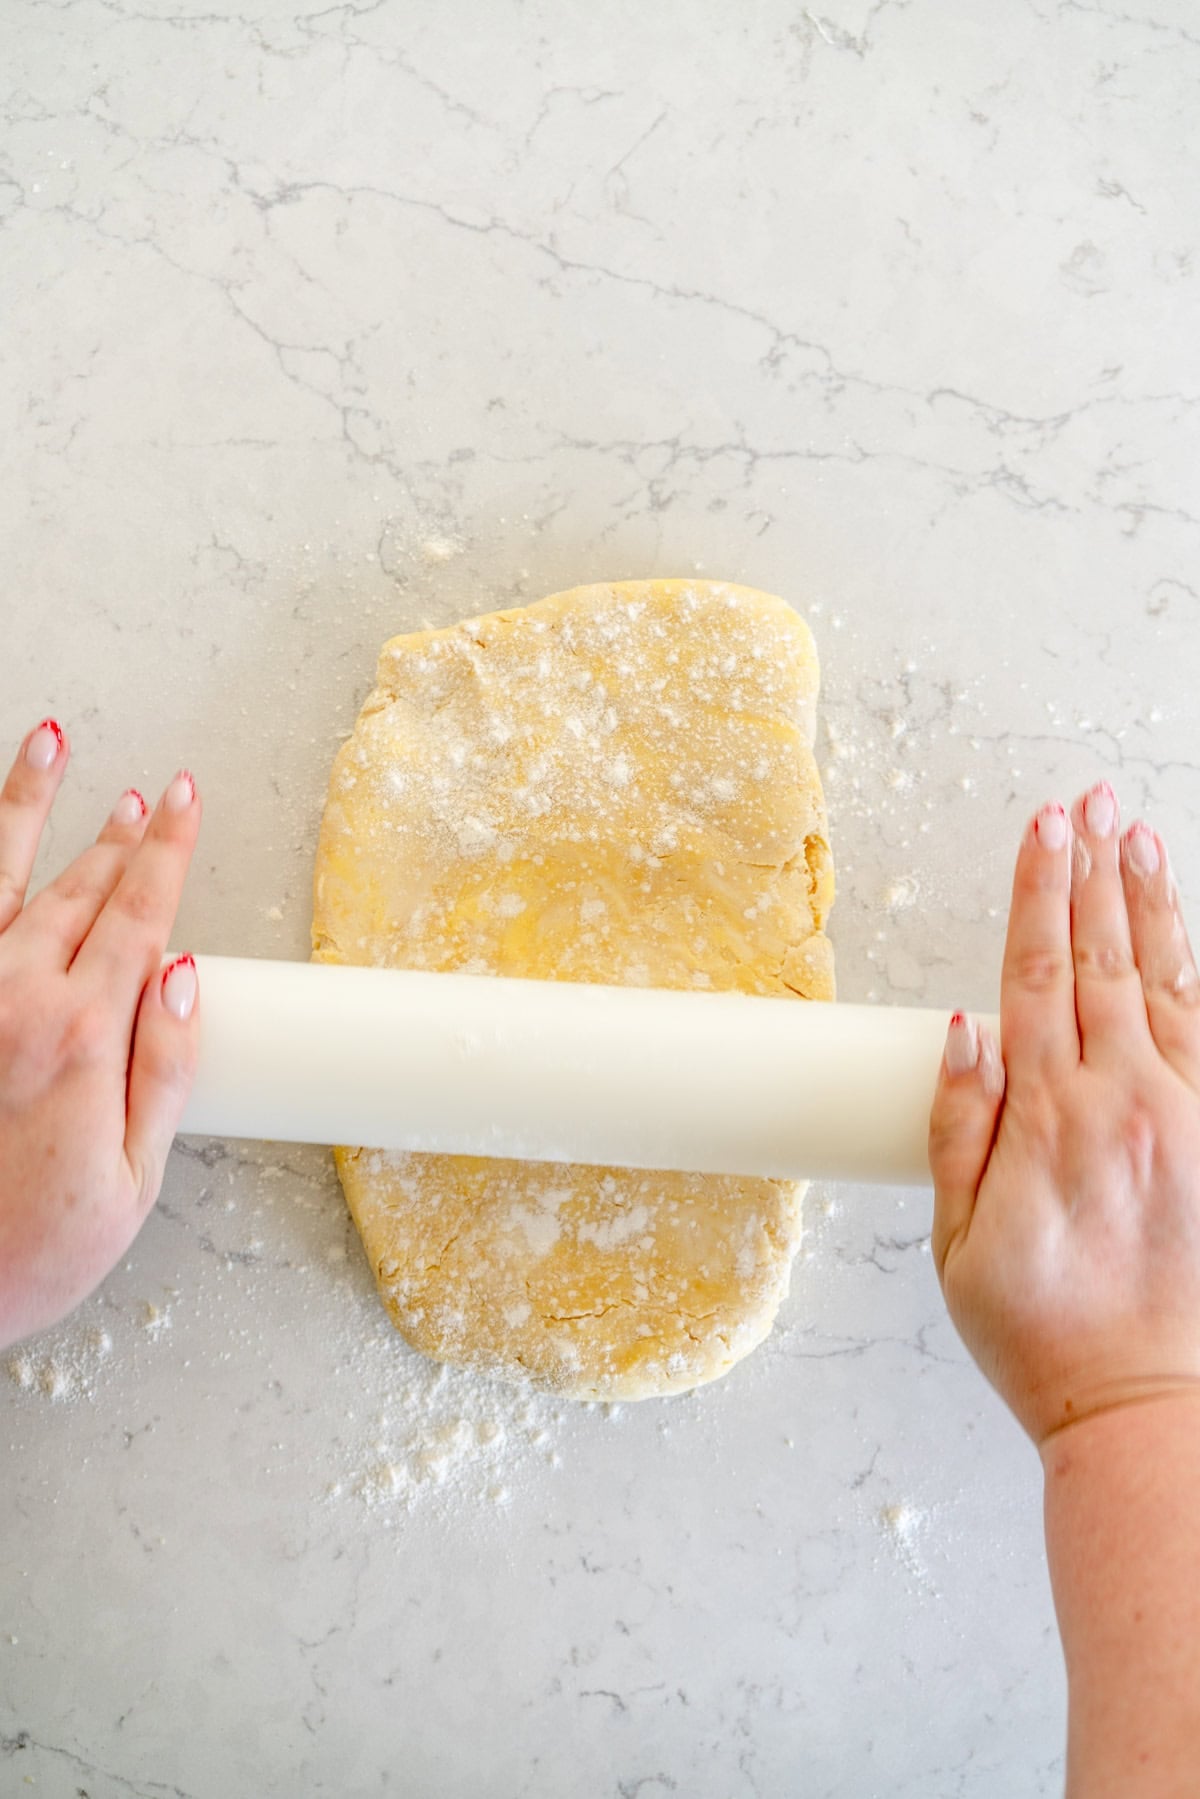
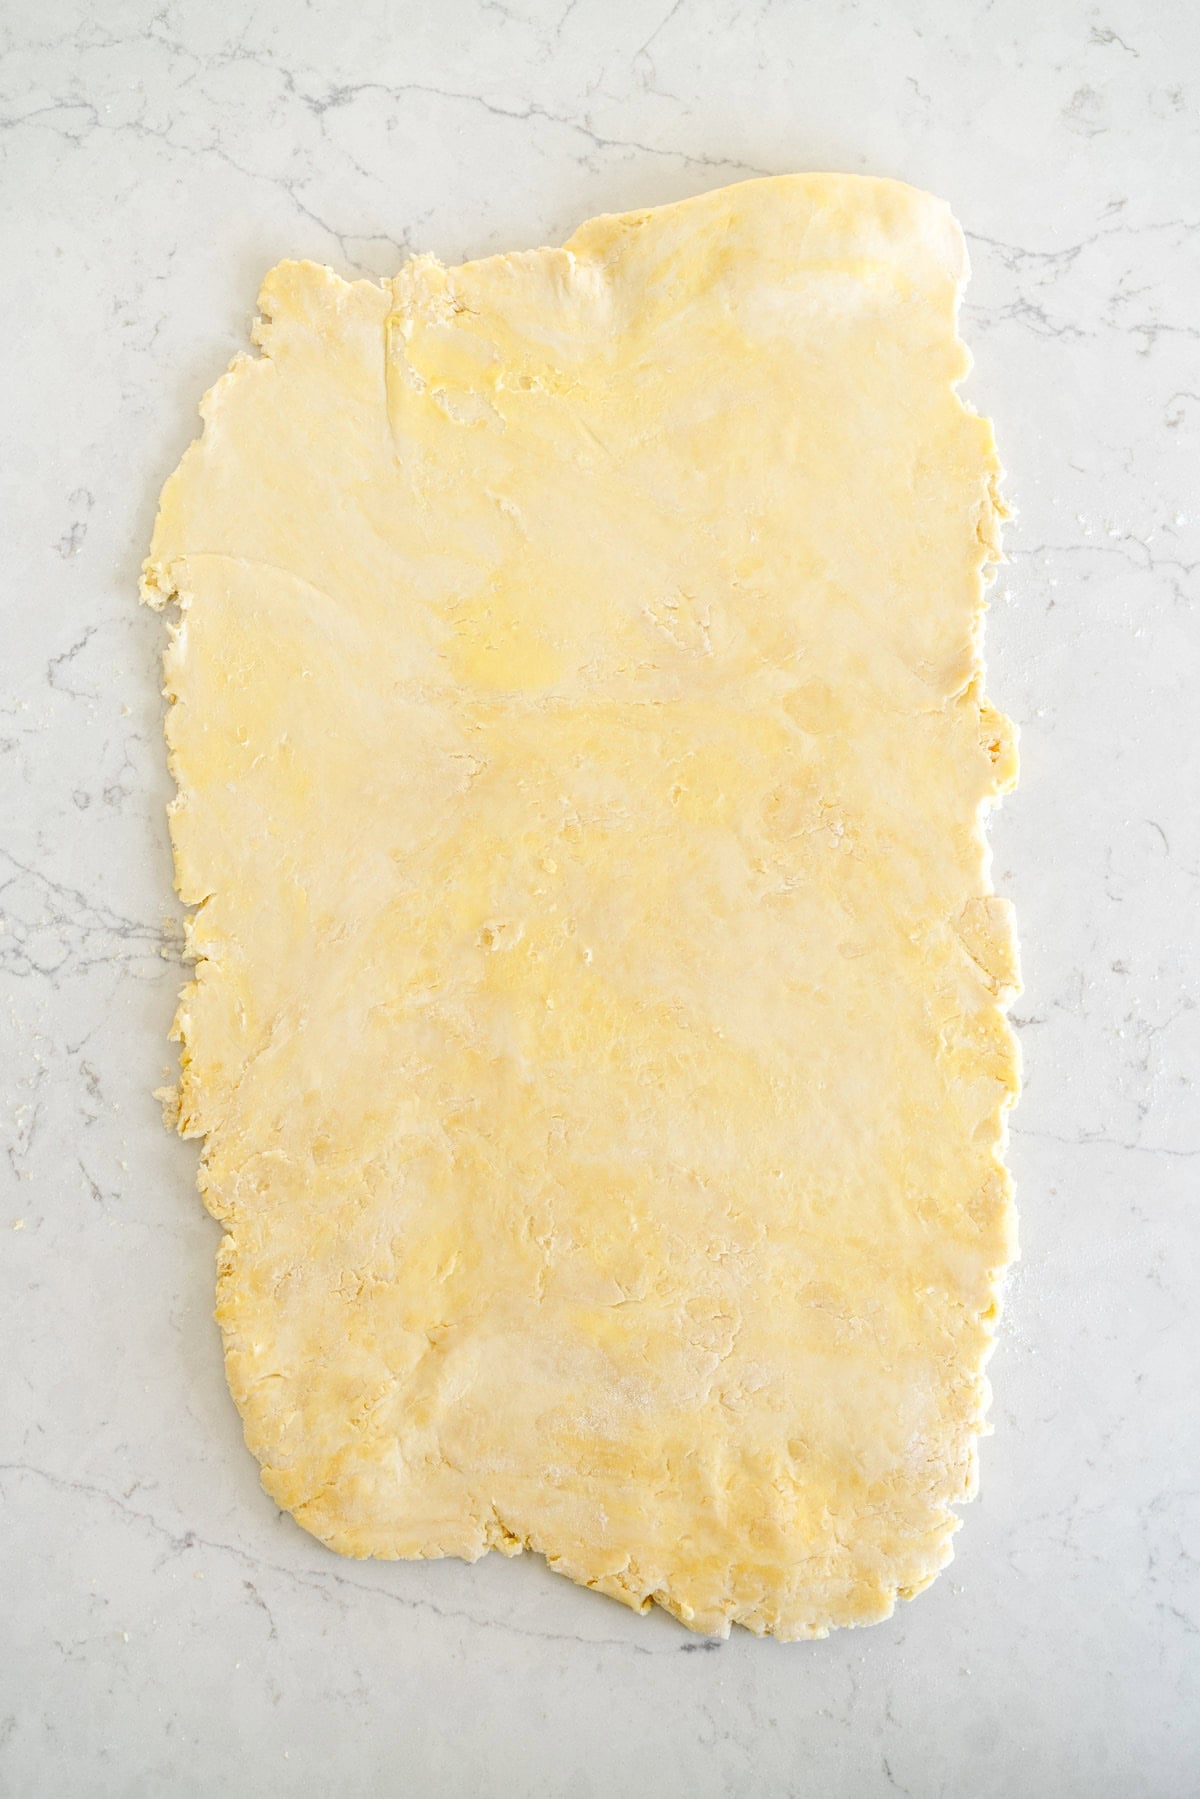
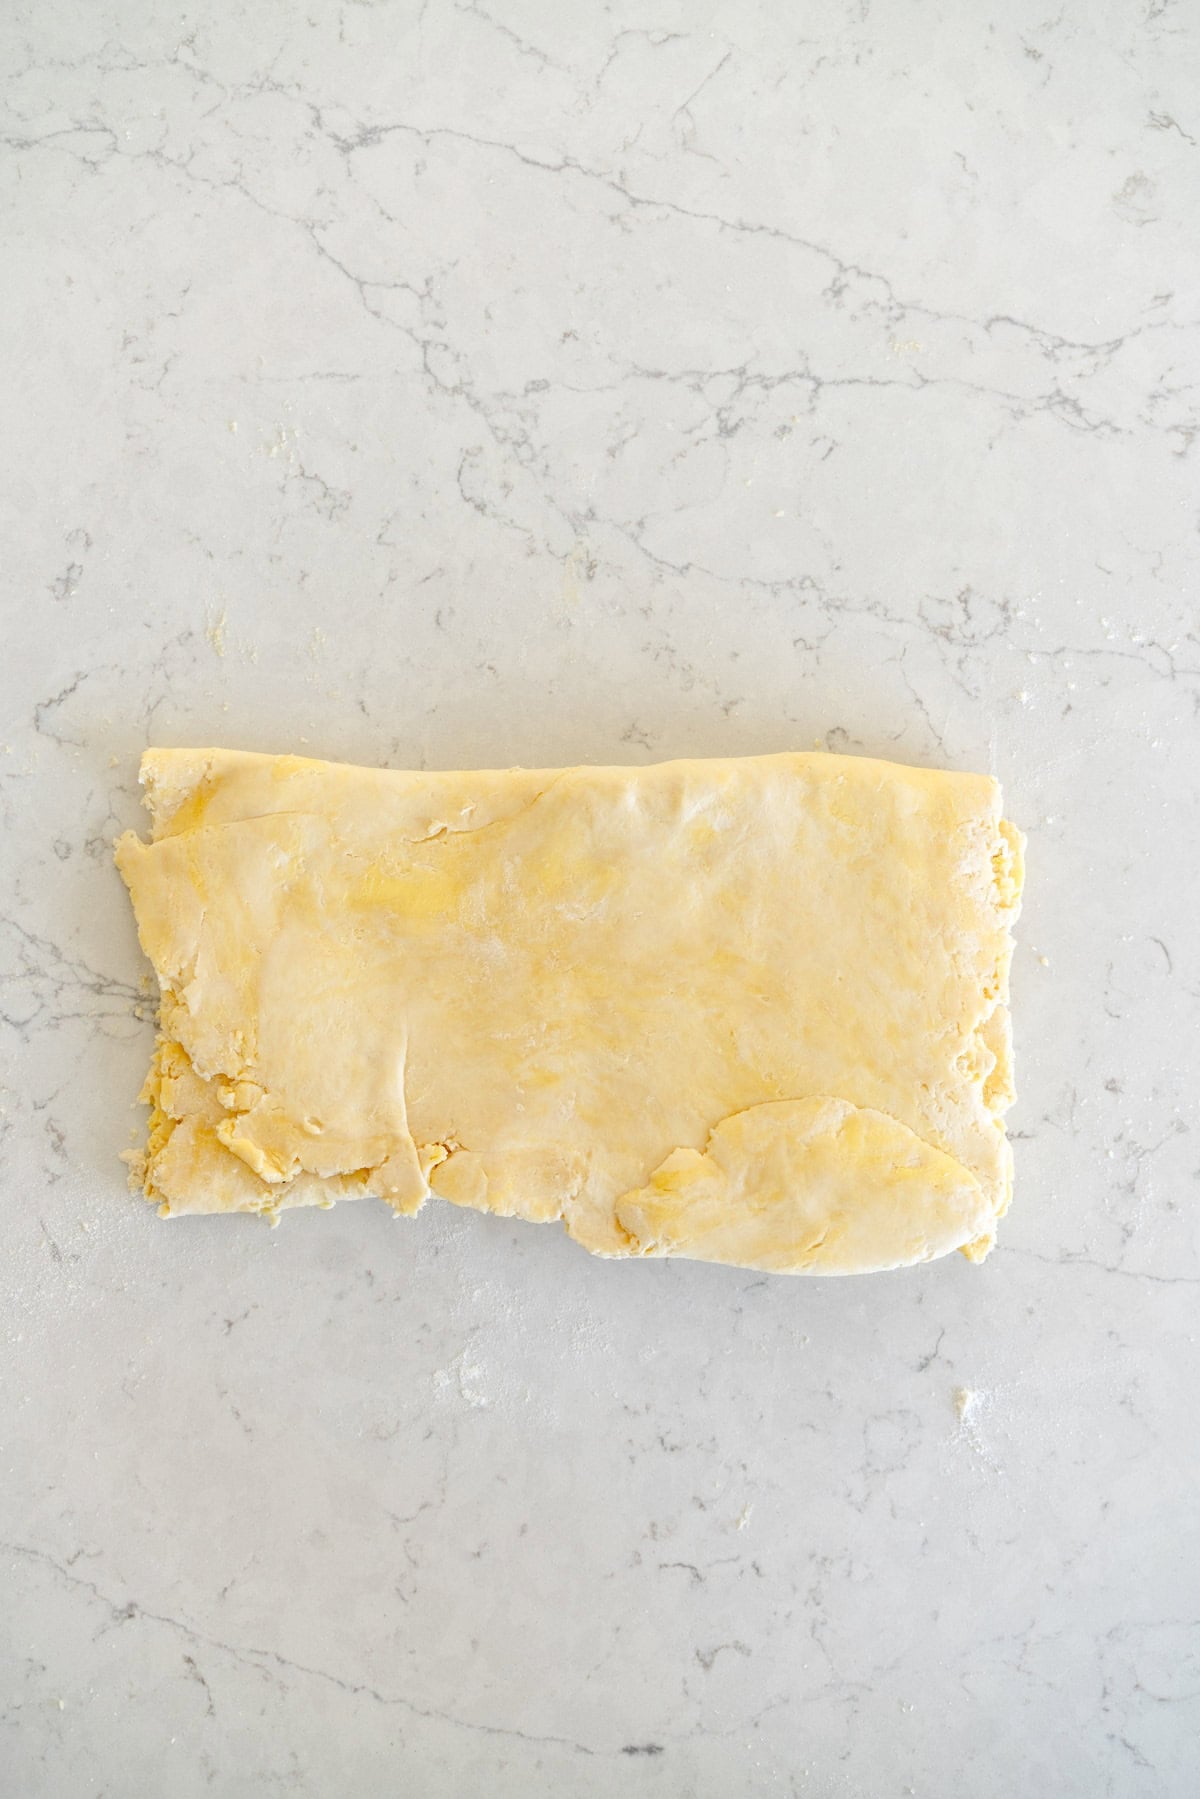
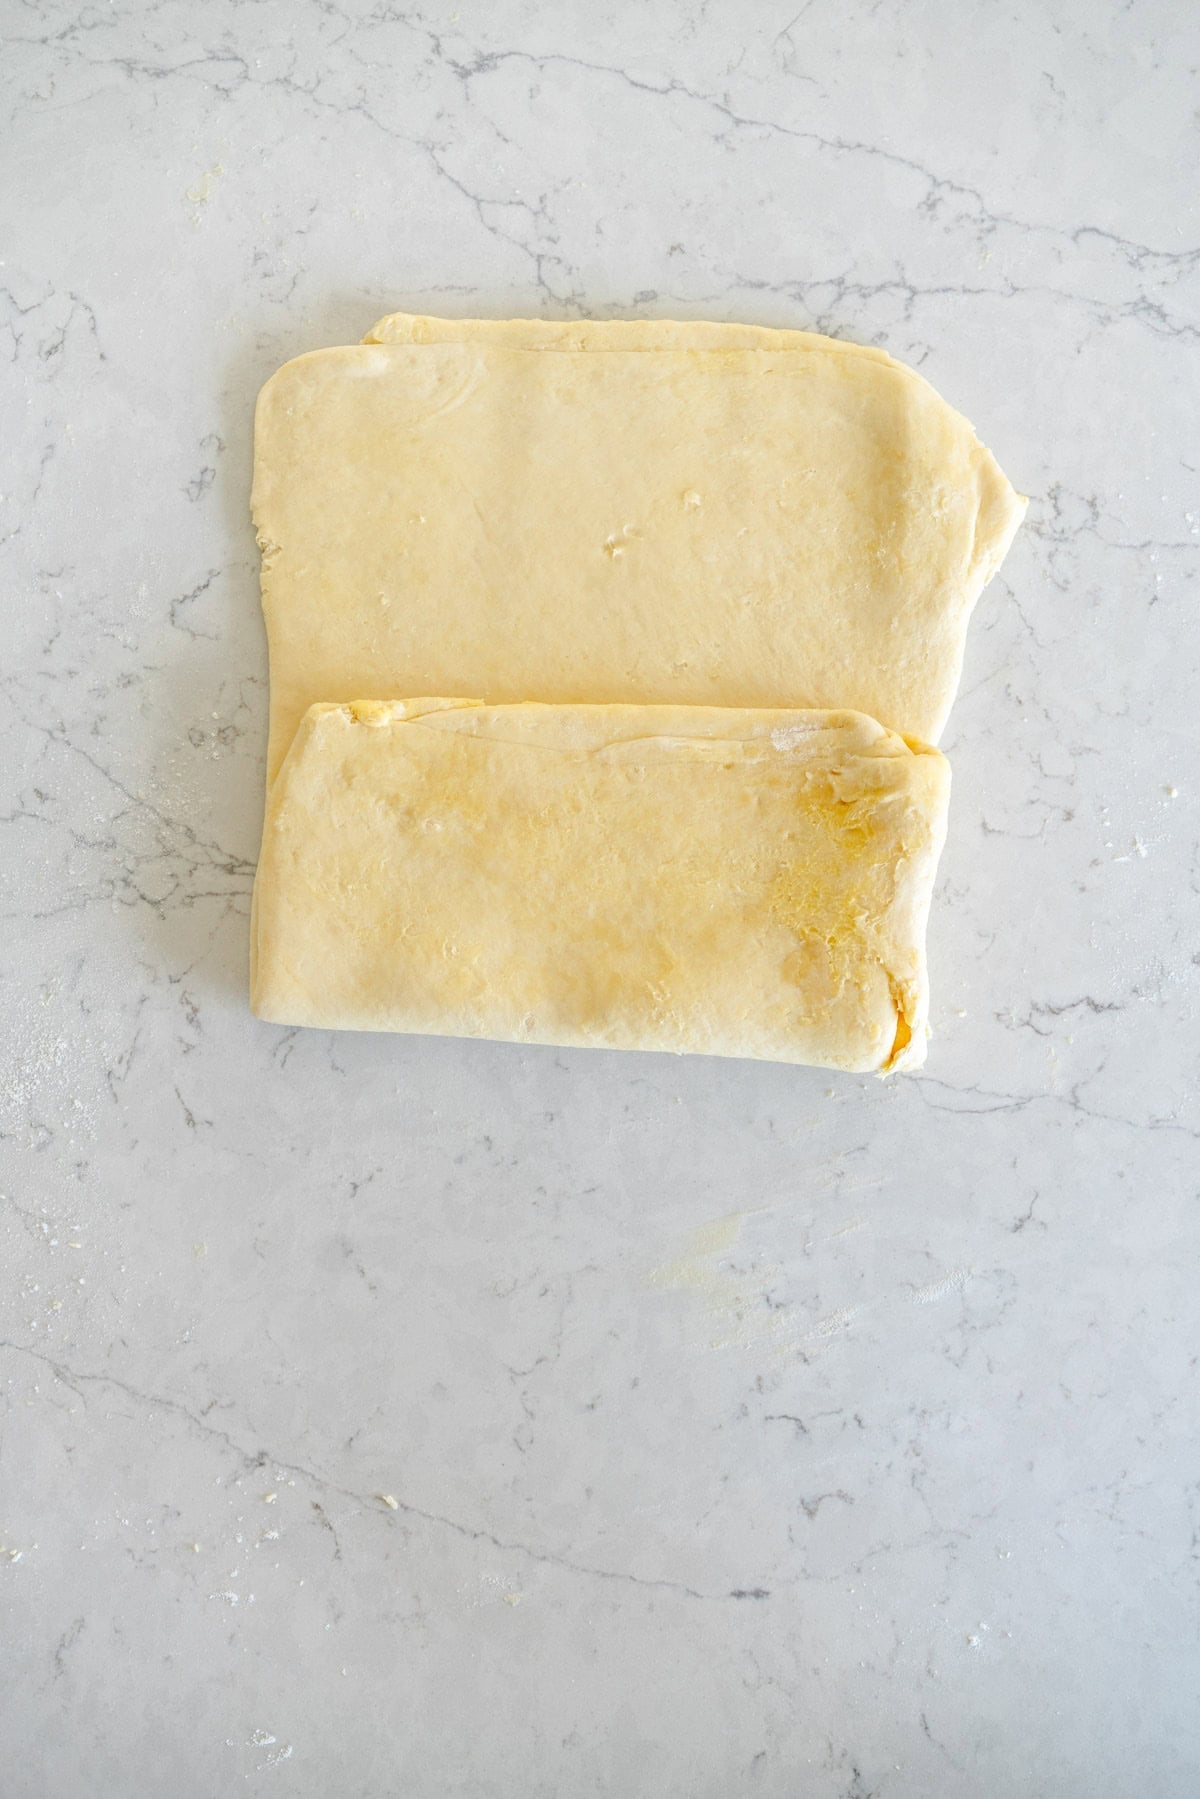
2. Brush off any excess flour. Fold the bottom third of the pie crust up, then fold the top third down over it - this is called a ‘letter fold’.
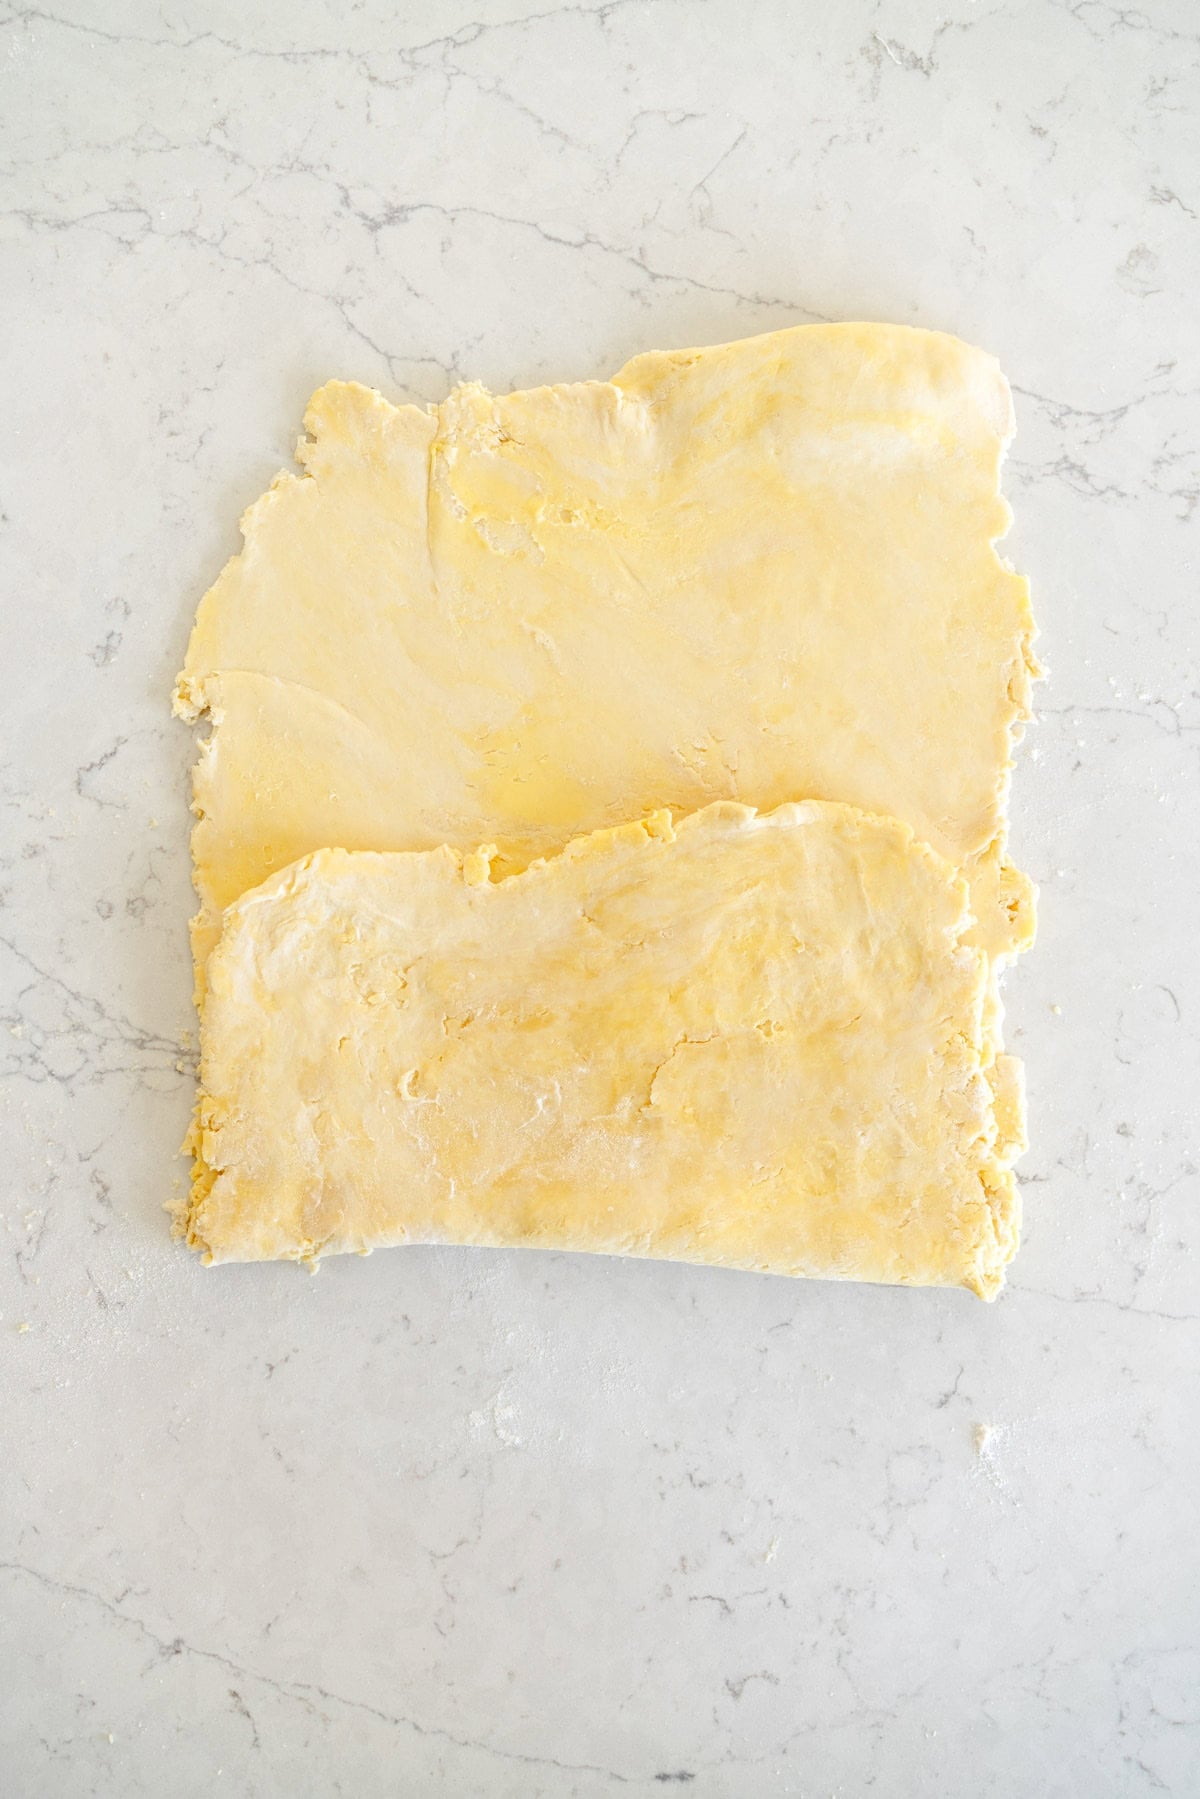
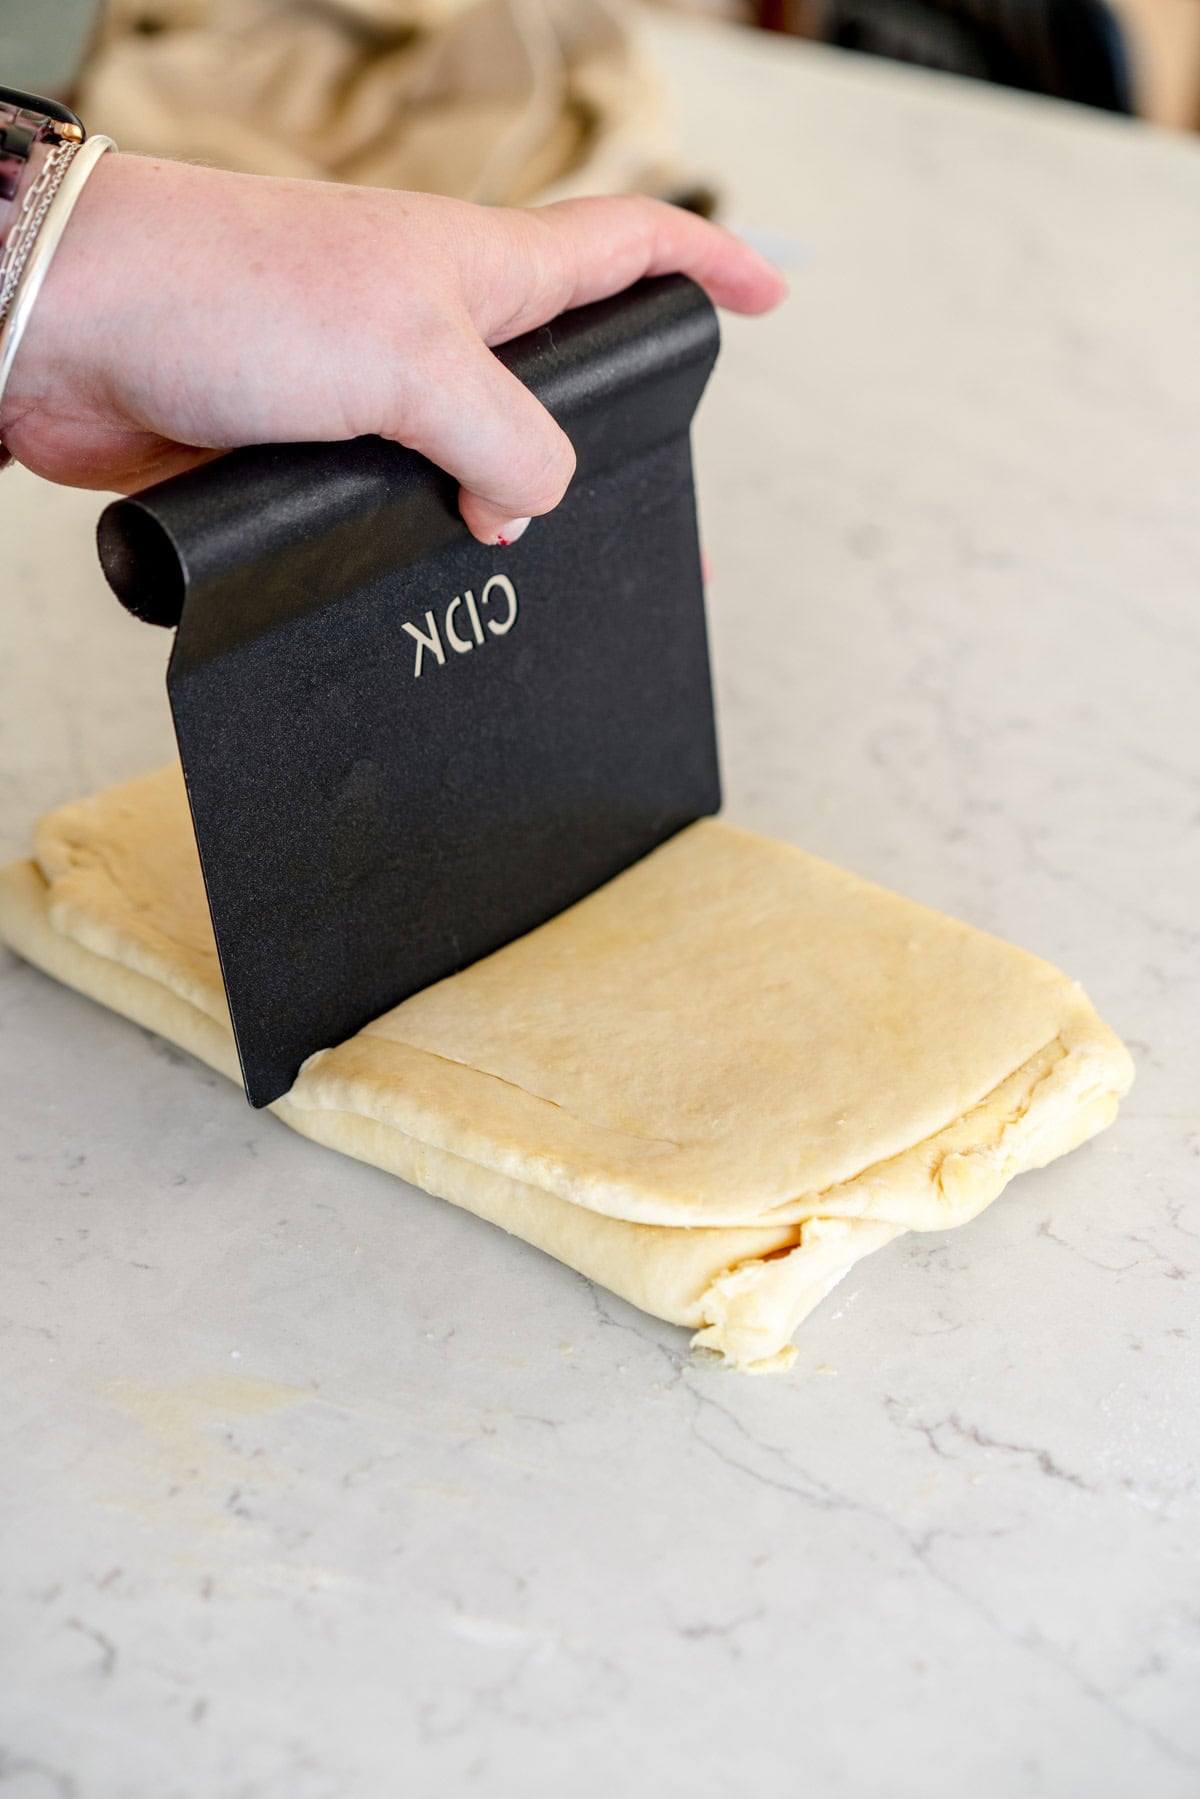
3. Turn the dough 90° so that the short side is facing you.
Repeat this process two more times until you have done three folds of the dough. If at any point it feels like the dough is warming up too much, you can wrap it and pop it back in the fridge for 10-15 minutes but I find that as long as I start working with the dough as soon as it is out of the fridge, I can do the folds all in one go.
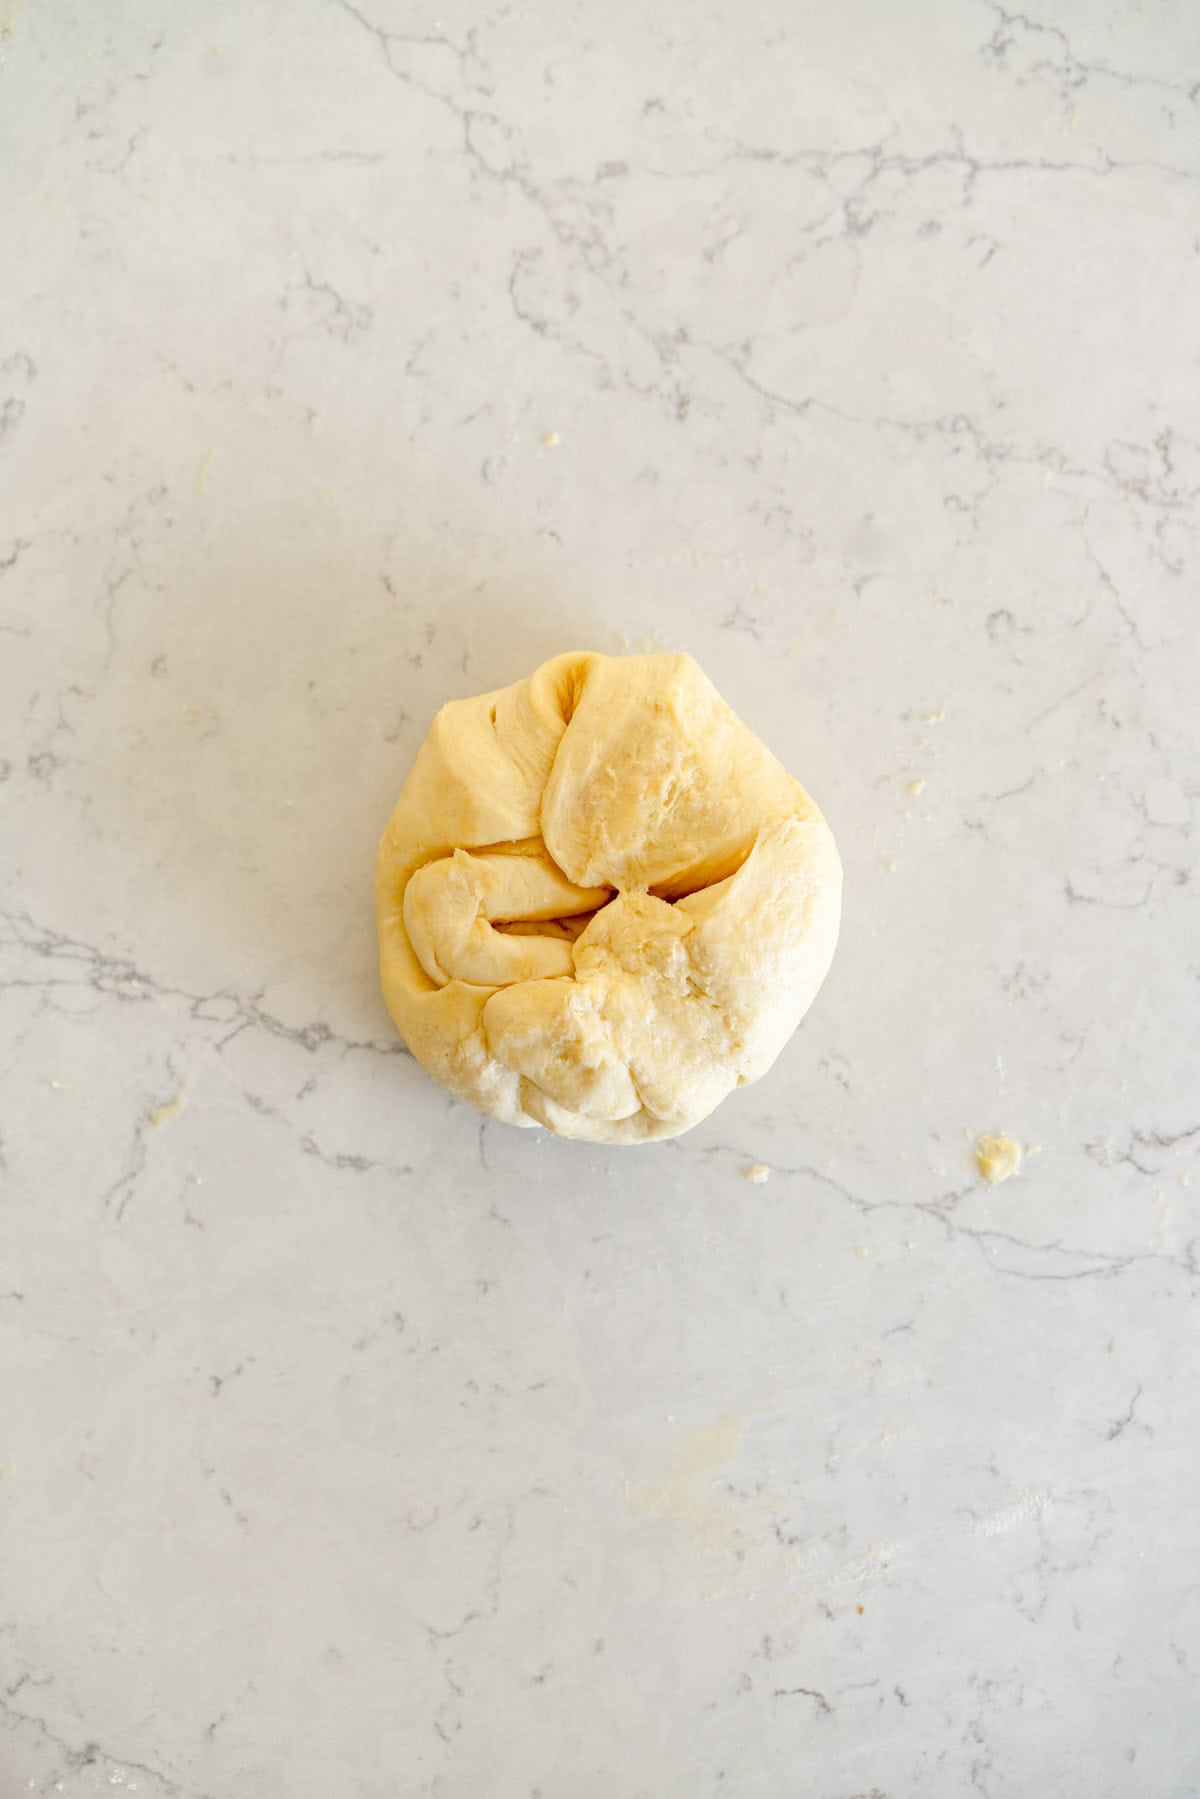
Step 7: Divide up the dough
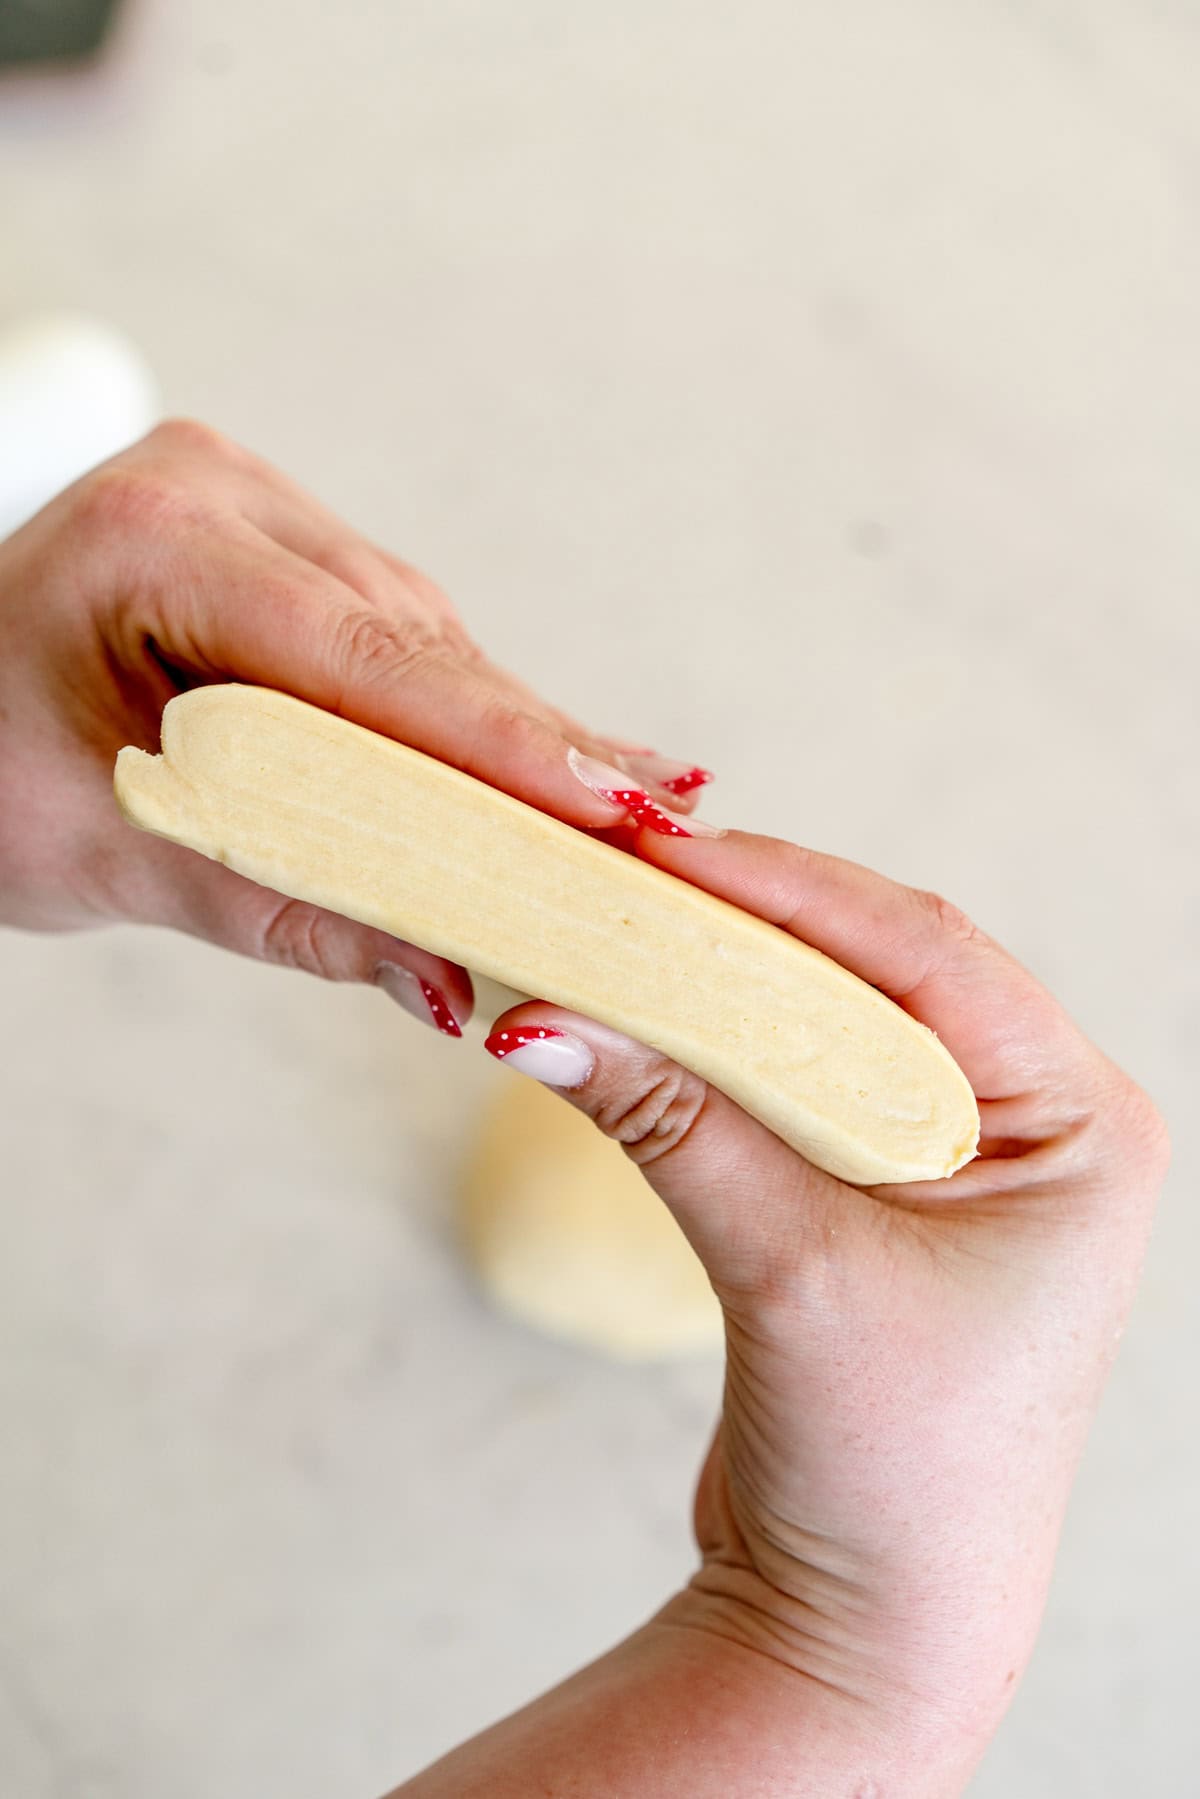
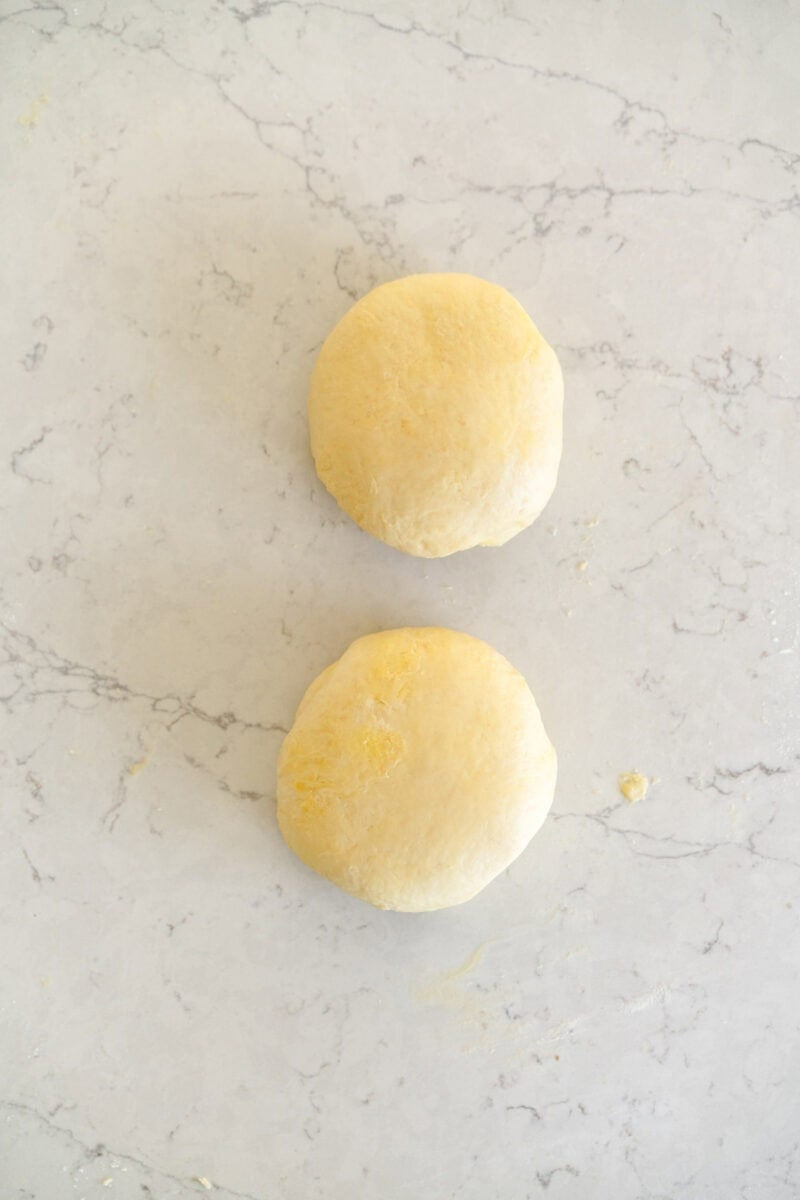
My Pie Crust recipe makes enough for two single crusts or one double crust pie, so once you have done the final fold you can divide the dough in two and shape each into a disc. To do this, I turn it over and fold the edges in, then turn it back over and flatten with my hand slightly to make a disc.
Step 8: Chill the dough
This is a super important step. You must chill your dough for a minimum of two hours, but I prefer to do overnight if I can. This lets the gluten fully relax, as well as making sure that the dough is fully hydrated. If you are making dough to freeze, I like to chill it first then transfer to the freezer.
How long does pie crust last in the refrigerator?
I like to make my homemade pie dough ahead of time - ideally the night before, but this can be done up to three days ahead of time if you are storing your pie crust in the fridge. Make sure that it is well wrapped, and use it straight from the fridge to keep everything nice and cold and to ensure that your pie crust is easy to work with.
Sometimes if you have left pie crust in the fridge for too long it will start to oxidise and turn grey - this is how to tell if pie crust is off. If you are unsure when you are going to use it, your best bet is to throw it in the freezer and bring out to thaw when needed.
How to freeze pie crust
The great thing about making homemade pie crust is that it is easy to make a whole bunch at once, and then freeze it until you are ready to use it. Pie crust will keep in the freezer for up to 3 months. I like to wrap it well in plastic wrap once it has been shaped into a disk, then add a layer of aluminum foil on the outside just to help with freezer smell.
To thaw pie crust, remove from the freezer and place into the fridge overnight until it has thawed. It is now ready to use the exact same way you would use a fresh pie crust from the fridge.
Can I freeze the pie crust in the pan?
I don't recommend doing this - things get weird and dried out. You are much better to just freeze the dough as discs, well wrapped, then proceed as usual.
How to scale a pie dough recipe
If I am making multiple batches of pie crust, I often do it all in one go. However there is a limit when scaling the recipe. You don't want to do too much at one time or you run the risk of over working your pie dough. The recipe below makes enough for a basic double crust pie, or two single crust pies. I divide the dough and shape it into a disc and store like that. I like to scale the recipe around how many discs of dough it will yield.
The most I recommend scaling this pie crust recipe by is a double batch, which will yield 4 single pie crusts. If you do any more, I would work in batches. Usually I do one batch of this pie crust recipe at a time if I can. Then I make multiples of it depending on how much I need.
This recipe makes enough pie crust for two single crust pies, or a basic double crust pie with a basic lattice. If you are making a pie where you want a more detailed top crust, I suggest making a 1.5 batch of this recipe to ensure you have enough. Any leftover pie crust can be wrapped in plastic and kept in the fridge or freezer for another time.

I screwed up my pie crust so you don't have to
Let's trouble shoot together.
While this pie crust guide should set you up for success, there are a few things that can go wrong when you are making pie crust. Here are the most common ones. Firstly here is an image showing pie crust that is too wet, too dry, and just right.
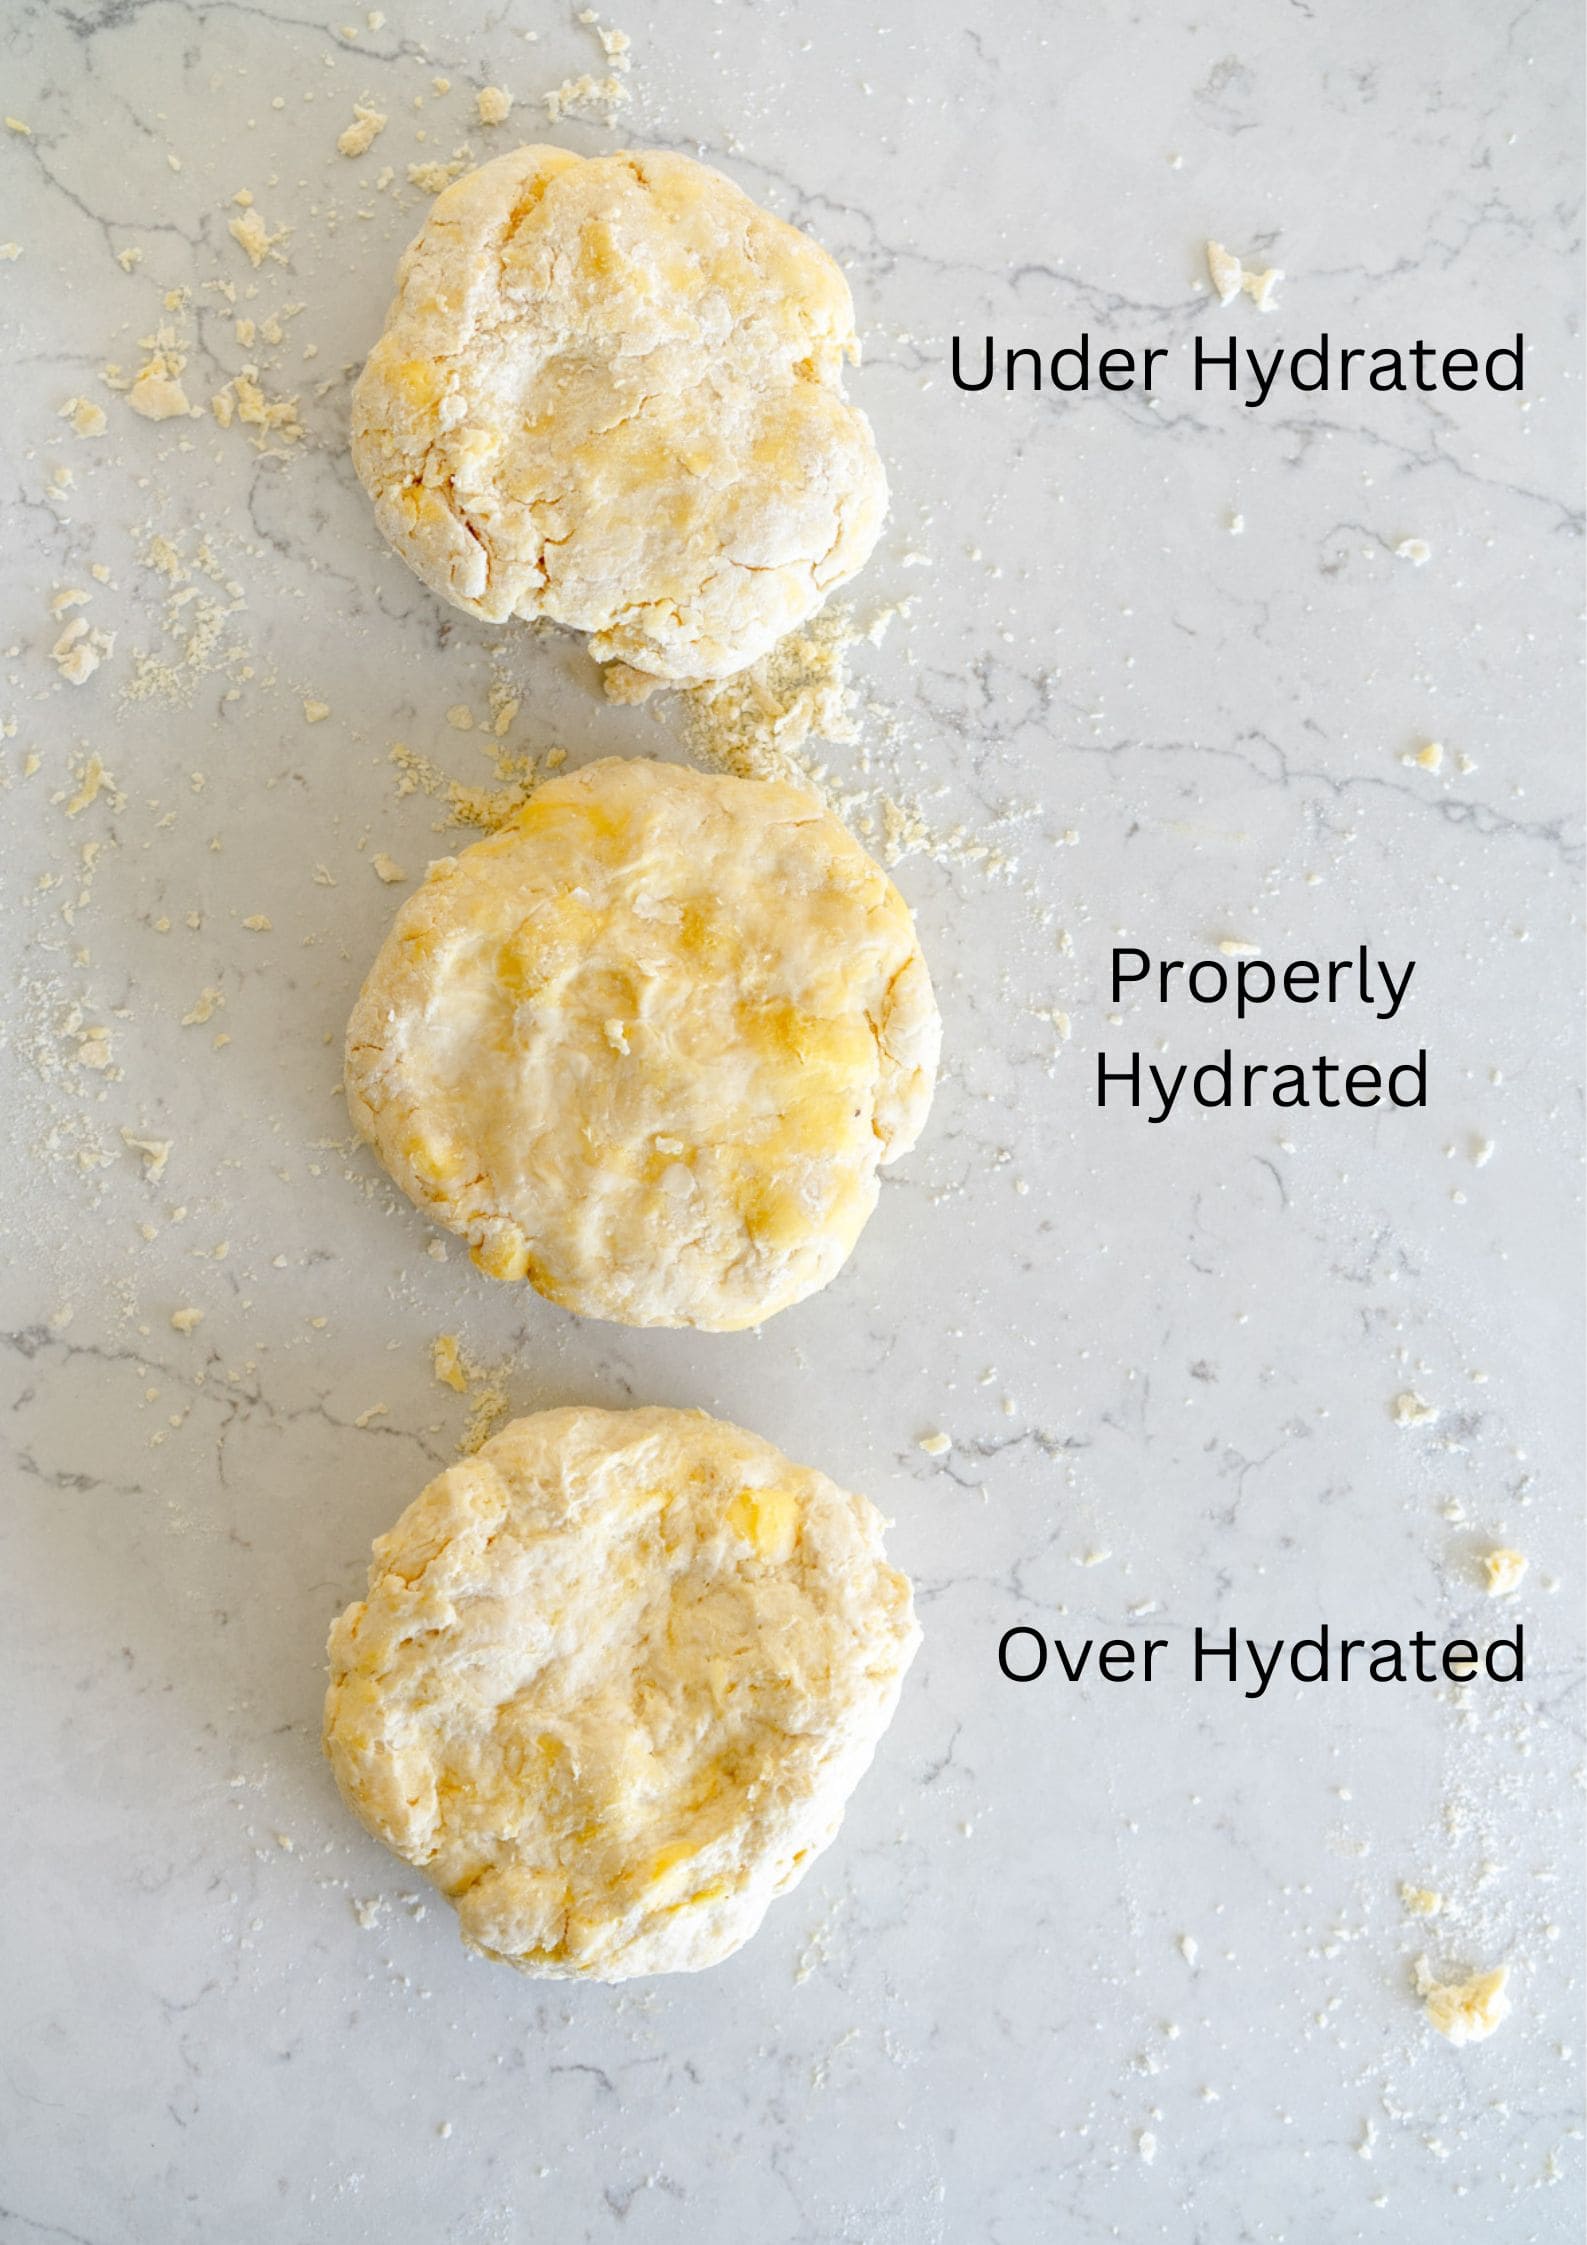
Pie Crust is over hydrated:
The dough will be sticky and hard to roll out. Remember that when the dough is resting in the fridge the flour will hydrate, so you don't want it to be too wet just after mixing. Start with the amount of water suggested in the recipe as a starting point and then add more from there carefully.
How to fix it:
You can fix over hydrated pie crust by dusting lightly with flour when you are doing the lamination steps. I find it easier to fix an over hydrated pie crust than an under hydrated one!
Pie Crust is Under Hydrated:
You know your pie crust is under hydrated when you have big dry chunks and it is hard to bring the dough together. Pie Crust that is under hydrated will be really hard to roll out, and will not have relaxed enough to make an easy to work with pie dough. Add a little more water when you are mixing - if needed, sprinkle some water on the dry parts at the bottom of the bowl and incorporate them in.
How to fix it:
Unfortunately it is not as easy to fix an under hydrated pie crust. You can try flicking a little water on it during the lamination steps, but often it will be hard to work with and really hard to roll out as the dough has not relaxed enough so will 'snap back' on you a lot.
Large Butter Chunks in Pie Crust
If you have large butter chunks in your dough, it is not going to roll out evenly and will seem like that it is lumpy.
How to fix it:
Make sure that when you are incorporating the butter, it gets mixed in enough so that all the pieces of butter have been shingled. Large pieces of butter mean they won't full incorporate into the dough, and may leak out in the oven or make lattice work difficult.
Pie Crust is leaking butter in the oven:
This often happens if the butter chunks were too big in your pie crust. When you do the lamination step, it should leave you with homogenous dough. Sometimes you can see leakage of butter from the crust around the edge of your pie dish. A little leakage is fine, but if you find that you are getting pools of butter, it is likely that you have not incorporated the butter well enough.
How to fix it:
Make sure that you do your laminations / folds in your pie crust. This makes it much more homogenous and gets rid of the large butter lumps, flattening them and making the crust much easier to work with and much less likely to leak.
Pie Dough is cracking when you go to roll it out:
This could be because it is too cool, or your dough is under hydrated. I like to press on the dough with my rolling pin a few times to help even it out before I start to roll. Forming the dough into a disc before it goes into the fridge and tucking the edges under means you get a nice clean edge on it too.

Commonly asked questions
- What tools and equipment do you use?
You can see a full list of all the tools I use here - Is Pie Crust the same thing as pie dough?
Yes! I use the words interchangeably but as far as I am aware, they are the same thing - Can you make pie crust gluten free?
Not with this recipe. But there are a bunch of gluten free specific pie crust recipes out there, so I would try one of those rather than trying to adapt this.


❤️ Made this recipe and love it? ❤️
I would LOVE for you to leave me a review and star rating below to let me know how you liked it! Also, please make sure to tag me on Instagram!
Answers to your baking questions
Over the years, many of you have asked me questions about:
- baking in grams
- adjusting oven temperatures
- what kind of salt to use
- and many more!
I've curated and answered them all for your easy reference in this frequently asked questions post!

All Butter Pie Crust: A Beginner's Guide
- Prep Time: 30 minutes
- Total Time: 2 hours
- Yield: 2 Pie Crusts 1x
- Category: Pie
- Method: Baking
- Cuisine: American
Description
Think you can't bake the most buttery, flaky pie crust home? Think again, because yes you can! Learn how to make the most perfectly flaky and tender all-butter pie crust in your own kitchen using a series of simple, easy folds, a technique called lamination. It's my secret for an ultra-flaky pie crust that's easy to work with, doesn't crumble, or leak. Made without vegetable shortening, my homemade pie crust has been tested, and perfected over many, many months. It's foolproof!
Ingredients
- 375g all-purpose flour
- Pinch of Salt
- 225g cold unsalted butter, cut into cubes
- 240g cold water
- 1 cup ice
- 60g Apple cider vinegar
Instructions
- Place flour and salt into a large bowl. Cut butter into chunks, and add to the flour. Toss lightly to coat.
- Incorporate the butter. Working quickly, using a pastry blender or your thumb and fingers, cut the butter into the flour mixture until there are only large pea-sized chunks left. You want a few lumps of butter remaining to keep the pastry nice and tender.
- Add the water and mix the pie dough. Combine ice, water and cider vinegar in a bowl. Sprinkle a few tablespoons of the ice water into the flour and butter mixture, and using a stiff spatula or your hands, mix in well. Continue adding water a tablespoon at a time ( I usually start with about 120g liquid, mix that in, then go from there and add additional liquid as needed) until you have a dough that holds together well, but is not too wet.
- Shape the pie dough. Squeeze together with your fingertips to make a homogenous dough. Shape into a rectangle, Rest in the fridge for one hour.
- Laminate the pie dough. Roll out the dough on a floured surface into a rectangle, fold it in thirds like a letter, then roll again and repeat the folding. Repeat this process one more time. Divide the dough into two pieces, and shape each into a disc by folding the edges under. Rewrap tightly in plastic, and rest for at least two hours, or preferably overnight, before using. Store pie crust in the fridge for up to 3 days, or in the freezer for up to 3 months.
Notes
Makes enough pie crust for one double crust pie, or two single crust pies. If you double the recipe, you may not need to double the quantity of water and vinegar - see how much you have left first and make up more if needed.
If you are doubling the pie crust recipe, divide into two rectangles before the lamination step and work with each separately to make two crusts each per rectangle of dough.
My recipe used to have 8g (2 tsp) of sugar in it but I have not been using the sugar in the recipe for years. If you would like to keep it in please go ahead - add it in along with the salt.
Comments
Jeana says
This recipe is flawless and has never once failed me. My family didn't believe it was homemade because of all the perfect layers!
Tricia S says
Easy to follow recipe and instructions, resulting in a buttery flakey pastry. This will now be my go to pastry recipe.
Stephanie Lowe says
Easy to make...you won't need anywhere near that much water.
Made a beautiful lattice too.
Talia says
AMAZE RECIPE!! Ran out of my trusty Pams sheets while making homemade sausie rolls and Google brought me to you. So happy it did!! Foolproof and delish.
Elizabeth says
Laminating the dough really works. Didn’t enjoy the apple cider vinegar flavor at all (and I only used half of what was recommended). I prefer more salt.
Erin Clarkson says
Hi! Feel free to adjust as needed 🙂
Tamora Lene Minkowski says
Do you have a receipe for peanut butter cake? Baked.
Erin Clarkson says
I don't sorry!
Tina Leonard says
Wonderful crust. I can’t believe I didn’t think of laminating a pie crust before! This so easy as folding three times is done all at once. No fold, refrigerate, repeat. Those who find laminating in this recipe time consuming, please don’t make puff pastry. Now that’s time consuming (but well worth it!).
The first time I made this, I chose no sugar. I realized I prefer a sweeter crust, so I added sugar the second time Perfect for me.
You made me — and my husband — very happy!
RH Ott says
Hi Erin, thank you for the time and effort you put into pie crust, I read almost the whole article but I had to jump to the recipe and am just pulling the blind baked crust (quiche) out of the oven and it looks impressive. I am writing to point out what I thought was a typo, not a misspelling but an incorrect word usage. In the Step-By-Step Instructions, number 3, first sentence reads "Add the butter to the flour bowl and toss it to combine so that each piece is covered in butter." Should that last word be changed to flour? Thank you again all the best.
Bobbi says
First time successfully making pies crust from scratch and I’m thrilled! Made two batches this afternoon. Followed all the steps and over hydrated a little bit, but as the steps said, it resolved with a bit more flour when I laminated the dough. Blind baked one crust last night for our breakfast quiche this morning and will be freezing the rest for holiday pies. Used American butter this round, but will use a higher fat butter next time. Great steps and process! One note is that I shouldn’t have trimmed off the extra dough before crimping, since the crust pulled back a bit during baking. Next time, I’ll just tuck the extra and crimp it up for a fuller edge. Great recipe!
Hannah says
10/10 recipe as always. Came out so tender and flakey. Highly recommend
Jarrett S says
If you freeze it, what is the thawing and back to room temperature suggestion? Example: take from freezer 2 nights before and place in fridge to thaw? Thank you
Erin Clarkson says
Hi this is covered in the blog post there is a section called 'how to freeze pie crust'!
Carson Trevino says
This is it!! I've tried so many recipes trying desperately to make pie crust. It's lowkey always been terrifying and an enigma. I made Erin's rye crust and it didn't turn out 100 (still tasty, just overworked and not flaky) so I tried this one and took my lesson from the other one. It worked!!! An amazingly soft, flaky, tasty pie crust. I will print this out and it will be THE ONE that I use and pass on. I am so excited to add this to my arsenal of crusts. The instructions were perfect, the amounts spot on, and I just want to say --- please, if you can, release a cookbook so I can give you my money directly.
I'm just stoked to try the rest of these recipes. I pulled the brown butter oatmeal pie from the oven and I'm patiently impatiently waiting for it to cool.
Erin Clarkson says
So happy you love! I LOVE that pie - enjoy!
Brad says
This recipe is the best I’ve tried. Saving it for future use.
Maggie says
This is absolutely the best pie crust recipe I have ever used. Rolls out so smoothly, doesn’t tear. I was able to properly crimp a pie for the first time ever!! SO flaky and buttery.
Follow the recipe and instructions exactly, everything serves a purpose. (I did a little hop for joy alone in my kitchen when I was laminating and saw the chunks of butter.
My new go-to pie crust!!
Erin Clarkson says
Yayyyy so so happy you loved!!
Jean-Louise says
Genuinely the most perfect pie dough recipe in existence. The thorough guide makes it impossible to mess up and you will end up with the flakiest, most amazing pie crust. I used it for a cherry pie for Thanksgiving and it got SO many compliments!
Tina says
This recipe is simply the best, just perfect, your recipes never fail.my go to for all my cooking thankyou so much perfection once more
Tina says
This is an amazing recipe, best flaky pastry I have made. Thankyou so much for sharing this amazing recipe,your recipes never fail and always are the family friends favourite. ❤️
Tina says
Best recipe super flaky, so delicious your recipes never fail.thank you for sharing your amazing recipes.
Saige M says
Hello! Excited to try this recipe! For the vinegar, would other vinegars also work or better to just leave off if I don't have ACV on hand?
Erin Clarkson says
Hi, I would just leave it out!
Heath says
This is by far the best pie crust recipe and where I learned to lattice. It’s become a skill I use outside of just pie!
Jasmin says
Hey Erin. This is my 10/10 pie crust go-to recipe, thank you for it! Wondering though, if you have any suggestions for how to keep jam inside my pop tarts / turnovers when using this dough. I think the flakiness / rise of the pastry when the layers are baking in the oven causes some separation from my crimped edges / seal of the pastry and every last drop of my jam oozes out. I've tried making my jam super thick, using egg wash where the top and bottom dough connects, and freezing the prepared pastry before baking. Appreciate any tips!
Noreen Lorenzen says
I come back to your pie dough recipe again and again. Thank you for sharing and teaching us all! Much appreciated and I’m off to start on a strawberry rhubarb pie!
Sara says
My go to pie crust for several years now, turns out great every time and workable enough to make fun lattices too. The lamination really makes such a flaky layered crust!