Cloudy Kitchen

  • recipes
    • Breads
    • Brownies
    • Cakes
    • Choux
    • Cookies
    • Doughnuts
    • Ice Cream
    • Macarons
    • Pies
    • Quickbreads
    • Small Batch Baking
    • More →
  • about
  • contact
  • products
menu icon
go to homepage
  • recipes
  • about
  • contact
  • products
  • calculators
  • subscribe
    • Facebook
    • Instagram
    • Pinterest
    • TikTok
  • search icon
    Homepage link
    • recipes
    • about
    • contact
    • products
    • calculators
    • subscribe
    • Facebook
    • Instagram
    • Pinterest
    • TikTok
  • ×
    Home

    Homemade Strawberry Pop Tarts

    Homemade Strawberry Pop Tarts are a super fun and easy baking project. Flaky buttery pastry is filled with a homemade strawberry filling, and finished with an easy royal icing and sprinkles.

    Roasted Strawberry and Balsamic Pop tarts. A slow roasted strawberry balsamic jam is used to fill a tender buttery pie dough to make perfect pop tarts, which are finished with a pink royal icing and sprinkles.
    Roasted Strawberry and Balsamic Pop tarts. A slow roasted strawberry balsamic jam is used to fill a tender buttery pie dough to make perfect pop tarts, which are finished with a pink royal icing and sprinkles.

    Roasted Strawberry and Balsamic Pop Tarts

    Hi hi! Happy Sunday! I am just sneaking in to share this recipe with you for Roasted Strawberry and Balsamic Pop Tarts! I didn’t grow up with Pop Tarts (they only started showing up in US specialty stores when I was at uni in NZ), but we always used to love trying all the different types when we travelled to the States with our family when we were younger. I’ve made them a few times, and am always reminded how easy and delicious they are!

    Roasted Strawberry and Balsamic Pop tarts. A slow roasted strawberry balsamic jam is used to fill a tender buttery pie dough to make perfect pop tarts, which are finished with a pink royal icing and sprinkles.

    Roasted Strawberry Jam

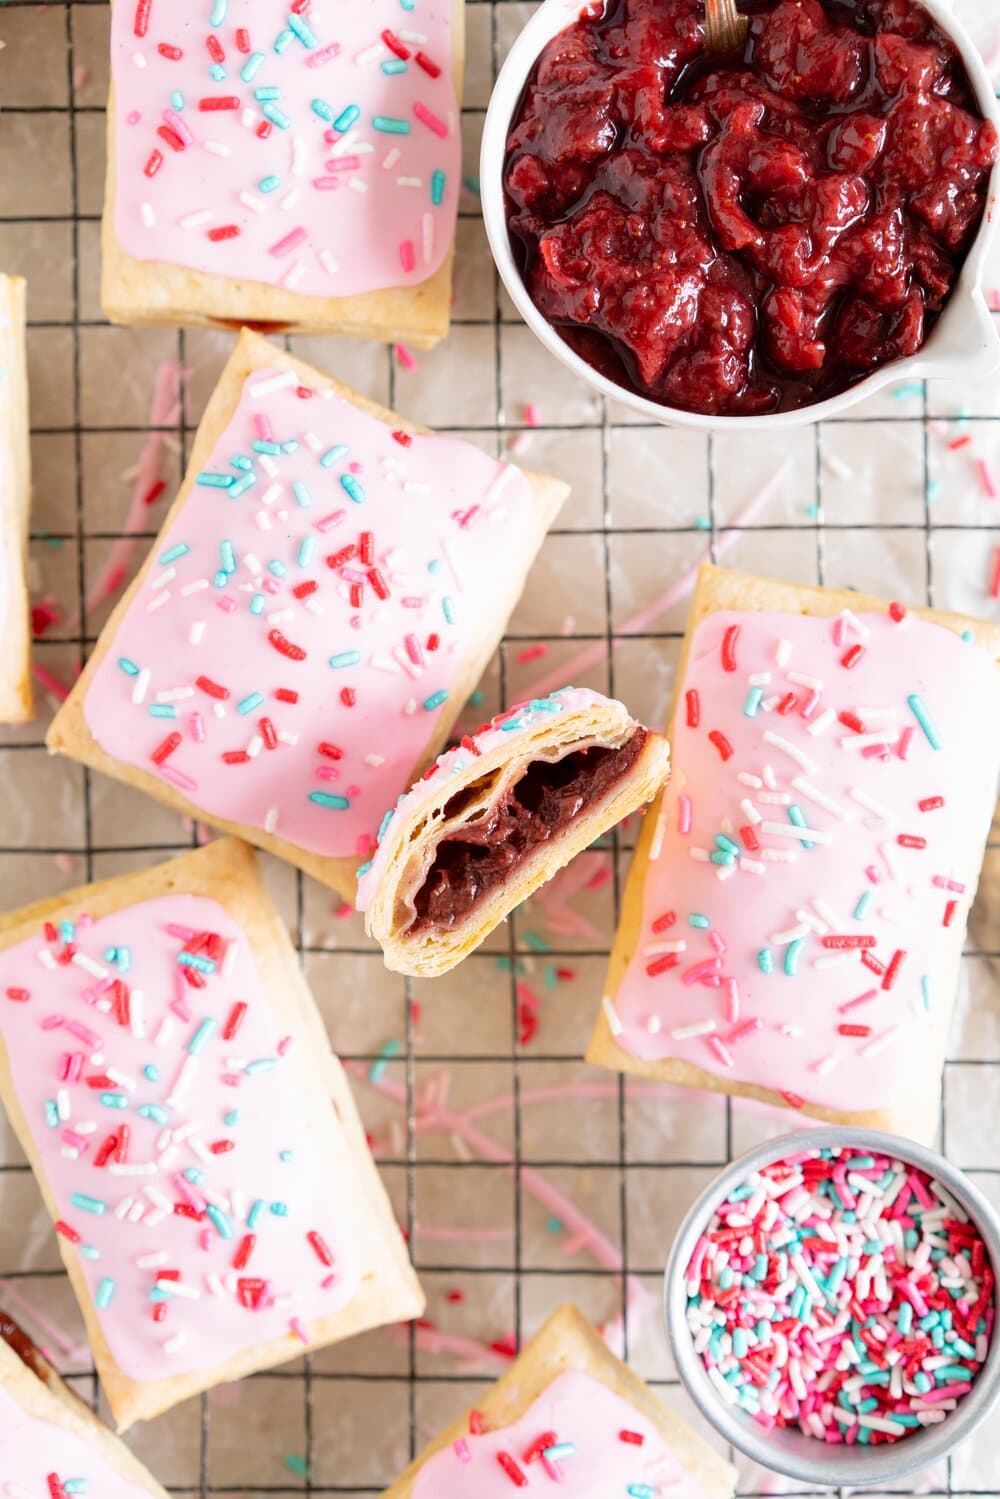
    I have been roasting loads of fruit lately - it is a great way to use up any tired fruit that you may have hiding in the fridge, and works particularly well with strawberries, which benefit from a longer roast at lower heat. The process is super simple - I macerated them at room temperature with some sugar and balsamic vinegar. The vinegar works so well with the strawberries, as it cuts through the sweetness while also amplifying the flavour of the fruit. You roast the fruit until the strawberries have let go of their moisture and the syrup surrounding them is thick, and you are left with a super delicious strawberry balsamic jam situation, which is the perfect filling for these pop tarts!

    Roasted Strawberry and Balsamic Pop tarts. A slow roasted strawberry balsamic jam is used to fill a tender buttery pie dough to make perfect pop tarts, which are finished with a pink royal icing and sprinkles.

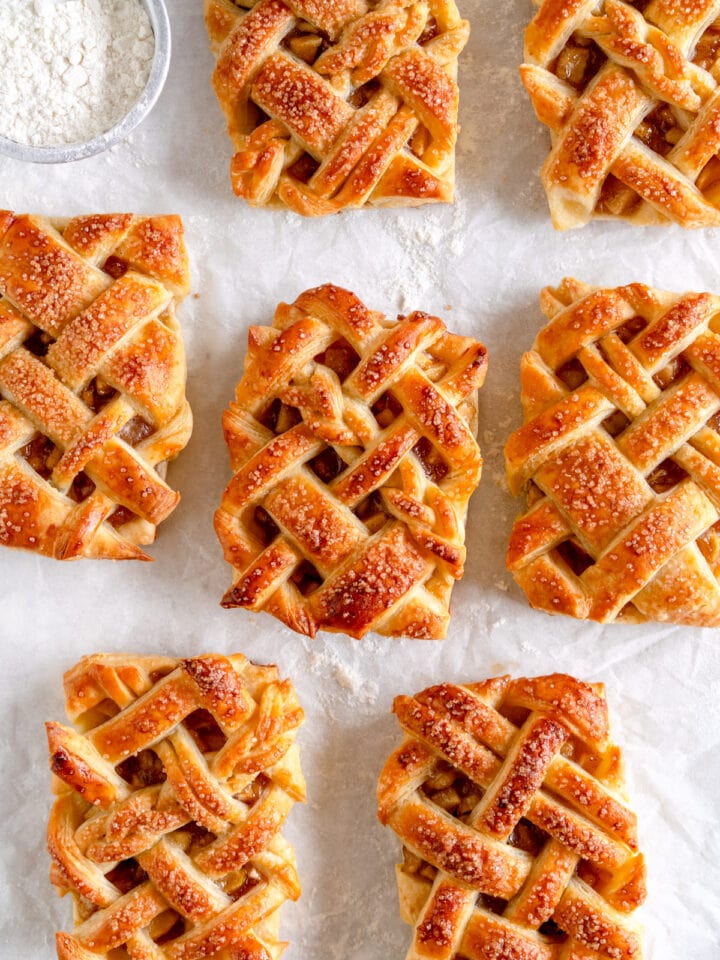
    The best Pie dough for Pop Tarts

    For the dough I made a bit more of a homogenous crust than I would for a pie dough - instead of leaving big chunks of butter in the dough I incorporated them a little more to give a more tender (rather than super flaky) crust, with just a little flake, and it was perfect for these.

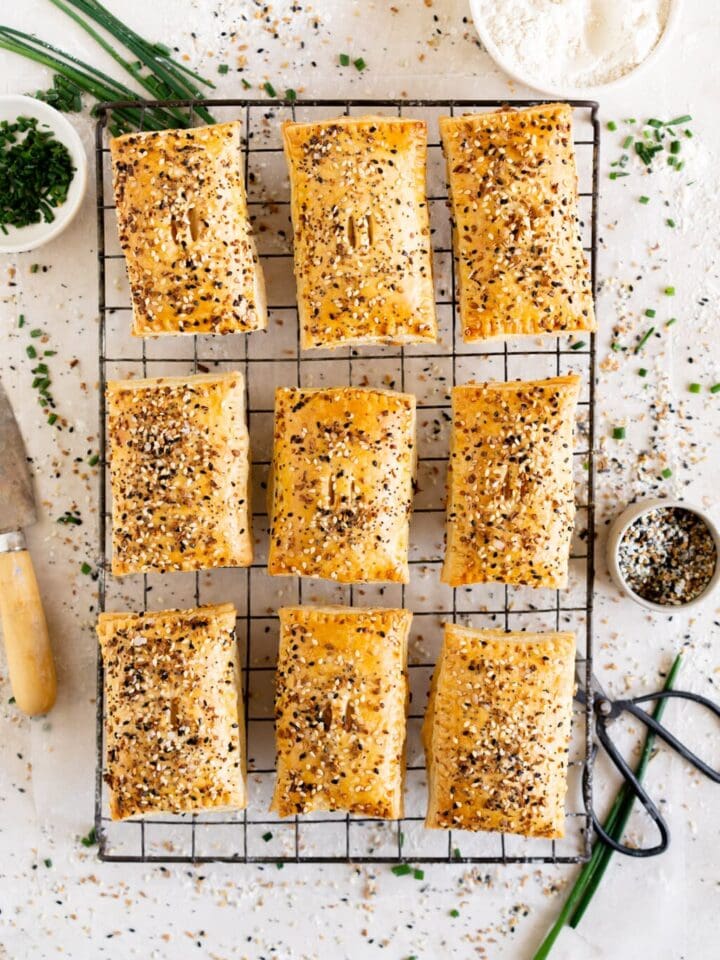
    I filled the pop tarts with the strawberry balsamic filling, then baked them off, choosing to use a lower temperature than I would for hand pies or something I was trying to get super brown and flaky. Once they were cool I finished them with a royal icing (I used Claire Saffitz’s technique of using the yolk to seal the pop tarts and the white for the royal icing), which sets up solid, and added some sprinkles. I have zero guarantees that these are toaster friendly, but I can guarantee you that they are very, very delicious.

    Roasted Strawberry and Balsamic Pop tarts. A slow roasted strawberry balsamic jam is used to fill a tender buttery pie dough to make perfect pop tarts, which are finished with a pink royal icing and sprinkles.

    A few wee tips for Strawberry Pop Tarts

    • If you don’t want to make your own pie dough, you can use store bought puff and it will work just fine.

    • This recipe makes 10 pop tarts. If you don’t want to bake them all at once, you can keep some frozen in an airtight container and bake them off from frozen.

    • The jam does take a while to make, so ensure that you leave enough time for that. It will keep for 2-3 weeks in the fridge so can easily be made ahead.

    • Don’t be tempted to skip the macerating step! It helps to bring out the liquid in the strawberries so that they roast down nicely and the syrup thickens enough.

    For more Strawberry Recipes:

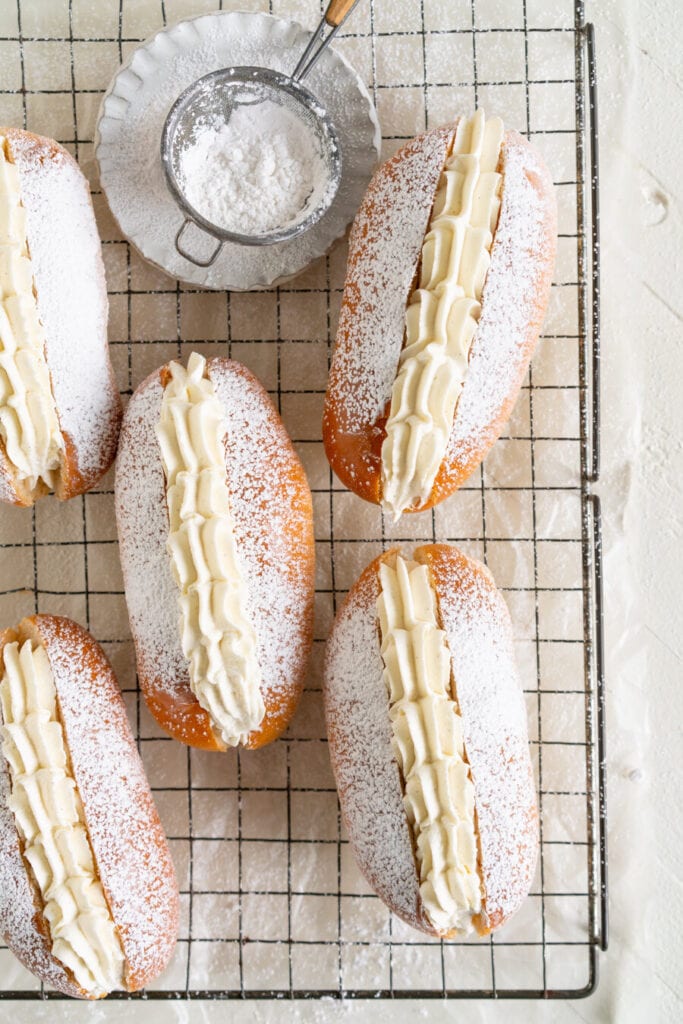
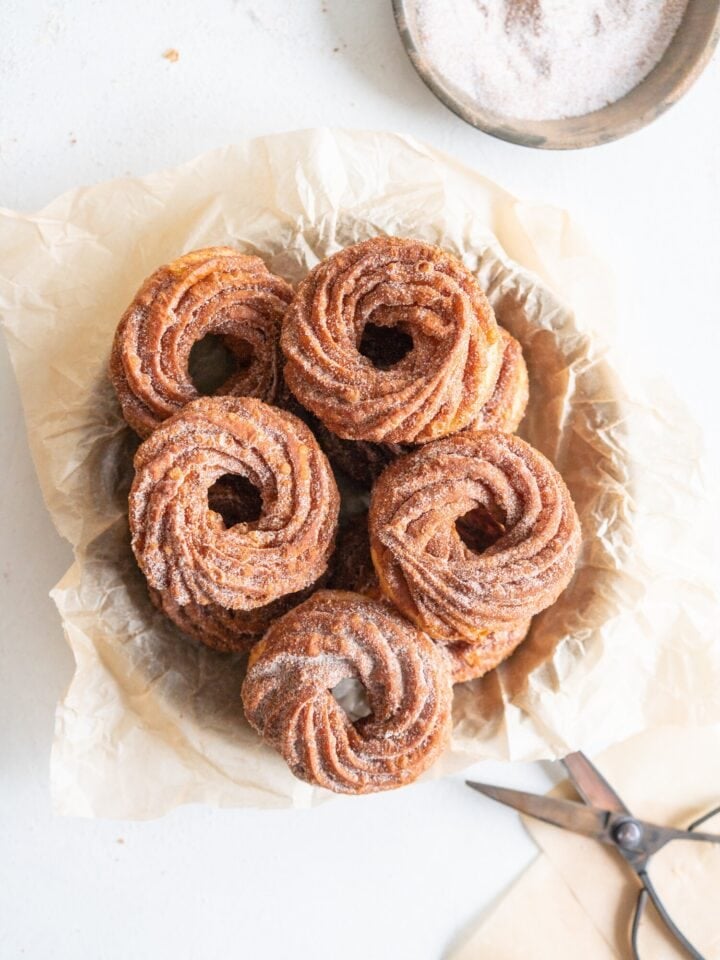
    • Roasted Strawberry Brioche Doughnuts with Vanilla Bean Pastry Cream and Strawberry Sugar
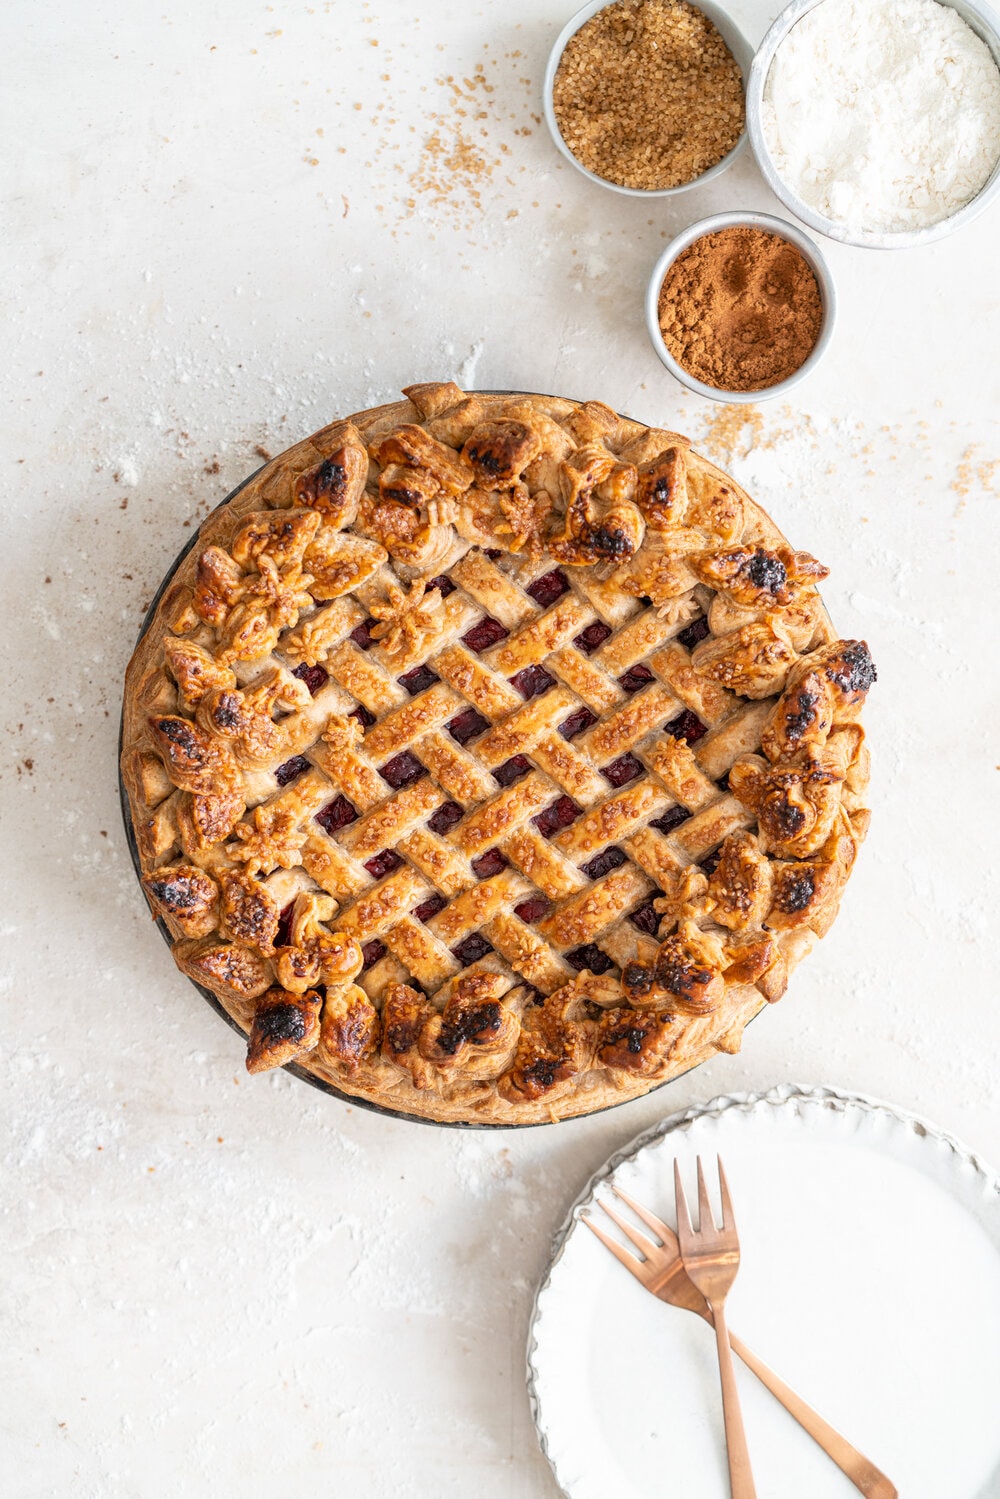
    • Strawberry Balsamic Pie
    • Strawberry Basil Hand Pies
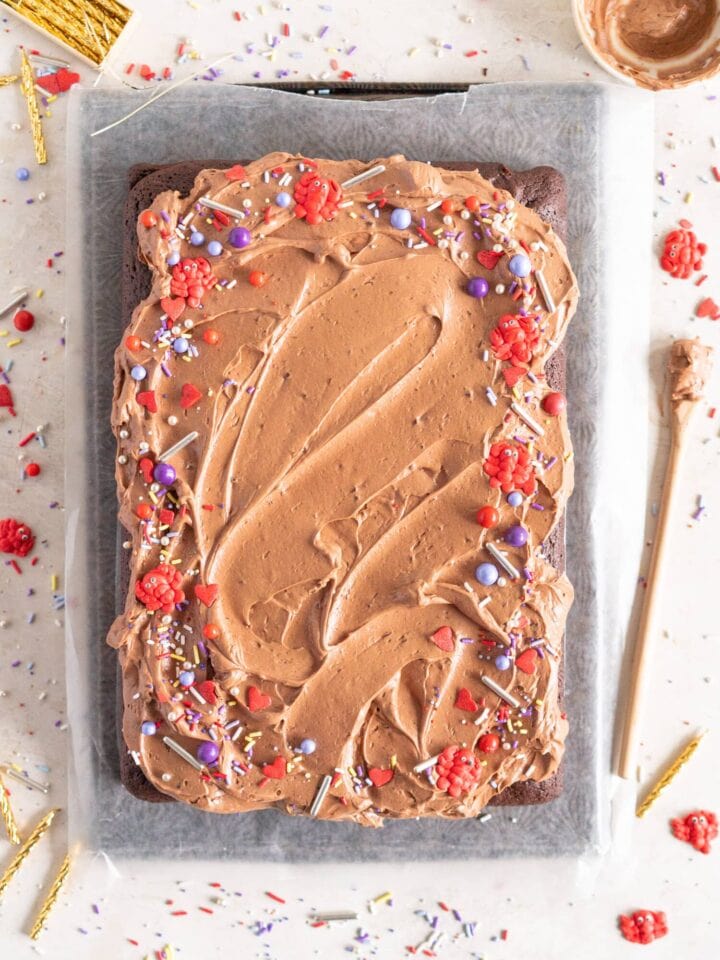
    • Chocolate Cake with Strawberry Swiss Meringue Buttercream
    Roasted Strawberry and Balsamic Pop tarts. A slow roasted strawberry balsamic jam is used to fill a tender buttery pie dough to make perfect pop tarts, which are finished with a pink royal icing and sprinkles.

    ❤️ Made this recipe and love it? ❤️

    I would LOVE for you to leave me a review and star rating below to let me know how you liked it! Also, please make sure to tag me on Instagram!

    Answers to your baking questions

    Over the years, many of you have asked me questions about:

    • baking in grams
    • adjusting oven temperatures
    • what kind of salt to use
    • and many more!

    I've curated and answered them all for your easy reference in this frequently asked questions post!

    Filed Under: Hand Pies

    10 Minute Stovetop Kettle Corn Recipe

    Easy Homemade Kettle Corn is sweet and salty, and can be made in ten minutes with just four ingredients. Add sprinkles for a fun twist on the original kettle corn recipe, or keep it simple for a quick and delicious crunchy popcorn snack.

    Funfetti Kettle Corn (Sprinkle Kettle Corn) - this sweet, salty snack is the perfect fun treat. Kettle corn is made on the stovetop, and crunchy confetti sprinkles are added for a funfetti twist. This Kettle corn recipe is easy, and is great for making with kids.

    Hi hi! Just popping in to share this kettle corn recipe with you. If you haven't made homemade kettle corn before I highly recommend you try it. It is sweet, salty, and just so, so good.

    This crunchy popcorn comes together in a couple of minutes and is great to make for a movie night or with kids. I have made a lot of homemade caramel popcorn before and I sometimes like also making a batch of this stovetop kettle corn to mix into the caramel corn for that real sweet and salty popcorn mix!

    • Ingredients in Kettle Corn
    • How to make Kettle Corn
    • How do you store Popcorn?
    • Tips and Tricks for The Best Kettle Corn

    what is Kettle Corn?

    Kettle corn is basically popcorn, but it is cooked with a little sugar and salt in the pot. The sugar melts as the popcorn pops and gives it this super delicious crackly caramelized sugar coating.

    Kettle corn can take a little bit of getting used to to make - things go quickly and the sugar can burn, so don't be too discouraged if you have to have a few tries at it. Once you get to know your stove you will be ok and be making the best kettle corn!

    Ingredients in Kettle Corn

    The ingredient list in this Kettle corn recipe is super simple:

    • Popcorn Kernels. Use whatever size / shape / colour you like here. I like mushroom style popcorn if I can find it (I couldn't for this post), or I often like getting my popcorn from the farmer's market!
    • Neutral Oil - I use canola or vegetable oil, but anything with a higher smoke point and a neutral taste will work well!
    • Sugar. Regular white granulated sugar is best here to help keep the kettle corn white
    • Salt. I use kosher salt, use whatever you have (just make sure to check the kind you are using, some salt is saltier than others)
    • Sprinkles. If you would like to add sprinkles to make funfetti corn, you can do that too!
    Funfetti Kettle Corn (Sprinkle Kettle Corn) - this sweet, salty snack is the perfect fun treat. Kettle corn is made on the stovetop, and crunchy confetti sprinkles are added for a funfetti twist. This Kettle corn recipe is easy, and is great for making with kids.

    How to make Kettle Corn

    If you are worried about the sugar burning while you make your kettle corn recipe, you can pull the pan from the heat a little earlier than you would regular popcorn. I like to pull it when there are about 2 seconds between pops.

    Moving it on and off the heat as you make it can help too - make sure you are using a large heavy bottomed pot so that it helps to retain heat without scorching. A glass lid is super helpful here too as you can see what is going on. Here's how I do it:

    • Prepare your sheet pan. Have the prepared baking sheet lined and ready to go by the oven so you can pour the finished kettle corn directly onto it to stop the cooking process.
    • Measure your ingredients out. Pre mixing the sugar, salt and popcorn kernels means that it is all ready to go in at once.
    • Heat the oil for the popcorn. Place your large pot over medium heat and add a few tester kernels into the pan.
    • Add your popcorn. Once the oil is hot enough, add the popcorn, sugar and salt and give it a quick stir, then pop the lid onto the pot.
    • Pop the popcorn. The key here is to keep everything moving. You want to be constantly shaking the pot to keep the kettle corn from burning.
    • Add sprinkles if using. Remove the popped kettle corn from the stove and add in any additions such as sprinkles if you are using them, then transfer to the prepared sheet pan. Doing this quickly helps prevent burning too.

    What is the best kind of popcorn to use?

    You can use whatever kind of popcorn you like to make kettle corn. Whatever you have in the pantry will work great. If you are looking for the big fluffy popcorn pieces, that is called mushroom popcorn and it is super fun to eat!

    How do you tell when popcorn oil is hot?

    The best way to tell when the oil for popcorn is hot is to sacrifice a few un popped kernels. Put them in when you start heating the oil. When they pop, you are ready to add the rest of your popcorn.

    In terms of the best oil to use for making popcorn, I just go for anything neutral, wich means something neutral tasting. Canola oil, vegetable oil or an extra light olive oil would work great.

    How do you store Popcorn?

    An airtight container is the best way to store popcorn to keep it fresh. It is best enjoyed the day or day after you make it but sealed properly it will keep well.

    Funfetti Kettle Corn (Sprinkle Kettle Corn) - this sweet, salty snack is the perfect fun treat. Kettle corn is made on the stovetop, and crunchy confetti sprinkles are added for a funfetti twist. This Kettle corn recipe is easy, and is great for making with kids.

    Adding sprinkles = funfetti kettle corn

    If you would like to add a super fun twist on your homemade kettle corn, you can add sprinkles to make funfetti kettle corn! There are notes in the recipe - I used confetti style sprinkles, which I also use in my funfetti sugar cookie recipe.

    Tips and Tricks for The Best Kettle Corn

    • This is probably the only time you will see me making a recipe WITHOUT adding the gram conversions - there is no need to as this is done on ratios, and so you can just use a Tablespoon to measure everything out!

    • Measure the popcorn, sugar, salt, and sprinkles first before measuring the oil so that you can use the same spoon.

    • You need to watch the kettle corn really carefully and make sure that it doesn’t catch. I moved mine around the whole time I was popping the corn, pulling it off the heat as needed to make sure it doesn’t burn. The whole process probably took 2 or 3 minutes for me on medium heat.

    • Have everything ready to go before you make this, you want to dump the sprinkles in as soon as you can so that they stick to the hot sugar.

    • You are better to lean more toward a few unpopped kernels of popcorn than taking it too far and burning it.

    • I only tried the confetti style sprinkles, I think Jimmies might melt too much.

    • If you want to make regular Kettle Corn just leave out the sprinkles!
    Funfetti Kettle Corn (Sprinkle Kettle Corn) - this sweet, salty snack is the perfect fun treat. Kettle corn is made on the stovetop, and crunchy confetti sprinkles are added for a funfetti twist. This Kettle corn recipe is easy, and is great for making with kids.

    For more funfetti recipes, check out:

    • Chocolate Sprinkle Sugar Cookies
    • Funfetti Sugar Cookies
    • Funfetti Layer Cake 

    ❤️ Made this recipe and love it? ❤️

    I would LOVE for you to leave me a review and star rating below to let me know how you liked it! Also, please make sure to tag me on Instagram!

    Answers to your baking questions

    Over the years, many of you have asked me questions about:

    • baking in grams
    • adjusting oven temperatures
    • what kind of salt to use
    • and many more!

    I've curated and answered them all for your easy reference in this frequently asked questions post!

    Filed Under: Other Sweets

    Nutella and Banana Rolls

    Nutella and Banana Rolls with Chocolate Cream Cheese Frosting. Soft, fluffy brioche is covered in nutella and bananas, and sprinkled with hazelnuts, then rolled up into perfect sweet rolls and finished with a creamy and smooth chocolate cream cheese frosting. These Nutella and Banana Rolls are a great way to use up any extra bananas that you have around!

    Nutella Banana and Hazelnut Sweet Rolls with Chocolate Cream Cheese Frosting. Soft, fluffy brioche is covered in nutella and bananas and sprinkled with hazelnuts, then rolled up into perfect sweet rolls and finished with a creamy and smooth chocolate cream cheese frosting. These are a great way to use up any extra bananas that you have around!
    Nutella Banana and Hazelnut Sweet Rolls with Chocolate Cream Cheese Frosting. Soft, fluffy brioche is covered in nutella and bananas and sprinkled with hazelnuts, then rolled up into perfect sweet rolls and finished with a creamy and smooth chocolate cream cheese frosting. These are a great way to use up any extra bananas that you have around!
    Nutella Banana and Hazelnut Sweet Rolls with Chocolate Cream Cheese Frosting. Soft, fluffy brioche is covered in nutella and bananas and sprinkled with hazelnuts, then rolled up into perfect sweet rolls and finished with a creamy and smooth chocolate cream cheese frosting. These are a great way to use up any extra bananas that you have around!
    Nutella Banana and Hazelnut Sweet Rolls with Chocolate Cream Cheese Frosting. Soft, fluffy brioche is covered in nutella and bananas and sprinkled with hazelnuts, then rolled up into perfect sweet rolls and finished with a creamy and smooth chocolate cream cheese frosting. These are a great way to use up any extra bananas that you have around!
    Nutella Banana and Hazelnut Sweet Rolls with Chocolate Cream Cheese Frosting. Soft, fluffy brioche is covered in nutella and bananas and sprinkled with hazelnuts, then rolled up into perfect sweet rolls and finished with a creamy and smooth chocolate cream cheese frosting. These are a great way to use up any extra bananas that you have around!
    Nutella Banana and Hazelnut Sweet Rolls with Chocolate Cream Cheese Frosting. Soft, fluffy brioche is covered in nutella and bananas and sprinkled with hazelnuts, then rolled up into perfect sweet rolls and finished with a creamy and smooth chocolate cream cheese frosting. These are a great way to use up any extra bananas that you have around!
    Nutella Banana and Hazelnut Sweet Rolls with Chocolate Cream Cheese Frosting. Soft, fluffy brioche is covered in nutella and bananas and sprinkled with hazelnuts, then rolled up into perfect sweet rolls and finished with a creamy and smooth chocolate cream cheese frosting. These are a great way to use up any extra bananas that you have around!

    Nutella and Banana Sweet Rolls

    Hi! Happy Saturday! I hope things are going ok where you are - it’s gross and rainy here and I really wish that I had some of these sweet rolls I made last week - they are a Nutella and Banana roll with chopped hazelnuts, and topped with a chocolate cream cheese frosting! I wanted a recipe that was a good way to use up some slightly sad bananas but that wasn’t a banana bread, and this is the perfect way!

    These Nutella and Banana Rolls are super simple - I took my favourite brioche dough and rolled it out, then filled it with a chocolate hazelnut spread (I actually used one which I brought back from NZ with me, but Nutella or any other chocolate hazelnut spread would work great too, or if you want to make your own chocolate hazelnut spread you can use this recipe!). Then I covered the surface with chopped hazelnuts and chopped banana, and rolled up. This recipe uses up two bananas - you can use ripe ones, or brown ones will work great too. Mine were pretty spotty which made them perfect, as they were nice and sweet. I wouldn’t go for anything too mushy or you may have a soggy situation on your hands.

    Chocolate Cream Cheese Frosting

    I finished these Nutella and Banana rolls with a chocolate cream cheese frosting, but you can do whatever you like here - a classic vanilla bean would be great, or so would a brown butter, or you can glaze them with a vanilla glaze. You choose what you like! If you wanted to get really fancy you could roll out the dough and cover half with the chocolate hazelnut and banana and the other half with a cinnamon sugar mixture for a cinnamon roll, and then do them half and half for a choose your own adventure tear and share. The options here really are endless.

    A few wee tips for Nutella and Banana Sweet Rolls

    • I like to either give my brioche dough a cold rise or an overnight rise in the fridge - make your dough and pop it into the fridge for the first rise. You can either do same day (it needs 2 ½ hours minimum), or you can do an overnight and make it the next day. Cold dough is much easier to work with to give you a clean roll.

    • I include a step about chilling the log in the freezer once you have rolled it up. I find that this step really helps with getting a clean cut too. I like to cut the log in half so it will fit nicely, then cover with plastic and freeze for about 20 minutes.

    • The chocolate hazelnut spread in this recipe is AMAZING if you want to give making your own a try!

    For more Sweet Roll Recipes:

    • Brown Butter Cinnamon Rolls with Brown Butter Cream Cheese Frosting
    • Chocolate Peppermint Sweet Rolls
    • Swedish Cinnamon Rolls
    • Laminated Brioche Cinnamon Rolls with Spiced Apple

    ❤️ Made this recipe and love it? ❤️

    I would LOVE for you to leave me a review and star rating below to let me know how you liked it! Also, please make sure to tag me on Instagram!

    Answers to your baking questions

    Over the years, many of you have asked me questions about:

    • baking in grams
    • adjusting oven temperatures
    • what kind of salt to use
    • and many more!

    I've curated and answered them all for your easy reference in this frequently asked questions post!

    Filed Under: Brioche, Buns and Rolls

    Peach Pie

    peach slab pie

    This homemade peach pie recipe has a simple peach pie filling, surrounded by an easy, flaky pie crust. Peach slab pie is the perfect summer dessert - this pie can be made with fresh or frozen peaches.

    Peach Slab Pie with Candied Pecan no-churn Ice Cream. Flaky pastry surrounds a flavourful fresh peach filling. This slab pie is easy to make and is great for making ahead or serving a crowd. It is served with a candied pecan no-churn ice cream, which is filled with buttery pecan pieces in a creamy no-churn base. This is the perfect summer combination!

    Table of contents

    • Homemade Peach Pie
    • Peach Pie Filling
    • How to make peach pie using frozen peaches
    • How to Peel Peaches
    • Easy Homemade Pie Crust
    • How to assemble a pie
    • How to Peel Peaches
    • FAQ for Peach Pie
    • For more pie recipes, check out:
    • Recipe for Peach Slab Pie
    top down peach pie with ice cream
    latticed peach pie

    Homemade Peach Pie

    Hi! I hope you are keeping well. Just popping in to share this super easy peach pie recipe. One of my favourite things to do with peaches aside from eating them fresh is to turn them into a pie. I have a bunch of fruit pie recipes on my site, and this easy peach pie has to be one of my favourites.

    Homemade pies are one of my favourite things to bake, which is funny seeing as fruit pies aren’t super popular in New Zealand. I love how relaxing they are to make, that the homemade pie crust can be made ahead, and that you don’t need any fancy ingredients. All you need is some baking staples and your fruit for your filling! Pies can be made ahead and frozen, or baked ahead of time and re-heated. They can also be served at room temperature, making them the perfect versatile summer dessert.

    Peach Pie Filling

    This peach pie recipe has a super simple fresh peach pie filling, which comes together quickly. I like to use fresh peaches for my pie filling, but this can also be made with frozen peaches if you like. The filling is super simple. I like to prepare my peaches, then quickly combine the ingredients for the filling after I have rolled out the top crust and bottom crust for the pie.

    When you are making homemade pie filling, it is important to combine the cornstarch with the sugar before tossing with the fruit. This ensures that there aren't any lumps in the starch, which could give you lumps in your pie filling!

    How to make peach pie using frozen peaches

    This recipe for peach pie works great with fresh or frozen peaches. To use frozen peaches, you will want to defrost them before using - I find the quickest way to do this is to spread them out on a sheet pan and defrost at room temperature, or you can defrost in a container overnight in the fridge.

    Choose frozen peach segments for pie, and make sure that you drain peaches from any excess liquid before using.

    baked slices of peach pie

    How to Peel Peaches

    I peeled my peaches for this peach pie because I prefer them that way. To do this, you use a large pot of boiling water. Set up a large bowl with ice water. Score an x in the bottom of each peach, and boil them, 3 or 4 at a time, for 30 to 45 seconds. Remove using a slotted spoon and transfer to the ice bath. The skins should slip off. Non-peeled peaches are fine too - this process is a little more labour intensive, but I think it’s worth it (and it’s pretty satisfying!)

    Easy Homemade Pie Crust

    I use my go to homemade pie crust recipe for this peach pie - you can read all my tips and tricks on how to make the best pie crust in my pie crust post.

    A slab pie has a high filling to pie crust ratio (the best), which means that it does require a higher quantity of dough than a regular double crust pie. I find that it is best to make two batches of the dough rather than one big one.

    It can be hard to know when the dough is properly hydrated with a bigger batch, so you will need to make two batches of the dough that is listed in the recipe. However, you will only need one quantity of the water mixture (water, apple cider vinegar and ice). It will be enough to hydrate both of the doughs.

    Peach pie with ice cream scooped on top

    How to assemble a pie

    This is the order I do things in when I am making a pie like this. It may seem trivial, but I think that it is helpful to explain why I do things in the order that I do! Otherwise you may end up with pie dough that is too warm to work with, and a soggy pie filling.

    1. Make the pie crust. I like to do this the night before if I can, but it will need at least two hours in the fridge before using if you are doing it on the same day. You can also make your pie crust ahead and freeze it - there are notes in my how to make pie crust post.
    2. Roll out the crusts. I roll out the bottom crust first - if there is a lot of overhang you can trim this back slightly and use the offcuts for more lattice strips or pie stamps. Fit the bottom crust to your pan and place in the fridge to give it a kick start at firming up.
    3. Roll out the top crust. I like to start my pies with the lattice strips already cut - seeing how many I have to start off with helps me decide spacing of the lattice on the pie, and also I know if I will need extra offcuts rolled out to make more lattice strips. I roll it all out, and cut the lattice strips and place them onto a parchment paper lined sheet pan and pop them into the fridge until I am ready.
    4. Make the filling. I usually make the peach pie filling just before it goes into the pie crust lined pan, so that it doesn't get too soggy in the bowl.
    5. Assemble the slab pie. Now is the fun part - the lattice. Having your strips already cut means that they have had some time to chill down a little which should make latticing your pie a little easier. If you are worried your pie crust is getting too warm at any point, just pop the whole thing into the fridge. I did a lattice using different sized strips and then used some pie stamps to make shapes from the leftover crust, but you can make it as intricate or as simple as you like - it will all taste delicious.
    6. Chill. Give your pie at least 30 minutes to chill in the fridge to let the pie crust chill back down. Cold pie crust plus hot oven = nice flaky pie crust when the butter in the crust creates steam, giving you layers. Chilling both your bottom crust and your lattice strips as you are assembling them also gives you a nice head start on this. If you have the time for it, I like to chill my pie for about an hour before baking.
    Peach Slab Pie with Candied Pecan no-churn Ice Cream. Flaky pastry surrounds a flavourful fresh peach filling. This slab pie is easy to make and is great for making ahead or serving a crowd. It is served with a candied pecan no-churn ice cream, which is filled with buttery pecan pieces in a creamy no-churn base. This is the perfect summer combination!

    How to Peel Peaches

    I peeled my peaches for this because I prefer them that way for pie. To do this, you use a large pot of boiling water. Set up a large bowl with ice water. Score an x in the bottom of each peach, and boil them, 3 or 4 at a time, for 30 to 45 seconds. Remove using a slotted spoon and transfer to the ice bath. The skins should slip off. Non-peeled peaches are fine too - this process is a little more labour intensive, but I think it’s worth it (and it’s pretty satisfying!)

    FAQ for Peach Pie

    How to freeze a pie
    Fruit pies freeze super well! You can either freeze them baked or unbaked - I like to place it uncovered in the freezer and freeze until solid, then wrap tightly and return to the freezer. If you have frozen it unbaked, you can bake it directly from frozen, you will just need to add some more time on to ensure the pastry is cooked through. To reheat a baked frozen pie, leave to thaw at room temperature for about an hour and a half, and then bake at 375°f / 190°c until warmed through. This is great for leftovers or if you want to make the pie while peaches are in season and store for another time.

    What pan size did you use?
    I used a quarter sheet pan for this pie, which is 9"x13". You want something relatively shallow.

    How did you make cut outs on the top of the pie?
    I used the leftover scraps from the pie dough to cut out the shapes for the top of the pie with pie stamps. You can just gather your scraps and press them together, then roll out and freeze for about 10-15 minutes before stamping out your desired shapes. Alternatively you can finish the pie with a crimped edge.

    Peach Slab Pie with Candied Pecan no-churn Ice Cream. Flaky pastry surrounds a flavourful fresh peach filling. This slab pie is easy to make and is great for making ahead or serving a crowd. It is served with a candied pecan no-churn ice cream, which is filled with buttery pecan pieces in a creamy no-churn base. This is the perfect summer combination!

    For more pie recipes, check out:

    • baked rhubarb pie on wire rack
      Rhubarb Pie
    • sliced pie with crumble topping
      Strawberry Rhubarb Pie
    • baked blueberry crostata
      Blueberry Crostata
    • baked apple hand pies
      How to make Flaky Apple Hand Pies

    ❤️ Made this recipe and love it? ❤️

    I would LOVE for you to leave me a review and star rating below to let me know how you liked it! Also, please make sure to tag me on Instagram!

    Answers to your baking questions

    Over the years, many of you have asked me questions about:

    • baking in grams
    • adjusting oven temperatures
    • what kind of salt to use
    • and many more!

    I've curated and answered them all for your easy reference in this frequently asked questions post!

    Recipe for Peach Slab Pie

    Filed Under: Fruit Pies, Slab Pies Tagged With: Egg Free

    Chocolate Sprinkle Cookies

    These chocolate sprinkle cookies are thin and chewy, and rolled in sprinkles instead of the traditional sugar, which gives them a perfect crunch and super cute rainbow sprinkle finish. These are similar to crinkle cookies, but the sprinkle coating makes them extra cute, and they are so easy to make!

    Chocolate Sprinkle Sugar Cookies. These chocolate sugar cookies are thin and chewy, and rolled in sprinkles instead of the traditional sugar, which gives them a perfect crunch and super cute rainbow sprinkle finish. These are similar to crinkle cookies, but the sprinkle coating makes them extra cute, and they are so easy to make!

    Hi hi! I am just poppping in to share the recipe for these chocolate sprinkle cookies! These cookies are a spin on my classic chewy chocolate cookies - during recipe testing I made them a little thinner so they sunk down in the oven, and rolled them in the cutest sprinkles.

    This is an easy no chill recipe that comes together in 30 minutes or so. You can either make them regular sized or tiny - both are so cute!

    Chocolate Sprinkle Sugar Cookies. These chocolate sugar cookies are thin and chewy, and rolled in sprinkles instead of the traditional sugar, which gives them a perfect crunch and super cute rainbow sprinkle finish. These are similar to crinkle cookies, but the sprinkle coating makes them extra cute, and they are so easy to make!

    Tips and tricks for success with sprinkle cookies.

    • I don’t really have too much to say here - you can roll these in any sprinkles that you like but the non-pareils are probably the best! I like getting them from here, or here - they both have really fun mixes. The ones I used for these cookies I just got in bulk online! Not all sprinkles are made equal - make sure that you use ones that won't melt in the oven. You can also roll them in coloured sanding sugar. I have also made them where I mixed in raw sugar into the sprinkles and it gave a sort of galaxy effect which I loved!
    • Use whatever cocoa that you like here - you can go with black cocoa for more of an oreo vibe, or a dutch cocoa. I would try to use something dutched if you can, but regular cocoa certainly won’t hurt either. If you do use black cocoa maybe just up the sugar by 30 or so grams to make up for the more bitter cocoa.
    • These freeze well baked! We have a stash in the freezer now and they store super well - just pop them in a ziploc bag or airtight container.
    Chocolate Sprinkle Sugar Cookies. These chocolate sugar cookies are thin and chewy, and rolled in sprinkles instead of the traditional sugar, which gives them a perfect crunch and super cute rainbow sprinkle finish. These are similar to crinkle cookies, but the sprinkle coating makes them extra cute, and they are so easy to make!

    ❤️ Made this recipe and love it? ❤️

    I would LOVE for you to leave me a review and star rating below to let me know how you liked it! Also, please make sure to tag me on Instagram!

    Answers to your baking questions

    Over the years, many of you have asked me questions about:

    • baking in grams
    • adjusting oven temperatures
    • what kind of salt to use
    • and many more!

    I've curated and answered them all for your easy reference in this frequently asked questions post!

    Filed Under: Holiday Cookies, Other Cookies

    Smoked Salmon Hand Pies

    Smoked Salmon Hand Pies with Cream Cheese Filling and Everything Bagel Seasoning. Easy flaky pie dough is filled with a Cold smoked salmon and cream cheese mixture, and baked until perfectly golden and flaky.

    Smoked Salmon and Cream Cheese Hand Pies with Everything Bagel Seasoning. Easy flaky pie dough is filled with a smoked salmon and cream cheese mixture, and baked until perfectly golden and flaky.
    Smoked Salmon and Cream Cheese Hand Pies with Everything Bagel Seasoning. Easy flaky pie dough is filled with a smoked salmon and cream cheese mixture, and baked until perfectly golden and flaky.
    Smoked Salmon and Cream Cheese Hand Pies with Everything Bagel Seasoning. Easy flaky pie dough is filled with a smoked salmon and cream cheese mixture, and baked until perfectly golden and flaky.
    Smoked Salmon and Cream Cheese Hand Pies with Everything Bagel Seasoning. Easy flaky pie dough is filled with a smoked salmon and cream cheese mixture, and baked until perfectly golden and flaky.
    Smoked Salmon and Cream Cheese Hand Pies with Everything Bagel Seasoning. Easy flaky pie dough is filled with a smoked salmon and cream cheese mixture, and baked until perfectly golden and flaky.
    Smoked Salmon and Cream Cheese Hand Pies with Everything Bagel Seasoning. Easy flaky pie dough is filled with a smoked salmon and cream cheese mixture, and baked until perfectly golden and flaky.
    Smoked Salmon and Cream Cheese Hand Pies with Everything Bagel Seasoning. Easy flaky pie dough is filled with a smoked salmon and cream cheese mixture, and baked until perfectly golden and flaky.
    Smoked Salmon and Cream Cheese Hand Pies with Everything Bagel Seasoning. Easy flaky pie dough is filled with a smoked salmon and cream cheese mixture, and baked until perfectly golden and flaky.
    Smoked Salmon and Cream Cheese Hand Pies with Everything Bagel Seasoning. Easy flaky pie dough is filled with a smoked salmon and cream cheese mixture, and baked until perfectly golden and flaky.

    Smoked Salmon Hand Pies

    Hi! Happy Tuesday! I hope you are keeping well - I am so excited to share this wee recipe with you we are currently obsessed with - Smoked salmon and cream cheese hand pies with everything seasoning! I’ve made these a few times in the last week or so and they are so, so good. I made a pureed cream cheese and smoked salmon filling, and tucked it inside some super, super flaky pie dough (more on that later), then covered them with everything seasoning and baked them until they were beautifully golden brown and so, so flaky!

    I have been partnering with Taste of New Zealand of New Zealand Trade and Enterprise for a while now, sharing a recipe focussed on a different New Zealand ingredient each month. I love my monthly New Zealand posts so much - I am so proud of where I come from, and I am so excited that I get to share a little bit of home with you each month. New Zealand isn’t very big but it cranks out some incredible products - including the best smoked salmon I’ve ever had. I grew up eating Regal smoked salmon (we get it at the supermarket back home), and it wasn’t until I moved here that I realised just how good it is, and I am so, so excited that it is now available in the states! The Cold Smoked Salmon is packed up and sealed tightly so it keeps for a really long time, so it’s perfect to have stashed in your fridge for when you need a wee smoked salmon fix. We got a bunch of different flavours to try (there’s a dill cured and also a pastrami cured (!!), but I always end up back with my old faithful, manuka smoked. Manuka is a tree native to New Zealand - you’ve probably heard of Manuka honey, but the wood produces a super rich smoked flavour too, so it has been used for a long time in the smoking of meat and fish.

    Ways to use Cold Smoked Salmon

    One of my favourite smoked salmon preparations is in a smoked salmon dip, and I wanted to take that flavour profile and pop it in some flaky pastry to make hand pies, so I blended a packet of salmon with some cream cheese, chives, lemon, and salt and pepper, and used it as the filling for these savoury hand pies. The filling is super simple to make (it takes about 3 minutes), and I made my own pie dough, but these would work perfectly with a store bought puff pastry too if that’s not your jam. These can be made ahead and stored in the freezer, or you can make a bunch and keep some on hand for a quick dinner or easy lunch - just whack one in the oven and you’re good to go! I hope you give these a try - there’s nothing quite like flaky pastry hot out of the oven.

    I made a super, super flaky pastry to go with these - imagine if pie dough and rough puff had a baby, this would be it. It uses the same ratios and method as my pie dough, but utilises a technique my friend Erin taught me - you laminate the dough a few times after you have mixed it, which creates amazing layers within the pastry. Its super easy, and so, so good.

    What is Everything Bagel Seasoning?

    Everything But The Bagel Seasoning is a classic bagel topping and is made up of poppy seeds, sesame seeds, dried garlic, dried onion and salt. It has become more popular recently used as a topping for baking, or on cream cheese, in dips, you name it. You can buy it online (I get this one), or you can make your own (I have found a recipe here). It lasts a long time and you can make loads at once if you like - it goes on all kinds of things! If you don’t want to use everything seasoning, some sesame seeds or poppy seeds on top would work great too.

    A few wee tips for Smoked Salmon Hand Pies

    • There are a bunch of different flavours of Regal Smoked Salmon! I have linked to a 3 pack here, but they also come in 6 packs. They are vacuum sealed so will last a long time in your fridge or they freeze perfectly.

    • The pie dough lamination method came from my friend Erin and works so well! You basically just leave the butter chunks bigger than usual, then perform a bunch of folds puff pastry style to give a super flaky dough that puffs up so beautifully in the oven.

    • I like to give the pie dough overnight to rest if I can, but if you are in a pinch, a couple of hours resting time after you perform the folds is fine.

    • Make sure that you keep your dough nice and cold - I rolled mine out then cut it in half with a cutter, and popped it in the freezer for 10 minutes before cutting out the rectangles for the hand pies, then I froze the cut out rectangles too just briefly before assembly.

    • You can make the filling ahead of time too if you like - I made it and then popped it in a piping bag with the end still intact, and then clipped up the other end, and stored it in the fridge directly in the piping bag. The filling would also double very well.

    • The pies freeze amazingly, so if you like you can bake off some, and leave the others to bake another time. Just freeze them until totally solid on a lined baking sheet (pre egg wash), then transfer to an airtight container to store. When you bake them, you may just have to add a few minutes onto the bake time, but it won’t affect the final outcome.

    • If you don’t want to make a flaky pie dough you can just blend the butter in a little better using your fingers in the initial butter flour step, then just leave the dough to rest in the fridge. I almost always do the laminations now though because it makes the dough so, so much easier to work with and is only 5 minutes more work!

    For more recipes using New Zealand Ingredients:

    • Brown Butter Cinnamon Rolls
    • Vanilla and Honey Doughnuts
    • Dark Chocolate Peanut Butter Stuffed Chocolate Chip Cookies
    • Perfect Swiss Meringue Pavlova

    Thank you so much to Taste of New Zealand of New Zealand Trade and Enterprise for Sponsoring this post! All opinions are my own.

    ❤️ Made this recipe and love it? ❤️

    I would LOVE for you to leave me a review and star rating below to let me know how you liked it! Also, please make sure to tag me on Instagram!

    Answers to your baking questions

    Over the years, many of you have asked me questions about:

    • baking in grams
    • adjusting oven temperatures
    • what kind of salt to use
    • and many more!

    I've curated and answered them all for your easy reference in this frequently asked questions post!

    Filed Under: Hand Pies, Savoury, Savoury Pies

    Coffee and Milk Chocolate Cream Puffs with Rose Icing

    Coffee and Milk Chocolate Cream Puffs with Rose Icing. This recipe comes from Amy Ho's new book "Blooms and Baking". A perfect craquelin covered cream puff is filled with an easy silky milk chocolate ganache filling and topped with swirls of espresso whipped cream. The cream puffs are finished with a rose icing and topped with sprinkles.These are an easy delicious dessert, and are fun to make.

    Milk Chocolate and Coffee Cream Puffs from Blooms and Baking

    Happy Tuesday, and happy book birthday to my friend Amy! She runs the most beautiful Instagram account and blog called Constellation Inspiration, and today she releases her book baby into the world (why does that sound like she’s physically giving birth to it!?), called Blooms and Baking! Amy’s book is all about adding florals and their flavors to cake, cookies, candies, and all kinds of other delicious sweets - if you follow her on Instagram you will know that she manages to incorporate the most beautiful blooms into almost every recipe she makes. Amy shot the book herself and it is full of beautiful photos and step by step shots (and the most perfect manicures of all time). There are so many beautiful recipes I can’t wait to make!

    I didn’t really have a hard time choosing what to make from the book - Amy and I share a huge love of cream puffs, and there’s a whole section dedicated to them, so the only decision I had to make was what puff recipe to choose! I quickly settled on this one - a choux au craquelin (craquelin is the crispy cookie stuff on the top), filled with a whipped milk chocolate ganache and a coffee whipped cream, and topped with a rose icing. The recipe in the book has a candied rose petal on top of the icing, but seeing as lots of things are shut in corona land here in NYC I wasn’t able to get my hands on some rose petals, so instead I went with sprinkles to celebrate Amy’s book birthday instead!

    How to make Milk Chocolate and Coffee Cream Puffs

    These cream puffs are so, so delicious - the puff itself isn’t too sweet and is nice and crispy, then the milk chocolate ganache is smooth and silky, and the coffee cream is unsweetened so provides the most perfect balance against the smooth ganache. These are so much fun to make - there are a few components but they all come together quickly. You can make the craquelin and the ganache the night before if you like (you can make the choux buns before too if you like, just freeze them in an airtight container), and then the coffee cream comes together with just a wee bit of whipping. I think they might be one of my most favourite things to make, don’t tell the others.

    Why Accuracy is important when making Cream Puffs

    In the ingredients, I have added in some ‘just in case’ egg. Sometimes when you are making choux dough you will need to add an extra little bit of egg (about 20 to 30g) to the mixture in order to get it to the right consistency - you want it to form a ‘v’ that eventually breaks off when you lift the paddle from the mixture. If it is not wet enough (ie you need to add more egg), you won’t get that nice v shape and the dough will be stiff and break off easily. I usually start with the 110g called for in the recipe, test it, then add in a little extra beaten egg if needed. This recipe uses 110g which is about 2 ½ eggs, so beat up 3 and measure out 110g then you have the extra as your just in case egg.

    How to store Cream Puffs

    Cream puffs will go soggy quickly if stored at room temperature, but keep perfectly in the freezer. Even if you are making them only a day ahead, store in the freezer overnight and defrost the next day. If you have extra cream puffs, freeze them empty in an airtight container then defrost at room temp. Store any extra components separate and assemble before eating as these are best on the day they are made.

    A few wee tips for Milk Chocolate Coffee Cream Puffs

    • I actually had some craquelin left over from a recipe in the freezer but my recipe is the same as Amy’s, so I popped my method in the recipe.

    • The milk chocolate ganache needs at least four hours to chill. Make it the night before if you like - making the actual ganache only takes about 5 minutes, you just need to account for the chill time.

    • Amy asks you to use a stand mixer to whip the ganache, but I am #verylazy and didn’t want to wash my mixing bowl so I just whipped it with a whisk directly in the bowl that I made it in and it worked fine!

    • Ganache is super easy but the one thing to be careful of is that you don’t get any water in it. Because you’re putting something warm into the fridge, some condensation will gather on the plastic wrap, and you want to make sure that doesn’t drip into the ganache or it will make it split. I carefully take off the plastic wrap a few times in the cooling process and wipe it down just to make sure there are no drops forming.

    • There is rose water in the icing for these - leave it out if you don’t have!

    ❤️ Made this recipe and love it? ❤️

    I would LOVE for you to leave me a review and star rating below to let me know how you liked it! Also, please make sure to tag me on Instagram!

    Answers to your baking questions

    Over the years, many of you have asked me questions about:

    • baking in grams
    • adjusting oven temperatures
    • what kind of salt to use
    • and many more!

    I've curated and answered them all for your easy reference in this frequently asked questions post!

    For more Cream Puff Recipes, Check out:

    • Chocolate Hazelnut Cream Puffs
    • Choux au Craquelin with Whipped White Chocolate Ganache
    • Choux au Craquelin with Passionfruit Cream

    Filed Under: Choux

    Mushroom and Sundried Tomato Pesto Pie with Parmesan and Black Pepper Crust

    Mushroom and Sundried Tomato Pesto Pie with Parmesan and Black Pepper Crust. A rich, hearty mushroom gravy enriched with sundried tomato pesto is tucked inside a golden brown parmesan and black pepper pie crust. This is a perfect vegetarian take on the classic pot pie, and is ultimate comfort food. Mushroom pot pie will be your next favourite!

    Mushroom and Sundried Tomato Pesto Pie with Parmesan and Black Pepper Crust. A rich, hearty mushroom gravy enriched with sundried tomato pesto is tucked inside a golden brown parmesan and black pepper pie crust. This is a perfect vegetarian take on the classic pot pie, and is ultimate comfort food. Mushroom pot pie will be your next favourite!
    Mushroom and Sundried Tomato Pesto Pie with Parmesan and Black Pepper Crust. A rich, hearty mushroom gravy enriched with sundried tomato pesto is tucked inside a golden brown parmesan and black pepper pie crust. This is a perfect vegetarian take on the classic pot pie, and is ultimate comfort food. Mushroom pot pie will be your next favourite!
    Mushroom and Sundried Tomato Pesto Pie with Parmesan and Black Pepper Crust. A rich, hearty mushroom gravy enriched with sundried tomato pesto is tucked inside a golden brown parmesan and black pepper pie crust. This is a perfect vegetarian take on the classic pot pie, and is ultimate comfort food. Mushroom pot pie will be your next favourite!

    Hi! Happy Sunday! I am sharing a recipe with you today that is somewhat inspired by my trip to New Zealand in February (so glad we went back when we did) - this Mushroom and Sundried Tomato Pesto Pie with a Parmesan and Black Pepper Crust!

    Savoury pies are a big thing in New Zealand - they are sold at every bakery and petrol station, and are a hangover staple in my opinion. We weirdly don’t have many fruit pies - if you asked someone if they wanted a pie, they would know you were referring to a small hand held pie filled with a savoury (usually meat) filling. Different bakeries are known for their flavour combinations and people will travel for their favourite. There is a place about a 15 minute drive from my Parent’s we went to a bunch of times when we were home, because they are THAT good.

    I’m not quite sure why savoury pies (excluding pot pie) haven’t caught on as well in the states, but I can truthfully say that the States are missing out, because we sure do know our way around a good pie in New Zealand.

    Mushroom and Sundried Tomato Pesto Pie with Parmesan and Black Pepper Crust. A rich, hearty mushroom gravy enriched with sundried tomato pesto is tucked inside a golden brown parmesan and black pepper pie crust. This is a perfect vegetarian take on the classic pot pie, and is ultimate comfort food. Mushroom pot pie will be your next favourite!

    We actually don’t eat much meat at home now, so when I was working on this, I really wanted to come up with a vegetarian version to share. We have been getting mushrooms from a small company here in Brooklyn since lockdown started, and so I had a bunch of different varieties in my fridge to use up. I started by frying off the mushrooms in batches to get them nice and golden brown, then parked them in a bowl and seasoned well. I then worked on a gravy of sorts - frying onions and garlic in butter (aka the ‘what smells good’ trio), and then adding flour to the pan, followed by some stock and heavy cream, and some soy sauce for extra flavour. The mix then got cooked until it was a thick gravy, pesto was added, and then the mushrooms got added back in, and the whole thing mixed together. Super easy - it does take a wee bit of chopping of the onions and the garlic, but it is so worth it. I wrapped the whole thing up in a super flaky pie crust, which I made with some parmesan and black pepper for a super delicious savoury twist on traditional pie dough.

    Mushroom and Sundried Tomato Pesto Pie with Parmesan and Black Pepper Crust. A rich, hearty mushroom gravy enriched with sundried tomato pesto is tucked inside a golden brown parmesan and black pepper pie crust. This is a perfect vegetarian take on the classic pot pie, and is ultimate comfort food. Mushroom pot pie will be your next favourite!

    Because I kept this pie veggie I knew I would have to work a little harder to get a super rich gravy, and I leaned on a few things to achieve this. The first trick was making sure that the mushrooms were super golden brown, adding depth of flavour and helping to cook out the moisture. Next I added in some soy sauce to the gravy, which helped with the umami, but the real flavour star here in the pie is Sundried Tomato Pesto. Just so, so good.

    This pie is ultimate comfort food and would make the perfect weekend meal. You can split up the work over a few days if you like (see notes), and leftovers are so delicious. We serve it alongside a super simple salad, but it would really go well with anything. Enjoy! xx

    Mushroom and Sundried Tomato Pesto Pie with Parmesan and Black Pepper Crust. A rich, hearty mushroom gravy enriched with sundried tomato pesto is tucked inside a golden brown parmesan and black pepper pie crust. This is a perfect vegetarian take on the classic pot pie, and is ultimate comfort food. Mushroom pot pie will be your next favourite!

    A few wee tips:

    • I like using a wee tip that my friend Erin taught me to make the pie dough nice and smooth and easy to work with. I make the dough, shape it into two rectangles, rest it in the fridge wrapped for about an hour, then remove it and roll it out into a rectangle on a lightly floured surface. I then give it a letter fold (as you would a letter), roll out to a rectangle, letter fold again, then roll out slightly, and shape into a disc. I then re-wrap it, and leave it to rest overnight. This makes the dough more homogenous without compromising the flaky texture that you want in the pie dough, and it makes it a total dream to work with. For me, it’s a game changer.

    • I used a bunch of different mushrooms! Whatever you have will work but I loved the mix of portobello, crimini, and shiitake.

    • 1kg of mushrooms seems like loads. It looks like loads, but they shrink down so much when fried off, so just trust me with this one.

    • I also made a homemade mushroom stock using some dried porcini and crimini mushrooms that I had - I simmered them in some water for about an hour then left them in the liquid for another 30 minutes, along with a parmesan rind, some garlic, peppercorns, and thyme. There’s so much going on flavour wise that you don’t have to do this, veggie stock will work just fine!

    • This is a vegetarian pie, but if you like, you can add a little bacon in when you are cooking the onion and garlic down. Totally up to you!

    • in saying that Parmesan isn’t actually vegetarian so if you need to keep it strictly veggie you can switch out the cheese in the crust to a veggie cheese - something hard is best.

    • If you don’t want to make your own dough, you can use store bought pie dough and it will work just fine! Making your own is a fun and easy project - if you like you can make double and wrap some tightly and freeze.

    • The filling for this pie can be made ahead if you like to break up the tasks. I made the dough and the filling the day before which made it nice and easy to pop together for dinner!

    • lattice this however you like - I did a “slattice” where I just laid down the strips over the filling rather than weaving them, then made some cut-outs using pie crust cutters!

    • The pie needs about an hour 15 in the oven to get nicely cooked so make sure you account for that!

    • The pie will hold its filling nicely if you leave it to cool, but it is best eaten hot, so you choose your own adventure - I prefer it hot!

    • This pie is GREAT On the reheat (we have had it four times in the last two weeks). You can either refresh it in the oven which helps keep the pastry crisp, or pop it in the microwave.

    Mushroom and Sundried Tomato Pesto Pie with Parmesan and Black Pepper Crust. A rich, hearty mushroom gravy enriched with sundried tomato pesto is tucked inside a golden brown parmesan and black pepper pie crust. This is a perfect vegetarian take on the classic pot pie, and is ultimate comfort food. Mushroom pot pie will be your next favourite!

    ❤️ Made this recipe and love it? ❤️

    I would LOVE for you to leave me a review and star rating below to let me know how you liked it! Also, please make sure to tag me on Instagram!

    Answers to your baking questions

    Over the years, many of you have asked me questions about:

    • baking in grams
    • adjusting oven temperatures
    • what kind of salt to use
    • and many more!

    I've curated and answered them all for your easy reference in this frequently asked questions post!

    Filed Under: Savoury, Savoury Pies

    The Best Salted Caramel Popcorn Cookies

    Satisfy your sweet tooth with these salted caramel popcorn cookies! They have soft, chewy middles, crispy edges, and crunchy popcorn in every bite. Recipe uses freshly popped popcorn, but for ease butter-flavored microwave popcorn works here too

    Cookies with popcorn on a wire rack

    Hi hi! Just popping in to share the recipe for these Salted Caramel Popcorn Cookies! I know I have a whole bunch of recipes for homemade chocolate chip cookies on my site, but it is always fun to put a little twist on them, such as with these caramel popcorn cookies!

    Popcorn is a staple food group of mine - I love making homemade caramel corn and homemade kettle corn, so it only made sense to make a chocolate chip cookie popcorn mashup!

    To make these popcorn cookies, I took my favourite salted caramel chocolate chunk cookies recipe to use as a base, and added in popcorn. The cookie has a brown butter base, which pairs so well with the popcorn and caramel. I use the same brown butter / salted caramel combination in my salted caramel tart and salted caramel slice recipes, and also borrow the hard caramel technique from these salted caramel snickerdoodles! I hope you enjoy these popcorn cookies - they are a super fun twist on the classic recipe, and take less than 45 minutes to make, no chill time needed!

    corner shot of popcorn with cookies on a rack over wax paper

    How to make Salted Caramel Popcorn Cookies

    These easy caramel popcorn cookies are super easy to make:

    • Brown the butter. Make this, and set aside to cool slightly while you make the caramel.
    • Make the salted caramel. This is a hard caramel, so it is made by melting down sugar until it forms a caramel, then pouring out to set. You can use store bought caramel candies if you do not want to make your own homemade caramel.
    • Make the cookie base. This is a super easy cookie recipe that comes together quickly.
    • Scoop the dough. Because of the caramel and the popcorn in the cookies, this recipe does not have a chill time - it would make the popcorn go soggy. I scoop as many cookies as I can fit on one pan at once.
    • Bake the popcorn cookies. Bake off according to the instructions in the recipe, then leave to cool and enjoy!
    close up image of cookies with caramel and chocolate

    Tips for perfect chocolate chip cookies

    I have a couple of tips and tricks that help to give perfect chocolate chip cookies every time:

    • Use chopped chocolate instead of chocolate chips. I love this because it gives you shards throughout the cookies.
    • Add chocolate puddles to the tops of the cookies before baking them, by pressing a little additional chocolate onto the tops of the cookie dough balls.
    • Use a cookie scoop. I made these big boi cookies with a #16 scoop which holds ¼ cup of cookie dough. A cookie scoop is a great investment - I use mine all the time. A 2 tablespoon (#40) and a 4 tablespoon (#16) are probably my most used. I like the Norpro ones, or the Oxo ones are nice too.
    • Scoot your cookies into shape - The caramel in these gets wild sometimes in the oven when it melts and the cookies can come out mis shapen. If this happens just do a cookie scoot - take a cookie cutter slightly larger than the cookie and use it to scoot it back into place.

    Get all my tips and tricks for perfect cookies in my post - how to make perfect chocolate chip cookies

    side on shot of chocolate chip cookies with salt and popcorn

    Homemade vs microwave popcorn

    I used freshly popped popcorn to make these caramel popcorn cookies, however if you don't want to make your own popcorn at home, store bought popped popcorn would work great, or you could use a butter flavoured popcorn (either from a packet or a microwave bag) here too.

    20g doesn't sound like lots of popcorn but popcorn doesn't weigh very much, so trust me here. I popped about ¼ cup of kernels which gave me enough for the cookie and a snack.

    image of cookies with chocolate and caramel

    For more homemade chocolate chip cookie recipes, check out:

    • cookie dough ready to freeze
      How to Freeze Cookie Dough and Bake From Frozen
    • cookie on sheet pan with parchment paper
      Brown Butter Chocolate Chip Cookies
    • m&m chocolate chip cookies
      Perfectly Chewy Chocolate Chip M&M Cookies
    • corner shot oatmeal chocolate chip cookie
      Oatmeal Chocolate Chip Cookies with Oil (No Butter)

    ❤️ Made this recipe and love it? ❤️

    I would LOVE for you to leave me a review and star rating below to let me know how you liked it! Also, please make sure to tag me on Instagram!

    Answers to your baking questions

    Over the years, many of you have asked me questions about:

    • baking in grams
    • adjusting oven temperatures
    • what kind of salt to use
    • and many more!

    I've curated and answered them all for your easy reference in this frequently asked questions post!

    Filed Under: Chocolate Chip Cookies

    Cinnamon and Cardamom Morning Buns

    Cinnamon and Cardamom morning buns. These buns are flaky and sweet, with layers from the lamination. The base laminated yeasted danish dough is a fun, easy project, and these morning buns make a perfect breakfast.

    DSC01817.jpg
    DSC01807.jpg
    DSC01795.jpg
    DSC01834.jpg
    DSC01854.jpg
    DSC01825.jpg

    Happy Thursday! I hope you are keeping well. I have been taking things a little more easy around here - working on a couple of more time consuming recipes to share with you, and a couple that need a lot of tweaking, along with a whole bunch of sourdough bread baking (which it looks like everyone else is joining in on too which makes me so happy because it’s so fun and satisfying!)

    I sat down a few weeks ago and made a list of things that I either haven’t tried before (like milk bread), or that I have tried before and want to try again to get the hang of. I’m super stubborn and pretty competitive with myself, so I tend to get an idea in my head and then just keep chipping away at it until I am happy with the outcome and feel like I have gotten it right - things such as pie dough, choux pastry and macarons. I think it is hugely beneficial to learn through failure, and through practice, and that is how I have taught myself to bake - by doing a whole lot of research, giving it a go, taking loads of notes, and knowing what I need to work on for the next try to make it a little easier or tastier or more efficient.

    Top of the list was yeasted laminated dough (basically croissant or danish dough). I tried it once a long time ago and had no idea what I was doing and it was a spectacular failure, but I’ve made it twice this week and taken a whole bunch of notes to add in to give you some wee tips and tricks to make the process easier, and I feel much more confident with it - so keep an eye out for more laminated doughs around this neck of the woods!

    What actually spurred me to try yeasted laminated dough again was the arrival of the Bake From Scratch book Volume Four - put together by my friends at Bake From Scratch Magazine! Their books are the best - they are a compilation of their recipes from their magazine from the last year, and really are a ‘baking bible’ of sorts.

    I have a couple of recipes in the book from work I did with Bake From Scratch the last year, but as I was flipping through the book I spied a recipe for danish dough, and asked Brian super nicely if I could share it with you. The book breaks down the process, and provides one danish dough that can then be adapted to make a variety of morning buns - savoury and sweet. I kept it simple with a cinnamon and cardamom variation, and they are so, so good. The layers baked up perfectly, giving it that shattery finish, made even better by the thick layer of cinnamon and cardamom sugar on the outside.

    These are a bit of an undertaking - you make the dough and the butter block and leave them to chill overnight, and then in the morning or the next day you perform your laminations, which is basically where you are incorporating the butter into the dough. You lock the butter into the dough, then roll it out and do a series of folds, each one creating a layer of butter in the dough. As you do more folds, you get more and more layers, giving you a beautifully laminated dough. It can seem a little intimidating at first but just make sure that you read through the recipe a couple of times, I have broken down all the steps that you need to take.

    A few wee tips:

    • The main thing you need to watch when you are making this is your dough and butter temperature. I find 15 min in the freezer before rolling out the dough to lock in the butter is good, and 7-10 minutes for the butter to stand on the counter to become pliable. You want them about the same temperature. If your butter is too warm then it will leak out and if it is too cold then it will break up within the dough and become lumpy. Just keep a very close eye on your timing - get a timer (I have about four of these and I love them) and stick to the timings strictly.

    • I added in some bread flour to the butter block to help keep it pliable and make it easy to roll out.

    • Obsessively square off your edges when you are rolling. Keep the dough edges as straight as you can - I use a bench scraper for this. It helps to keep your folds nice and neat.

    • Add flour as needed for the rolling, but brush off with a dry pastry brush before doing your folds so that you don’t incorporate the flour within the folds.

    • A good muffin pan helps. I use this - it is super non stick and I love it.

    • Watch these carefully when you are baking as the bottoms can burn quite easily. I start checking mine at 18 minutes.

    • These morning buns are made with a HALF batch of the dough - I made a full batch then cut it in half and used half to make these buns and wrapped the other half up tightly and froze it to use for another time. Don’t try and halve the dough from the start - make the full amount and freeze some.

    • The recipe in Bake from Scratch has 70g chopped pecans scattered on top of the cinnamon sugar. I didn’t have any so I left them out - add them in if you like!

    • Leave out the cardamom if you like!

    ❤️ Made this recipe and love it? ❤️

    I would LOVE for you to leave me a review and star rating below to let me know how you liked it! Also, please make sure to tag me on Instagram!

    Answers to your baking questions

    Over the years, many of you have asked me questions about:

    • baking in grams
    • adjusting oven temperatures
    • what kind of salt to use
    • and many more!

    I've curated and answered them all for your easy reference in this frequently asked questions post!

    Filed Under: Buns and Rolls

    Carrot Snack Cake with Cream Cheese Frosting

    Thank you so much to ALDI for sponsoring this post! All opinions are my own - thank you for supporting the businesses that keep Cloudy Kitchen going!

    Carrot Snack Cake with Cream Cheese Frosting. This easy, moist, carrot sheet cake is the most perfect easter cake. It is made with pantry staples and finished with a simple cream cheese frosting and some super cute piped frosting carrots. This cake is great for a simple easter dessert, or for entertaining, as sheet cakes are super easy to transport.

    Carrot Snack Cake with Cream Cheese Frosting. This easy, moist, carrot sheet cake is the most perfect easter cake. It is made with pantry staples and finished with a simple cream cheese frosting and some super cute piped frosting carrots. This cake is great for a simple easter dessert, or for entertaining, as sheet cakes are super easy to transport.
    Carrot Snack Cake with Cream Cheese Frosting. This easy, moist, carrot sheet cake is the most perfect easter cake. It is made with pantry staples and finished with a simple cream cheese frosting and some super cute piped frosting carrots. This cake is great for a simple easter dessert, or for entertaining, as sheet cakes are super easy to transport.
    Carrot Snack Cake with Cream Cheese Frosting. This easy, moist, carrot sheet cake is the most perfect easter cake. It is made with pantry staples and finished with a simple cream cheese frosting and some super cute piped frosting carrots. This cake is great for a simple easter dessert, or for entertaining, as sheet cakes are super easy to transport.
    Carrot Snack Cake with Cream Cheese Frosting. This easy, moist, carrot sheet cake is the most perfect easter cake. It is made with pantry staples and finished with a simple cream cheese frosting and some super cute piped frosting carrots. This cake is great for a simple easter dessert, or for entertaining, as sheet cakes are super easy to transport.
    Carrot Snack Cake with Cream Cheese Frosting. This easy, moist, carrot sheet cake is the most perfect easter cake. It is made with pantry staples and finished with a simple cream cheese frosting and some super cute piped frosting carrots. This cake is great for a simple easter dessert, or for entertaining, as sheet cakes are super easy to transport.
    Carrot Snack Cake with Cream Cheese Frosting. This easy, moist, carrot sheet cake is the most perfect easter cake. It is made with pantry staples and finished with a simple cream cheese frosting and some super cute piped frosting carrots. This cake is great for a simple easter dessert, or for entertaining, as sheet cakes are super easy to transport.
    Carrot Snack Cake with Cream Cheese Frosting. This easy, moist, carrot sheet cake is the most perfect easter cake. It is made with pantry staples and finished with a simple cream cheese frosting and some super cute piped frosting carrots. This cake is great for a simple easter dessert, or for entertaining, as sheet cakes are super easy to transport.
    Carrot Snack Cake with Cream Cheese Frosting. This easy, moist, carrot sheet cake is the most perfect easter cake. It is made with pantry staples and finished with a simple cream cheese frosting and some super cute piped frosting carrots. This cake is great for a simple easter dessert, or for entertaining, as sheet cakes are super easy to transport.
    Carrot Snack Cake with Cream Cheese Frosting. This easy, moist, carrot sheet cake is the most perfect easter cake. It is made with pantry staples and finished with a simple cream cheese frosting and some super cute piped frosting carrots. This cake is great for a simple easter dessert, or for entertaining, as sheet cakes are super easy to transport.
    Carrot Snack Cake with Cream Cheese Frosting. This easy, moist, carrot sheet cake is the most perfect easter cake. It is made with pantry staples and finished with a simple cream cheese frosting and some super cute piped frosting carrots. This cake is great for a simple easter dessert, or for entertaining, as sheet cakes are super easy to transport.

    Carrot Snack Cake with Cream Cheese Frosting

    Hi! I hope you are keeping well. I wanted to pop in and share a wee easy recipe that is perfect for the upcoming spring season - this Carrot Snack Cake with Cream Cheese Frosting, made with some pantry staples! As someone who works from home, goes through a lot of ingredients and doesn’t have a car, I almost always turn to online grocery shopping through Instacart when I need to replenish staples, and my favourite place to get them from is ALDI - their ingredients are super high quality and incredibly well priced, which make choosing to shop with them a no-brainer every time.

    How to make Carrot Snack Cake

    This carrot snack cake is a twist on a classic carrot cake - instead of baking it in a round pan or turning it into a layer cake, I baked it in a 9” square pan (this super cute speckled one is from ALDI!), and then made a quick and easy cream cheese frosting to top it off with. The cake itself is the perfect texture - there is moisture from the grape seed oil and flavour from the melted butter, and fresh grated carrots and a little bit of spice to round it all off so nicely. The cake can easily be made a day or two in advance if you were looking to prep ahead, then all you would have to do the day of serving is add on the frosting, which comes together super quickly and is nice and sturdy, making it perfect to swoop onto your snack cake.

    A few wee tips:

    • I finished the cake with some little piped carrots using the cream cheese frosting but you can finish it any way that you like - chopped pecans or walnuts would be great, or some toasted coconut, or just some swoops with your spatula.
    • You can also add the frosting to the cake while it is in the cake pan, which makes it easy to store or transport.
    • If you were wanting to make this ahead, you can store the cake, either wrapped or in an airtight container, at room temperature for 1-2 days. Add the cream cheese frosting the day of serving.

    For more recipes using ALDI staples, check out:

    • Kit Kat Cookies
    • Hot Chocolate Sandwich Cookies
    • Peach Slab Pie with Candied Pecan No-Churn Ice Cream
    • Ginger Caramel Slice

    ❤️ Made this recipe and love it? ❤️

    I would LOVE for you to leave me a review and star rating below to let me know how you liked it! Also, please make sure to tag me on Instagram!

    Answers to your baking questions

    Over the years, many of you have asked me questions about:

    • baking in grams
    • adjusting oven temperatures
    • what kind of salt to use
    • and many more!

    I've curated and answered them all for your easy reference in this frequently asked questions post!

    Filed Under: Sheet and Snack Cakes

    Peanut, Pretzel and Potato Chip Chocolate Chip Cookies (Refined Sugar Free, Gluten Free, Dairy Free)

    These Peanut, Pretzel and Potato Chip Cookies are from Rachel Connor's new book, Bakerita. They are Refined Sugar Free, Gluten Free, and Dairy Free, and can be adjusted to suit your liking.

    DSC01683.jpg
    DSC01711.jpg
    DSC01733.jpg
    DSC01707.jpg
    DSC01720.jpg

    Happy, happy Wednesday! I did a spot of baking today and thought I should probably hop on here immediately so I can share these cookies with you - they are peanut, pretzel and potato chip cookies, that also just happen to be gluten free, dairy, free, AND refined sugar free (and vegan if you please)!!

    The recipe comes from my internet friend Rachel’s new book, Bakerita. Rachel runs the most amazing blog, focussing on dairy, gluten and refined sugar free treats, and she just wrote a whole book all about it! I do sometimes often get asked if I have any refined sugar or gluten free recipes on my website - while it isn’t a way that I eat, I totally appreciate that others do, and I tend not to develop recipes that fit within that niche as there are people like Rachel who have been doing such an amazing job for so long that I would much rather point you in her direction because her recipes are just incredible!

    I had a really hard time deciding what to make from the book, but I found myself coming back to these cookies a couple of times and I knew that they would be a winner. They are packed with all kinds of salty goodness - crushed pretzels, potato chips and salted peanuts, along with a solid dose of chocolate. The cookie base itself is gluten free and refined sugar free, relying on almond flour and coconut sugar for substance, and doing a damn good job. This is a super delicious cookie regardless of if you are gluten-free or not - can you really go wrong with potato chips in cookies? I think not. Congrats Rachel - the book is so, so beautiful! x

    A few wee tips:

    • If you want to make these totally gluten-free, make sure that you have gluten free pretzels!
    • I added a big handful extra of potato chips so mine came out extra chippy and delicious, but maybe a little more chunky. So good.
    • Rachel says you can use a flax egg in these if you like which would make them vegan - whisk 1 tablespoon ground flax seed with 2 ½ tablespoon water. Set aside for 10 minutes to give it time to gel.

    ❤️ Made this recipe and love it? ❤️

    I would LOVE for you to leave me a review and star rating below to let me know how you liked it! Also, please make sure to tag me on Instagram!

    Answers to your baking questions

    Over the years, many of you have asked me questions about:

    • baking in grams
    • adjusting oven temperatures
    • what kind of salt to use
    • and many more!

    I've curated and answered them all for your easy reference in this frequently asked questions post!

    Filed Under: Chocolate Chip Cookies Tagged With: Gluten Free, Vegan

    Brown Butter Salted Caramel Slice

    Brown Butter Salted Caramel Slice - a toasty brown butter shortbread is topped with a chewy, silky brown butter caramel, and finished off with a smooth layer of chocolate. This is a slight twist on the classic bakery treat, and is sure to become a firm favourite.

    DSC01302.jpg

    Table of contents

    • Brown Butter Salted Caramel Slice
    • How to make brown Butter salted Caramel Slice
    • The secret ingredient for perfect caramel slice - Condensed Milk
    • Steps for Making Brown Butter Salted Caramel Slice
    • A few wee tips for Brown Butter Salted Caramel Slice:

    Brown Butter Salted Caramel Slice

    Hi! I hope you are staying safe! I’ve been hanging out at home, doing all of the puzzles and bopping around in my tiny NYC kitchen making all sorts of things - most recently, this brown butter salted caramel slice! There’s a brown butter shortbread base, a super chewy, silky brown butter caramel filling, and then a smooth chocolate topping to finish it all off, complete with some retro bakery style feathering if you feel like fancying it up a little bit (it’s easy and I’ll tell you all about it, I promise!).

    I grew up eating caramel slice, or millionaire’s shortbread as I think it is called here in the states - it is a New Zealand bakery staple, and one of my favourite things. It varies from place to place in both the ratio of base to caramel, and also in the technique of the caramel. Some recipes will have you stir together a filling and then pop it in the oven to finish, but others will have you make a caramel on the stove top and pour it over the cooled shortbread base to set. I went for the stovetop method as I feel it is much easier to control and you know when it is done by using a thermometer to measure the temperature of the mixture.

    DSC01238.jpg

    How to make brown Butter salted Caramel Slice

    I browned the butter for both the shortbread base and the caramel filling, which gives this a super toasty, extra delicious flavour. Browning butter is great because it adds so much flavour wise, without having to use any extra ingredients. The shortbread is super simple and I actually found it easiest to make it by hand rather than using a mixer, and just using a spatula instead to bring the base together. I creamed brown butter which I had chilled back down to be spreadable with some brown sugar, then added in some flour, vanilla and salt, to make a super smooth shortbread base which is insanely satisfying to pat into your baking pan. The shortbread base gets baked until it is nice and toasty, then once it is cool it is caramel time!

    • Brown Butter Shortbread Base
    • Brown Butter Salted Caramel Slice

    The secret ingredient for perfect caramel slice - Condensed Milk

    The caramel filling is perfectly thick and chewy, and has a lovely silkiness to it, which is from the Sweetened Condensed Milk that I used! I love all things condensed milk. It is perfect to have on hand for times like this when you just need a little caramel slice treat, and Eagle Brand is super simple - it’s only ingredients are milk and sugar! I started with the condensed milk and brown butter as a base, then added in some golden syrup for texture (set caramel benefits from an invert sugar), a little bit of brown sugar for colour and toastiness to help bring out the brown butter flavour, and a solid dose of salt.

    I finished it off with a thin layer of dark chocolate, which I added a wee feather texture to by drizzling some white chocolate over the surface and feathering it using a cake tester. This is a totally optional step but it’s super easy and makes the caramel slice look a little fancy. You could also sprinkle a little flaky sea salt on the top of the chocolate topping instead of the feathering - you do you here!

    DSC01269.jpg
    • Side shot of salted caramel slice
    • top down shot of salted caramel slice ready to be cut

    Steps for Making Brown Butter Salted Caramel Slice

    • Brown the butter. I'm going to get you to brown two just one large quantity here, which will be used in both the shortbread base and also in the caramel topping.
    • Make the Shortbread Base - A toasty brown butter shortbread base is made and baked off until golden, then left to cool completely until it is ready for the caramel.
    • Make the Caramel Layer - The Brown Butter Salted Caramel is a favourite of mine. It's such a simple twist on the classic that makes a huge difference in flavour. It all comes together in a pot - a candy thermometer is super helpful here, and then is poured over the shortbread base and left to set.
    • Finish with Chocolate - Caramel slice usually has a thin layer of chocolate on the top, which gives it a beautiful finish. I like adding a little neutral oil to help it set super flat. This time I also went for the classic feathered top, which is a signature bakery finish!
    • Cut up and serve - Use a super sharp knife to cut your salted caramel slice up. This stores for about two weeks in the fridge. Enjoy!

    I know that making brown butter can be intimidating. Don't be scared, I will hold your hand the whole way through in my post and you'll be nailing it in no time: Brown Butter 101: The Ultimate Guide

    DSC01352.jpg

    A few wee tips for Brown Butter Salted Caramel Slice:

    • I am going to get you to brown all of the butter at once, so that you don’t have to do the process twice. You want to brown it and then place into a bowl or container and chill it down until it is a spreadable texture - either you can do this in the freezer, stirring often, or if you are making it ahead, just pop it in the fridge then bring out and let it come to a spreadable texture when you are ready to bake.
    • You will notice that the quantity of butter needed is more than the quantity of brown butter that I call for in the recipe. When you cook brown butter, it loses volume from cooking out the water during the browning process, so the initial quantity of butter reflects the amount lost during the browning. I added just a touch more as a buffer so you’re not caught short!
    • The brown butter for the caramel filling can be fridge solid and you can just plop it in - it will get melted so don’t worry about bringing that to room temp!
    • I used golden syrup in the filling, but honey or corn syrup will work well too!
    • The caramel needs to set for an hour and a half or two hours - I like to assemble it all and then set it overnight or for at least 3 hours just to make sure that it is all set.
    • If you don’t want to brown the butter you can use the same amounts of unsalted butter.
    • Adjust the salt content to what works for you!
    • I like to use little bulldog clips to hold my parchment to my pan edges. If you get the unpainted ones they are fine to go in the oven.
    DSC01263.jpg

    ❤️ Made this recipe and love it? ❤️

    I would LOVE for you to leave me a review and star rating below to let me know how you liked it! Also, please make sure to tag me on Instagram!

    Answers to your baking questions

    Over the years, many of you have asked me questions about:

    • baking in grams
    • adjusting oven temperatures
    • what kind of salt to use
    • and many more!

    I've curated and answered them all for your easy reference in this frequently asked questions post!

    Filed Under: Bars and Slices, Holiday Cookies, New Zealand Recipes

    Roasted Apple, Crystallised Ginger, and Sultana Hot Cross Buns with Salted Caramel Crosses

    Roasted Apple, Crystallised Ginger, and Sultana Hot Cross Buns with Salted Caramel Crosses. Soft buns are filled with roasted apple and sultana, and are finished with a salted caramel cross.

    DSC01637.jpg
    DSC01603.jpg
    DSC01553.jpg
    DSC01596.jpg
    DSC01599.jpg
    DSC01644.jpg
    DSC01646.jpg
    DSC01659.jpg
    DSC01665.jpg

    Hello! happy whatever day this is! I made these yesterday and wanted to pop up the recipe - I already have two hot cross bun recipes on my site, this chocolate cardamom one and this more traditional one from last year, and you all seem to be baking up a storm with them, but I wanted to also add in another version. This roasted apple, ginger and sultana bun is finished in the standard method with a pastry cream cross, but this time I made the pastry cream as a salted caramel version, which worked incredibly well with the fruit.

    The process of all my buns is the same really - you make a dough, fill it with goodies, shape into buns and then rise and score, then bake off so that the cross you have scored on top opens up, making the perfect trench to pipe in pastry cream. You can absolutely make these with a more traditional cross, but I love pastry cream more than most things in life, so it really does make sense to get as much goodness into these as you can. I absolutely won’t be going back to a traditional cross now that I know just how good these are!

    I switched up the spices a little for these buns, making them a little more ginger forward, and then added in some apple, which I roasted with some cinnamon and sugar before hand just to add more flavour and help dry out the apple a little so that it wouldn’t make the buns soggy when they baked. I then added in some chopped up crystallised ginger (which I love so much and should use more), and then some sultanas. The combination was really nice, but feel free to leave out either the sultanas or the ginger (or the apple even) if you don’t have them or don’t like them, just sub in some more fruit.

    Also, Mix and match these! I have a custard cross and a 'traditional’ fruit bun here, and a chocolate one here, you can mix and match the crosses. Chocolate bun with salted caramel cross!?! Happy bunning! xx

    A few wee tips:

    • I made these buns into 20 - arranged 4 across and 5 down. If you would like them slightly larger, follow shaping instructions for the dark chocolate cardamom buns.

    • I like to make the pastry cream while the dough is doing its first rise, then place it into a piping bag with a clip both above the tip and above the pastry cream, then cool it directly in the piping bag which helps to prevent a skin from forming

    • I did these all in one day, but the first rise can absolutely be done overnight in the fridge if you wanted to have them first thing in the morning - the second rise post shaping may take a little longer.

    • The dough for these will seem a little softer than you are used to - I jammed a whole lot of milk and butter into them, which makes for the most lush, soft bun. Just trust me on this one - it makes it easy to roll them too!

    • I kneaded the fruit in by hand toward the end. It will feel really weird and wet squishy to start off with, but just keep kneading and incorporating - you can add a teeny bit of flour to the surface if you need, but it will all eventually incorporate. I like to pat the dough into a rectangle, scatter the fruit over the top, then kind of fold it up into a package and start kneading from there.

    • Mix and match these! I have a custard cross and a 'traditional’ fruit bun here, and a chocolate one here, you can mix and match the crosses. Chocolate bun with salted caramel cross!?!

    • If you have leftover pastry cream, use it in place of butter! It is so epic spread onto the buns.

    • Also you can mix and match your fruit. If you don’t want to add ginger, add more sultanas, or more apple etc. Just make it up - the dough is super forgiving and so can take it.

    • When you are rounding these off, the dough has a tendency to spit all the fruit out to the edges. I found that lightly flouring my surface when I was rounding the dough balls meant that you ended up with dough on the outside and most of the fruit on the inside.

    • I listed the apple ingredients first, and then the other ingredients. You will want to roast your apple ahead of time to give it time to cool. Same with the pastry cream - I either make it before I start working on the dough, or as it is mixing just to give it time to cool enough. I chill it directly in the bag with a clip above the tip and also at the top of the bag.

    ❤️ Made this recipe and love it? ❤️

    I would LOVE for you to leave me a review and star rating below to let me know how you liked it! Also, please make sure to tag me on Instagram!

    Answers to your baking questions

    Over the years, many of you have asked me questions about:

    • baking in grams
    • adjusting oven temperatures
    • what kind of salt to use
    • and many more!

    I've curated and answered them all for your easy reference in this frequently asked questions post!

    Filed Under: Buns and Rolls

    Brown Butter Chouquettes

    Brown Butter Chouquettes. Chouquettes are little choux pastry bites, piped into rounds and finished with pearl sugar before being baked to golden perfection. Choux is easy to make and is easy to freeze, making these the perfect treat. Brown butter choux has a delicious depth of flavour and is a perfect easy twist on a classic.

    Brown Butter Chouquettes. Chouquettes are little choux pastry bites, piped into rounds and finished with pearl sugar before being baked to golden perfection. Choux is easy to make and is easy to freeze, making these the perfect treat. Brown butter choux has a delicious depth of flavour and is a perfect easy twist on a classic.
    Brown Butter Chouquettes. Chouquettes are little choux pastry bites, piped into rounds and finished with pearl sugar before being baked to golden perfection. Choux is easy to make and is easy to freeze, making these the perfect treat. Brown butter choux has a delicious depth of flavour and is a perfect easy twist on a classic.
    Brown Butter Chouquettes. Chouquettes are little choux pastry bites, piped into rounds and finished with pearl sugar before being baked to golden perfection. Choux is easy to make and is easy to freeze, making these the perfect treat. Brown butter choux has a delicious depth of flavour and is a perfect easy twist on a classic.
    Brown Butter Chouquettes. Chouquettes are little choux pastry bites, piped into rounds and finished with pearl sugar before being baked to golden perfection. Choux is easy to make and is easy to freeze, making these the perfect treat. Brown butter choux has a delicious depth of flavour and is a perfect easy twist on a classic.
    Brown Butter Chouquettes. Chouquettes are little choux pastry bites, piped into rounds and finished with pearl sugar before being baked to golden perfection. Choux is easy to make and is easy to freeze, making these the perfect treat. Brown butter choux has a delicious depth of flavour and is a perfect easy twist on a classic.
    Brown Butter Chouquettes. Chouquettes are little choux pastry bites, piped into rounds and finished with pearl sugar before being baked to golden perfection. Choux is easy to make and is easy to freeze, making these the perfect treat. Brown butter choux has a delicious depth of flavour and is a perfect easy twist on a classic.
    Brown Butter Chouquettes. Chouquettes are little choux pastry bites, piped into rounds and finished with pearl sugar before being baked to golden perfection. Choux is easy to make and is easy to freeze, making these the perfect treat. Brown butter choux has a delicious depth of flavour and is a perfect easy twist on a classic.

    Hi! Happy Sunday! I hope you are doing well. Things are ok here - this week was a bit of a weird one but I am so grateful for everything.

    I made a wee batch of chouquettes this week as a little treat for Rich. He ate about 12 million of them while we were in Paris, so every now and then I make them again and then am amazed at the speed at which he can eat them. If you haven’t had chouquettes before they are basically little choux bites - blobs of choux dough piped out and then aggressively sprinkled with Swedish pearl sugar before being baked up into crispy crunchy little bites. The sugar caramelises a little giving them the most delicious crunch and sweetness. They are super easy to make, and I often make a couple if I am also making choux au craquelin - they are exactly the same thing, just finished with pearl sugar instead of the craquelin top.

    I was testing a bunch of recipes last week using brown butter, which I made a big batch of, so I had a lot of extra on hand and decided to pop it into some choux dough to see if it would work. Spoiler alert - it did, although the flavour was pretty subtle by the time it got diluted by the egg in the mixture. They were super good though, so I wanted to include some instructions incase you wanted to try a brown butter twist too! Enjoy! xx

    A few wee tips:

    • I’ve included enough brown butter here to use in the choux - you usually need 1.3 times the amount of brown butter for your starting butter quantity. If by chance you don’t have enough after browning, just top it up with some normal butter.

    • If you don’t want to brown the butter then just skip the browning step and use regular unsalted butter - straight from the fridge is fine.

    • In the ingredients, I have added in a ‘just in case’ egg. Sometimes when you are making choux dough you will need to add an extra egg to the mixture in order to get it to the right consistency - you want it to form a ‘v’ that eventually breaks off when you lift the paddle from the mixture. If it is not wet enough (ie you need to add more egg), you won’t get that nice v shape and the dough will be stiff and break off easily. I usually start with the 240g called for in the recipe, test it, then add the extra beaten egg if needed.

    • The swedish sugar is great because it doesn’t melt. You could try sprinkling these with other things such as coconut. It’s a really fun kitchen ingredient to have on hand though!

    • Mine were kind of chunky at 1 ¼” diameter. You can do them smaller if you would like - just watch the bake time!

    • I do these all at once in my oven but you can do them one tray at a time - you can pipe them all out and leave the second tray to sit at room temp while you bake off the first.

    • These would be great with a savoury topping - there is very little sugar in the choux so you can top these with whatever you like - everything bagel seasoning!?! (I’ve been putting that on everything lately). You could easily do one tray savoury and one sweet, just varying the sprinkles!

    • These freeze really well - just pop them into an airtight container or ziplock and freeze, then thaw at room temp before eating. If you aren’t eating them all in one day, freeze the remainder to help keep them fresh.

    • The chouquettes bake up nice and hollow, so if you wanted to fill them then you could!

    ❤️ Made this recipe and love it? ❤️

    I would LOVE for you to leave me a review and star rating below to let me know how you liked it! Also, please make sure to tag me on Instagram!

    Answers to your baking questions

    Over the years, many of you have asked me questions about:

    • baking in grams
    • adjusting oven temperatures
    • what kind of salt to use
    • and many more!

    I've curated and answered them all for your easy reference in this frequently asked questions post!

    Filed Under: Choux

    Tomato and Ricotta Pesto Pull-apart Buns

    Tomato and Ricotta Pesto pull-apart buns. This easy bread dough has no eggs and no butter, making it the perfect easy dough. It is rolled out and filled with a tomato and ricotta pesto mixture and parmesan cheese, then rolled up and cut into buns and baked into perfect pull apart buns. These buns are great alongside a soup or as a delicious easy snack.

    Tomato and Ricotta Pesto pull-apart buns. This easy bread dough has no eggs and no butter, making it the perfect easy dough. It is rolled out and filled with a tomato and ricotta pesto mixture and parmesan cheese, then rolled up and cut into buns and baked into perfect pull apart buns. These buns are great alongside a soup or as a delicious easy snack.
    Tomato and Ricotta Pesto pull-apart buns. This easy bread dough has no eggs and no butter, making it the perfect easy dough. It is rolled out and filled with a tomato and ricotta pesto mixture and parmesan cheese, then rolled up and cut into buns and baked into perfect pull apart buns. These buns are great alongside a soup or as a delicious easy snack.
    Tomato and Ricotta Pesto pull-apart buns. This easy bread dough has no eggs and no butter, making it the perfect easy dough. It is rolled out and filled with a tomato and ricotta pesto mixture and parmesan cheese, then rolled up and cut into buns and baked into perfect pull apart buns. These buns are great alongside a soup or as a delicious easy snack.
    Tomato and Ricotta Pesto pull-apart buns. This easy bread dough has no eggs and no butter, making it the perfect easy dough. It is rolled out and filled with a tomato and ricotta pesto mixture and parmesan cheese, then rolled up and cut into buns and baked into perfect pull apart buns. These buns are great alongside a soup or as a delicious easy snack.
    Tomato and Ricotta Pesto pull-apart buns. This easy bread dough has no eggs and no butter, making it the perfect easy dough. It is rolled out and filled with a tomato and ricotta pesto mixture and parmesan cheese, then rolled up and cut into buns and baked into perfect pull apart buns. These buns are great alongside a soup or as a delicious easy snack.

    Happy Sunday! I hope things are nicer where you are than where they are here - things are a bit gross and grey, but I have a big pot of soup on the stove which I am going to serve with these Tomato and Ricotta Pesto pull-apart buns!

    I have a bunch of bun / roll recipes on this site, and for the most part, they use my brioche bun dough as a base. The brioche is great, but because it is an enriched dough and requires the butter to be incorporated in when it is room temperature, it is a little harder to make by hand, and uses more ingredients than your standard bread. I know that butter and eggs can be a little harder to find in the supermarket at the moment, so I wanted to develop a bread base that doesn’t use either and can be made - instead it relies on milk and olive oil for softness, and can be made much more easily by hand. I also scaled down my regular recipe a bit - this makes 12 petite rolls instead of 12 large mamas, although you can roll it however you like!

    This would work well as a basic dough for a whole bunch of things. I turned it into some super simple pull-apart buns which I filled with a tomato ricotta pesto and some parmesan cheese. We’ve eaten these a bunch this week while I was recipe testing the dough base, and they are great as is, or also work perfectly as an accompaniment to a meal.

    A few wee tips:

    • This makes about 12 rolls. I used a small-ish skillet because I really wanted to shoot in it, then added the extra ones into a little pie pan and baked them off separately. These would work great spaced out in a 10” skillet, or you could do them in two smaller round cake pans.

    • Fill these with whatever you like!

    • I used Olive oil in the dough, because I love the flavour, but feel free to use a neutral oil, particularly if you are going a sweet direction with these.
    • You can either rise the dough at room temp, or do a fridge rise for 3 hours or up to overnight!

    • If you want to make a few bigger rolls, roll the dough to a width of 16” - you will probably get 8 or 9 from this.
    • You can do the dough by hand if you like - you will need to knead it for about 10 minutes until it is soft and smooth.

    ❤️ Made this recipe and love it? ❤️

    I would LOVE for you to leave me a review and star rating below to let me know how you liked it! Also, please make sure to tag me on Instagram!

    Answers to your baking questions

    Over the years, many of you have asked me questions about:

    • baking in grams
    • adjusting oven temperatures
    • what kind of salt to use
    • and many more!

    I've curated and answered them all for your easy reference in this frequently asked questions post!

    Filed Under: Savoury Breads

    Banana Layer Cake with Salted Caramel Filling and Peanut Butter Swiss Meringue Buttercream

    Layers of moist banana cake are stacked with a smooth, creamy salted caramel and a peanut butter Swiss meringue buttercream. The cake is finished off with buttercream stripes for a classic bakery look!

    DSC09840.jpg
    DSC09876.jpg
    DSC09843.jpg
    DSC09910.jpg
    DSC09925.jpg

    Hi! Happy Saturday! I hope you are keeping well and safe. I wanted to pop on here and share a recipe I made a few weeks back - this banana layer cake with a salted caramel filling and a peanut butter Swiss meringue buttercream. I have made this flavour combination a bunch of times before but just never for the internet. The most recent time was for my friends Rosie and Luke’s wedding back in NZ when we were home, where I did a whole cake table with 6 cakes rather than a traditional tiered cake. The concept worked out so well - we were able to do a whole bunch of different flavours, and I didn’t have the stress of worrying about stacking a cake. They were all a huge hit, and I had some requests to share the banana cake with you, so here we are! I paired it with a salted caramel filling and a vanilla bean Swiss meringue buttercream for the wedding, but today I went a little rogue and went with a peanut butter Swiss meringue buttercream instead, and finished it with some stripes for a super cute, slightly retro finish.

    The cake is one I think most New Zealand kids grew up on - a take on the classic from Edmond’s cookbook (which is the baking bible of NZ). We typically pair it with what we call “shitty chocolate buttercream”, which isn’t shitty at all, but just the one that we grew up on, which is a mixture of powdered sugar, cocoa powder, a teeny bit of butter, and some boiling water. It’s a childhood classic, and is Richard’s fave to this day - on more than one occasion he’s scraped buttercream I’ve made off a cake to replace it with the shitty chocolate one. It’s pretty damn yum, although I really don’t think you can beat this banana, salted caramel and peanut butter combo. xx

    A few wee tips:

    • I made this a few weeks ago before we went into lockdown so shared it with a lot of friends. If you were looking for smaller quantities you could halve the banana cake recipe and bake it in 6” pans instead for a smaller cake!

    • Swiss Meringue buttercream freezes super well - just make sure that you rewhip nicely when you have defrosted it. I like making the full amount of buttercream even if I am halving the cake recipe because it is a great thing to have in the freezer.

    • This buttercream is a little looser than some because of the peanut butter, but will firm up nicely in the fridge. It still worked great for stacking the cake!

    • Salted Caramel keeps in the fridge for at least a few weeks, and in the freezer for much longer. I love stirring it into coffee.

    • Here is a little tip for you when it comes to dividing up batter - weigh your mixing bowl and note down the weight! If you know how much your bowl weighs then you can weigh the whole bowl, full of batter, and then subtract the weight of the bowl from the total weight.

    • I made the stripes with an icing comb! It looks super fancy but it’s not too tricky to do. You just have to make sure that your initial coating of icing is nice and thick, and that you freeze the cake down well after carving out the ridges. This means that when you add the accent colour, it is super easy to smooth down because you are working with a frozen cake. Don’t be afraid to fill the ridges right up with the accent colour! I didn’t put quite enough buttercream aside when I did it and it was a major error.

    • Mix and match this cake with any of the buttercreams here on the site - there’s so many!

    ❤️ Made this recipe and love it? ❤️

    I would LOVE for you to leave me a review and star rating below to let me know how you liked it! Also, please make sure to tag me on Instagram!

    Answers to your baking questions

    Over the years, many of you have asked me questions about:

    • baking in grams
    • adjusting oven temperatures
    • what kind of salt to use
    • and many more!

    I've curated and answered them all for your easy reference in this frequently asked questions post!

    Filed Under: Layer Cakes, New Zealand Recipes

    No-Bake Nanaimo Bars

    Homemade Nanaimo Bars have a chocolate graham cracker crust, an easy custard Nanaimo Bar filling, and a smooth chocolate topping. They are the perfect no-bake recipe!

    No-Bake Nanaimo Bars - a graham cracker and coconut base is topped with a smooth custard American buttercream and finished off with a super smooth layer of dark chocolate. These are a classic bar, and this no-bake version is so so easy to make!

    Hi hi! Just popping in to share this easy Nanaimo Bar recipe with you. I love making bar and slice recipes, and these Nanaimo Bars fit the bill - they have a chocolate graham cracker crust, a custard buttercream filling, and a smooth chocolate topping.

    These no-bake Nanaimo bars are super similar to the New Zealand classic the peppermint slice. I love the custard filling paired with the chocolate topping - I have used the same Nanaimo Bar filling in my Squiggle Slice recipe.

    No-Bake Nanaimo Bars - a graham cracker and coconut base is topped with a smooth custard American buttercream and finished off with a super smooth layer of dark chocolate. These are a classic bar, and this no-bake version is so so easy to make!

    How to make Nanaimo Bars

    Nanaimo bars are named after a wee town on Vancouver Island in British Columbia, Canada, which happens to be super close to Port Alberni, where I have family! These are a no bake Nanaimo Bar, so have a base made from graham cracker crumbs and coconut rather than a baked base containing eggs. Here's how to make them:

    • Make the base. This is a super easy crumb crust - combine all the ingredients, and add the butter and mix until it forms a wet sand consistency. Pat down firmly into the pan and place into the freezer to firm up while you make the filling.
    • Make the middle layer: The filling for a Nanaimo Bar is basically just a custard flavoured American buttercream. Whip it up until smooth, then spread over the chilled base and chill again to firm up the custard layer.
    • Add the chocolate layer. Melt chocolate with the neutral oil - either in the microwave or over a double boiler. The oil in the chocolate gives it a nice shiny finish that also means that it is nice and easy to cut. Pour over the filling to form the top layer, then chill in the refrigerator until fully set.
    • Cut and enjoy! I like to use a super sharp knife to cut my Nanaimo Bars - I don't usually heat it up as I find that it makes the chocolate run, but you can if you like.
    No-Bake Nanaimo Bars - a graham cracker and coconut base is topped with a smooth custard American buttercream and finished off with a super smooth layer of dark chocolate. These are a classic bar, and this no-bake version is so so easy to make!

    What is Custard Powder?

    Custard powder is a powder made up of thickeners and flavourings, primarily corn starch (cornflour for those outside the US). It can be used to make instant custard, but it is also used to flavour this Nanaimo Bar recipe.

    There isn't really a substitute for custard powder in a Nanaimo bar as it is what gives it the main flavour. You could leave it out if you just wanted a vanilla icing filling, but I highly recommend picking some up. If you are looking for other ways to use it (it keeps super well), I also use it in my squiggle slice recipe, my rhubarb custard buns recipe, and my Chelsea Buns recipe.

    No-Bake Nanaimo Bars - a graham cracker and coconut base is topped with a smooth custard American buttercream and finished off with a super smooth layer of dark chocolate. These are a classic bar, and this no-bake version is so so easy to make!

    Tips and tricks for making Nanaimo Bars

    • I like to really let these chill down before cutting them to ensure that they are nice and chilled and easy to cut. 2-3 hours in the fridge if you can manage it is great.
    • A super sharp knife will be your friend when cutting the Nanaimo Bars.
    • Store your Nanaimo Bars in the fridge in an airtight container for up to a week.
    • You can get custard powder online, or it can be found in some supermarkets.
    • If you are having issues getting your buttercream to a thick, smooth consistency, add 1-2 tablespoon cream to get it right. Add a little at a time and then beat to incorporate.
    • If you cannot find graham cracker crumbs you can use a similar biscuit or cookie crumb - a digestive biscuit works well. You may need to adjust the quantity of the butter in the base layer - you want it to be like wet sand.
    No-Bake Nanaimo Bars - a graham cracker and coconut base is topped with a smooth custard American buttercream and finished off with a super smooth layer of dark chocolate. These are a classic bar, and this no-bake version is so so easy to make!

    For more bar and slice recipes, check out:

    • cheesecake brownies on wax paper
      Cheesecake Brownies
    • rice bubble slice on pan with parchment paper
      Rice Bubble Slice
    • top down shot of brownie caramel slice
      Caramel Brownie Bars
    • Slice of ginger crunch
      Oaty Ginger Crunch

    ❤️ Made this recipe and love it? ❤️

    I would LOVE for you to leave me a review and star rating below to let me know how you liked it! Also, please make sure to tag me on Instagram!

    Answers to your baking questions

    Over the years, many of you have asked me questions about:

    • baking in grams
    • adjusting oven temperatures
    • what kind of salt to use
    • and many more!

    I've curated and answered them all for your easy reference in this frequently asked questions post!

    Filed Under: No-bake Bars

    Baked Cream Buns with Jam

    Cream Buns with Vanilla Bean Whipped Cream and Raspberry Jam. A baked version of the New Zealand Classic Bakery jam doughnut. A fluffy soft brioche bun is filled with piped sweetened whipped cream and raspberry jam.

    Cream Bun with Jam

    Table of contents

    • Baked Cream Buns with Vanilla Bean Whipped Cream
    • Jam Cream Buns - A New Zealand Bakery Classic
    • A few wee tips for making Baked Cream Buns
    • For more New Zealand Recipes, check out:

    Baked Cream Buns with Vanilla Bean Whipped Cream

    Hello! I hope you are keeping safe and healthy, and staying home if you can. Things are so weird and scary at the moment for everyone. It’s an extra weird time to be living in a country that you are not a citizen of, and it’s very strange knowing that I don’t have the backup option of hopping on a plane and going home to my family like I usually do. I have been coping the best way that I know how - with lots and lots of baking.

    I made these Baked Cream Buns a wee bit ago, inspired by my trip back home. New Zealand has some amazing bakery classics - custard square, raspberry buns, and cream buns, which are usually in a doughnut form, filled with mock cream (which is basically a buttercream), and then dolloped with jam. I wanted to see if I could develop a baked version, and these come pretty damn close to the real deal.

    cream bun with jam filling

    Jam Cream Buns - A New Zealand Bakery Classic

    Doughnuts are great, but they do have one downside - you have to eat them on the same day that you make them, or things get super weird. The sugar on the outside makes them soggy, and they lose that beautiful crisp exterior from the frying and just don’t taste great. So while I love making them so, so much, we do get a little overwhelmed with them when I make them, so I wanted to develop a recipe for cream buns where the bun itself could be used for a few different things.

    And ohhh man, these cream buns are good. I made a super super soft brioche dough, which I shaped into buns, brushed with egg wash and baked up into golden brown buns that kinda resemble potatoes, but in a good way. The bun itself can be used for a whole bunch of things (see notes) - we are having hot dogs in them tonight, but I gave these ones the cream bun treatment, and split them down the middle, dusted them aggressively with powdered sugar, and then filled them with a sweetened vanilla bean cream and some dollops of raspberry jam. The combination of soft and fluffy brioche bun, sweet vanilla cream and jam is so, so good. I hope you give these cream buns a go - they sure give a bakery cream bun a run for its money! x

    cream bun ready to be filled

    A few wee tips for making Baked Cream Buns

    • I prefer, for shaping purposes, to work with cold dough for these rolls. I find that they come out a bit neater. You can either do your rise overnight, or I have been playing around with a cold same day rise recently. Putting the dough in the fridge just slows things down a bit in terms of rising. Also, because this dough has butter in it too, it firms it up which can be helpful for rolling out and shaping.
    • I have found 2 hours rise time in the fridge seems to be the minimum time that works. keep an eye on it, you need it to double in size. The cold rise is preferable because it means I can be a little more flexible with things in terms of timing. If I have to leave it for a few hours then I’m not worrying about over proofed dough etc. I often make the dough early in the morning. Then, I can pull it from the fridge when I’m ready to work with. You get the benefit of cold dough but don’t have to wait overnight.
    • So there are three options now! Overnight in the fridge, same day but in the fridge, and a room temp rise. All of them work, but I do like working with cold dough a little more. I find that it is easier to shape.
    • The recipe for the brioche makes 12 buns. The good thing about these is that they can be used for all kinds of things. I use the dough for hot dog buns, slider buns, etc etc. Rich eats them with just jam for what he calls ‘lunch dessert’. You can shape some into rounds too and use as burger buns - do whatever you like! My one recommendation is that you skip the vanilla in the dough if you want to use some for savoury. Just do extra in the cream!
    • The buns freeze well too if you want to save some for another time. Just let them thaw and then freshen by quickly microwaving.
    • I used raspberry jam for these, but anything you have on hand will work great.
    • These are best served soon after you pipe in the cream. If you aren’t planning to eat them all in one day, keep the components separate and assemble as needed! Keep the rolls in an airtight container.
    • If you don’t have a stand mixer for the brioche you can do it by hand but it will need some elbow grease. Put the butter in at the beginning with the rest of the ingredients and then mix from there. It will be a workout but so worth it!
    • I baked two trays at once in my oven, switching half way through. If you like, you can do one at a time - I place the second tray into the fridge about 10 minutes before I start baking the first to let it finish off rising in the fridge so it doesn’t over proof at room temp.
    • When you are whipping cream to pipe, stop the mixer before it gets to stiff peaks and finish by hand. You only want medium stiff peaks so that it doesn’t get gritty and pipes nicely.
    • I filled these ‘bakery style’ with fancy looking piping. If you want to just fill with cream either with a spoon or just with a plain round piping tip that works great too! You do you here.
    side on cream bun shot
    new zealand jam and cream bun

    For more New Zealand Recipes, check out:

    • Hundreds and Thousands Biscuits
    • No Bake Peppermint Slice
    • Brown Butter Anzac Biscuits

    ❤️ Made this recipe and love it? ❤️

    I would LOVE for you to leave me a review and star rating below to let me know how you liked it! Also, please make sure to tag me on Instagram!

    Answers to your baking questions

    Over the years, many of you have asked me questions about:

    • baking in grams
    • adjusting oven temperatures
    • what kind of salt to use
    • and many more!

    I've curated and answered them all for your easy reference in this frequently asked questions post!

    Filed Under: Brioche, Buns and Rolls, New Zealand Recipes

    Perfect Pink French Macarons with Strawberry Filling

    filled pink macarons with sprinkles and pink buttercream.

    Strawberry macarons, made at home! Yes. you. can. With a bit of practice — and
    my kitchen-tested tips and tricks — this recipe proves you can make French
    macarons successfully at home in your own kitchen! This post includes step-by-
    step instructions for making the delicate vanilla bean French macarons shells,
    and strawberry buttercream filling too!

    macarons with sprinkles
    Pink macarons on paper with a dish of sprinkles

    Vanilla French Macarons with Strawberry Buttercream

    Hi! Happy first day of spring! - Bake from Scratch magazine has teamed up with Bob’s Red Mill to create the 2020 Better Baking Academy and I am so excited to team up with them for this month’s module all about how to make French Macarons.  Each month they release a new recipe - so far there has been a super versatile bread dough and some amazing looking brownies, and this month’s focus is on macarons, which is something I spend a lot of time making!

    Macarons and I go way back to before I even started this blog and was just baking at home for fun. I had gotten a stand mixer for Christmas and was slowly working my way through a whole bunch of recipes I had gathered, but hadn’t gotten around to making macarons. I think I tried once, they didn’t go well for me (because I had no idea what I was doing), and I put them into the ‘too hard’ basket and moved on with my life.

    A few years later after I had been baking for a while I decided that the time had come to master them, and set out to perfect my technique for making French macarons. They can be a little fiddly, but once you identify the potential sticking points and things to watch out for, I am confident that everyone can master these delicious chewy wee cookies, and the flavour combinations are endless! Bake from Scratch covers everything super thoroughly in their baking modules, and I have added a couple of my own little tips and tricks down below to help you out too. Enjoy these Vanilla Bean French Macarons. I filled mine with a super easy strawberry macaron filling made with American buttercream and strawberry jam, which gives a super delicious strawberry flavor, however you can add any filling you like.

    pink macaron shells on a sheet pan with pink buttercream

    Strawberry Macaron Recipe

    I started with Bake From Scratch’s base vanilla bean macaron recipe and added pink food colouring and some pink sprinkles to put a pink spring flair on it. I paired it with their strawberry buttercream, which is super easy and made with strawberry preserves. The buttercream comes together quickly and compliments the delicate shells perfectly. Feel free to customise these any way you like - you can make them any colour that you please, add sprinkles, and play around with the filling to give you some different colour combinations. These Vanilla Bean french macarons are super versatile, and so fun to make.

    bag of almond flour

    The Best Almond Flour for Macarons

    There are a whole bunch of different French macaron recipes out there (different ratios of almond flour to sugar to egg whites etc). However, the most important thing is that you have the right technique. There are a few different skills needed, which I have outlined below. While French macarons require a lot of technique, they do have a relatively small ingredient list. This means it is really important that you use high quality ingredients, particularly when it comes to the almond flour in the macaron. Almond flour provides structure, texture, and flavour to these Vanilla Bean French Macarons.

    I have used Bob’s Red Mill Super-Fine Almond Flour in my macarons for a few years now, and I love how even it is, and how easy to sift it is. It gives a super smooth batter with no lumps due to the smaller particle size, and provides a beautiful fluffy texture on the inside of the macaron. Starting with great quality ingredients sets you up for success when baking macarons.

    angle shot of macarons on a sheet pan with sprinkles

    Things to watch out for when making Macarons

    1. The consistency of your almond flour and powdered sugar mixture. You want it to be well sifted and combined before you add it to the mixture. You can either do this in a food processor, or I like to sift the mixture at least twice. This ensures that it is evenly mixed and is lump free. Bob’s Red Mill Superfine Almond Flour is great for this because the particles are very small, which makes it super easy to get a lump-free dry mixture.
    2. The consistency of your meringue. You want your meringue stiff enough that it will provide you stability, but you don’t want to beat it so far that it dries out, which can make it lumpy and lead to hollow shells. Get it to very near stiff peaks, then watch it carefully as you whip, checking the consistency often.
    3. Mixing, or Macaronnage. This is the action of incorporating the dry ingredients into the meringue. You want to be deflating some of the air out of the batter while you are mixing in the dry ingredients. To mix you do a series of ‘turns’ - spreading the batter against the side of the bowl using your spatula. You want to reach a point where the mixture flows, but not so much that the macarons will not hold their shape as they are held out. I like to check it every few turns. A good measure is that you can draw a figure of 8 in the batter without the flow of batter breaking off your spatula. Remember that your batter will continue to mix as you pipe out the macaron shells. You are better to under mix it at this stage than to over mix it.
    4. Piping. You want to hold the piping bag straight up and down, and apply even pressure until your batter fills the inside of the drawn template.
    5. Pan Banging. The purpose of banging the pans is to evenly flatten out your shells. This also releases any bubbles that may have formed in the shells while you are piping them out. Banging the pan on the counter pops the bubbles, which helps your macarons have nice smooth tops.
    6. Drying. The drying stage of the macaron forms a ‘skin’ on the shell. This means that when you put them into the oven to bake, the skin stays intact and the macaron shell does not crack. Instead it develops the little ruffle at the bottom of the shell which is called the foot.
    7. Baking. You want to bake the shell without browning, so it is important to bake it at a relatively low temperature.

    If you find your shells are sticking to the parchment paper when you remove the macarons from the oven even though they are baked, transfer the pan to the freezer for 10-15 minutes. This should help the shells release cleanly.

    close up image of pink macaron shells with strawberry filling

    Tips and Tricks for French Macarons

    • Please make these Vanilla Bean French Macarons by weight. There are so many little steps already with them that you want to be as accurate as possible. I always measure salt, extracts etc with a teaspoon, but for the sugars, almond flour etc, weigh it. You don’t have to if you don’t want to, but this is your warning. Scales are great, and very helpful, but PARTICULARLY when it comes to things that rely on accuracy such as macarons.
    • I always use gel food coloring when making macarons and add it in at the meringue stage. Remember that the mixture will lighten when you add the dry ingredients. Take this into consideration when you are choosing how much to add.
    • Both parchment paper and silicone baking mats work for macarons - you do you. I like parchment paper, but I know others like silicone baking mats. Do whatever feels best for you!
    • If your macaron shells stick after they have cooled, pop the whole baking sheet in the freezer for 10-15 minutes. It should help them lift off cleanly.
    • I often get asked - can macarons be made ahead? They sure can. Store the unfilled shells in an airtight container in the freezer until you are ready to fill them.
    • I like to double up on my pans when I bake to help insulate the shells. Preheating the bottom pan in the oven helps to give the shells a little lift. This helps them to bake evenly.
    • I made two batches of macarons here for the photos! One has a lighter pink batter, and one with a darker pink. I just used the same gel food colour and varied the amount I used to give different shades. Add it one drop at a time until you are happy with the shade.

    To freeze macarons, place in an airtight container with a layer of parchment paper between the layers. You can either freeze them filled, or freeze the shells and then defrost and fill.

    hand holding macaron with a bite taken out of it.

    Frequently Asked Questions for French Macarons

    Can you freeze macarons filled?
    Yes, you can freeze them either filled or unfilled, depending on the filling. For these French macarons with strawberry filling, you can either freeze the unfilled shells or the filled macarons. Freeze in an airtight container and defrost at room temperature or in the fridge.Add image

    What is the best food coloring for macarons?
    Gel food coloring is best for French macarons as it does not add in any additional moisture to the shells, which can cause issues.

    How do you add sprinkles to macaron shells?
    You can add all sorts of fun things to the tops of macaron shells. Add them just after you have banged them out. If you’re adding sprinkles, the nonpareils ones work best. Sugar balls will heat up and melt through. The little confetti circles or shapes work well too.

    filled pink macarons on a sheet pan with a dish of pink sprinkles.

    This post has been sponsored by Bake from Scratch and Bob’s Red Mill, all opinions expressed are my own.

    ❤️ Made this recipe and love it? ❤️

    I would LOVE for you to leave me a review and star rating below to let me know how you liked it! Also, please make sure to tag me on Instagram!

    Answers to your baking questions

    Over the years, many of you have asked me questions about:

    • baking in grams
    • adjusting oven temperatures
    • what kind of salt to use
    • and many more!

    I've curated and answered them all for your easy reference in this frequently asked questions post!

    Recipe for Vanilla Bean French Macarons

    Filed Under: Macarons

    Peanut Brownie Cookies (Chocolate Peanut Cookies)

    A revamp on the classic New Zealand Peanut Brownie biscuit. These cookies have a chocolate base, and are filled with roasted salted peanuts and milk chocolate chunks.

    DSC09934.jpg

    Table of contents

    • Tips for perfect chocolate chip cookies
    DSC09949.jpg
    DSC09984.jpg
    DSC09983.jpg
    DSC00018.jpg
    DSC09962.jpg

    Hello! Just popping in to share this recipe. Not too sure what to say at this point - I think we are all a bit uncertain about what’s next for all of us, but I promise these cookies will help even if it’s just a tiny bit.

    This is a recipe for my take on a Peanut Brownie, which is a classic New Zealand biscuit (cookie for all of you in the states). I am unsure where the brownie part came from as these guys aren’t anything like a brownie. The original was always pretty dry and crumbly, and used those natural peanuts with the skins. They were a childhood favourite, but I realised not too long ago that they could probably do with a good revamp, so here we are. I subbed natural peanuts for roasted and salted, which turned out to be a game changer, and adjusted the matrix of the cookie so that it was a little more chewy and fudgy. I also threw some milk chocolate chunks in just for good measure, and finished it with a sprinkle of flaky sea salt. And oh man, what a glow up. These are chocolatey and delicious, soft and chewy and a tiny bit crunchy around the edges, and the peanuts and the chocolate work so well together. I hope you enjoy!

    A few wee tips:

    • Roasted salted peanuts are a game changer here. If you only have raw you can toast them in the oven at 350°f / 180°c for about 10 mins, shaking frequently, then up the salt just a touch.

    • I used milk chocolate in these but dark would work great - just whatever you have on hand.

    • I haven’t tried these with other nuts but I bet they would be so so good with walnuts or something!

    Tips for perfect chocolate chip cookies


    ❤️ Made this recipe and love it? ❤️

    I would LOVE for you to leave me a review and star rating below to let me know how you liked it! Also, please make sure to tag me on Instagram!

    Answers to your baking questions

    Over the years, many of you have asked me questions about:

    • baking in grams
    • adjusting oven temperatures
    • what kind of salt to use
    • and many more!

    I've curated and answered them all for your easy reference in this frequently asked questions post!

    Filed Under: New Zealand Recipes, Other Cookies

    Vanilla Bean and Honey Doughnuts

    Doughnuts two ways using the same brioche dough - fluffy vanilla bean and honey pastry cream stuffed doughnuts, and honey glazed brioche doughnuts.

    DSC09620.jpg
    DSC09704.jpg
    DSC09717.jpg
    DSC09717.jpg
    DSC09802.jpg
    DSC09808.jpg
    DSC09808.jpg
    DSC09777.jpg
    DSC09709.jpg

    Hi! Happy Sunday! I hope you are keeping well and staying at home wherever you can - what better way to distract ourselves from the outside world than with a big old tray of doughnuts! I have been keeping really busy at home, doing my social distancing and baking up a storm in my wee safe space - my kitchen, so you can expect to see a bunch of recipes coming your way.

    I wanted to put together a post that outlined a couple of different ways to make doughnuts - they all use the same dough, basically the same process and the same method of cooking, but are finished different ways to give you variations on a theme. This month for my post with Taste of New Zealand of New Zealand Trade and Enterprise we are working with honey and vanilla, so there are a few different honey and vanilla variations here for you!

    The honey we are using comes from Wedderspoon, who make a load of amazing manuka honey products. I used their Premium Manuka in these doughnuts - it is a super versatile honey which I have been using for everything from on toast to in baking or in a mug for a lemon honey ginger. It is raw, so you get all the amazing manuka benefits that make honey so good for you.

    The Vanilla you have probably seen before around here - it comes from Heilala, who are an incredible New Zealand owned company who make the best vanilla ever (in my opinion anyway). Heilala started as a way to help inject money back into the economy of Tonga after a big cyclone in 2002, and has blossomed into an incredible company making a super high end product. I use their paste in almost every recipe that I make. They are one of the only companies who control the production of the vanilla from the growing to the processing, and each purchase made helps to support the community back in Tonga. The vanilla itself is incredible - a lot of high end pastry chefs around the world use it. I used both their paste and their extract in these doughnuts just for a wee double dose - the vanilla and the honey really compliment each other to help the flavours shine through.

    I made two types of doughnut from the same brioche dough - the first is a filled doughnut which is made by forming the dough into a ball, then proofing it and frying it off. The fried doughnut is then rolled in sugar, and filled with a honey and vanilla pastry cream for a little twist on the classic custard filled doughnut.

    The second variation I did what I am calling a ‘holed doughnut’ - instead of rolling the dough up, you roll it out and cut doughnut shapes out of the rolled dough, then follow the same proofing and frying process. Instead of rolling in sugar I glazed them in a vanilla bean and honey glaze, which is so, so good. A fun bonus of holed doughnuts is the doughnut holes, which I just rolled in some sugar.

    I hope you give these a try - let me know which ones you like best! x

    A few wee tips:

    • If you would like to purchase vanilla, Heilala have given me a discount code - use CLOUDY20 at checkout!
    • The brioche for both doughnuts is the same, so you can even roll out half the dough and make holed doughnuts, and then roll the rest into round doughnuts if you wanted to have some of both.
    • The pastry cream recipe and also the glaze recipe halve well if you don’t want to make a full batch.
    • Alternatively if you only wanted a few doughnuts, you could roll the rest of the dough out and bake into rolls to use for something else. You do you here. The dough is super versatile.
    • I made the dough for both of these doughnuts the night before - the great thing about this brioche recipe is that it can be done both ways, making the dough the day of, or the night before and doing the first rise in the fridge overnight.
    • Some people use a doughnut cutter, but I don’t have one, so just used two circle cutters. If you don’t want to make doughnuts with holes in the middle, just skip the middle hole. The doughnut holes are great for testing the oil temp, and for a sneaky wee snack while you are frying!
    • I cut a bunch of extra doughnut holes from the scraps from the holed doughnuts and used them to make doughnut holes which I rolled in sugar after frying.
    • A thermometer is a must for frying - if the oil is too hot, the doughnuts won’t cook properly in the middle, and if it is too cold, they will absorb too much and will be greasy, so a thermometer is needed to help you get the right temperature. Make sure you check the temp of the oil and adjust before you fry each batch. I use a deep fryer, but a cast iron dutch oven works great too.
    • Do one doughnut as a quick test of your frying time before doing multiple just to make sure you have your timing right.
    • I have added a general guideline of the cream to add in the glaze for the glazed doughnuts - I find it varies a little every time, so start adding the cream a tablespoon at a time, until you have a glaze consistency you are happy with. I like to use the doughnut holes as a test!

    Thank you so much to Taste of New Zealand of New Zealand Trade and Enterprise for Sponsoring this post! All opinions are my own.

    ❤️ Made this recipe and love it? ❤️

    I would LOVE for you to leave me a review and star rating below to let me know how you liked it! Also, please make sure to tag me on Instagram!

    Answers to your baking questions

    Over the years, many of you have asked me questions about:

    • baking in grams
    • adjusting oven temperatures
    • what kind of salt to use
    • and many more!

    I've curated and answered them all for your easy reference in this frequently asked questions post!

    Filed Under: Brioche, Doughnuts

    Black Cocoa Brownie with Dark Chocolate Bailey's German Buttercream

    Dark, rich, black cocoa brownie is topped with a pastry cream based German Buttercream which is made with Bailey's and Dark Chocolate. This is the perfect St. Patrick's day brownie but is also amazing year-round.

    DSC00048.jpg
    DSC00048.jpg
    DSC00063.jpg
    DSC00073.jpg
    DSC00077.jpg
    DSC00137.jpg
    DSC00024.jpg

    Hi! Writing this from a social isolation in my home - things here have gotten a bit scary with this new virus that seems to be taking over, so we are listening to the rules and keeping our distance from things. I think things like this, while scary, are a great reminder to check in on those around you - your neighbors, friends, anyone who might be particularly vulnerable or feeling a bit alone and could do with you standing in their corner. I already work from home so the changes haven’t affected us too much, but I am super aware that there are some who aren’t as fortunate as us and who will be leaning on support in the next coming weeks. Please also consider them when you are preparing any way that you can - whether it be a donation to a food bank, or checking in on some of your friends.

    If you need a wee distraction, baking is a great option. I often turn to the kitchen as a little safe space in my home where I can forget about the outside for a while. I made these brownies last week with St Patrick’s day in mind, but they are super easy to make, incredibly delicious and last well in the fridge, so they would work great for any occasion.

    This is just a wee riff on a favourite brownie of mine - I added on a dark chocolate Bailey’s German Buttercream. The great thing with German Buttercream is that you can easily sub the milk within the pastry cream recipe for another liquid - in this case Bailey’s. If you want the alcohol to be stronger tasting, only warm it slightly before adding in to the mixture. Lots of it will boil off but some of the flavour will be retained. If you want to boil it off more, bring the Bailey’s to a boil in the pan first, leave it to boil for a minute or two, then proceed as usual. I love the combination of the dark brownie with the chocolate Bailey’s buttercream, but you can leave the chocolate out of the buttercream if you like too.

    A few wee tips:

    • Make sure your brownie is nice and cool before frosting.
    • The pastry cream for the buttercream needs time to cool, so make sure you account for that.
    • I used these sprinkles on the top!
    • Here is an oreo variation!

    ❤️ Made this recipe and love it? ❤️

    I would LOVE for you to leave me a review and star rating below to let me know how you liked it! Also, please make sure to tag me on Instagram!

    Answers to your baking questions

    Over the years, many of you have asked me questions about:

    • baking in grams
    • adjusting oven temperatures
    • what kind of salt to use
    • and many more!

    I've curated and answered them all for your easy reference in this frequently asked questions post!

    Filed Under: Brownies

    Tart Cherry Pie with Spiced Pie Crust

    Tart Cherries are cooked into a delicious filling and tucked inside a flaky, spiced pie crust. This can be made with fresh or frozen tart cherries and is perfect year-round.

    DSC07399-2.jpg
    DSC06828.jpg
    DSC07063-2.jpg
    DSC07088-2.jpg
    DSC07212-2.jpg
    DSC07360-2.jpg
    DSC07401-2.jpg
    DSC07487-2.jpg
    DSC06864.jpg
    DSC07523-2.jpg

    Hi! Pi(e) Day, which falls on the 14th March (3.14, get it?), is one of my favourite internet holidays, and I am so excited to share this pie that I have planned for it! I partnered with Montmorency Tart Cherries to bring you this recipe for Tart Cherry Pie with a Spiced Pie Crust, using frozen Montmorency tart cherries.

    Montmorency tart cherries, also known as sour cherries, are a bright red, sweet-tart cherry that not only have a whole host of nutritional benefits, but are also incredible for baking, as they are versatile and perfect for offsetting sweetness with their tart flavour and they retain their beautiful bright red colour even after baking. Montmorency tart cherries are grown in the U.S. and are available year-round in a bunch of different forms - dried, canned, juiced, concentrate and the version that we are using here, frozen! The cherries are frozen by IQF, which stands for individually quick frozen, where the fresh fruit is run through a blast freezer, which freezes it incredibly quickly, meaning that the colour and nutritional benefits are preserved (fun fact - I used to work in an IQF factory as my summer job when I was at university in NZ!).

    I kept things fairly simple, with a classic tart cherry pie, but elevated it a little by adding spices to my pie crust. This is one of my favourite tricks - you can add whatever you think would complement the fruit. A couple of seconds of extra work gives you a whole different flavour profile within the pie, which I really like for putting a twist on an old favourite. I added five spice powder to the pie crust, which is a blend of star anise, cinnamon, fennel, sichuan peppercorns and cloves. The warmth from the spices complemented the tart cherry filling perfectly.

    I often like to pre-cook the filling on the stove before making pies using fruit which has a higher water content, and this technique works particularly well for things such as the frozen Montmorency tart cherries I used in this pie. The cooking process is super simple and means that you start with a filling that isn’t going to leak everywhere and will hold up very nicely when sliced.

    I hope you pick up some Montmorency tart cherries in your freezer section and give this one a go!

    A few wee tips:

    • For the filling, frozen Montmorency Tart Cherries work great. I weighed out the quantity needed, then let them thaw at room temperature, stirring occasionally help distribute the juices.
    • Both the filling and the pie crust can be made ahead as they need time to cool / rest, which makes assembly the day that you are baking very easy.
    • I use a folding method when I am making my pie dough which makes it much easier to work with, while still retaining the flakiness of the dough. I make the dough, shape it into two rectangles, rest it in the fridge wrapped for about an hour, then remove it and roll it out into a rectangle on a lightly floured surface. I then give it a letter fold (as you would a letter), roll out to a rectangle, letter fold again, then roll out slightly, and shape into a disc. I then re-wrap it, and leave it to rest overnight. This makes the dough more homogenous without compromising the flaky texture that you want in the pie dough, and it makes it a total dream to work with. For me, it’s a game changer.
    • I like to divide the pie dough into ⅓ and ⅔ - shape the smaller one into a disc as it will be your bottom crust, and shape the top into a rectangle so it’s the right shape when it comes to cutting out lattices.
    • I cut my lattice strips using a fluted cutter, and then finished the pie using cut-outs from leftover pieces of pie dough which I pressed together and rolled out.

    Thank you so much to Montmorency Tart Cherries for Sponsoring this post! All opinons are my own.

    ❤️ Made this recipe and love it? ❤️

    I would LOVE for you to leave me a review and star rating below to let me know how you liked it! Also, please make sure to tag me on Instagram!

    Answers to your baking questions

    Over the years, many of you have asked me questions about:

    • baking in grams
    • adjusting oven temperatures
    • what kind of salt to use
    • and many more!

    I've curated and answered them all for your easy reference in this frequently asked questions post!

    Filed Under: Fruit Pies

    Black Cocoa Sugar Cookie Sandwiches with Cream Cheese Buttercream

    Black Cocoa Sugar Cookie Sandwiches with Cream Cheese Buttercream are the perfect 'grown-up oreo' treat! Soft, chewy black cocoa sugar cookies are paired with a smooth cream cheese frosting to make the perfect sugar cookie sandwich.

    Black Cocoa Sugar Cookie Sandwiches with Cream Cheese Buttercream are the perfect 'grown-up oreo' treat! Soft, chewy black cocoa sugar cookies are paired with a smooth cream cheese frosting to make the perfect sugar cookie sandwich.
    Black Cocoa Sugar Cookie Sandwiches with Cream Cheese Buttercream are the perfect 'grown-up oreo' treat! Soft, chewy black cocoa sugar cookies are paired with a smooth cream cheese frosting to make the perfect sugar cookie sandwich.
    Black Cocoa Sugar Cookie Sandwiches with Cream Cheese Buttercream are the perfect 'grown-up oreo' treat! Soft, chewy black cocoa sugar cookies are paired with a smooth cream cheese frosting to make the perfect sugar cookie sandwich.
    Black Cocoa Sugar Cookie Sandwiches with Cream Cheese Buttercream are the perfect 'grown-up oreo' treat! Soft, chewy black cocoa sugar cookies are paired with a smooth cream cheese frosting to make the perfect sugar cookie sandwich.
    Black Cocoa Sugar Cookie Sandwiches with Cream Cheese Buttercream are the perfect 'grown-up oreo' treat! Soft, chewy black cocoa sugar cookies are paired with a smooth cream cheese frosting to make the perfect sugar cookie sandwich.
    Black Cocoa Sugar Cookie Sandwiches with Cream Cheese Buttercream are the perfect 'grown-up oreo' treat! Soft, chewy black cocoa sugar cookies are paired with a smooth cream cheese frosting to make the perfect sugar cookie sandwich.
    Black Cocoa Sugar Cookie Sandwiches with Cream Cheese Buttercream are the perfect 'grown-up oreo' treat! Soft, chewy black cocoa sugar cookies are paired with a smooth cream cheese frosting to make the perfect sugar cookie sandwich.
    Black Cocoa Sugar Cookie Sandwiches with Cream Cheese Buttercream are the perfect 'grown-up oreo' treat! Soft, chewy black cocoa sugar cookies are paired with a smooth cream cheese frosting to make the perfect sugar cookie sandwich.

    Hi hi! I’m sorry that I’ve been hiding a little bit. Anxiety, jet lag and homesickness isn’t a great combination if you’re looking for a good time, it turns out! I always find coming back to NYC a little hard, but for some reason this time was extra tricky. I am so, so grateful to have something that makes coming back so hard. It’s been 6 years and I swear it gets harder each time, and I forget about how hard it is and expect to be able to throw myself full noise back into work, and get bummed out with myself each time when I remember I need to just take it easy on myself for a wee bit and say a big old NOPE to adulting for a few days, and sure enough, I popped out the other side and I am ready to party again (by partying I mean staying home and working with my cat)!

    Thankfully past me must have been able to predict this wee slump, because I have a couple of things that I shot before we left tucked away to share with you! These Black cocoa sugar cookie sandwiches with cream cheese frosting are a wee riff on a few recipes that I have shared before. This sugar cookie recipe originally came from Sarah Kieffer’s amazing book, and I have tweaked it a couple of times over the years for a few different things. It’s a basic chocolate sugar cookie, which I gave the black cocoa treatment, which gives off some serious Oreo vibes. The cookies alone are super good, and are the perfect texture - soft but also a little chewy, and they bake up perfectly flat, with a coating of sugar on the outside, which makes them ideal for sandwiching with things, in this case a cream cheese frosting. Black cocoa pairs perfectly with the cream cheese in this case - the cocoa is a little bitter and the frosting is sweet and a little bit tangy. These are kind of like a grown up oreo - and they are very, very good. I hope that you give them a try! x

    A few wee tips:

    • The cookies alone are great. You should make them and eat them.
    • The secret, I have found, to cream cheese icing that doesn’t go everywhere, is cold cream cheese. You want room temperature butter, and cold cream cheese. Don’t be scared to whip the heck out of it once you add the powdered sugar to get rid of any lumps.
    • I sandwiched these together with little blobs of frosting which I piped with a french star tip, which meant that there wasn’t toooo much frosting. You could use a round tip or pipe a circle of frosting too - just make it nice and thin so that you don’t get too much sweetness from the frosting.
    • These do soften up quite a bit once you make them so if you are preparing them ahead, I would make the cookies and frosting separately and store them, then assemble these the day you are serving. Just give the frosting a quick wee re-whip. I have two mixing bowls for this reason - I often will store something in the bowl with some plastic wrap pressed against the surface, so if it needs to be re-whipped I can just stick the whole thing back onto the mixer and whip it back up!
    • If you can’t find black cocoa, dutch cocoa will work great too! Black cocoa and dutch cocoa have been through a similar alkalising process, black cocoa has just been taken one step further and alkalised even more to make it extra dark. It’s worth tracking down if you can, but if not, dutch cocoa works perfectly here too!

    ❤️ Made this recipe and love it? ❤️

    I would LOVE for you to leave me a review and star rating below to let me know how you liked it! Also, please make sure to tag me on Instagram!

    Answers to your baking questions

    Over the years, many of you have asked me questions about:

    • baking in grams
    • adjusting oven temperatures
    • what kind of salt to use
    • and many more!

    I've curated and answered them all for your easy reference in this frequently asked questions post!

    Filed Under: Sandwich Cookies

    Carrot Cake Tea Cakes with Blood Orange Glaze and Swiss Meringue Kisses

    Moist miniature carrot cakes are finished with a blood orange glaze, and finished with crunchy, sweet, Swiss meringue kisses

    DSC08782.jpg
    DSC08816.jpg
    DSC08831.jpg
    DSC08852.jpg
    DSC08890.jpg
    DSC08858.jpg

    Hi hi! Just popping in to share this recipe for Carrot Cake Tea Cakes with you! I am calling these guys ‘tea cakes’ which sounds a little fancy, but in reality they are just tiny cakes baked in a muffin pan, then flipped upside down! I finished them off with a blood orange glaze and some Swiss Meringue kisses for a super simple but super pretty finish.

    Carrot cakes are one of my favourites - they are super easy to make, and keep well. This recipe is the perfect balance of fluffy and moist - the moisture is provided by a neutral tasting oil in the recipe. The addition of the oil removes the need for butter, which also means that carrot cake is generally dairy-free. I used a dairy-free glaze and meringue recipe, which makes this whole recipe sneakily dairy-free too!

    You can turn these into a choose your own adventure situation - the cakes alone would be amazing just baked in cupcake liners or in the muffin pans and served as little cupcakes or tea cakes, or you can finish them off with a glaze as I have here. I chose blood orange because I love the super pretty pink colour, but your favourite orange juice would work great here too.

    The meringues are a great way to finish off these wee cakes - I often have them on hand in my pantry. They keep for a super long time in an airtight container, so I like to make a whole bunch of them at once so that I have them for finishing off baking or adding a little pretty touch to something (or just eating, they are so delicious)! If you didn’t want to make the meringue kisses, a little edible flower or a wee shower of sprinkles would be so, so cute on these too! Make them your own! x

    A few wee tips:

    • Using a good non-stick muffin pan here really makes a difference. This is the one that I have. Make sure that you grease it well with baking spray, and give it a little dust of flour and tap out the excess if you are worried.
    • The recipe for the meringue kisses makes quite a lot, but they keep for a really long time in an airtight container. You are essentially drying them out rather than baking so it’s usually fine to have two trays at once on the go in the oven.
    • These can be done as a cupcake too if you like with cupcake liners.
    • These also just so happen to be dairy free!

    ❤️ Made this recipe and love it? ❤️

    I would LOVE for you to leave me a review and star rating below to let me know how you liked it! Also, please make sure to tag me on Instagram!

    Answers to your baking questions

    Over the years, many of you have asked me questions about:

    • baking in grams
    • adjusting oven temperatures
    • what kind of salt to use
    • and many more!

    I've curated and answered them all for your easy reference in this frequently asked questions post!

    Filed Under: Cupcakes and Mini Cakes Tagged With: Dairy Free

    Brown Butter Spelt Chocolate Chip Cookies

    Brown Butter Spelt Chocolate Chip Cookies - these are a variation on the classic chocolate chip cookie. Brown butter provides depth of flavour along with spelt flour. These spelt chocolate chip cookies cookies are easy to make with a short chill time and are the perfect way to start baking using alternative grains such as spelt flour.

    Brown Butter Spelt Chocolate Chip Cookies - these are a variation on the classic chocolate chip cookie. Brown butter provides depth of flavour along with spelt flour. The cookies are easy to make with a short chill time and are the perfect way to start baking using alternative grains such as spelt flour.

    Brown Butter Spelt Chocolate Chip Cookies

    Hi hi! These are a brown butter spelt chocolate chip situation, and while there are already a bunch of cookie recipes here on the site, these brown butter spelt chocolate chip cookies are a very welcome addition to my chocolate chip cookie recipe collection. These Spelt chocolate chip cookies are a riff on my salted caramel chocolate chunk cookies, if you're after a classic chocolate chip cookie recipe, check out my homemade perfect chocolate chip cookies. If you would like a slightly thin and crispy cookie, my brown butter chocolate chip cookie recipe will be your friend!

    I got a little counter top grain mill a while back and have been happily milling all kinds of things ever since. It is amazing for milling grain to add into sourdough to add a whole different depth of flavour, but I have also been sneaking the freshly milled grain into other things - I started with pie dough, adding in rye and spelt, and was amazed at the complexity that adding in a different grain adds to the flavour of the pie crust. I use fresh milled grains but there are a huge variety of alternative flours available either at your supermarket or likely at your local Farmer’s market. NYC has an amazing grain programme at their markets where I can get locally grown, super fresh grains and flours really easily. Bread baking is becoming more and more popular these days, so in turn there are all these amazing mills popping up that also sell online.

    • brown butter spelt chocolate chip cookies on a sheet pan

    How to make Cookies with Spelt Flour

    I usually sub about 30-50% of the flour called for in a recipe with an alternative grain, and for these cookies I went for an even split of all-purpose and spelt. If you don’t have spelt flour you can use all all-purpose in this recipe, but it adds a whole new depth of flavour to the cookies, which paired with the brown butter makes for a pretty incredible cookie.

    Use whatever chocolate you have here - I often use cookies as a bit of a grab bag to use up bits and bobs of things I have in my cupboard, but I have been leaning more toward chopped bars recently rather than wafers or chunks. When you chop chocolate you get a whole load of tiny shards along with your chunks, which gives you a whole range of chocolate distribution within the cookie. For these particular cookies I used a block of this chocolate which comes in the shape of a brick rather than a thin bar, and I smashed it up, which gave me some super craggy cookie tops. Just so good.

    Brown Butter Spelt Chocolate Chip Cookies - these are a variation on the classic chocolate chip cookie. Brown butter provides depth of flavour along with spelt flour. The cookies are easy to make with a short chill time and are the perfect way to start baking using alternative grains such as spelt flour.

    Recipe Tips

    • If you don’t have spelt, sub it for all-purpose!
    • These cookies benefit from a quick chill in the fridge just to firm up the dough slightly and allow the flour to hydrate just a tiny bit. I tested it with a full hour chill and also no chill and there was a big difference between no chill and half an hour, but not much between half an hour and an hour, so I figured why make you wait an unecessary amount of time for cookies?
    • You will see that there are two different weights of butter called for in the recipe - the starting weight of 225g, and the 175g of brown butter called for in the recipe. When you brown butter you cook off the water, so the starting weight and ending weight are different. The initial quantity of butter accounts for this moisture loss. Measure out 175g of the brown butter to use for your cookie recipe.
    • If you don’t want to chill the dough, then you can bake these off straight away but they will bake up a little thinner.
    • If you want to freeze some of the dough, scoop it out onto a parchment paper lined baking sheet then freeze until solid, then transfer into a ziploc bag until your next cookie emergency comes along. You will have to add a little extra time onto the baking time.
    • The baking time varies depending on both your cookie preference and your oven. If you like these gooey, with that ‘only just baked’ texture, bake for less time, if you like them slightly crunchy around the outside and chewy in the middle, up the baking time by a minute or two. Sometimes I like to bake one off at a time to find my ideal baking time. You do you here.

    I know that making brown butter can be intimidating. Don't be scared, I will hold your hand the whole way through in my post and you'll be nailing it in no time: Brown Butter 101: The Ultimate Guide

    ❤️ Made this recipe and love it? ❤️

    I would LOVE for you to leave me a review and star rating below to let me know how you liked it! Also, please make sure to tag me on Instagram!

    Answers to your baking questions

    Over the years, many of you have asked me questions about:

    • baking in grams
    • adjusting oven temperatures
    • what kind of salt to use
    • and many more!

    I've curated and answered them all for your easy reference in this frequently asked questions post!

    Filed Under: Chocolate Chip Cookies

    Vanilla Bean Cupcakes with Chocolate Peanut Butter Buttercream

    These easy, fluffy Vanilla Bean Cupcakes are topped with a swirl of chocolate peanut butter American Buttercream and finished with a healthy dose of sprinkles. Mix and match your cupcake and buttercream recipes to make your own cupcake and frosting combinations.

    Vanilla Bean Cupcakes with Chocolate Peanut Butter Buttercream. These easy, fluffy Vanilla Bean Cupcakes are topped with a swirl of chocolate peanut butter American Buttercream and finished with a healthy dose of sprinkles. Mix and match your cupcake and buttercream recipes to make your own cupcake and frosting combinations.
    Vanilla Bean Cupcakes with Chocolate Peanut Butter Buttercream. These easy, fluffy Vanilla Bean Cupcakes are topped with a swirl of chocolate peanut butter American Buttercream and finished with a healthy dose of sprinkles. Mix and match your cupcake and buttercream recipes to make your own cupcake and frosting combinations.
    Vanilla Bean Cupcakes with Chocolate Peanut Butter Buttercream. These easy, fluffy Vanilla Bean Cupcakes are topped with a swirl of chocolate peanut butter American Buttercream and finished with a healthy dose of sprinkles. Mix and match your cupcake and buttercream recipes to make your own cupcake and frosting combinations.
    Vanilla Bean Cupcakes with Chocolate Peanut Butter Buttercream. These easy, fluffy Vanilla Bean Cupcakes are topped with a swirl of chocolate peanut butter American Buttercream and finished with a healthy dose of sprinkles. Mix and match your cupcake and buttercream recipes to make your own cupcake and frosting combinations.
    Vanilla Bean Cupcakes with Chocolate Peanut Butter Buttercream. These easy, fluffy Vanilla Bean Cupcakes are topped with a swirl of chocolate peanut butter American Buttercream and finished with a healthy dose of sprinkles. Mix and match your cupcake and buttercream recipes to make your own cupcake and frosting combinations.
    Vanilla Bean Cupcakes with Chocolate Peanut Butter Buttercream. These easy, fluffy Vanilla Bean Cupcakes are topped with a swirl of chocolate peanut butter American Buttercream and finished with a healthy dose of sprinkles. Mix and match your cupcake and buttercream recipes to make your own cupcake and frosting combinations.
    Vanilla Bean Cupcakes with Chocolate Peanut Butter Buttercream. These easy, fluffy Vanilla Bean Cupcakes are topped with a swirl of chocolate peanut butter American Buttercream and finished with a healthy dose of sprinkles. Mix and match your cupcake and buttercream recipes to make your own cupcake and frosting combinations.

    Hi hi! Sneaking in here with just one more Valentine’s recipe for you - although I would absolutely make these year round, I just wanted an excuse to use some super pretty sprinkles! These Vanilla Bean Cupcakes are super simple, and extra delicious topped with a big swirl of chocolate peanut butter buttercream.

    I actually don’t have a lot of cupcake recipes on the blog, which is weird because I love making them, and I love eating them! They are, to me, the perfect ratio of cake to buttercream, and I love piping buttercream and sprinkling sprinkles. Best combination of all of the fun things.

    The cupcakes are my go-to vanilla cake, which is made using the reverse creaming method, which yields a finer crumb and a flatter top on the cake, making it perfect for cupcakes. As opposed to whipping lots of air into the cake through creaming butter and sugar, which creates pockets within the mixture, reverse creaming coats the flour with the fat, meaning that the flour is less hydrated, giving you a more tender crumb. The recipe comes together super, super easily, and is one of my favourites.

    I topped these with a simple buttercream - a chocolate peanut butter American buttercream. I don’t often make an american buttercream, but the combination of peanut butter and cocoa powder works perfectly with the nostalgic flavour of the buttercream. American buttercream is much more simple method wise to make than a meringue or pastry cream based recipe, and I make mine slightly differently by really upping the ratio of heavy cream in the buttercream and whipping it hard, (lolololol) which gives a super light and fluffy buttercream which pipes like a dream. I went for the standard big swirl of buttercream on top of these, but you could also decorate them with an offset spatula or a different piping tip.

    A few wee tips:

    • I use vanilla bean paste in all of my baking. Vanilla extract works well too but paste is just the best. I always always use Heilala, who are an amazing company doing incredible things. You can purchase their products here - use the code CLOUDY20 for 20% off.
    • If you like, you can make the cupcakes ahead of time - I made them the day before and stored them in an airtight container at room temperature.
    • Mix and match these with any buttercream that you like! There’s a whole bunch on the site - this is a great way to use up any extra buttercream that you may have around.
    • My cupcake liners were a little short so my cupcakes got a bit of a tan line - don’t be like me and buy higher liners so this doesn’t happen to you too.

    ❤️ Made this recipe and love it? ❤️

    I would LOVE for you to leave me a review and star rating below to let me know how you liked it! Also, please make sure to tag me on Instagram!

    Answers to your baking questions

    Over the years, many of you have asked me questions about:

    • baking in grams
    • adjusting oven temperatures
    • what kind of salt to use
    • and many more!

    I've curated and answered them all for your easy reference in this frequently asked questions post!

    Filed Under: Cupcakes and Mini Cakes

    Sharp Cheddar Cheese and Caramelised Onion Brioche Rolls

    Fluffy brioche is spread with sweet caramelised onions and sprinkled with grated sharp cheddar, then rolled into perfect rolls and baked to perfection - cheesy onion goodness. These are easy to make and make the perfect savoury breakfast or brunch treat.

    Sharp Cheddar cheese and caramelised onion brioche rolls. Fluffy brioche is spread with sweet caramelised onions and sprinkled with grated sharp cheddar, then rolled into perfect rolls and baked to perfection - cheesy onion goodness. These are easy to make and make the perfect savoury breakfast or brunch treat.
    Sharp Cheddar cheese and caramelised onion brioche rolls. Fluffy brioche is spread with sweet caramelised onions and sprinkled with grated sharp cheddar, then rolled into perfect rolls and baked to perfection - cheesy onion goodness. These are easy to make and make the perfect savoury breakfast or brunch treat.
    Sharp Cheddar cheese and caramelised onion brioche rolls. Fluffy brioche is spread with sweet caramelised onions and sprinkled with grated sharp cheddar, then rolled into perfect rolls and baked to perfection - cheesy onion goodness. These are easy to make and make the perfect savoury breakfast or brunch treat.
    Sharp Cheddar cheese and caramelised onion brioche rolls. Fluffy brioche is spread with sweet caramelised onions and sprinkled with grated sharp cheddar, then rolled into perfect rolls and baked to perfection - cheesy onion goodness. These are easy to make and make the perfect savoury breakfast or brunch treat.
    Sharp Cheddar cheese and caramelised onion brioche rolls. Fluffy brioche is spread with sweet caramelised onions and sprinkled with grated sharp cheddar, then rolled into perfect rolls and baked to perfection - cheesy onion goodness. These are easy to make and make the perfect savoury breakfast or brunch treat.
    Sharp Cheddar cheese and caramelised onion brioche rolls. Fluffy brioche is spread with sweet caramelised onions and sprinkled with grated sharp cheddar, then rolled into perfect rolls and baked to perfection - cheesy onion goodness. These are easy to make and make the perfect savoury breakfast or brunch treat.
    Sharp Cheddar cheese and caramelised onion brioche rolls. Fluffy brioche is spread with sweet caramelised onions and sprinkled with grated sharp cheddar, then rolled into perfect rolls and baked to perfection - cheesy onion goodness. These are easy to make and make the perfect savoury breakfast or brunch treat.

    Every now and then when I’m shooting and making something for this wee corner of the internet, I will make something that is a little messy looking, but 1000% worth it taste wise. These Sharp Cheddar Cheese and Caramelised Onion Brioche Rolls fall into this category - they are a little cheesy and melty around the edges, making them perhaps not the most gram worthy food, but absolutely one of the most delicious.

    Cheese and Onion is a super popular combination, particularly in Southland in New Zealand where there is something called a ‘cheese roll’ - cheese, onion soup mixture and evaporated milk are cooked together, then spread over white bread and rolled up into a wee roll then baked off. It’s a very unique way of making them, but they are very, very yum. I drew inspiration from the flavour combo for these rolls, switching things up a little by making the filling a sharp cheddar and caramelised onion situation, and going for a fluffy brioche, which I baked individually in muffin pans to give stand alone rolls rather than a cinnamon roll style which is baked all together in one pan (that would work great with this recipe too if you like).

    When you are making something like this with relatively simple ingredients, I like to get the best quality ones I can, particularly when it comes to the dairy, and for these New Zealand inspired rolls it only made sense to use New Zealand butter and cheese! I am so, so excited that the Anchor butter and cheese that I grew up on is starting to become available in the States - there really is nothing else like it. New Zealand dairy comes from grass-fed cows, which produce the most delicious, rich milk, which is made into so many amazing products. The butter and cheese are a beautiful rich flavour and are so yellow, which reflects the quality of the milk that they were made with. I am so stoked that there are so many amazing New Zealand products available in the States now, and that I get to shout about them each month with Taste New Zealand!

    I used Anchor’s unsalted butter in the brioche - it is rich and creamy and perfect for something butter forward like brioche. I made the dough, and rolled it out into a big rectangle, which I spread with a solid amount of caramelised onions and Anchor Sharp Cheddar, which is super ideal for all applications - it is slightly sharp but also mellow, and grates like a dream, and paired so well with the slight sweetness of the onions. The whole thing then got rolled up and cut into pieces, which I placed into muffin tins and gave a second rise, then sprinkled with pretzel salt and baked to golden deliciousness. The cheese and onion mixture bubbles out the top a little, but to me, that is the best bit. You really can’t go past cheesy, oniony perfection.

    Make sure you grab some Anchor butter and cheese if you see it in your local! x

    A few wee tips:

    • Make sure your muffin pan is very non stick for these, or they will stick. If you are worried you can make a little parchment paper sling to help pull them out, which will help with releasing the bottoms.
    • If you would like to make these into cinnamon roll style rolls (baked all together), follow the same instructions but arrange them into a greased 9”x13” pan and then bake off as directed - you will likely have to increase the baking time a little to account for them being all snuggled in together.
    • Want to make these for breakfast? The first proof can be done overnight in the fridge!
    • Ideally the caramelised onions need a bit to cool - make sure that you allow for this. Either do them before you make the brioche dough, or they can be done up to a few days in advance. I like doing a whole bunch at once and then having them on hand for other things - it’s no more effort to make more and they are so good!

    Thank you so much to Taste of New Zealand of New Zealand Trade and Enterprise for Sponsoring this post! All opinions are my own.

    ❤️ Made this recipe and love it? ❤️

    I would LOVE for you to leave me a review and star rating below to let me know how you liked it! Also, please make sure to tag me on Instagram!

    Answers to your baking questions

    Over the years, many of you have asked me questions about:

    • baking in grams
    • adjusting oven temperatures
    • what kind of salt to use
    • and many more!

    I've curated and answered them all for your easy reference in this frequently asked questions post!

    Filed Under: Savoury Breads

    Chocolate Brownie Sheet Cake with Chocolate Hazelnut German Buttercream

    Rich Chocolate Brownie sheet cake is finished with a chocolate hazelnut German buttercream. German buttercream is pastry cream based, and is the perfect accompaniment to the rich, fudgy brownie cake.

    DSC08288.jpg
    DSC08295.jpg
    DSC08270.jpg
    DSC08275.jpg
    DSC08304.jpg
    DSC08341.jpg

    Hi hi! Back with another Valentines-ish recipe - a chocolate brownie sheet cake with chocolate hazelnut buttercream. I recently made this for a friend’s birthday party - I often take cakes to parties, and sheet cakes are now my go-to because of how easy they are to transport and serve. There’s no worrying about a stacked cake falling over or getting damaged, and squares of cake with frosting on top are much easier to serve than a full layer cake. Both have their place, but for ease of transport etc, sheet cakes are the the best!

    I riffed on an older recipe of mine and turned this brownie layer cake into a sheet cake. The brownie is slightly more cakey than a traditional fudgy brownie, because I needed it to have a little structure, but still retained that rich chocolate taste that we all love from a brownie, with a moist texture thanks to the butter and oil in the recipe.

    The brownie bakes up nice and flat, which makes it perfect sheet cake material. I finished it off with one of my all time favourite things - German buttercream, to which I added a healthy dose of chocolate hazelnut spread to to make the most silky luscious buttercream that paired so well with the dense brownie cake. The chocolate hazelnut spread added the most amazing depth of flavour - Deb from Smitten Kitchen once described German buttercream as “room temperature ice cream” and I can’t agree more. Make it. It’s just the best ever.

    My friend who had the birthday is a huge Friends fan, so I added some lobster themed sprinkles, which were the perfect way to finish off a cake. The sprinkles are actually Valentine’s themed, but seeing as her birthday is late Jan, we killed two birds with one stone. This cake was eaten off napkins in a Lower East side oyster bar, and it went down an absolute treat.

    A few wee tips:

    • This makes a BIG cake. You can make a half batch and bake it in a 9” square pan.
    • I don’t have any cut shots of this sorry as it was a birthday cake for a friend - so I tested everything a few days before and then re made and shot the cake on the day of the party!
    • The brownie cake needs to be totally cool when you frost it, so make sure that you give it enough time to cool before you add the icing.
    • The pastry cream for the German buttercream also needs time to cool before you incorporate the butter - I like to make it ahead if I can and just pop it into a container, but if you are really in a pinch then you can spread it onto a quarter sheet pan and place plastic wrap directly on the surface of the pastry cream (don’t skip this step or you will get a skin on your custard and it’s not cute), and then cool it in the fridge in the sheet pan - the larger surface area will mean that it cools quickly. Alternatively you can place it into a metal bowl and make yourself an ice bath situation, stirring often to help distribute the pastry cream to help it cool evenly.

    ❤️ Made this recipe and love it? ❤️

    I would LOVE for you to leave me a review and star rating below to let me know how you liked it! Also, please make sure to tag me on Instagram!

    Answers to your baking questions

    Over the years, many of you have asked me questions about:

    • baking in grams
    • adjusting oven temperatures
    • what kind of salt to use
    • and many more!

    I've curated and answered them all for your easy reference in this frequently asked questions post!

    Filed Under: Sheet and Snack Cakes

    Valentine's French Macarons

    The perfect Valentine's Day Macarons - Bright red shells, finished with confetti heart sprinkles and filled with a dark chocolate American buttercream frosting. This macaron recipe is a riff on my basic macaron shell recipe, which can be adapted to suit whatever flavour you like!

    DSC07611.jpg
    DSC07634.jpg
    DSC07647.jpg
    DSC07634.jpg
    DSC07655.jpg
    DSC07725.jpg
    DSC07657.jpg

    Hiii and happy February! We have snuck off to New Zealand - we arrived a few days ago, and OH MAN it is so nice to be home. We arrived just in the peak of late summer / stone fruit / all the delicious foods season and I am loving it so much.

    I worked my wee butt off shooting things before I left so that I would have things to share with you when I was away, which meant that there was a lot of pink and red and sprinkles happening in my kitchen in January, which I was absolutely not mad about. I’m not huge on celebrating Valentine’s day itself, but I will never turn down pink and sprinkles.

    While my Valentine’s content this year has nothing on this extravaganza that we made last year, I did want to do a little spin on some macarons after I got some super cute sprinkles. I took my regular vanilla bean mac recipe, and filled them with a dark chocolate American buttercream, which is sweet and fudgy and a perfect match for the shells.

    A note on adding sprinkles to the tops of macaron shells - I have learnt the hard way that you do need to be a little picky when choosing which sprinkles to use. Anything that is shiny sugar balls tends to melt and make holes in your shell, and the waxy jimmies don’t do super well either, so you want to go for confetti style sprinkles, sanding sugar, or non pareils. I just sprinkle them on directly after piping, before I leave them to sit and dry off.

    A few wee tips:

    • All my macaron tips are here in this post!
    • When it comes to using food colouring, to get this vibrant red colour I needed quite a lot. I used a red gel food colouring from Americolor. Add it in at the meringue stage so that you can tweak as needed without over mixing your batter. Remember that the colour will lighten a little as you mix in the dry ingredients, but will then darken a little in the oven. I also added a touch of black food colouring (put it on the end of a toothpick and add it a little at a time so you don’t add too much) to help deepen the red colour.

    ❤️ Made this recipe and love it? ❤️

    I would LOVE for you to leave me a review and star rating below to let me know how you liked it! Also, please make sure to tag me on Instagram!

    Answers to your baking questions

    Over the years, many of you have asked me questions about:

    • baking in grams
    • adjusting oven temperatures
    • what kind of salt to use
    • and many more!

    I've curated and answered them all for your easy reference in this frequently asked questions post!

    Filed Under: Macarons Tagged With: Gluten Free

    Spiced Sugar Crullers

    Crullers are circles of piped choux dough, fried until perfectly crisp and golden, then tossed in your choice of sugar or dipped into a glaze. These crullers are rolled in spiced sugar for the perfect holiday or anytime treat.

    DSC05958.jpg

    Table of contents

    • Spiced Sugar Crullers
    • Tips for making crullers
    • Recipe for Crullers

    Spiced Sugar Crullers

    I am a big fan of making small changes to lead up to a larger goal. I love making a super detailed list so that I get to cross off as many things as possible, and when I am tracking goals I make the steps to achieving super specific so that I can track my progress.

    The last few years, a lot of the small changes that I have made around the home have focussed on making my kitchen more environmentally friendly. It is the place where I spend the most time, but I also think that it is the place where a large number of changes can be made. This involves doing things like shopping locally in bulk to transfer to my own jars, getting bowl covers for when I make bread so that I don’t use plastic wrap, switching to eco-friendly cleaners, getting a compost bin and composting food scraps rather than throwing them away, and switching to compostable parchment paper.

    DSC05944.jpg

    As a baker, parchment paper is one of my most reached for items in the kitchen - whenever I am lining a cookie sheet, cake tin or a baking pan for a project, it is what I use, and I have teamed up with If You Care and The FeedFeed to bring you this recipe using If You Care’s compostable parchment. We have a little compost bin on our counter top, and while I try and re-use parchment wherever I can, I love knowing that when I am done with it I can just pop it into the compost, reducing waste that we would otherwise send to the landfill. I have used the regular roll of If You Care Parchment Paper, but they also make a roll of pre-cut sheets, which are perfect for lining cookie sheets, and come in a roll rather than a package of flat paper, which makes storing them an absolute breeze.

    pan of sugar crullers
    side shot of cruller with cinnamon sugar

    Today I am sharing this recipe for Spiced Sugar Crullers using the If You Care Parchment Paper. Crullers are circles of choux dough (same dough that is used for eclairs and cream puffs), fried until they are puffed up and golden. The outside is slightly crispy and the centre is custardy and delicious - they are one of my favourite types of doughnuts. They are super easy to make, and the variations in terms of flavours are endless.

    I kept things fairly simple with this recipe, going with a vanilla bean cruller, which I rolled in a spiced sugar after frying to add a little festive twist. Once you have made your choux dough, you transfer it into a reuseable piping bag and pipe out your rounds onto squares of parchment paper. In the past I have frozen the piped out rounds but after a little experimenting I found it works best to fry them straight after they are piped. They are then dropped into the hot oil, and the paper is peeled off. Using the If You Care Parchment Paper made this so easy as I was able to pull off the parchment paper using tongs and drop it directly into the compost bin.

    I hope you give these spicy wee doughnuts a try, and make sure you pick up some If You Care Parchment Paper!


    Spiced sugar cruller
    if you care parchment paper

    Tips for making crullers

    A few wee tips:

    • I have included an extra 'just in case' egg in the ingredients. The reason that this is in there, is that sometimes you need to add extra egg to the pastry if necessary. You want the mixture to be at a consistency where if you dip in the beater of the mixer, the batter will form a 'v' shape and eventually break off. If it is too stiff, and breaks off very quickly, you may need to add another beaten egg, and mix again, before performing the test. Make sure that you do not make the batter too runny - if anything you want it to be a little stiffer than necessary rather than have too much egg or the crullers won’t hold their shape.
    • Instead of drawing a circle on each individual piece of parchment paper, draw a circle on one piece and use that as a template by placing each piece of parchment over your template and tracing the shape through the paper. Not drawing each individally saves loads of time.
    • Make sure that you do a test cruller when it comes to frying - if the oil is too cool they will go soggy or not cook properly inside, causing them to collapse. Test one, then take it out of the oil and rest for a few minutes to ensure that it does not collapse. If it does, it is not properly cooked inside - either increase your cooking time, or check your oil temperature.

    Thank you so much to If You Care and The FeedFeed for sponsoring this post! All opinions are my own.

    DSC06023.jpg

    ❤️ Made this recipe and love it? ❤️

    I would LOVE for you to leave me a review and star rating below to let me know how you liked it! Also, please make sure to tag me on Instagram!

    Answers to your baking questions

    Over the years, many of you have asked me questions about:

    • baking in grams
    • adjusting oven temperatures
    • what kind of salt to use
    • and many more!

    I've curated and answered them all for your easy reference in this frequently asked questions post!

    Recipe for Crullers

    Filed Under: Doughnuts

    Shortbread Cut-out Cookies with Vanilla Bean American Buttercream Rosettes

    Buttery shortbread is cut into perfect round circles and finished with a rosette swirl of American buttercream and sprinkles. These would be perfect for a bridal or baby shower, or just for any time when you need some beautiful, simple cookies.

    DSC06346.jpg
    DSC06349.jpg
    DSC06350.jpg
    DSC06354.jpg
    DSC06427.jpg

    Shortbread Cut Out Cookies with American Buttercream Rosettes

    Hi hi! Happy Saturday! While I’m not a huge one to celebrate Valentine’s day (restaurants etc go all out here in the city so we tend to just stay home where it’s not crowded), I can’t resist the opportunity to make all the pink, sprinkly, sparkly things for it, so here we are with these shortbread cut-out cookies with vanilla bean American buttercream.

    I originally made these for my friend who was showing at a bridal show, and they came out so well that I figured I might as well show you how to make them too! They are super simple but so pretty - a tender, buttery shortbread round is topped with a swirl of vanilla bean American buttercream. I have mixed thoughts about American buttercream and believe that there is a time and a place for it - and this is both the time and the place. The taste is nostalgic, amped up with some vanilla bean paste, and it is stiff enough that it holds the rosettes perfectly on the cookies, and forms a sturdy crust once it sets, meaning that these keep super well and are really easy to transport. They fitted the ‘bridal’ theme perfectly, but they would also be so fun for a birthday party or a baby shower or other celebration - you can mix up the colours of the buttercream and the sprinkles however you like!

    How to make super sharp edges and stable shortbread cut out cookies

    The cookie itself is an adaptation of my Grandma’s shortbread recipe - hers were a simple slice and bake, but with a few tweaks they work super well as a cut out cookie too. I like to make the dough ahead of time and leave it to rest, then roll out between two pieces of parchment to keep it nice and smooth, then give it a quick spin in the freezer before cutting out. Freezing the dough seems like an annoying step but it works so well in helping to give a really straight, clean cut on your cookies as the dough is soft at room temperature.

    I kept the cookies a little thicker because I wanted something that was sturdy enough to hold up to the buttercream. Remember they are shortbread so they won’t rise too much or spread because there is no leavening agent in there, and starting with frozen cookies means that they hold their shape really well. It is also super easy to pump out a whole bunch of these - once you get in your rhythm you are suddenly done and have a whole kitchen full of delicious cookies!

    A few wee tips for Shortbread Cut Out Cookies

    • This seems like a lot of chilling and mucking around with freezer and fridge time BUT I promise you it’s for a reason. The dough is soft and buttery (which leads to a super tender, delicious cookie), but that makes it a little finicky to work with at room temp. My way around this is to start by properly chilling your dough, and then once it is rolled out, freezing it before cutting, which will give you nice clean cuts and straight edges on your cookies. They then get another quick spin in the freezer before they are baked, which helps them to keep their shape. Once you get in the swing of things, it will be fine - roll out and freeze the dough for the first tray, then cut them out and freeze them again - while they are in the freezer roll out your second lot of dough, and that chills while the first tray is baking etc. It all works out promise - I have hardly any freezer space and it’s fine! If some have to sit out while they wait for their turn in the freezer don’t worry - just pop them in the fridge until there’s space.
    • The American buttercream works here because it crusts, which means that it sets nice and hard and can be held at room temp. You can try another buttercream if you like but it will likely have to be kept in the fridge which could give you soggy cookies. I haven’t tried it out, so do so at your own risk!
    • My sprinkles came from Layer Cake Shop!
    • Don’t over fill your piping bag if you have a small one, or it is hard to have enough control over the piping. Just half fill it and place plastic wrap against the surface of the remaining buttercream to ensure that it does not dry out.

    ❤️ Made this recipe and love it? ❤️

    I would LOVE for you to leave me a review and star rating below to let me know how you liked it! Also, please make sure to tag me on Instagram!

    Answers to your baking questions

    Over the years, many of you have asked me questions about:

    • baking in grams
    • adjusting oven temperatures
    • what kind of salt to use
    • and many more!

    I've curated and answered them all for your easy reference in this frequently asked questions post!

    Filed Under: Other Cookies

    Olive Oil Passionfruit Loaf Cake

    This passionfruit loaf cake has floral olive oil and a perfect texture from greek yogurt, and is brushed with a passionfruit syrup and finished with a passionfruit icing

    Olive Oil Passionfruit Loaf Cake. This passionfruit loaf cake has floral olive oil and a perfect texture from greek yogurt, and is brushed with a passionfruit syrup and finished with a passionfruit icing #passionfruit #loafcake #passionfruitloafcake
    Olive Oil Passionfruit Loaf Cake. This passionfruit loaf cake has floral olive oil and a perfect texture from greek yogurt, and is brushed with a passionfruit syrup and finished with a passionfruit icing #passionfruit #loafcake #passionfruitloafcake
    Olive Oil Passionfruit Loaf Cake. This passionfruit loaf cake has floral olive oil and a perfect texture from greek yogurt, and is brushed with a passionfruit syrup and finished with a passionfruit icing #passionfruit #loafcake #passionfruitloafcake

    Hi! Happy Sunday! It’s been a bit of a quiet one around here - we got loads of snow yesterday so have just been keeping cozy.

    I’ve been slowly getting back into the swing of things in the kitchen, and have been working on some fun simple recipes to share with you - starting with this Olive Oil Passionfruit Loaf Cake! I know a lot of my recipes are multi component and / or very time consuming, and although this cake does have a few steps to it, it comes together with just a few bowls and a whisk (and a scale of course), no washing your mixing bowl required!

    Olive Oil Passionfruit Loaf Cake. This passionfruit loaf cake has floral olive oil and a perfect texture from greek yogurt, and is brushed with a passionfruit syrup and finished with a passionfruit icing #passionfruit #loafcake #passionfruitloafcake

    Passionfruit is absolutely one of my favourite fruits - and it grows everywhere in NZ, so I was super bummed out when I moved to New York and realised that it’s not the right environment for it to grow here. Thankfully I can often find the frozen puree in the freezer section at the supermarket, which is the next best thing, and I splashed out and got a fresh passionfruit for the icing of this cake.

    I wanted to get a triple dose of the passionfruit into the recipe, so I finished the cake off with a brush of a passionfruit syrup to help amp up the flavour and lock in some of the moisture, and then added a passionfruit icing made from puree and powdered sugar. All the components are super simple, but put together, they create a tiny bit of passionfruit magic. I hope that you will give this one a go! x

    Olive Oil Passionfruit Loaf Cake. This passionfruit loaf cake has floral olive oil and a perfect texture from greek yogurt, and is brushed with a passionfruit syrup and finished with a passionfruit icing #passionfruit #loafcake #passionfruitloafcake

    A few wee tips:

    • I baked this in a Pullman Pan, which has super straight sides, but a one pound loaf pan 9” x 4 ½” x 2 ¾” would work too - just don’t go any smaller than that or you will have a bad time. I usually line my loaf pans with a parchment paper sling but this particular pullman pan is very non-stick so I just went with a good spray of baking spray!
    • I always bake this on a baking sheet, just in case.
    • I like adding the syrup while the cake is still a bit warm, so that it absorbs it nicely, but wait until it is properly cooled before adding the passionfruit glaze, so that it does not run off the cake. The glaze will look super rough when you first put it on, but it will settle and become smooth in a minute or two.
    • I used passionfruit pulp / puree for this, which I got at my local supermarket in the freezer section. You could use regular passionfruits for this too - to get this, I like to quickly pulse the insides of the fruit in the food processor, which makes the flesh separate out from the seeds, and then strain to get the juice / pulp. Don’t buy passionfruit juice with added sugar - you want pure puree.
    • I added the seeds of a passionfruit to the glaze, just for a little texture. This step is totally optional if you can’t find fresh fruit!
    • I like my glaze to be quite thick - but by all means feel free to make yours a little thinner if you like. I usually start with 30g of passionfruit juice, mix it until fully incorporated, then add more just a little squeeze at a time. You need the glaze to be thicker than you think or it goes everywhere.
    Olive Oil Passionfruit Loaf Cake. This passionfruit loaf cake has floral olive oil and a perfect texture from greek yogurt, and is brushed with a passionfruit syrup and finished with a passionfruit icing #passionfruit #loafcake #passionfruitloafcake

    ❤️ Made this recipe and love it? ❤️

    I would LOVE for you to leave me a review and star rating below to let me know how you liked it! Also, please make sure to tag me on Instagram!

    Answers to your baking questions

    Over the years, many of you have asked me questions about:

    • baking in grams
    • adjusting oven temperatures
    • what kind of salt to use
    • and many more!

    I've curated and answered them all for your easy reference in this frequently asked questions post!

    Filed Under: Loaf Cakes and Quickbreads

    Lemon Yogurt Sheet Cake with Lemon Curd Swiss Meringue Buttercream

    Fluffy lemon yogurt cake is topped with a punchy, silky lemon curd Swiss meringue buttercream. This sheet cake is perfect for feeding a crowd

    Lemon Yogurt Sheet Cake with Lemon Curd Swiss Meringue Buttercream. Fluffy lemon yogurt cake is topped with a punchy, silky lemon curd swiss meringue buttercream. This sheet cake is perfect for feeding a crowd. #sheetcake #lemoncurd #swissmeringuebuttercream
    Lemon Yogurt Sheet Cake with Lemon Curd Swiss Meringue Buttercream. Fluffy lemon yogurt cake is topped with a punchy, silky lemon curd swiss meringue buttercream. This sheet cake is perfect for feeding a crowd. #sheetcake #lemoncurd #swissmeringuebuttercream
    Lemon Yogurt Sheet Cake with Lemon Curd Swiss Meringue Buttercream. Fluffy lemon yogurt cake is topped with a punchy, silky lemon curd swiss meringue buttercream. This sheet cake is perfect for feeding a crowd. #sheetcake #lemoncurd #swissmeringuebuttercream
    Lemon Yogurt Sheet Cake with Lemon Curd Swiss Meringue Buttercream. Fluffy lemon yogurt cake is topped with a punchy, silky lemon curd swiss meringue buttercream. This sheet cake is perfect for feeding a crowd. #sheetcake #lemoncurd #swissmeringuebuttercream
    Lemon Yogurt Sheet Cake with Lemon Curd Swiss Meringue Buttercream. Fluffy lemon yogurt cake is topped with a punchy, silky lemon curd swiss meringue buttercream. This sheet cake is perfect for feeding a crowd. #sheetcake #lemoncurd #swissmeringuebuttercream
    Lemon Yogurt Sheet Cake with Lemon Curd Swiss Meringue Buttercream. Fluffy lemon yogurt cake is topped with a punchy, silky lemon curd swiss meringue buttercream. This sheet cake is perfect for feeding a crowd. #sheetcake #lemoncurd #swissmeringuebuttercream

    Hi hi! Happy Thursday! Apologies for things being a little quiet around here - we are heading back to NZ in a few weeks for a holiday so there’s a lot to organise before we go.

    I made this Lemon Yogurt Sheet Cake a while back, and semi forgot that it was hiding in my recipe notebook / photo folders, so it was more than a pleasant surprise when I came across it!

    It’s pretty simple - the cake itself is your standard lemon yogurt situation. It comes together with two bowl and a whisk. I have this weird thing about washing the bowl and mixing attachment of my stand mixer, so bowl and whisk recipes are my current favourite! Everything gets stirred together and spread into a 9x13 pan, and baked up to lemony yogurt perfection. You could stop there and finish it just with a dusting of powdered sugar, but I figured that seeing as the cake is so simple, we could go a little extra on the buttercream.

    I finished the cake off with a Lemon Curd Swiss Meringue Buttercream - which is just a Swiss Meringue Buttercream with cooled Lemon Curd incorporated into it once the mixing process has finished. Lemon Curd buttercream is a favourite of mine. It is still punchy, but the acidity of the curd is tamed by the buttercream, while still letting the lemon flavour shine through. The cake is perfect without, but it’s extra special with.

    A few wee tips:

    • The lemon curd needs time to cool, so make sure that you allow time for that! I like to make it the day before if I can, or at least before starting to bake the cake so that it has time to bake before making the buttercream.
    • I like to make the lemon curd in a double boiler setup on the stove. I prefer to use a stainless steel mixing bowl for the double boiler - it goes much faster than a glass bowl.
    • I have this pan which I use for sheet cakes and I love it - it is super non stick and the sides are nice and straight.
    • This makes a pretty chunky cake, so make sure you cut it into smaller pieces when serving (the ones I cut for styling were massive)
    • I used some yellow non pareils and then this mix to finish the cake!

    ❤️ Made this recipe and love it? ❤️

    I would LOVE for you to leave me a review and star rating below to let me know how you liked it! Also, please make sure to tag me on Instagram!

    Answers to your baking questions

    Over the years, many of you have asked me questions about:

    • baking in grams
    • adjusting oven temperatures
    • what kind of salt to use
    • and many more!

    I've curated and answered them all for your easy reference in this frequently asked questions post!

    Filed Under: Sheet and Snack Cakes

    Peanut Butter Stuffed Chocolate Chip Cookies

    These Peanut Butter Stuffed Chocolate Chip Cookies are fun and easy to make. They are stuffed with a disc of peanut butter. These Peanut Butter chocolate chip cookies are bakery style size, and are the perfect peanut butter cookie!

    Dark Chocolate Peanut Butter Stuffed Chocolate Chip Cookies. Discs of Dark Chocolate Peanut Butter are stuffed into the middle of a no chill chocolate chip cookie for the most perfect peanut butter stuffed cookie situation. #peanutbutter #peanutbutterstuffedcookie #stuffedcookie
    Dark Chocolate Peanut Butter Stuffed Chocolate Chip Cookies. Discs of Dark Chocolate Peanut Butter are stuffed into the middle of a no chill chocolate chip cookie for the most perfect peanut butter stuffed cookie situation. #peanutbutter #peanutbutterstuffedcookie #stuffedcookie
    Dark Chocolate Peanut Butter Stuffed Chocolate Chip Cookies. Discs of Dark Chocolate Peanut Butter are stuffed into the middle of a no chill chocolate chip cookie for the most perfect peanut butter stuffed cookie situation. #peanutbutter #peanutbutterstuffedcookie #stuffedcookie
    Dark Chocolate Peanut Butter Stuffed Chocolate Chip Cookies. Discs of Dark Chocolate Peanut Butter are stuffed into the middle of a no chill chocolate chip cookie for the most perfect peanut butter stuffed cookie situation. #peanutbutter #peanutbutterstuffedcookie #stuffedcookie
    Dark Chocolate Peanut Butter Stuffed Chocolate Chip Cookies. Discs of Dark Chocolate Peanut Butter are stuffed into the middle of a no chill chocolate chip cookie for the most perfect peanut butter stuffed cookie situation. #peanutbutter #peanutbutterstuffedcookie #stuffedcookie
    Dark Chocolate Peanut Butter Stuffed Chocolate Chip Cookies. Discs of Dark Chocolate Peanut Butter are stuffed into the middle of a no chill chocolate chip cookie for the most perfect peanut butter stuffed cookie situation. #peanutbutter #peanutbutterstuffedcookie #stuffedcookie
    Dark Chocolate Peanut Butter Stuffed Chocolate Chip Cookies. Discs of Dark Chocolate Peanut Butter are stuffed into the middle of a no chill chocolate chip cookie for the most perfect peanut butter stuffed cookie situation. #peanutbutter #peanutbutterstuffedcookie #stuffedcookie
    Dark Chocolate Peanut Butter Stuffed Chocolate Chip Cookies. Discs of Dark Chocolate Peanut Butter are stuffed into the middle of a no chill chocolate chip cookie for the most perfect peanut butter stuffed cookie situation. #peanutbutter #peanutbutterstuffedcookie #stuffedcookie

    Hi hi! Happy Saturday! I would be lying if I said it wasn’t a struggle to get back into the swing of things after the New Year. I picked up a super cute case of bronchitis, so it’s been a bit of a mission to get back into something that resembles regular life and routine (whatever that is). I have to remind myself that this happens every January, and it will soon pass!

    I wanted to start off this year with a couple of jazzed up simple recipes, and what better place to start than with these Dark Chocolate Peanut Butter Stuffed Chocolate Chip Cookies? These guys are massive, super easy to make, and the cookies don’t require any chilling, meaning that you can have these ready to eat ASAP.

    Before we get into it, I want to tell you about the peanut butter that I stuffed these bad boys with. Fix and Fogg is a small New Zealand company who makes kickass peanut butter. They are based in Wellington, the city that I went to university in (and the city we are hoping to live in when we eventually move home), and operate out of a tiny little facility down a side alley in downtown Wellington, where they create the most incredible nut butters. I used to stock up every time that I was home, but I am SO, so excited that we can finally get them here in the states too! Their crunchy peanut butter is a toast time staple around here, but they also make all kinds of incredible flavoured nut butters - there’s a coffee maple, a fruit toast, a honey one, one called ‘smoke and fire’ which is spicy and smoky, and one of my favourites - their dark chocolate peanut butter. The dark chocolate PB is made with 62% dark chocolate, and it works so well in everything, including as the stuffing for these Chocolate Chip Cookies.

    I took my regular cookie recipe and tweaked it a little - upping the muscovado sugar content for some more caramel notes, and then increasing the flour and leavening and decreasing the butter content just a touch to give a more sturdy cookie that would hold its shape wrapped around a disc of dark chocolate peanut butter. I then went full nerd on the process, testing chill times and baking temperatures to work out what worked best in terms of texture and keeping the peanut butter intact. Surprisingly, chill times didn’t make a difference, but the bake temperature made a significant difference in how much the peanut butter spread. Upping the bake temperature to 375°f (190°c) instead of the usual 350°f (190°c) meant that the cookie baked a little quicker, minimising the spread of the filling in the centre. So here we have it - giant peanut butter filled cookies, which require zero chill time. Everyone wins.

    A few wee tips:

    • I used a bar of chocolate for these cookies - I love how the uneven edges give texture within the cookie. Chopped wafers will work too.
    • I worked out a new to me way of adding additional chocolate onto the top (which is an optional step but gives you epic chocolate puddles). You flatten one ball of dough, press the chocolate onto the top side, then continue as usual and roll it into a ball, which then gives you even chocolate distribution as the cookie bakes. This is optional - I like to chop up a little extra chocolate and keep it in a bowl next to me to do this step while I am assembling. I am a sucker for a good chocolate puddle.
    • I found that the best way to get the peanut butter inside the cookie was to plop it out onto a pan lined with baking paper, then freeze until solid, then sandwich between two pieces of cookie dough, forming a seal around the outside, and then shaping into a ball.
    • A cookie scoop is the best way to evenly portion your dough. I have a bunch but the one I reach for the most is this 2 tablespoon one. They are cheap but make your life so much easier when it comes to getting consistently sized cookies.
    • You won’t use all of the peanut butter I have called for here - you want to make 12 or 13 2 teaspoon sized blobs of it, which you will use to stuff the cookies. I transferred the peanut butter to a bowl first and gave it a good mix to ensure it was even in consistency.
    • Store the peanut butter blobs in the freezer while you aren’t using them - I like to get the first batch on to bake and then assemble the next batch just as they are almost finished baking, then use the first baking sheet to bake off the final batch. I did this in three batches, each with four cookies per baking sheet. They are big and do spread a little - you could get away with five per sheet, just make sure that they are well spaced.
    • Sometimes your cookies bake up to be not so perfectly round. While I am all about embracing cookies as they naturally are, I do like them to be perfectly round, and a little trick for this is to take a cookie cutter slightly bigger than the cookie, place it over the top and use the cutter to scoot the cookie into a round shape. It’s definitely an optional step but works extremely well!

    Thank you so much to Taste of New Zealand of New Zealand Trade and Enterprise for Sponsoring this post! All opinions are my own.

    ❤️ Made this recipe and love it? ❤️

    I would LOVE for you to leave me a review and star rating below to let me know how you liked it! Also, please make sure to tag me on Instagram!

    Answers to your baking questions

    Over the years, many of you have asked me questions about:

    • baking in grams
    • adjusting oven temperatures
    • what kind of salt to use
    • and many more!

    I've curated and answered them all for your easy reference in this frequently asked questions post!

    Filed Under: Chocolate Chip Cookies

    Chocolate Hazelnut Cream Puffs

    Chocolate Hazelnut Cream Puffs - rounds of Choux dough are topped with chocolate craquelin and baked to perfection, then filled with silky chocolate hazelnut whipped cream

    Chocolate Choux au Craquelin with Chocolate Hazelnut Whipped Cream Filling. Rounds of Choux dough are topped with chocolate craquelin and baked to perfection, then filled with silky chocolate hazelnut whipped cream #chouxaucraquelin #creampuffs #chocolatehazelnut
    Chocolate Choux au Craquelin with Chocolate Hazelnut Whipped Cream Filling. Rounds of Choux dough are topped with chocolate craquelin and baked to perfection, then filled with silky chocolate hazelnut whipped cream #chouxaucraquelin #creampuffs #chocolatehazelnut
    Chocolate Choux au Craquelin with Chocolate Hazelnut Whipped Cream Filling. Rounds of Choux dough are topped with chocolate craquelin and baked to perfection, then filled with silky chocolate hazelnut whipped cream #chouxaucraquelin #creampuffs #chocolatehazelnut
    Chocolate Choux au Craquelin with Chocolate Hazelnut Whipped Cream Filling. Rounds of Choux dough are topped with chocolate craquelin and baked to perfection, then filled with silky chocolate hazelnut whipped cream #chouxaucraquelin #creampuffs #chocolatehazelnut

    Chocolate Hazelnut Cream Puffs

    Hi hi! Happy New Year! I hope that you all had a relaxing holiday break - I got a super cute dose of Bronchitis, so have spent the last few weeks encouraging my lungs to do their job properly. All is well now though and I am excited to get into the swing of things!

    I made these to take to a New Year’s party the other evening and they turned out great so I thought I would pop up a recipe for them! They are my standard choux recipe, but I added some cocoa to the craquelin mixture for a chocolate vibe, and then filled them with a chocolate hazelnut whipped cream, which is as simple as folding chocolate hazelnut spread into whipped cream. Bingo Bango.

    How to make Chocolate Hazelnut Cream Puffs

    These were (and always are) a huge hit, and that’s what I love about them. They are super easy to make once you get the hang of making the choux, and one batch makes loads. If you would like to make them ahead, you can bake off the cream puffs and then freeze them in an airtight container - just defrost when you are ready to use and then fill them. It works great. If you would like to mix it up a little bit and get more bang for your buck, instead of putting craquelin on all of the cream puffs, leave some without and instead sprinkle with some swedish pearl sugar to make chouquettes.

    A few wee tips for making cream puffs:

    • In the ingredients, I have added in a ‘just in case’ egg. Sometimes when you are making choux dough you will need to add an extra egg to the mixture in order to get it to the right consistency - you want it to form a ‘v’ that eventually breaks off when you lift the paddle from the mixture. If it is not wet enough (ie you need to add more egg), you won’t get that nice v shape and the dough will be stiff and break off easily. I usually start with the 240g called for in the recipe, test it, then add the extra beaten egg if needed.
    • I just got a new oven, so I was able to bake both of these trays of choux buns at the same time - I switched the trays around half way through the first 15 minutes at 400°f, and again during the final bake at 350°f. If your oven isn’t super consistent, you can absolutely bake these off one at a time - what you want to do is to pipe out both trays of choux dough, but only top the one you are going to bake with craquelin. The ones without craquelin can be held at room temp until you are ready to bake - just add the craquelin just before you pop them into the oven. Don’t forget to increase the temperature back to 400°f before you bake the second tray.
    • If you can, leave the filling of the cream puffs until close to when you are planning on serving them. I like to prepare the diplomat cream, place a clip just above the piping tip of the piping bag, and then add the cream into the bag. I then give the top a quick twist, and secure with another clip - this way the cream is in the bag, ready to go, making the assembly step easy. However if you are in a pinch and need to prepare these earlier, store them in an airtight container in the fridge until ready to serve.

    For more cream puff recipes, check out:

    • Choux au Craquelin (Cream Puffs) with Passionfruit Cream
    • Golden Sugar Choux au Craquelin - Cream Puffs with Salted Caramel Diplomat Cream
    • Choux au Craquelin with Caramelised White Chocolate Ganache

    ❤️ Made this recipe and love it? ❤️

    I would LOVE for you to leave me a review and star rating below to let me know how you liked it! Also, please make sure to tag me on Instagram!

    Answers to your baking questions

    Over the years, many of you have asked me questions about:

    • baking in grams
    • adjusting oven temperatures
    • what kind of salt to use
    • and many more!

    I've curated and answered them all for your easy reference in this frequently asked questions post!

    Filed Under: Choux

    Cranberry and White Chocolate Macarons

    Cranberry and white chocolate macarons. French macaron shells are filled with white chocolate swiss meringue buttercream and fresh cranberry sauce filling, for the perfect festive macaron. These gluten free treats are easy to make for a crowd.

    Cranberry and white chocolate macarons. French macaron shells are filled with white chocolate swiss meringue buttercream and fresh cranberry sauce filling, for the perfect festive macaron. These gluten free treats are easy to make for a crowd.
    Cranberry and white chocolate macarons. French macaron shells are filled with white chocolate swiss meringue buttercream and fresh cranberry sauce filling, for the perfect festive macaron. These gluten free treats are easy to make for a crowd.
    Cranberry and white chocolate macarons. French macaron shells are filled with white chocolate swiss meringue buttercream and fresh cranberry sauce filling, for the perfect festive macaron. These gluten free treats are easy to make for a crowd.
    Cranberry and white chocolate macarons. French macaron shells are filled with white chocolate swiss meringue buttercream and fresh cranberry sauce filling, for the perfect festive macaron. These gluten free treats are easy to make for a crowd.
    Cranberry and white chocolate macarons. French macaron shells are filled with white chocolate swiss meringue buttercream and fresh cranberry sauce filling, for the perfect festive macaron. These gluten free treats are easy to make for a crowd.
    Cranberry and white chocolate macarons. French macaron shells are filled with white chocolate swiss meringue buttercream and fresh cranberry sauce filling, for the perfect festive macaron. These gluten free treats are easy to make for a crowd.
    Cranberry and white chocolate macarons. French macaron shells are filled with white chocolate swiss meringue buttercream and fresh cranberry sauce filling, for the perfect festive macaron. These gluten free treats are easy to make for a crowd.

    Hi hi! Happy Thursday! Just popping in to share the recipe for these cranberry macarons. The original plan was to make a shaped macaron, but the weather wasn’t on our side for trying something tricky (macarons hate humidity) so we stuck to what we are good at, and went with these cranberry white chocolate babies, which turned out to be a great decision.

    In terms of the macarons, we went with our standard vanilla shell - we have found it is easiest to keep the shell the same, mixing up the colour and the sprinkles etc on the topping, and then to mix up the filling to give the macarons flavour. The shells can be temperamental at best, so it is best to just leave them the same in order to get consistent results. We then filled them with a white chocolate buttercream and a tangy cranberry filling in the middle, for a classic white chocolate and cranberry flavour. I am not usually a big fan of white chocolate, but paired with something a little tart such as cranberry or passionfruit, the sweetness of the chocolate plays off well with the filling. These are a perfect festive take on a macaron, but would be delicious any time of the year.

    A few wee tips:

    • All my macaron tips are here in this post!
    • We actually made two batches to get the colour variation - the recipe here is enough for one batch. We added sprinkles to some of the red.
    • You can make the cranberry filling ahead of time - it will just need a good stir before you use it!

    ❤️ Made this recipe and love it? ❤️

    I would LOVE for you to leave me a review and star rating below to let me know how you liked it! Also, please make sure to tag me on Instagram!

    Answers to your baking questions

    Over the years, many of you have asked me questions about:

    • baking in grams
    • adjusting oven temperatures
    • what kind of salt to use
    • and many more!

    I've curated and answered them all for your easy reference in this frequently asked questions post!

    Filed Under: Macarons

    Milk Chocolate Christmas Mini Egg Magic Bars

    Shortbread base topped with a 'magic' layer - shredded coconut, chopped hazelnuts, chooped chocolate, peppermint candies, and milk chocolate mini eggs. These come together quickly and are the perfect holiday treat.

    DSC05665.jpg
    DSC05678.jpg
    DSC05652.jpg
    DSC05684.jpg
    DSC05698.jpg

    Hi! Happy Tuesday! Things are starting to wrap up here now that we are getting toward the pointy end of things. I am going away for a few days to work on a fun project, and then when I get back there’s only a few more days until Christmas! I am hoping to take a few days off between Xmas and New Years, and I am so, so ready for a little break.

    I popped around to Jase’s earlier this week and we banged out this variation on these magic bars that we made a few months ago just before easter. Turns out a Christmas version of the very popular mini eggs exists, so we whipped up a christmas variation - adding some cocoa to the shortbread base, white and dark chocolate to the filling, and crushed peppermint candies for a little festive finish.

    These are super easy to make - the shortbread base comes together very easily, and is baked off, then topped with the ‘magic’ layer - a whole bunch of deliciousness, bound together with condensed milk. It is baked until it is sticky and slightly golden, and then once cooled, it is sliced to reveal all the treats jammed into the filling. These are super super yum, and so simple to make, so would make the perfect addition to your holiday baking schedule!

    A few wee tips:

    • You can really make these your own, by adding whatever you like. If you don’t have caramelised white chocolate, you could add milk chocolate, or dark chocolate, or regular chocolate. They would work great to use up any leftover easter chocolate. Same goes with the nuts - if you are allergic, or you don’t like them, leave them out or sub them with something else.
    • We used Cadbury mini eggs in this recipe! The ones that go into the oven whole may crack a little, so we added some extra on the top too once they were baked, for the #instagram. This is totally optional, but IMO you can’t go wrong with too many eggs.
    • The base definitely doesn’t need to be made in a stand mixer if you don’t have one - an electric mixer or just a wooden spoon and some elbow grease would be fine!
    • We used the pre-chopped hazelnuts, but if you don’t have those, you can just blitz up some roasted hazelnuts until they are in chunks. You will need 105g total - 30g for the base, and 75g for the filling.

    ❤️ Made this recipe and love it? ❤️

    I would LOVE for you to leave me a review and star rating below to let me know how you liked it! Also, please make sure to tag me on Instagram!

    Answers to your baking questions

    Over the years, many of you have asked me questions about:

    • baking in grams
    • adjusting oven temperatures
    • what kind of salt to use
    • and many more!

    I've curated and answered them all for your easy reference in this frequently asked questions post!

    Filed Under: Bars and Slices

    Thin and Crispy Cardamom and Milk Chocolate Chip Cookies

    These thin and crispy chocolate chip cookies are quick and easy to make. They have cardamom and milk chocolate in them which are the perfect pairing. These milk chocolate chip cookies are perfect for any occasion.

    DSC05878.jpg
    DSC05881.jpg
    DSC05816.jpg
    DSC05882.jpg
    DSC05836.jpg
    DSC05864.jpg

    Hi hi! I know we are in full christmas cookie swing, and I wanted to take a second to pay tribute to what will be my all time best cookie friend - the chocolate chip cookie. I am popping on to share a slightly seasonal variation with you to add to your chocolate chip cookie recipe collection, which can be made without the spice for a bomb thin and crispy cookie for any time cookie eating.

    I tweaked my perfect chocolate chip cookie for this recipe - tweaking the butter content, sugar ratios and leavening so that these cookies bake up relatively flat with lovely crispy edges. I also upped the chocolate and switched it to mainly milk with a little dark for good measure. I used a chopped bar for these, but chopped wafers work great too. I also added in a wee bit of cardamom and cinnamon for a spiced variation - leave this out if you like, but it’s a nice change on a classic. A good shower of flaky sea salt once they come out of the oven and you have the perfect thin and crispy situation.

    This recipe doesn’t require a rest time - you scoop the dough and bake right away, but this dough would freeze very well. Just scoop the dough onto a lined baking sheet, freeze until solid, then store in an airtight container or bag and you have the perfect freezer stash!

    To see all my tips and tricks on how to freeze cookie dough and how to bake from frozen, check out my post: How to freeze cookie dough

    Happy holiday cookie-ing!

    A few wee tips:

    • If you don’t like cardamom (I am married to one of those monsters), then feel free to leave the spices out - these are a great, chocolate packed, thin and crispy cookie!
    • I like mine chewy in the middle and crispy on the outside so 13 minutes is the sweet spot for me, but if you like them properly crispy, up the baking time.
    • This cookie recipe is great because it doesn’t need any rest time, but if you like you can scoop the dough and either freeze or chill it until ready to bake - you may need to increase the baking time by a minute or two.
    • I used mainly milk chocolate for these, with a little dark chocolate for balance, but these would work great with any type of chocolate.

    ❤️ Made this recipe and love it? ❤️

    I would LOVE for you to leave me a review and star rating below to let me know how you liked it! Also, please make sure to tag me on Instagram!

    Answers to your baking questions

    Over the years, many of you have asked me questions about:

    • baking in grams
    • adjusting oven temperatures
    • what kind of salt to use
    • and many more!

    I've curated and answered them all for your easy reference in this frequently asked questions post!

    Filed Under: Chocolate Chip Cookies

    Spicy Tomato Pesto and Parmesan Star Bread

    Fluffy brioche dough is layered with spicy tomato pesto and parmesan, then twisted into an easy but beautiful star bread which is perfect for tearing and sharing.

    Spicy Tomato Pesto and Parmesan Star Bread. Brioche dough is layered with spicy tomato pesto and parmesan, then twisted into an easy but beautiful star bread which is perfect for tearing and sharing.

    Spicy Tomato Pesto Star Bread

    Happy middle of December! There are officially less than two weeks left until Christmas, and my apartment is jammed with all kinds of festive baking situations that I will be sharing with you over the next week or so!

    I am super excited to share this one with you - a super festive holiday (or any time) star bread, stuffed with Spicy Tomato Pesto and Parmesan Cheese. My first attempt to make star bread was back in 2015 (there is Instagram evidence to prove it) and have been meaning to try it ever since. I made this yesterday and took it to a holiday party, and it disappeared incredibly quickly.

    The concept of this bread is super simple - you roll out four circles of dough, and stack them on top of each other, layering some filling in between. You then place something round in the middle and cut the dough circle into 16 pieces, which you twist together to make a star shape. It is really easy to make, and it looks so, so beautiful.

    How to make Star Bread using jarred Pesto

    I used my favourite, go-to brioche dough for this, which I made the night before. I kept it even more simple by filling the star bread with jarred Tomato Pesto but other types of pesto would also work really well.

    I added a little bit of freshly grated parmesan because cheese, but the Tomato Pesto’s flavour carried so perfectly through the bread. I finished the bread off with a little pretzel salt for a salty crunchy finish.

    Using a jarred pesto takes some of the work out of this star bread, making it quick and easy to assemble. It bakes up into a tear and share style bread, so is perfect for a party or holiday gathering. You can just plonk the whole thing down on the table and let people go for it!

    Spicy Tomato Pesto and Parmesan Star Bread. Brioche dough is layered with spicy tomato pesto and parmesan, then twisted into an easy but beautiful star bread which is perfect for tearing and sharing.

    A few wee tips for Pesto Star Bread

    • I did my first proof overnight which helped a lot when it came to rolling out the dough. Having it slightly chilled makes it a lot easier to work with.
    • I find it easiest to roll out all the pieces of dough in one go and then assemble together. If you like you can roll them one at a time as you assemble.
    • Mix this up if you like. Add different cheese, you could add chopped up olives, whatever you like!


    • Pesto Star bread on surface with knife
    • Side on shot of pesto star bread

    For more recipes with Pesto, check out:

    • Tomato and Ricotta Pesto Pull-apart Buns
    • Laminated Brioche Pesto Buns with Lemon, Parmesan, and Walnut
    • Pretzel Bites with Whipped Feta and Vegetable Pesto Dip 
    • Mushroom and Sundried Tomato Pesto Pie

    ❤️ Made this recipe and love it? ❤️

    I would LOVE for you to leave me a review and star rating below to let me know how you liked it! Also, please make sure to tag me on Instagram!

    Answers to your baking questions

    Over the years, many of you have asked me questions about:

    • baking in grams
    • adjusting oven temperatures
    • what kind of salt to use
    • and many more!

    I've curated and answered them all for your easy reference in this frequently asked questions post!

    Filed Under: Savoury Breads

    New Zealand Christmas Treat Box

    A collection of all the delicious things that New Zealand has to offer - a mixture of homemade treats and packaged sweets makes the most amazing New Zealand treat box!

    DSC05220.jpg
    DSC05226.jpg
    DSC05221.jpg
    DSC05289.jpg
    DSC05238.jpg
    DSC05292.jpg

    Hi hi! We are in full swing of holiday baking over here, and I am so excited to share this treat box with you, in partnership with my friends at Taste of New Zealand of New Zealand Trade and Enterprise. We are teaming up for the next year or so to bring you a super fun new recipe each month, showcasing all the amazing things that are coming out of New Zealand.

    I made my first cookie box in 2017, inspired by my friend Amy’s amazing amazing cookie boxes, and I’ve been hooked since! This guy is less of a cookie box and more of a Christmas treat box. I wanted to include recipes that are nostalgic to me (we are big fans of making treats for Christmas time), and then pair them with some pre-made treats from home (also nostalgic), to make the ultimate NZ treat box!

    We don’t really have any cozy food holidays in New Zealand (Christmas is in the summer), so we aren’t really ones for cookie swaps or cozy holiday recipes such as hot chocolate and spiced, warming things (I love all of those things so I am fully embracing a cold holiday season while I am living overseas). What we do do though is little treaty things - filling up the containers with treats for guests or for some holiday treat eating. I usually spend a few days with my Mum early December making a bunch of little treats that keep well and are good to have on hand, but we also stock up on some store bought staples too to have during the holiday season! I channelled that the best I could in this box, and am so stoked with how it turned out - to me, it’s a whole lot of Christmas treats from home, all packed into one box!

    Making some of the treats yourself and outsourcing some of them is a great way to cut down on your work load a little - you can pick and choose just how much you want to make yourself. I made a batch of Russian Fudge and a batch of coconut ice, which are both treat staples back home, then also made a batch of Peanut Butter Cups using Fix and Fogg Peanut Butter which is made in the town where I went to University. They have all kinds of amazing flavours (they have a spicy one which is so good, and a honey one), but I stuck with their smooth. Good peanut butter and good chocolate paired together is the most perfect match, and peanut butter cups are super easy to make and to have in the fridge!

    I then made some toffee apples using a super cute varietal of apples from New Zealand - Rockit apples. These are a miniature variety of apples, which are perfect for snacking and for little hands. They made the perfect toffee apple due to the small size - you get an ideal apple to toffee ratio.

    I also made a quick batch of a favourite of mine -hokey pokey, or honeycomb candy. Usually I would use golden syrup in the recipe but I really wanted something honey forward, so switched it up and used a manuka honey instead from Manukora, which is a company based in the North Island of New Zealand who produce beautiful, sustainably harvested, traceable manuka honey. A jar of delicious NZ honey would be an incredible Christmas present for someone in your life!

    I then rounded out the box with a few treats that I am so excited to finally be able to get here in the States. I used some Snackaballs from Tom and Luke, who make amazing gluten free, vegan snack balls. I discovered these last time I was home and brought back a whole bunch of them with me (the mint chocolate is my favourite), so I was so stoked to see that they are now available here too! I often have a wee bag of them hiding in the cupboard and another bag in my handbag so that we have little snacks wherever we go!

    I finished off the box with my fave licorice from home by a brand called RJ’s. They make the most amazing soft black licorice, and their raspberry flavour is super good too. They also make allsorts, which is sort of a layered candy and licorice situation - super delish, v perfect for Christmas treating.

    Here’s what we ended up with:

    • Russian Fudge
    • Coconut Ice
    • Tom and Luke Snack Balls
    • RJ’s Licorice Allsorts and Soft Licorice Logs (Black and Raspberry)
    • Hokey Pokey (Honeycomb Candy) made with Manukora Honey
    • Salted Peanut Butter Cups made with Fix and Fogg Smooth Peanut Butter
    • Caramel Apples made with Rockit Apples

    A few wee tips:

    • You can make some of the fixings a few days ahead - both the russian fudge and the coconut ice can be made before hand and stored in airtight containers.
    • The toffee apples are best on the day that they are made.
    • I used this box, and made my own dividers from craft wood. I have used the same one over and over and just add in different

    Thank you so much to Taste of New Zealand of New Zealand Trade and Enterprise for Sponsoring this post! All opinions are my own.

    ❤️ Made this recipe and love it? ❤️

    I would LOVE for you to leave me a review and star rating below to let me know how you liked it! Also, please make sure to tag me on Instagram!

    Answers to your baking questions

    Over the years, many of you have asked me questions about:

    • baking in grams
    • adjusting oven temperatures
    • what kind of salt to use
    • and many more!

    I've curated and answered them all for your easy reference in this frequently asked questions post!

    Filed Under: New Zealand Recipes, Treat Boxes

    • « Previous Page
    • 1
    • …
    • 5
    • 6
    • 7
    • 8
    • 9
    • …
    • 12
    • Next Page »
    Erin Clarkson Cloudy Kitchen

    HI, I'M ERIN

    My recipes range from quick & easy all the way to complex & impressive. I love the science and process of recipe development almost as much as baking itself. I specialize in rigorously tested recipes that are fun, reliable, and accurate.

    More about me →

    • https://www.instagram.com/cloudykitchen/
    • Facebook
    • Pinterest
    • TikTok

    Popular

    • Christmas Macaron Box
    • close up of roll with cream cheese frosting
      10 Minute Cream Cheese Frosting for Cinnamon Rolls
    • cookie on sheet pan with parchment paper
      Brown Butter Chocolate Chip Cookies
    • burger bun on wire rack
      Homemade Burger Buns

    Footer

    Cloudy Kitchen Classics

    • Chocolate chip cookies
    • Brownie cookies
    • Chocolate cookies
    • Vanilla cookies
    • Cheesecake brownies
    • Focaccia bread
    • Ciabatta recipe

    Popular Cookie Recipes

    • Oatmeal raisin cookies
    • Peanut butter oatmeal cookies
    • White chocolate chip cookies
    • Gingersnap cookies
    • Shortbread cookies
    • Snickerdoodles cookies
    • Anzac biscuits

    Easy Breads & Buns

    • Hot cross buns
    • Sticky buns
    • Burger buns
    • Dinner rolls
    • Soft pretzels
    • Pretzel buns
    • Garlic knots

    Links

    • About
    • Contact
    • Web Stories

    Newsletter

    • Sign Up! for emails and updates

    Resources

    • FAQ
    • Policies
    • All recipes at once

    Copyright © 2026 Cloudy Kitchen

    Support by Foodie Digital