

The softest, squishiest garlic butter dinner rolls are the perfect accompaniment to any meal. These are easy and fun to make, and the recipe can easily be scaled. They are baked until golden brown then finished with a garlic butter when they are hot from the oven.
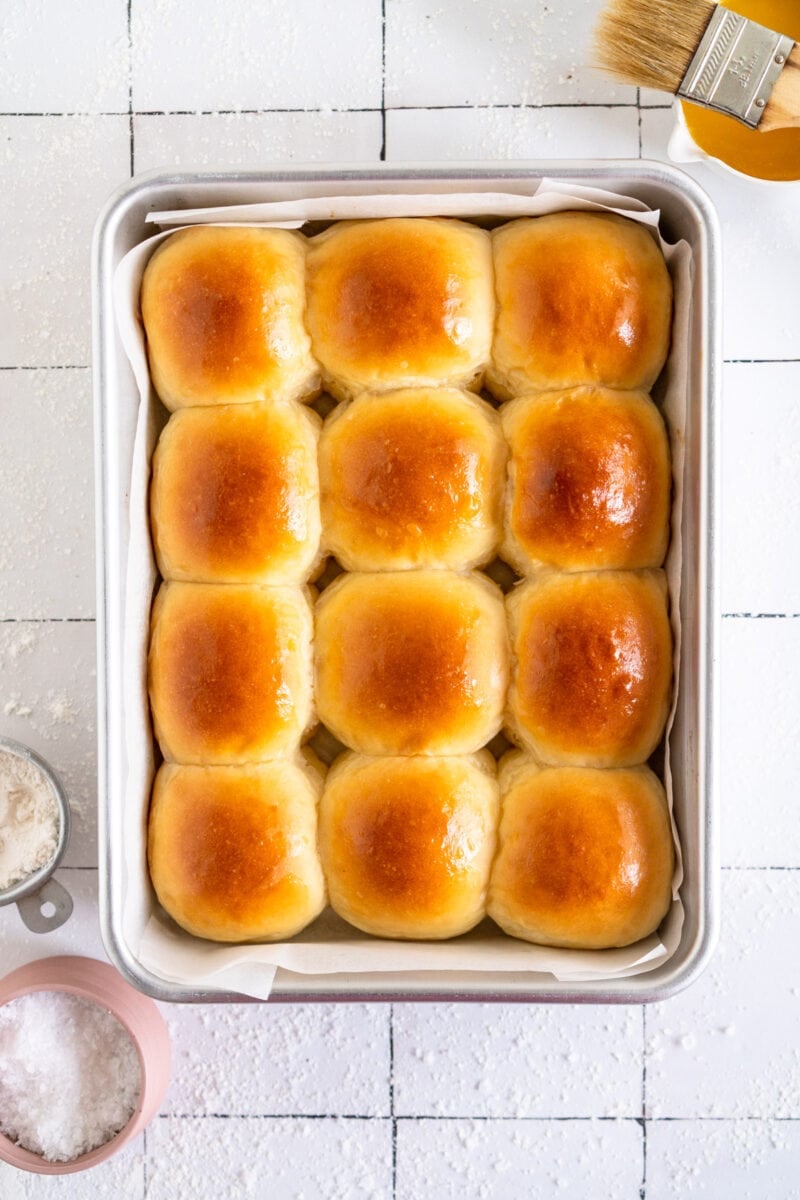
Table of contents
The best Dinner Roll Recipe
Hi hi! I am so excited to share the recipe for these Garlic Butter Dinner Rolls with you! I've tested this a whole bunch of times to get it just right for you, and am so stoked to finally share! This recipe is such a winner - super super soft dinner rolls, finished with a salty garlic butter glaze. I made them a whole lot of different ways when testing, so I've also listed some optional sizing and baking pan variations for you too!
This recipe is also perfect for burger buns - I will write a separate post up for them later, but for now, enjoy these! I am so excited for them!


Steps for making the best Dinner Rolls
These are pretty hands off - you dump all the ingredients in then leave it to mix. However there are a few steps along the way that I discovered which make the process super easy, and you get the best rolls!
- Activate your yeast - I use active dry yeast in the recipe, and it needs to be bloomed in lukewarm liquid. To get my liquid 'lukewarm' I mix boiling water with the milk and it works great, or you can mix them both together and then warm up either in a pan or the microwave. The milk and water, yeast, and sugar hang out until the yeast is foamy.
- Add the remaining ingredients - Unlike my brioche recipes where I mix up everything except for the butter first, with this recipe you just dump everything in and then leave it to knead in the mixer!
- Mix the dough - This takes a wee bit. Because the rolls are so nice and soft and fluffy, the mixture is pretty wet, and it takes a bit for the gluten to develop and come together. Don't worry though. We are baking by weight, so you know you've added the right amount of each ingredient. Scales for the win, as per usual.
- Shape and do the first rise - Once the dough has finished mixing, you pull it out of the mixer and shape into a ball. You may need a tiny bit of flour here if it's sticking a wee bit. Shape it into a ball, resist the urge to play with it because it's SO SOFT, and then cover with plastic and leave to do its first rise, which takes about two hours!
- Pre-shape - I did a TON of reading when I was developing these, along with watching a bunch of videos and one technique that is new to me for rolls in particular is giving them a pre-shape. You divide the dough into the number of rolls you're going to make (in this case it is 12), then shape each into a ball and leave to hang out under some plastic wrap for 10 minutes or so, then shape them again into a ball. This helps develop even more tension in the dough and gives you beautiful perky round rolls!
- Second shape and second rise - The dough balls get another wee roll and then are arranged in the pan, covered lightly and left to do their second rise. This takes about an hour, and you can preheat the oven while this is happening. The rolls should puff up and double in size, and when poked gently with your fingertip, will spring back and leave a tiny dent.
- Bake the rolls - The rolls get brushed with egg wash and then are baked until golden brown. This takes 15-18 minutes, but you can check the internal temperature too if you need! For enriched dough you want to shoot for 190°f / 90°c. Internal temperature is a great way to check doneness if you're new to baking with yeast!
- Finish with garlic butter - If you're serving these right away, prepare the garlic butter while the rolls are baking. Butter and minced garlic get combined and simmered for just a wee bit on the stove to take the edge off the garlic and infuse the butter, then the warm garlic butter gets brushed over the rolls when they are hot out of the oven.


Ingredients in Garlic Butter Dinner Rolls
The ingredient list for these dinner rolls is a bit more lengthy than some other roll recipes, but I think that everything has its place and they all contribute to the most amazing roll recipe!
- Flour - We have All-Purpose and Bread Flour in these. The Bread Flour gives the dough strength which it needs to make a super round, soft and fluffy dinner roll.
- Yeast - I use active dry yeast, but you should be able to use Instant just fine if that's all you have - I need to test it but I don't see it being an issue. You can skip the activation step.
- Milk and Water - Milk helps with softness and browning.
- Milk Powder - Milk Powder gives a super soft, smooth, tender dough. I used whole milk powder, non-fat should work fine too.
- Butter - Provides softness and richness in the dough.
- Egg - Helps with dough strength and richness. This recipe only has one egg, just to help keep it together! There is another egg used as an egg wash too, to help the buns bake up to be beautifully golden brown.
- Salt - Essential for flavour in all bread recipes!

How to scale this recipe for other uses.
I tested this recipe both as a double and a single, but ultimately wanted to make a recipe that was super solid and can easily be doubled. For some reason in baking it is always easier to double a recipe than halve it and be certain that it worked, so I wanted to make sure that I had a super solid single batch recipe that you could double, and it works great. Use the scale button in the recipe card to double the ingredients.
I also tested out a bunch of different sized rolls. The recipe makes about 600g dough. You can divide this however you like depending on the roll size that you want. This recipe also makes really good burger buns, which I will cover in a new post very soon. You can use it to make 12 good sized dinner rolls as I have here in this post, but you could also:
- Divide the dough into 9 and arrange in a 9" square pan for 9 larger dinner rolls
- Divide into 6 and shape into buns to make 6 large burger buns. Or, divide into 8 to make 8 slightly smaller ones. You can either use rings for these or arrange them stand alone on your pan. I'll break my whole process down in a post soon!
- Double the recipe and use it to make 24 dinner rolls. If you do this, I would suggest arranging them on a half sheet pan. You could also divide the dough into 18 and make 18 slightly larger rolls. I would also use a half sheet pan for this. This would be great if you were feeding a few more people. The rolls are VERY easy to eat, particularly straight out of the oven, and make great leftovers, so if you've got a larger family to feed then I would suggest doubling


How to store Garlic Butter Dinner Rolls
The rolls store super well in an airtight container at room temperature and will stay soft for a few days. You can re-warm briefly in the microwave before eating them. If you're planning on having leftovers, don't add salt or the garlic butter to the tops until just before serving. It will go soggy while storing them.
Even if you are making these a little ahead of time (for example you make them in the morning for the evening meal), hold off on adding the garlic butter until just before serving. You can refresh them in the oven for 5 minutes or so just to warm them up. This will make sure they are nice and fresh when you brush the butter over them. Alternatively you could make a compound butter to serve them with. Something with garlic and herbs would be so good, and can be prepared ahead of time.
These would freeze well. Don't add the garlic butter, and once the rolls are cooled, pop them into a ziploc bag and freeze. Bring to room temperature and refresh in the oven or microwave before serving.

FAQ for Garlic Butter Dinner Rolls
- Can this recipe be doubled?
Yes, super easily. Just double everything (there is a button to do this in my recipe card). The rise time will be the same. See the notes above for scaling the recipe for possible roll configurations. - Can these be made sweet?
They can - just increase the sugar to 2 Tbsp. Rich eats these with Nutella or Peanut Butter all the time - you could also glaze them hot cross bun style when they come out of the oven to give them a shiny sweet finish. Obviously leave off of the garlic butter! - Can I make these ahead of time?
Yes! The dough takes a fair amount of time to do the first rise even at room temperature due to the higher quantity of liquid and butter and egg, so you could easily do the first rise overnight in the fridge and then assemble the next day. You can make the dough up to 24 hours ahead of when you need it. Any longer and I find that the yeast generally won't be as active. The rolls themselves store well but are best on the day they are made, so if you are planning ahead, I would aim to bake them on the day that you serve them. - Can I make these without a stand mixer?
Not these ones I don't think. The dough needs a LONG time in the mixer in order to develop enough strength, and it is really sticky. You could probably make these by hand if you really, really had to, but you're going to be there for a very long time kneading. If you want a recipe that can be made without a mixer, my small batch dinner rolls are perfect for this! - Help! My dough doesn't look like it is coming together!
It's a sticky dough, just a heads up! It needs about 15 to 20 minutes in the mixer, but it will come together! - Can Dinner Rolls be frozen?
I haven't tried it but I think that it would be fine to freeze the baked rolls in an airtight container. I would thaw on the counter and then refresh in the oven briefly to help soften them up. - Do I have to make the garlic butter?
Absolutely not - you do you here! You could sprinkle them with flaky sea salt after you brush with the egg wash, or you could sprinkle with some everything bagel seasoning, or sesame seeds. - How long do these need to rise for?
The first rise has been taking about 2 hours for me, and then the second takes about an hour. Because it is cold at the moment I am using a little countertop oven on the proof setting to rise my bread in. You can also generate this environment by microwaving a bowl of water for about 30 seconds, then removing and using the warm microwave to rise your bread, or you can do it in the oven with the light on. The most important thing is to watch your dough, not the timing. Rise time may vary a lot depending on what temperature your kitchen is. - Do I have to use Bread Flour?
Yep, it's super important. Bread Flour (or High Grade Flour if you are in NZ, or Strong flour if you're in the UK), is higher in protein than all-purpose flour, so is super important for developing a strong dough, especially when it's a soft one like these rolls. I tested a bunch of different ratios of bread to all-purpose flour when I was making these, and the bread flour makes a huge difference. Dough made with only AP doesn't come together as well and isn't as elastic. - Can I leave out the milk powder?
The role of the milk powder in these rolls is to help keep the dough super soft. I haven't tried it without it, so I am not sure about this sorry! I would get some if you can as it gives bread the most amazing soft texture. - What kind of pan should I use?
I prefer something metal - 12 rolls fit perfectly into a 9"x13" (23x33cm) pan. You can either use something with sides, or a quarter sheet pan works great too. I tested both and either are perfect. You can see all the products I use often here.


A few wee tips for Garlic Butter Dinner Rolls
- The dough will take a while to come together. Mine takes about 15 to 20 minutes in the mixer. If you're worried, set a timer and walk away. When it is ready it will be somewhat balling around the hook and pulling away from the sides, and the dough will be super smooth and elastic. You can do the windowpane test on it, where you stretch out the dough. It should stretch out enough that you can see light through it.
- Don't add more flour when you're mixing. The dough is sticky. And it takes a while to come together in the mixer, and even when it's done, it won't ball up around the hook as much as some other recipes do. It will be a bit tacky, and super smooth and elastic when it is ready to rise. This is the benefit of baking in grams - I know exactly how much flour you are adding in, so can be confident in telling you that your mix will come together just fine!
- You can add a tiny dusting of flour onto your work surface when shaping the dough into a ball to rise, and then a bit more when shaping. Use only just enough to help it not stick, not too much more. The dough is super nice to work with!
- To get your milk and water mixture lukewarm, just mix the milk with the 40g boiling water and it should give you a lukewarm situation! If it feels like it needs a little more warmth to get it lukewarm, just zap a little of the liquid in the microwave to warm it up a touch and add it back in.You want it to feel about body temperature when you stick your finger in. Too hot and it will kill the yeast so just be careful!

For more bun recipes, check out:
❤️ Made this recipe and love it? ❤️
I would LOVE for you to leave me a review and star rating below to let me know how you liked it! Also, please make sure to tag me on Instagram!
Answers to your baking questions
Over the years, many of you have asked me questions about:
- baking in grams
- adjusting oven temperatures
- what kind of salt to use
- and many more!
I've curated and answered them all for your easy reference in this frequently asked questions post!

Garlic Butter Dinner Rolls
- Prep Time: 20 minutes
- Cook Time: 15 minutes
- Total Time: 3 hours 15 minutes
- Yield: 12 rolls 1x
- Category: Dinner Rolls
- Cuisine: American
- Diet: Vegetarian
Description
The softest, squishiest garlic butter dinner rolls are the perfect accompaniment to any meal. These are easy and fun to make, and the recipe can easily be scaled. They are baked until golden brown then finished with a garlic butter when they are hot from the oven.
Ingredients
Bread Dough
- 150g whole milk, lukewarm
- 40g water, lukewarm
- 1 Tbsp granulated sugar
- 1 tsp active dry yeast
- 1 large egg, at room temperature
- 245g bread flour
- 50g all-purpose flour
- 20g milk powder
- ¾ tsp kosher salt
- 45g unsalted butter, at room temperature
- Egg wash - 1 egg beaten with 1 teaspoon cold water
Garlic Butter (Optional - see FAQ for other finishing options)
- 50g unsalted butter, cold from the fridge is fine
- 2 cloves garlic, finely minced or grated on a microplane
- Big pinch of flaky sea salt such as maldon
- Flaky Sea Salt such as Maldon to finish
Instructions
BREAD DOUGH
- Activate the yeast. In the bowl of a stand mixer, combine the milk, water, sugar, and yeast, and leave to stand for 5 minutes until foamy.
- Add the dough ingredients. Add the egg, bread flour, all-purpose flour, milk powder, salt, and butter, and mix with the dough hook attachment on low speed until combined, 2-3 minutes, scraping down if the hook is having a hard time reaching any dry flour.
- Mix the dough. Increase the speed of the mixer to medium-high and mix the dough for 15 to 20 minutes, until it is smooth, supple, and is pulling away from the sides. It will go through stages where it looks like it will never come together - this is fine, just leave it to keep mixing and it will develop strength. It may not pull fully away from the sides but you will see that the gluten is developing and the dough generally moves as one mass. It will be very smooth and stretchy and will pass the windowpane test.
- Leave the dough to rise. Turn the dough out onto a very lightly floured surface, and shape into a tight ball. Transfer to a lightly oiled bowl and cover with plastic wrap. Leave to proof in a warm place until doubled in size, which will take anywhere between 1 ½ to 2 ½ hours depending on the temperature of your kitchen.
- Divide the dough. Turn the dough out onto a lightly floured surface, and divide into 12 pieces of equal weight. The dough should weigh about 600g so you want to shoot for 50 g per piece. Weigh your dough first just to check and divide that number by 12 to work out your weight per ball.
- Shape the dinner rolls. Working with one piece of dough at a time, flatten out the piece of dough, then tuck up into a ball, then turn the ball seam side down and roll into a tight ball by cupping your hand to create a 'claw' shape, using the tension from the counter to roll the dough tightly. Place to the side and cover lightly with plastic wrap. Repeat with the remaining pieces of dough, grouping the balls together on your counter with a little space between them so they don't touch.
- Arrange in the pan. Grease or line a 9"x13" (23x33cm) pan. Leave the dough balls to rest under the plastic for 10 minutes, then give them a quick re-roll to tighten the ball back up, and arrange in the prepared pan. There will be a little space between your dough balls. Cover the pan with plastic and leave to rise in a warm spot for about an hour, until the dough balls are puffy and when poked gently, an indentation that slowly springs back is left. See images in post for immediately after rolling, and just before the oven.
- Bake the rolls. When there is about 20 minutes to go on the second rising period of the rolls, preheat the oven to 375°f / 190°c. Brush the rolls with egg wash, and place in the oven. Bake uncovered for 15 to 18 minutes, until the rolls are evenly golden brown and register 190°f / 90°c internal temperature on a thermometer (checking the internal temperature isn't super important, just bake until nice and golden brown).
- Finish the rolls. When the rolls are done, remove from the oven. If serving immediately, brush with the garlic butter and sprinkle with extra flaky sea salt (see notes).
GARLIC BUTTER
- Melt the butter and garlic. Place the butter and garlic into a small saucepan and place over medium low heat. Cook until the butter is melted, then cook for a further 1-2 minutes, stirring often, to infuse the butter and take the edge off the garlic. Add a big pinch of salt, then stir to combine and use. This can be made ahead and then just re-melted prior to use.
Notes
If you are serving these right away, add the garlic butter. If you are making ahead, leave the garlic butter off until just before serving as it can make them soggy. Warm the rolls in the oven then brush with the garlic butter and serve.
Comments
Heather says
These were terrific and the recipe was so easy to follow! The dough was beautiful...The perfect pillowy soft roll for dinner! Five stars all around!
Daniela says
Made these for a family dinner the other night. Five stars. Everyone raved about them. Super soft, super delicious. We didnt finish all of them and they were still yum the next day. Thanks for another awesome recipe, Erin! I think this is the 7th I’ve made. You never let me down.
Marianne Jessiman-Perreault says
SO good. The perfect bun and I will never make another bun again. My son, who is a bun expert(because that’s all he eats) exclaimed these were “the best buns he’s ever had in his life!!”
Can’t wait to make them again!
Hayley says
The best dinner rolls, super easy to make, this is now my go-to recipe!
Cassandra says
Absolutely amazing! Easy to make & seriously good. The detailed notes & tips really helped. Thank you so much for this recipe- a new favorite in my household!
Oksana says
These turned out super soft and very delicious, definitely a recipe I'll be using again. I also loved how simple the dough was, just throw everything together and mix; no time-consuming extra steps. A sure keeper
Caroline says
Made these tonight and they were amazing. I’ve never made rolls before but I smashed this out of the park. Thanks for the fantastic recipe and instructions. Can’t wait to make again.
Antonia says
I've made these a bunch of times now. I even found the milk powder and it sure makes them even softer. Every time I bring them to a barbecue or any other type of gathering people are obsessed with them and can't believe I didn't get them from a bakery. Erin, you are a genius!
Antonia says
Thank you so much for the recipe! I tried these yesterday and they came out great. Even without the milk powder cause it's hard to get in Germany.
Do you have any suggestions for a substitute?
Erin Clarkson says
Hi! You can just leave it out! 🙂
Kendall says
These dinner rolls are THE BEST. As is everything Cloudy Kitchen – truly have not had a recipe I haven't loved. Made it the way of the recipe the first few times, but going to try an overnight rise for Thanksgiving tomorrow so I have time to make 4 dozen in the AM. Thanks again Erin for an amazing recipe and for being so thorough in your notes! P.s. GRAMS ARE LIFE.
Jessa says
My first time making rolls and they were a total success. Her recipes are so thoughtful and well-written. I’ll make these again for sure.
Erin says
These rolls were Beyond Fantastic! Perfect texture and flavor! They were the biggest hit at Thanksgiving dinner. People could not stop raving about them. I will be making these rolls all year, not just at Thanksgiving!
Deb Will says
I made these for Thanksgiving and they were a hit! I had been eyeing them on your site for a while and finally took the plunge…Now that I bought the milk powder, I’m tempted to make them again every week! I followed your recipe exactly and would not change a thing. Thanks a million!
lucy says
these were literally insane. highly recommend! 🙂
SS says
What is the technique for making these rolls ahead of time? I saw that we can do the first rise in the fridge overnight but what do we do after that? Does the second rise need to be longer because the dough would be cold?
Erin Clarkson says
Hi! You proceed as usual - you will need to leave the dough out longer for the second rise, so just go by how the dough looks rather than the time that is in the recipe 🙂
Lara says
A firm family favourite! I have to make a triple batch of these because everyone loves them so much.
Vanessa Shee says
Another amazing recipe! These rolls are delicious and soft! My new favourite dinner roll recipe
Martina says
Easy and delicious!
Diane says
This garlic roll recipe is only calling for one teaspoon of yeast? I have never seen a recipe that requires so little yeast. I realize it's only a dozen rolls but seems odd.
Erin Clarkson says
If you're not comfortable making it that's ok! It is the correct amount of yeast though.
Jackie says
It is! I've made this recipe at least two dozen times and it comes out perfect every time. As someone who does a lot of bread making, you don't need a lot of yeast for these type of recipes compared to a sweet roll
Jackie says
This is my favorite roll recipe! I use it for every holiday. The structure inside the rolls is just fantastic!
Cassie says
These are amazing! My family's favorite rolls! So delicious and beautiful, and easy enough to make once you read through the whole post. Our thanksgiving was 6 people, including one toddler and I had to make 4 dozen rolls because everyone eats multiple and wants leftovers. Genuinely cannot recommend them highly enough!
Rachel says
Delicious!!
Sarah Keyarts says
I made these yesterday for Christmas dinner and oh my goodness they were delightful! The texture is so fluffy and the garlic butter was such a perfect finish. All your notes and detailed science behind everything made them easy to make, too!
Lexi Norris says
This recipe works with a hand held mixer and instant yeast! I just adjusted the recipe for what I had. The initial dough was questionable I think due to my mixer but I saw it through and it came out amazing! Will definitely make again!
Katie says
Fantastic recipe! I'm a novice Baker and amazed that they are incredibly soft and so yum, even without the garlic butter. I should have used a smaller pan so they were a bit closer together and more "pull apart", but they're delicious regardless!
Leah says
Made these 3 times already. Always a hit. Best fresh out of the oven… my family asks me to triple the recipe now 😂
Jan Lane says
Made Cloudy Kitchens Garlic Dinner Rolls today. 11/10. So easy and yummy. Will be living off soup and these rolls this winter!
Also made her Rhubarb Bars without Rhubarb, subbed in pear and crystallized ginger with spices. Sooooo good…. Another banger. Thank you Erin, simple way to follow recipes that taste so good! 🙌
Annette Carstens says
I have made these buns previously (made recipe 5 x), it was s huge success at the potluck.
Erica says
Hi! Will these cook fine you think in a glass 9x13 casserole dish? I don’t have a 9x13 metal one.
Erin Clarkson says
Yep just make sure that you line it so that they don't stick 🙂
Erica says
Awesome! I’ve made these with great success and the burger buns. Your recipes are my fav! Always easy to follow and such thorough instructions.
Can I beg you to come up with some Einkorn flour recipes? I’m desperate for a good sandwich bread and roll/bun recipe. I’ve tried so many and they never turn out.
Erin Clarkson says
They look great! I haven't really worked too much with Einkorn sorry!
Summer says
Half baked harvest could never make such a user friendly recipe. I have never made these kinds of rolls before, and I felt supported throughout the entire process. They came out perfect. Top tier recipe writing IMO
Andrea says
Love these for a quicker non-sourdough dinner roll, people are always stoked about them at gatherings too 🤗
Sandra says
Have made these for Thanksgiving two years in a row and they are delicious and so soft! It’s easy to weigh everything out and the dough comes together just as she says.
Deb Will says
This recipe is perfect! I made a double recipe. Half was this recipe exactly. The other half I filled with either Nutella or almond paste and left off the garlic butter 😉 . Of course it was delicious 😋
AnnieVW says
I made these without garlic for Thanksgiving b/c the ingredients are pretty close to my grandma's recipe, which I can't make b/c she measured the flour "by feel" and I'm incapable of doing that (never turns out right). I like recipes with gram measurements for my scale! Will definitely make these again.
Erin Clarkson says
Oh yayyyy I love that! Haha my grandma did the same and thankfully someone poked a scale under her one time and wrote most things down!
Hannah says
Love these! Made with a different rise schedule from another Erin recipe and it worked great!
Rachel says
These are my go to bread rolls if I want to impress anybody, so soft and delicious! Firm favourite in my household!