
One Bowl Chocolate Sheet Cake with Vanilla Bean Swiss Meringue Buttercream. This cake is super easy to make and is filled with a quick mixed berry filling. It is finished with fluffy pink Vanilla Bean Swiss Meringue Buttercream Piping.


One Bowl Chocolate Snack Cake
Hi hi! I am here with a recipe I’ve been excited to share with you for a while now - a one bowl chocolate snack cake, with a mixed berry filling and vanilla bean swiss meringue buttercream. I am a huge fan of snack cakes - I am sure that I’m not alone, but I find transporting and cutting layer cakes insanely stressful (mildy scarred from a mid summer cake disaster in the back of a cab a few years back), so sheet cakes are a dream. They are nice and easy to transport, are great for feeding a crowd, and in the case of this cake, can be assembled and served right in the pan that it is baked in!
I think that this chocolate snack cake might be my new favourite - there is something so relaxing about making a cake without having to drag out your mixer, and this one comes together all in the one bowl. I wanted a cake that was the perfect texture, rich with chocolate flavour, and was super versatile but also easy to make, and this one checks all the boxes. Once it was cooled, I sliced it in half, and filled it with my favorite vanilla bean Swiss meringue buttercream (which you have to use your mixer for but it is always, always worth it), and a homemade mixed berry jam filling. You can absolutely use a store bought jam in this situation, but with berries coming into their peak right about now here in NYC, I wanted to capture as much early summer flavour as I could. I finished the filled cake off with my very favourite way to decorate a cake - piped blobs! This method is super easy, but by using a range of piping tips and a range of different coloured frostings, you are able to make it look super fancy for not too much more effort. I switched it up a little this time, taking inspiration from this photo from Wilton’s Instagram page which I have had bookmarked on my phone for the longest time, and added in some rosettes and wriggles, and finished it with just a few sprinkles!
Wilton Decorating tools for Chocolate Snack Cake
I used some amazing new tools from Wilton to make this cake - their new Texturra Performance Non-Stick Bakeware line is an absolute dream to bake with. Not only is it super lightweight and the cutest colour, it is covered in a nonstick coating, which means that your cake releases perfectly every time. I was running late for a spin class last week and had Rich take the cake out of the oven for me - I had no worries whatsoever knowing that it would pop out of the pan so nicely! I used the Texturra Performance Square Pan, 9x9 inch, which was the perfect size!
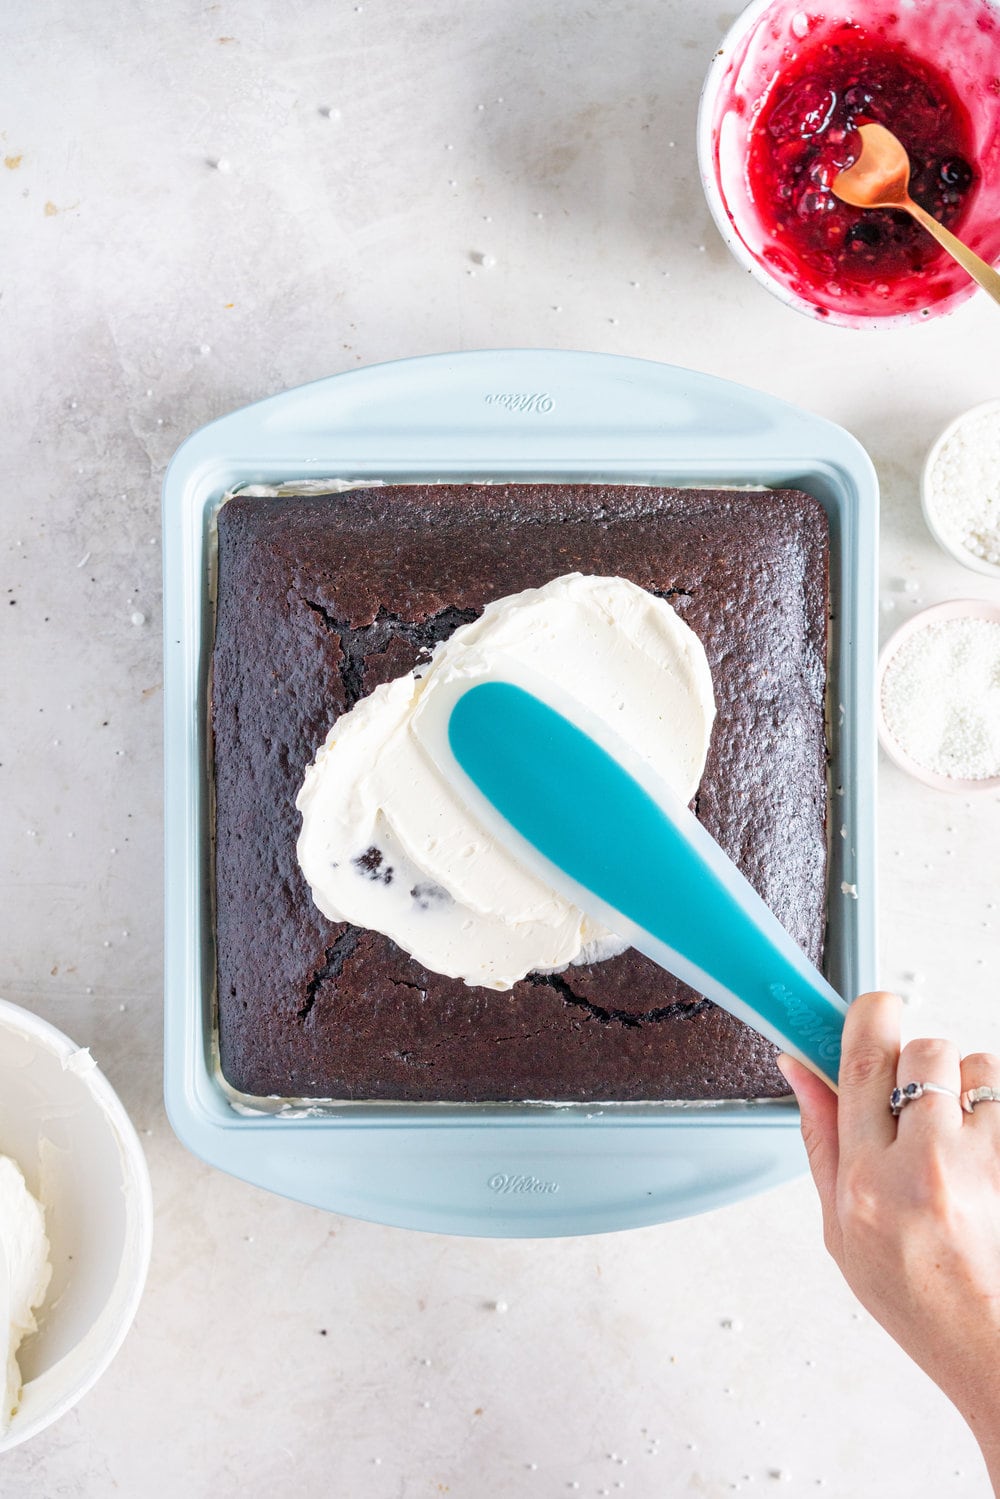
I also got to have a wee play around with their new Versa-Tools, which are a line of baking tools which have multiple uses - something that is a must in a small NYC kitchen. I used the Versa-Tools Universal Spatula, which was perfect for this cake - I used the large end to to transfer the cake batter cleanly from the bowl into the cake pan, and then again to make the mixed berry filling for the cake, then used the small end to spread the buttercream onto the cake, and for transferring the coloured buttercream into the individual piping bags. It’s already become a well reached for tool in my kitchen - I love the versatility!
I also used a whole bunch of my favourites from Wilton - they have the most amazing range of piping tips. For this cake I made the blobs with the #199, #4B, and #6B tips, then added in the wriggle design with the #104 petal tip, and the rosettes with a #1M. I used couplers in my piping bags, which meant that I was able to switch up the tips between the bags, allowing me to pipe different designs in different colours super easily to give me a great range in texture and colour. I also tried out Wilton’s Icing bag ties which are great for keeping everything contained - I’m a shocker at concentrating too hard and not realising my buttercream is escaping out the back of my piping bag!
I hope that you give this one a go - it’s simple but delicious, and the new Wilton tools are a dream to use!
A few wee tips for One Bowl Chocolate Snack Cake
- My favourite way to make an ombre buttercream is by using just one colour of food colouring and then tinting bowls of buttercream with different amounts of colour. I used Wilton’s Burgundy gel food colour for this and it made the most beautiful pink!
- Mix it up a bit - I popped two colours of buttercream into one piping bag to give me a swirled look. I used it for both the piped wriggles and some of the blobs!
- I finished the cake off with some White Nonpariels Sprinkles, and some White Sugar Pearl Sprinkles
- I made the mixed berry filling for the cake, but you can absolutely use a store bought jam too. If you are making it, make sure you leave enough time for it to cool!
- It seems like loads of buttercream, but you don’t want to run out, which is the worst thing. Store any leftover in the fridge or freezer for another project!
- I used Wilton Bake even strips to help my cake bake up nice and flat!
For more Snack and Sheet Cakes, Check out:
Thank you so much to Wilton for sponsoring this post! All opinions are my own.
❤️ Made this recipe and love it? ❤️
I would LOVE for you to leave me a review and star rating below to let me know how you liked it! Also, please make sure to tag me on Instagram!
Answers to your baking questions
Over the years, many of you have asked me questions about:
- baking in grams
- adjusting oven temperatures
- what kind of salt to use
- and many more!
I've curated and answered them all for your easy reference in this frequently asked questions post!

One Bowl Chocolate Snack Cake
- Prep Time: 45 minutes
- Cook Time: 30
- Total Time: 1 hour 15 minutes
- Yield: one 9" snack cake 1x
- Category: Cake
- Method: Baking
- Cuisine: American
Description
One Bowl Chocolate Sheet Cake with Vanilla Bean Swiss Meringue Buttercream. This cake is super easy to make and is filled with a quick mixed berry filling. It is finished with fluffy pink Vanilla Bean Swiss Meringue Buttercream Piping.
Ingredients
One Bowl Chocolate Sheet Cake
- 250g all-purpose flour
- 250g granulated sugar
- 80g dutch process cocoa
- 2 tsp espresso powder
- ½ tsp salt
- 1 tsp baking soda
- 1 ½ tsp baking powder
- 2 eggs
- 1 egg yolk
- 1 tsp vanilla bean paste
- 120g neutral oil
- 220g whole milk, at room temperature
- 200g boiling water
Mixed Berry Filling
- 200g trimmed and diced strawberries
- 200g blackberries
- 200g raspberries
- 200g blueberries
- ½ tsp vanilla bean paste
- pinch of salt
- 350g granulated sugar
- Juice of half a lemon
Vanilla Bean Swiss Meringue Buttercream
- 250g egg whites
- 400g sugar
- ¾ tsp salt
- 1 tsp vanilla bean paste
- 900g (8 sticks) unsalted butter, cold, cut into small cubes
Instructions
CHOCOLATE CAKE
- Preheat the oven to 350°f / 180°c. Lightly spray a Texturra Performance Square Pan, 9x9 inch with baking spray and set aside.
- In a large bowl, whisk together the flour, sugar, cocoa, espresso powder, salt, baking soda, and baking powder. Add the eggs, yolk, vanilla bean paste, oil, and milk, and mix to combine well. Add the boiling water and whisk until incorporated.
- Transfer the batter into the prepared pan, and tap a few times on a flat surface to remove any excess bubbles.
- Bake the cake for 30 to 35 minutes, until the centre springs back, or a cake tester inserted in the middle of the cake comes out cleanly.
- Cool in the pan for 15 minutes, then transfer to a wire rack and allow to cool completely.
MIXED BERRY JAM FILLING
- Place a small plate in the freezer - this will be used to test your jam. Place the berries and sugar in a large saucepan, and mix to combine. Allow to sit for 30 minutes. Add the vanilla bean paste and salt
- Place the saucepan over medium high heat, and mash the berries using a potato masher. Heat, stirring frequently, until the mixture comes to a boil, then cook for a further 10 to 15 minutes, until it has thickened slightly and passes the “wrinkle test” - when you put a little onto the plate in the freezer and freeze for a minute, if you nudge the jam, it should wrinkle if it is done.
- Add the lemon and mix to combine. Transfer to a clean jar, cool, and store in the fridge until needed.
VANILLA BEAN SWISS MERINGUE BUTTERCREAM
- Place the egg whites, sugar and salt in the bowl of a stand mixer or a heat proof bowl. Place over a pot of simmering water, ensuring that the water does not touch the bowl. Heat, whisking constantly, until the mixture registers 160˚f / 70˚c on a thermometer and the sugar has dissolved. Carefully transfer the bowl to the mixer, and fit with the whisk attachment.
- Whip the egg whites on high for 8-10 minutes, until they hold a relatively stiff peak. Add the butter one chunk at a time. The mixture may look curdled - but just keep mixing! Once all the butter is incorporated, mix on high for a further 5 minutes. Add the vanilla and mix until incorporated.
- Once the buttercream has finished mixing, and is smooth and silky, mix for a further 2-3 minutes, then switch to the paddle attachment and mix on low for one minute to remove any air.
ASSEMBLY
- Transfer some of the buttercream to a piping bag fitted with a medium round tip - this will be used to make a buttercream dam to hold in the passionfruit filling between layers. Using a sharp knife, cut the cake horizontally into two pieces.
- Place the first layer of cake into the cake pan, then top with about a cup of the Swiss meringue buttercream. Pipe a ‘dam’ around the outside of the cake using the piping bag, then fill in using the mixed berry jam filling. You will likely not need all of it - store remainder in the fridge.
- Top with the second layer of cake, and spread a smooth layer of buttercream over the top surface of the cake. Place in the fridge or freezer while you prep the buttercream topping.
- Divide the remaining buttercream into 4-5 bowls, and tint into various shades of your desired colour using gel food colouring. Transfer to piping bags fitted with various piping tips of your choice - I used Wilton 104, 199, 1M, 4B and 6B.
- Pipe a combination of rosettes, wriggles (using the 104 tip), and blobs onto the surface of the cake - I found that it was best to pipe the rosettes and wriggles first, then fill in with the blobs.
- Chill well - allow to come to room temperature an hour before serving. Cut with a sharp knife, wiping the blade between cuts.
- Store leftovers in an airtight container in the fridge.
Comments
Stella says
Can I use this recipe to make a (say, triple) layered cake?
Erin says
Hi! I have a layer cake on my site - you can just scale up this recipe! Otherwise it should work 🙂
Fran Smith says
Love this recipe. It’s easy and super tasty. The individual parts are great skills to have in your kit. I keep coming back time and time again to this one. The cake is light and tasty and can be used with other flavours if you want to change things up. The berry filling also makes for a great homemade jam. Great icing is always a good thing to have. Definitely recommend.
Cara says
Delicious moist chocolate cake on its own, with the instructed filling and buttercream, or with no filling and just a basic b buttercream :). Thanks, Erin!