


I’ve been meaning to post a wee variation on my Swedish Cinnamon Roll recipe for a while now, but just kinda never got around to it. It’s a super popular recipe on the blog, and I totally understand why - swirly bread, cardamom, and swedish pearl sugar is the most perfect combo.
We dreamed these Dark Chocolate, Tahini, and Sesame buns up during a baking day with my good friend Rachel, who owns an amazing Tahini and Halva business, Seed and Mill, in Chelsea Market here in NYC. We spent the day shooting at her beautiful apartment in Chelsea - there was loads of Tahini and Chocolate, and a casual professional butt mask shoot going on in the living room (It’s exactly what you think it is). There was loads of baking, and a couple of weird recipe tests, and a whole lot of butts. Dream day, right?!
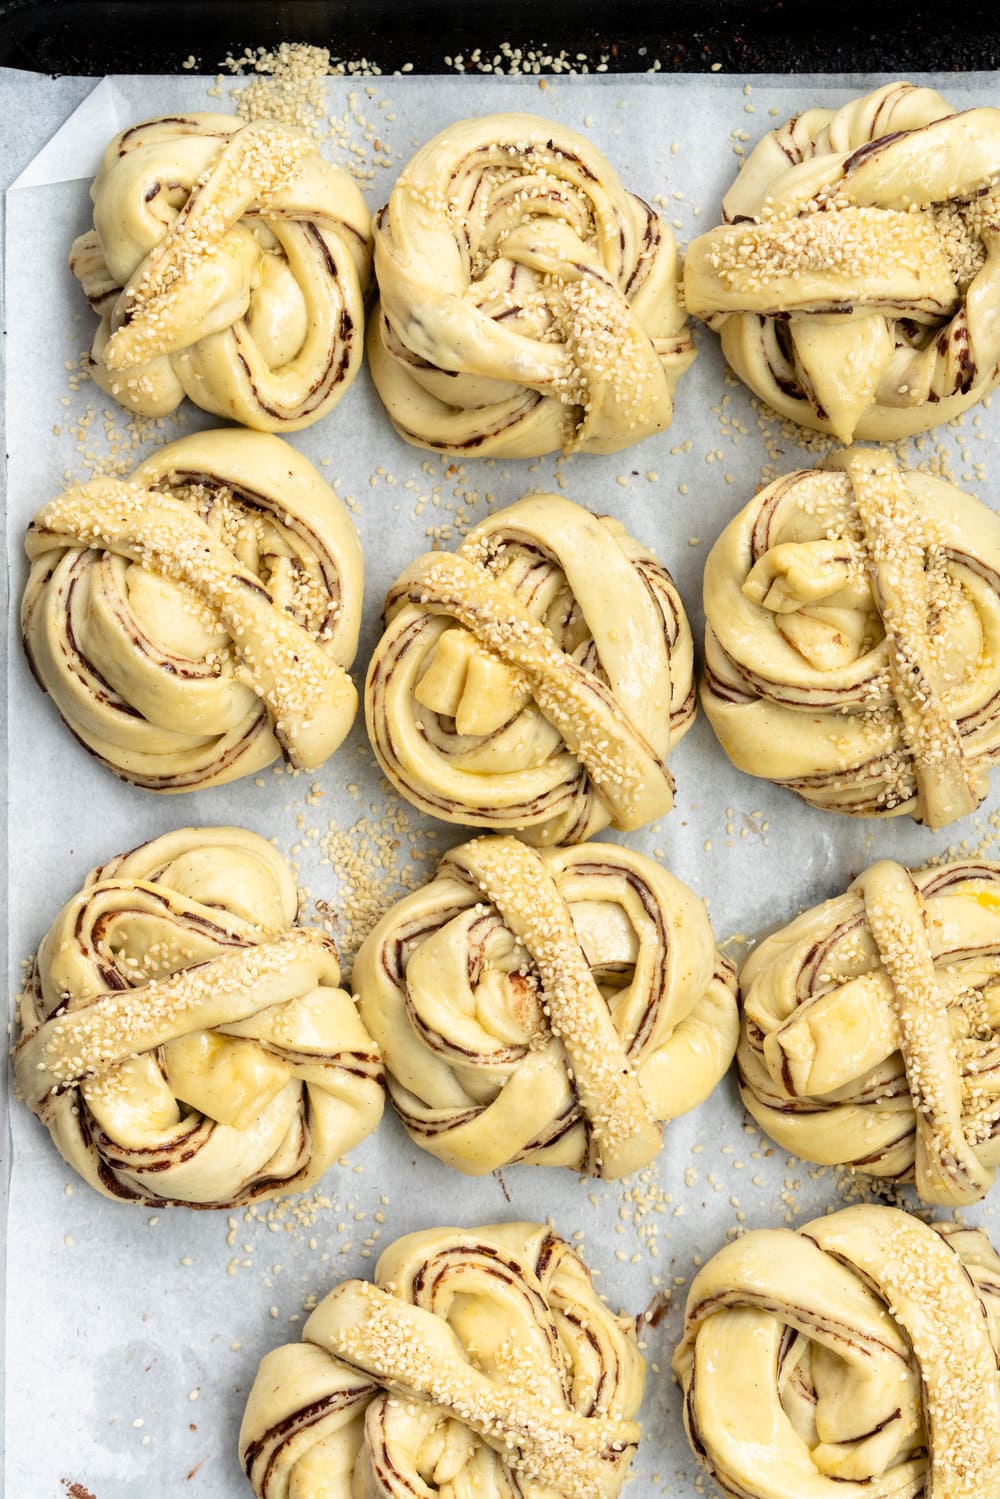
I made the dough the evening before, and did the first rise in the fridge, and Rachel made a ridiculous dark chocolate tahini spread to go inside the buns. We rolled out the dough, slathered it with the chocolate tahini mixture, then folded it up, cut it into strips, and twisted the strips into twirly, swirly buns. The buns look complicated to make, but lots of the hard work is done by twisting the strip up so it is swirly before you shape it into the final bun.
To me, these are the perfect variation on the swedish bun. Because there is no sugar in the filling, they aren’t super sweet, but the flavour of tahini and chocolate play beautifully with the sesame on top. They are easy to make but look fancy, and I love how fun and pretty the twisted dough looks. Enjoy! x
A few wee tips:
- This little tutorial from the lovely Izy is a perfect visual on how to make these! Basically you go around your fingers and thumb twice, then take your thumb out before you take the strip over the top and tuck it under. Watch the gif. It makes it much less confusing. Even if they get a bit messy, I promise they will still taste amazing
- These aren’t super sweet. We finished them with some sesame seeds, but if you wanted to up the sweetness in them, you could finish them with some swedish pearl sugar.
- Ideally the tahini chocolate filling needs a little bit of time to rest and cool - either overnight, or a few hours. It won’t go super solid like nutella, but it will thicken a little as it sits!
- You may have a little filling leftover, but it is great served with the buns, on toast, or drizzled over a banana.
- If I know I am making something ahead of time, I like to do the first rise overnight. Just make the bread dough, shape into a ball, and place into a large bowl (I usually just reuse my mixer bowl), and leave it in the fridge overnight. Then in the morning the dough is risen and will be super easy to work with! I find if I rise overnight I can skip the chilling step once the dough is rolled out.
❤️ Made this recipe and love it? ❤️
I would LOVE for you to leave me a review and star rating below to let me know how you liked it! Also, please make sure to tag me on Instagram!
Answers to your baking questions
Over the years, many of you have asked me questions about:
- baking in grams
- adjusting oven temperatures
- what kind of salt to use
- and many more!
I've curated and answered them all for your easy reference in this frequently asked questions post!

Dark Chocolate, Tahini, and Sesame Buns
- Yield: Makes about 12 1x
Description
Dark Chocolate, Tahini, and Sesame Buns
Ingredients
Bread Dough
- 250g whole milk, lukewarm
- 100g sugar, divided
- 2 ¼ tsp active dry yeast
- 525g all-purpose flour
- ½ tsp salt
- 1 small egg, at room temperature
- 75g (5 Tbsp) unsalted butter, at room temperature
Filling
- 200g Bittersweet dark chocolate (I used 65%)
- 200g Tahini (I used Seed and Mill)
- ⅛ tsp salt
- Sesame Seeds or Swedish pearl sugar to sprinkle (see notes)
Instructions
BREAD DOUGH
- Place the lukewarm milk, 1 tablespoon of the sugar, and the yeast in a medium sized bowl, and stir to combine. Leave for 10-15 minutes, or until foamy.
- In the bowl of a stand mixer fitted with the dough hook attachment, place the flour, salt, and remaining sugar, and mix briefly to combine.
- Add the milk mixture and the egg to the dry ingredients, and mix on low for 2-3 minutes. Increase the speed of the mixer to medium, and mix for a further 5 minutes. Add the butter a little at a time, waiting until it is incorporated until adding the next piece. Mix for a further 7-10 minutes, until the dough is smooth and soft.
- Cover the bowl with plastic wrap and place in a warm place until doubled in size, 45 minutes to an hour. Alternatively you can do the first rise overnight.
DARK CHOCOLATE TAHINI FILLING
- Combine all of the filling ingredients in a heat safe bowl, and place over a pot of simmering water to create a double boiler setup. Ensure that the bowl does not touch the water. Heat, stirring occasionally with a spatula, until the chocolate has melted and the mixture has combined. Do not whisk or you could cause the tahini to seize. Transfer into a jar and allow to sit at room temperature for at least an hour, or overnight. Store at room temperature.
ASSEMBLY
- Turn out the dough onto a lightly floured surface, and roll into a 24"x15" (60cm x 40cm) rectangle. If you find that the dough is snapping back and hard to work with, cover it lightly with a tea towel and leave it for 5 minutes to relax before continuing to roll out.
- Using an offset spatula, spread about 6 tablespoon of the dark chocolate tahini spread over the dough, ensuring the mixture goes right to the edges. Holding the short side, starting on the left, fold the dough over a third, then fold the right side over so that it covers the left, the same way that you would fold a letter to go into an envelope. Transfer the dough to a baking sheet, cover lightly with plastic wrap, and place in the fridge for 5-10 minutes to help the filling firm up a little. (See notes)
- Remove the dough from the fridge and transfer back to your work surface. Roll out slightly, to a rectangle approximately 15”x12” (40cm x 30cm). Using a ruler and a pastry wheel, working on the short side (so cutting long strips), cut the dough into long strips approximately 2cm (0.8 inches) wide.
- Line a baking sheet with parchment paper. Working with one strip at a time, holding both ends, twist the strip a couple of times. Then, hold one end in your hand, and wrap the other end twice around your four fingers and thumb. Remove your thumb, and loop the strip over the top of the roll, and tuck it in underneath along with your thumb loop (see notes for tutorial). Place each bun on the prepared baking sheet, leaving a little space between each. Once you have twisted all of your buns, cover the baking sheet loosely with plastic, and allow to sit in a warm place for 30-40 minutes, or until the cinnamon rolls have risen slightly. While the rolls are rising, preheat the oven to 400°f / 200°c.
- Lightly egg wash each roll, and sprinkle with sesame seeds. Bake for 15 minutes, checking after 12, or until golden brown. Remove from the oven and allow to cool for 5 minutes on the baking sheet, before transferring to a wire rack and allowing to cool completely. Serve with extra tahini chocolate spread.
- Store remaining rolls in an airtight container. Warm slightly in the microwave before serving.
Comments
Mads says
Oh I love these! Mine came out a bit chewy but I actually really like the texture. I added a bit of brown sugar to the filling to make it a little more sweet and that turned out great. Serving them with the extra filling is the way to go! I'll definitely be making these again, they're delicious and I like the more unique flavors.
Ashley says
These were a total disaster. The chocolate tahini didn’t set up even after overnight but I tried it anyway and the filling spilled out all over the place. What a waste of perfectly good ingredients.
Sheena says
I’ve had these in my to-make list for a long while and finally got around to it today. Can’t believe it has taken me so long! I always appreciate baking recipes that give measurements by weight, makes it so simple without having to do conversions. These buns turned out absolutely perfect- not too sweet, but definitely delicious with that chocolate and sesame hit. Bun dough is easy to work with and bakes up lovely. I didn’t have any problem with the filling being too runny, just followed the directions and left it on the counter for an hour before using. Twisting the buns looks intimidating but is actually quite simple and looks so impressive. I’ll definitely be making these again!
Lucy says
Can extras be frozen?
Erin Clarkson says
Yep!