
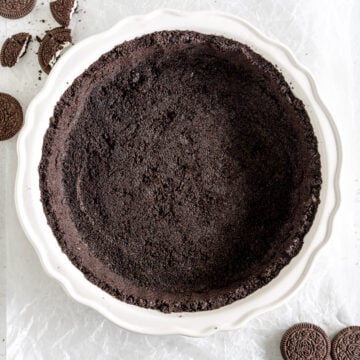
This super easy Oreo Pie Crust only has two ingredients - Oreos and butter! This cookie crust can be made in less than 20 minutes. It is the perfect base for a pie or no bake bar recipe. This homemade Oreo crust holds its shape well and can easily be made ahead of time. Read my post for all my tips and tricks on the perfect Oreo Cookie crust!

Hi hi! I am just popping in to share the recipe for this super easy 2 ingredient Oreo Cookie pie crust! Making a crumb crust for a pie is a super fun and really simple option if you don't want to go use a regular blind baked pie crust for a single crust pie, and they are super, super delicious.
I used this Oreo Crust as the base of my new French Silk Pie recipe, but it is perfect for all kinds of things - you can use it as the base of a bar, or for a cheesecake, or for Oreo Brownies. I have never used a store bought crumb crust myself, but I can guarantee you this will be 100 times tastier and a lot fresher (and it is so satisfying to make!).
This Oreo Crust takes about 10 minutes to make and then has another 10 minutes in the oven, and it is is good to go! You can easily make it up to a day ahead of time so that you can add your filling whenever you are ready.


What is the best pan to use for an Oreo Crust?
I tested this Oreo pie crust in a few different pans, and I have some notes. If you have made any of my pie recipes before you will know that I am a big fan of using a metal pie pan over ceramic or glass for pies that use a classic pie crust recipe.
However. You do not want to do this for a crust like this Oreo crust, or a graham cracker crust. I tested them in a non stick pan, and the pan did exactly what it is made to do - it didn't stick. The crumb crust slumped down into the bottom of the pan and didn't stick to the sides.
So for a crust like this oreo crust, you can use a ceramic or glass pie dish - it makes enough for a thick crust for a 9" pan or a thinner crust for a slightly larger pan that is a bit deeper, like the one I used for my French Silk Pie. The quantity of crust would also work great for a 9" springform pan, or make enough crust for a 9" square pan.

The right ratio of butter to oreos
I had a few pie slumps with this recipe test, which is funny seeing as it is so simple - but I quickly learnt that too much butter causes the crust to slump down the pie plate in the oven too.
The quantity of butter may seem small, but because of the cream filling being left in the oreo cookies, you need less than you think. Make sure that the amount of butter is 45g melted butter - you may need to re-weigh after melting just to check that you have enough.
How to make a super even Oreo Crust
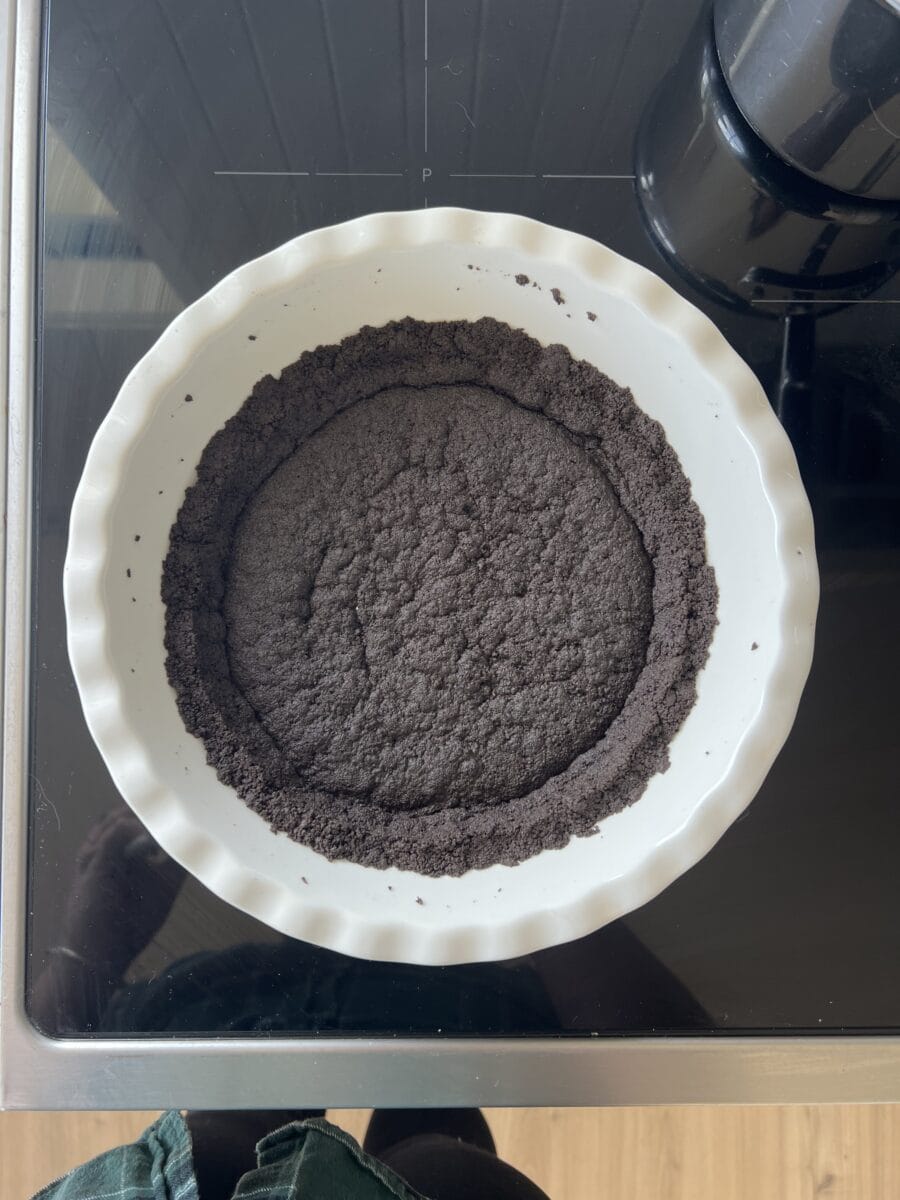
I LOVE making homemade crumb crusts because I find the process of smoothing them into the pan really satisfying, and there is a way to make sure that you have a nice even crust on the sides and the bottom of the pan: Do the sides first.
I like to fully compact the crust onto the edges of the pie pan first, and the easiest way to do this is to divide up the crust and add the part you are using for the sides first, and then add the rest when you are ready to form the bottom.
I usually add 160g of the crust to the pan first (just pop the pan onto the scale and weigh out the right amount of crust).
Using either a straight sided measuring cup or flat bottomed drinking glass, evenly arrange the crumbs around the pie pan, then press them up against the edges of the crust. If your crust is coming close to the top edge of your pan, you can use the thumb or finger of your opposite hand to press down slightly to give you a nice top edge.
Once the edge of the pie crust is done, add the remainder of the crust mixture and smooth down, making sure that you have full contact with the side crust - you do not want to leave a gap or you will have structural failure when you slice your pie.


❤️ Made this recipe and love it? ❤️
I would LOVE for you to leave me a review and star rating below to let me know how you liked it! Also, please make sure to tag me on Instagram!
Answers to your baking questions
Over the years, many of you have asked me questions about:
- baking in grams
- adjusting oven temperatures
- what kind of salt to use
- and many more!
I've curated and answered them all for your easy reference in this frequently asked questions post!
2 Ingredient Oreo Crust
- Prep Time: 10 minutes
- Cook Time: 10 minutes
- Total Time: 20 minutes
- Yield: One Pie Crust
- Category: Pie
- Method: Baking
- Cuisine: American
Description
This super easy Oreo Pie Crust only has two ingredients - Oreos and butter! This cookie crust can be made in less than 20 minutes. It is the perfect base for a pie or no bake bar recipe. This homemade Oreo crust holds its shape well and can easily be made ahead of time. Read my post for all my tips and tricks on the perfect Oreo Cookie crust!
Ingredients
- 250g regular oreos, whole (keep the cream in the middle)
- 45g melted salted butter (if you only have unsalted butter, add a pinch of salt)
Instructions
General Crust Preparation
- Place the oreos in the bowl of a food processor, and pulse until only fine crumbs remain. Alternatively you can place them into a ziploc bag and roll over it with a rolling pin until fine crumbs form.
- Transfer the crumbs to a medium bowl, and add the butter. Mix with a spatula until well combined. Use the crust as directed.
To make into a pie crust (blind baked)
- Preheat the oven to 350°f / 180°c.
- Place 160g of the crust mixture into the pan you are using - this quantity will be used to build the sides of your crust.
- Pat the crust mixture onto the sides of the pan, then use a straight sided measuring cup or drinking glass to help press it evenly against the edges of the pan. You want to make it nice and compact. You can use the fingers or thumb on the other hand to help keep a nice even top edge on your crust.
- Add the remainder of the crust mixture and spread evenly over the bottom of the pie pan, then compact down with whatever flat tool you are using. Make sure that there is a good join between the edges and sides of the crust - if needed, use your fingers to make sure that it is all well sealed.
- Bake the pie crust for 10 minutes, then remove from the oven and allow to cool completely.
- Proceed with the recipe as written. This crust can be made up to 24 hours ahead of time and stored in the fridge until ready to use.
To make into a crust for a cheesecake / brownie etc
- Grease and line the pan of your choice with parchment paper.
- Transfer the crust mixture to the pan and evenly distribute across the bottom of the pan.
- Using the bottom of a flat drinking glass or a tamper, press the crust down flat to compact it into the pan.
- Proceed with the recipe as written.
Comments
Dana says
So easy and delicious! Made it for French silk pie and my snotty sister in law was impressed how well it kept together when slicing. Will definitely make again!
Erin Clarkson says
Hahahah anything for the SIL points! So happy you loved!
Kimberly Cooper says
Hi there ☺️
I have a question, so I want to make cherry cool whip dessert with a Oreo crest bottom .(jumbo cupcake /liners ) this recipe goes in the freezer for a few hours
Do I need to still bake the Oreo crumb then put my cherry whip on top once crest has cool? Then to the freezer to freeze or just freeze them unbaked with cherry whip all at once
Thank you for your time and advice ☺️
Erin Clarkson says
I'm not too sure sorry I haven't used this in that application before! maybe worth testing it out?
Wendy Dann says
How many cookies? I can't be squishing and squishing and weighing after each time.
Erin Clarkson says
Just weigh them all out and then process them!
Sam says
It is about 22 cookies!
Mike says
Who cooks using grams? WTH? How about using the measurements found on the side of the butter? And nobody is saying at what temperature to bake the crust. I'd give a zero for the rating, but the lowest I can go is 1, so here you go.
Erin Clarkson says
Almost every country in the world does... and the temperature is in step one.
Joshua Holmes says
For Baking? Everybody who bakes well uses grams, a unit of mass; rather than tsp/Tbsp/cups, units of volume. Get a kitchen scale for like $15, watch your baking game skyrocket.
Alyse says
I used this crust recipe for an Oreo cheesecake and it turned out perfectly! Thank you for such an easy recipe to follow!
Lesley McQuade says
Perfect Erin !!
Heather says
Made this today and it came out perfectly. Thanks for including the instructions for how to actually put the crust in the pan, that made the difference for me, as I’ve always failed at making crusts like this! Thanks also for using measurements in grams, it made things so easy and precise!
In case it’s helpful for anyone, I made this with vegan butter to accommodate some folks who avoid dairy and it all worked out just fine.
Erin Clarkson says
Thank you, this is so so helpful!