
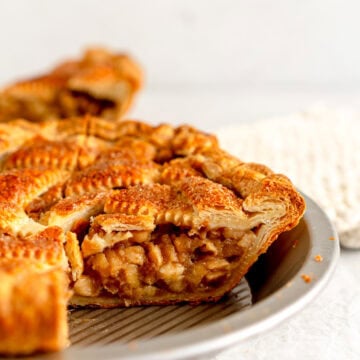
This is my classic apple pie with a buttery homemade pie crust and a gooey cooked apple pie filling. Keep it simple or add a fancy lattice - this is the perfect apple pie! Precooking the pie filling takes the guesswork out of making apple pie, and means you will have a perfectly set filling. My Apple Pie is the perfect make-ahead dessert.
Hi hi! I am popping in to share this recipe for my classic apple pie! I love all things apple pie, and if I may say so myself, this is a particularly good one. Not only is is easy to make, it is a great make-ahead option, and my perfect pie crust and easy apple pie filling recipe makes assembly a breeze. No more fussing with how many apples you can fit in the pan or a lattice that won't behave - my apple pie recipe won't do that to you. If you don't want to make a lattice top, try my Dutch Apple Pie which has a crumble top and is also so delicious!
I'll talk you through all the steps on how to make and assemble an absolute banger of an apple pie, along with step-by-step photos.
Why a cooked filling for apple pie?
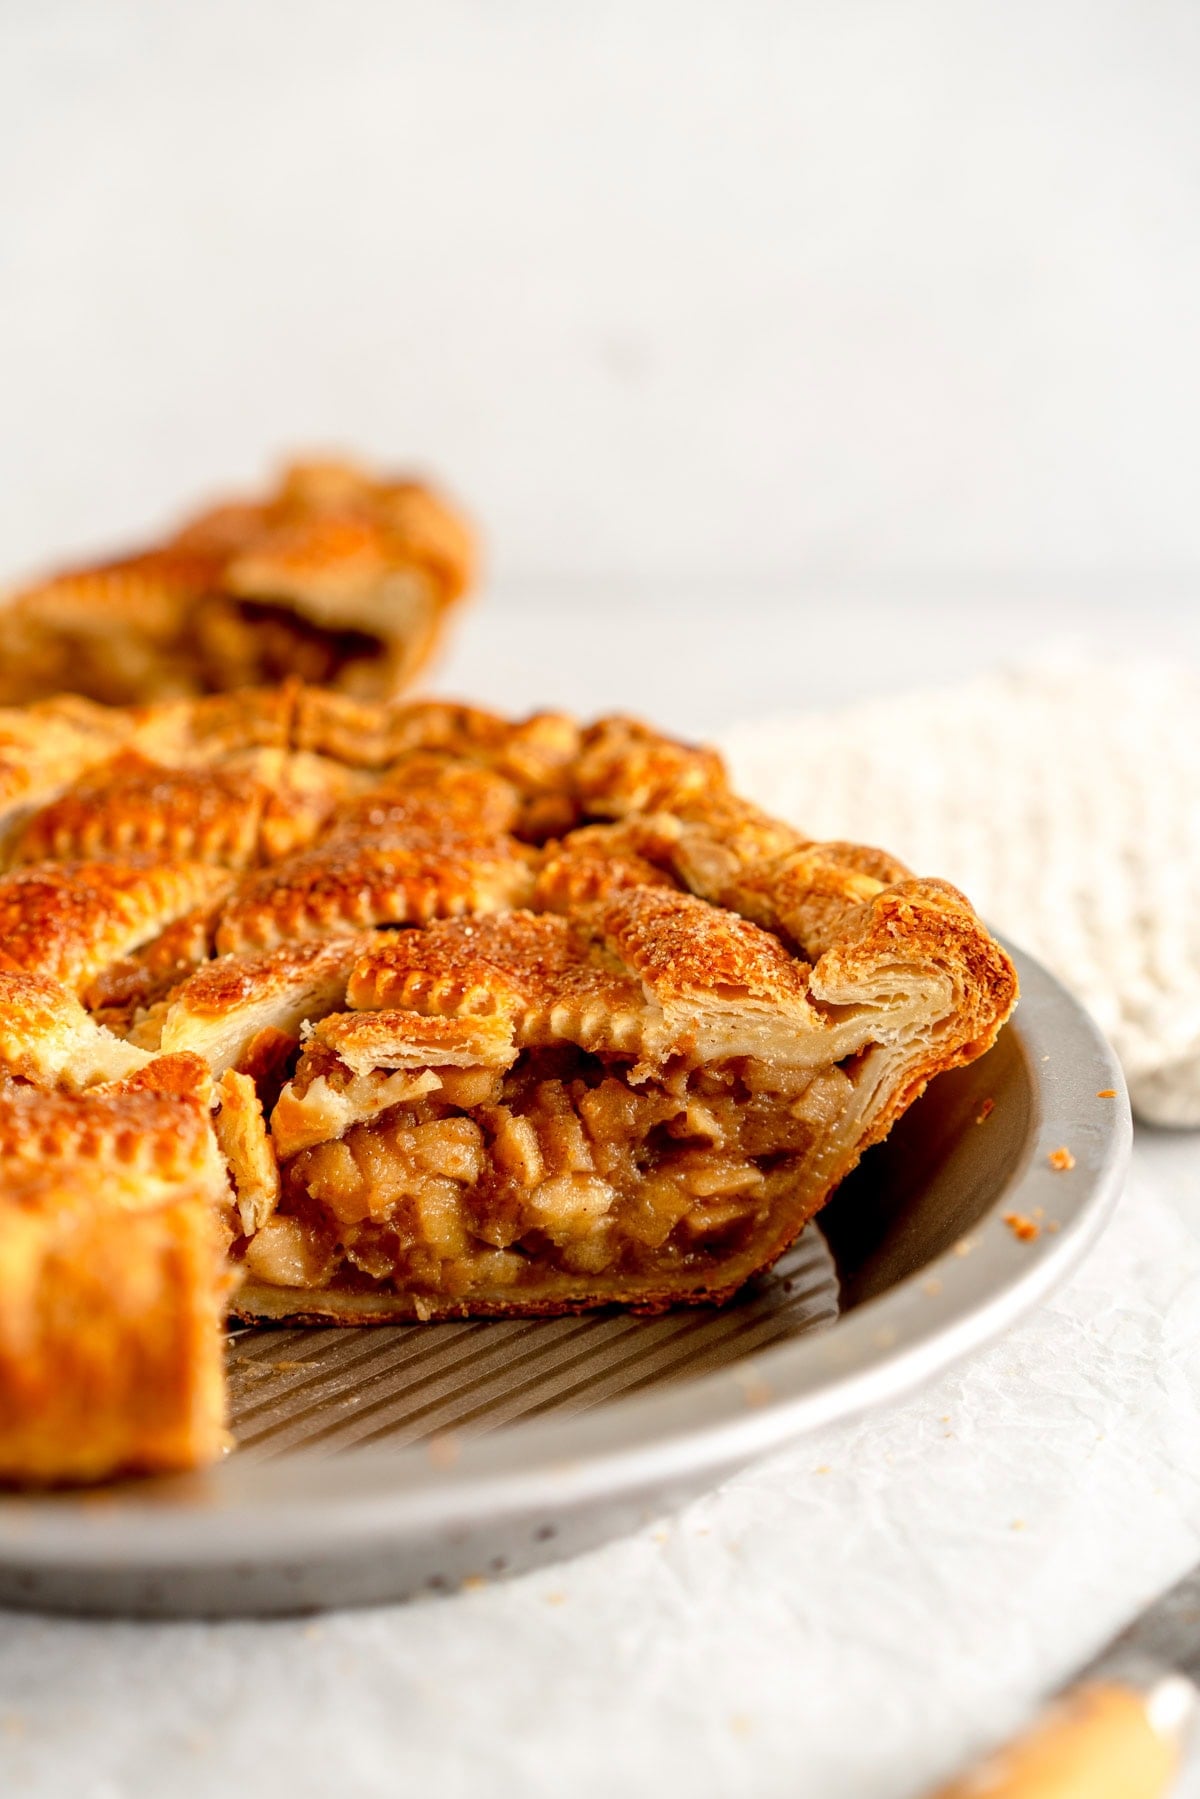
There are lots of ways to make apple pie and the two main ones are fresh apples, or a pre-cooked filling. If you're after a fresh apple pie filling my basic apple pie is just that. However, pre cooking the filling makes your life a lot easier. Apples have a lot of water in them, which means that they cook down a lot in the oven and it can be hard to work out exactly how much starch to use in the filling as different apples have different moisture levels. To get around this you have to stack the pie full of sliced apple, and you might end up with a gap between the crust and the filling. This isn't the end of the world at all!
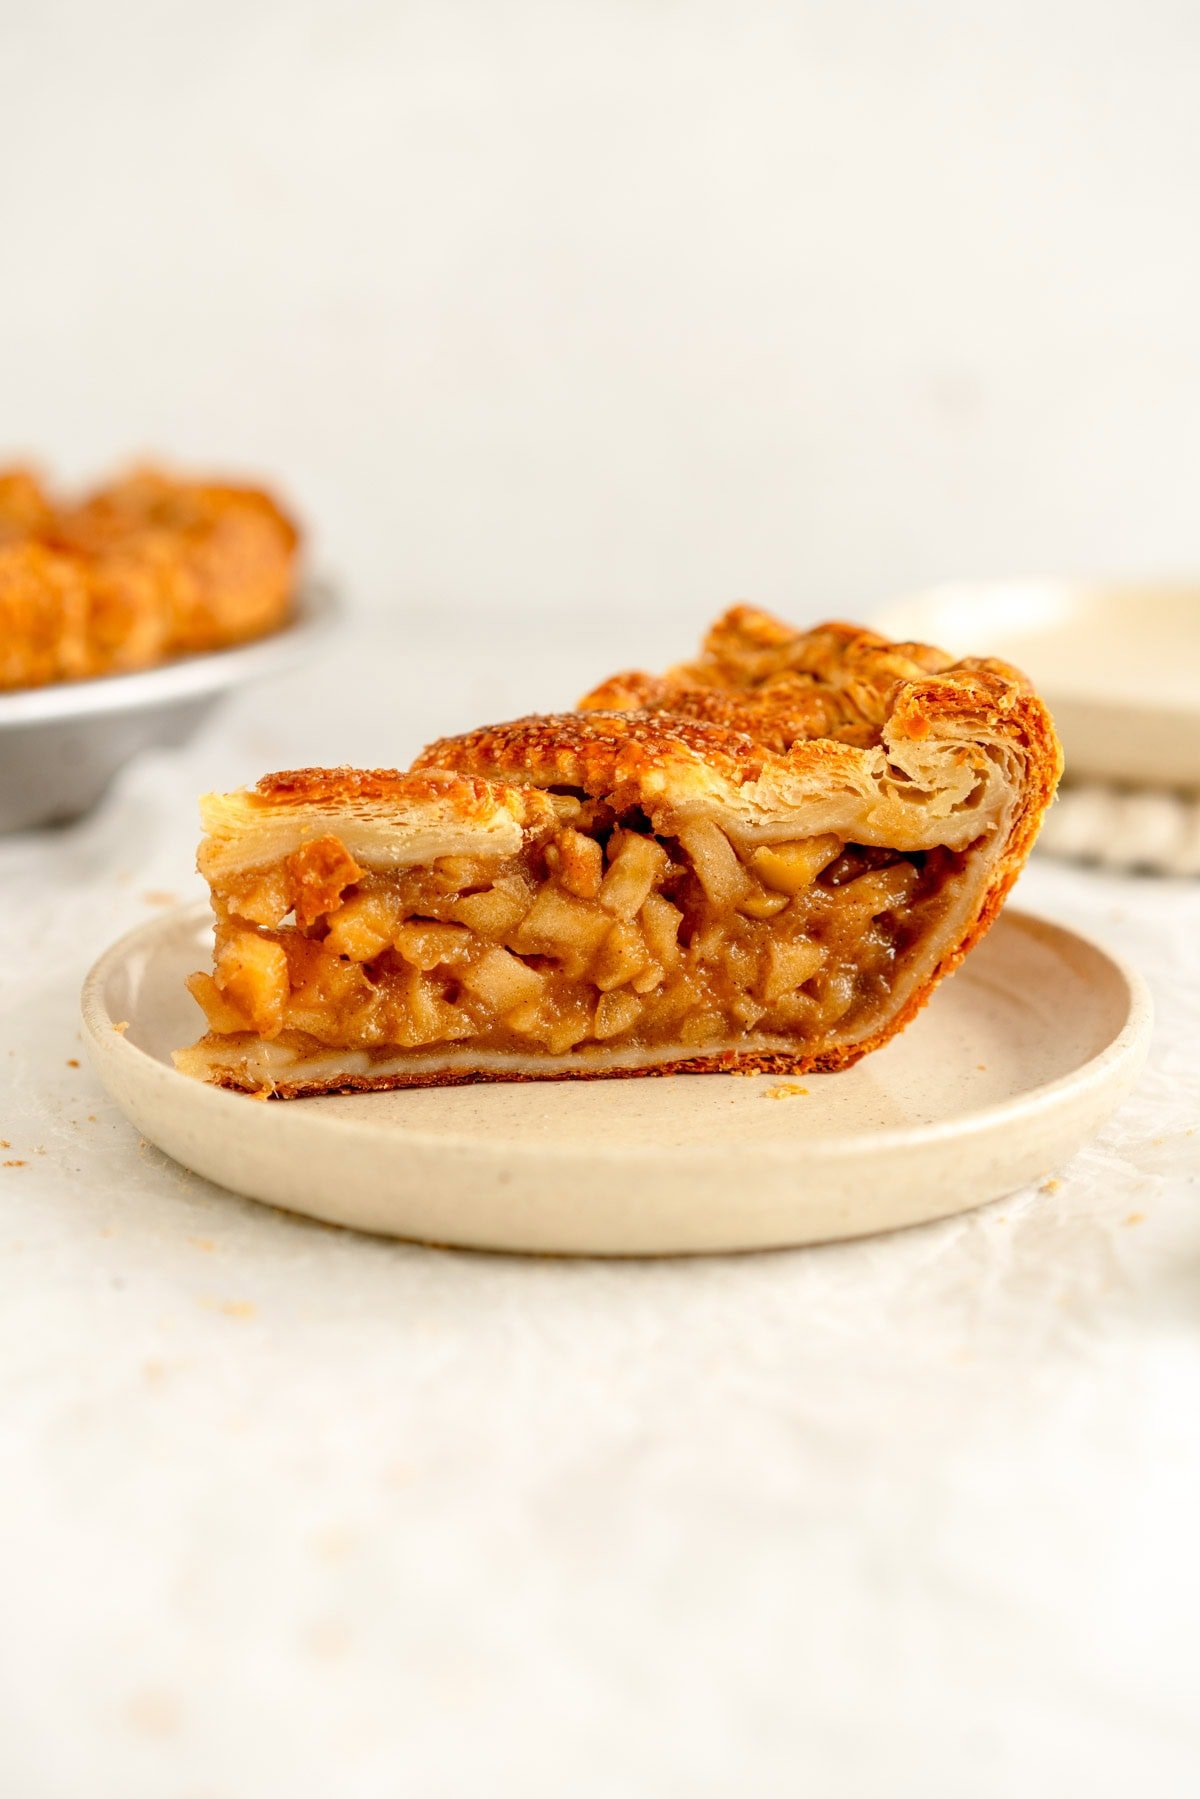
By using a cooked apple pie filling, you have already done the reducing stage on the stove, and so you know that the filling isn't going to reduce any more in the oven. It has already been thickened, so it is much more predictable when it comes to how the pie will turn out.
My apple pie filling is also great to make ahead - you can store it in the fridge for 3-4 days, or freeze for up to a month.
Great Pie starts with a Great Pie Crust
There's nothing worse than spending time making pie crust and apple pie filling just for it to all fall apart on you when you go to assemble it.
I have a theory why people find pie intimidating: They aren't making good pie crust. Pie crust that is hard to work with makes your life so much more stressful than it needs to be. My Pie Crust recipe won't do that to you. It has a series of turns to the pie crust after mixing it, which makes it super homogenous and easy to work with, but still nice and flaky. It means that it is perfect for latticing and decorating a pie as it is a dream to roll out and cut.
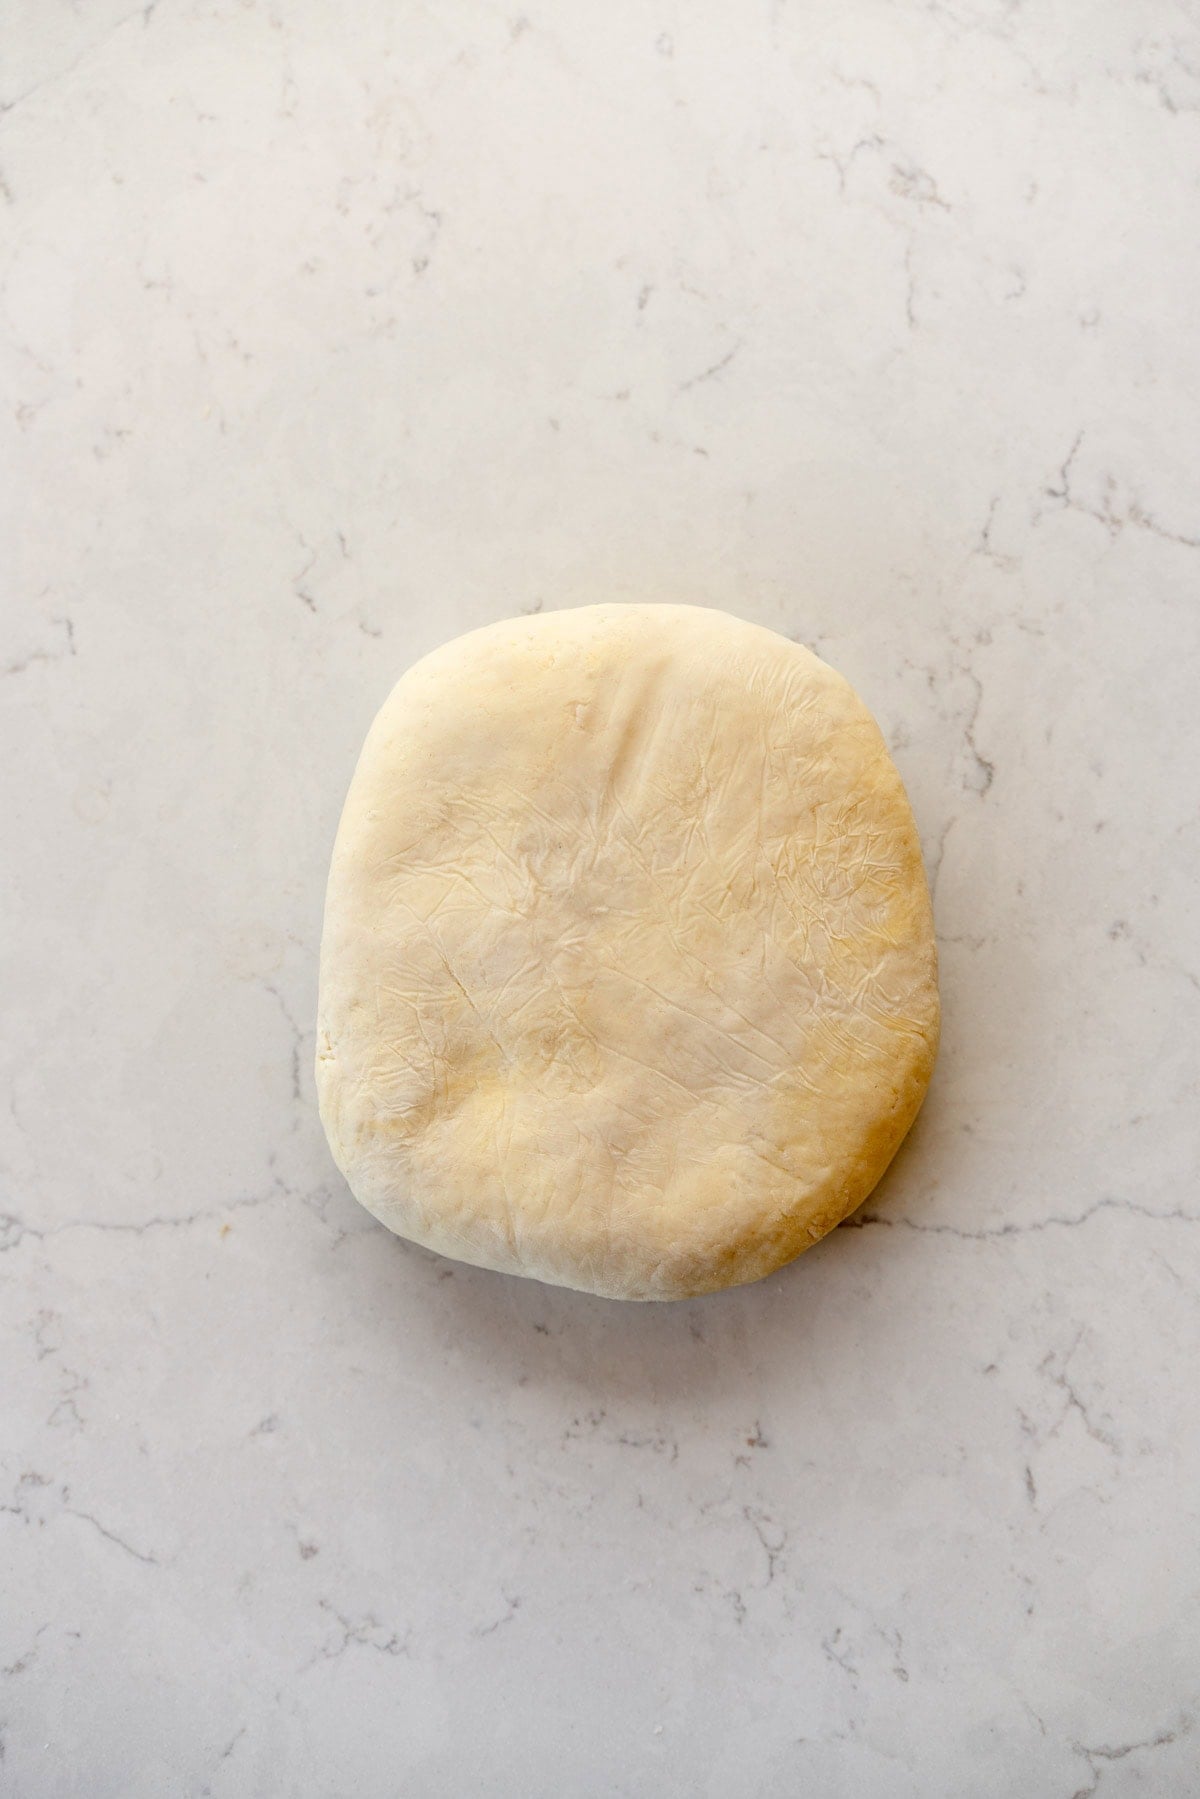
When I am making pie for a double crust pie like this apple pie, I like to shape one portion of the dough into a disc for rolling out the base of the pie, and the other piece into a rectangle which makes rolling it out for a lattice top nice and easy. If you want to do a detailed lattice, I recommend making a double batch of my pie crust, just to give yourself some wiggle room when it comes to cutting out pieces.
A step by step guide to assembling apple pie
There are a few steps to making apple pie. I'm going to break it all down for you, and have taken photos of my process along the way to really make things nice and clear. I promise making a double crusted pie isn't as hard as you might think, and my easy pie crust recipe is super forgiving and will make the process much easier for you!

Roll out your pie crust. I do this on a lightly floured surface, you want to roll it into as even of a circle as you can with an even overhang around all sides.
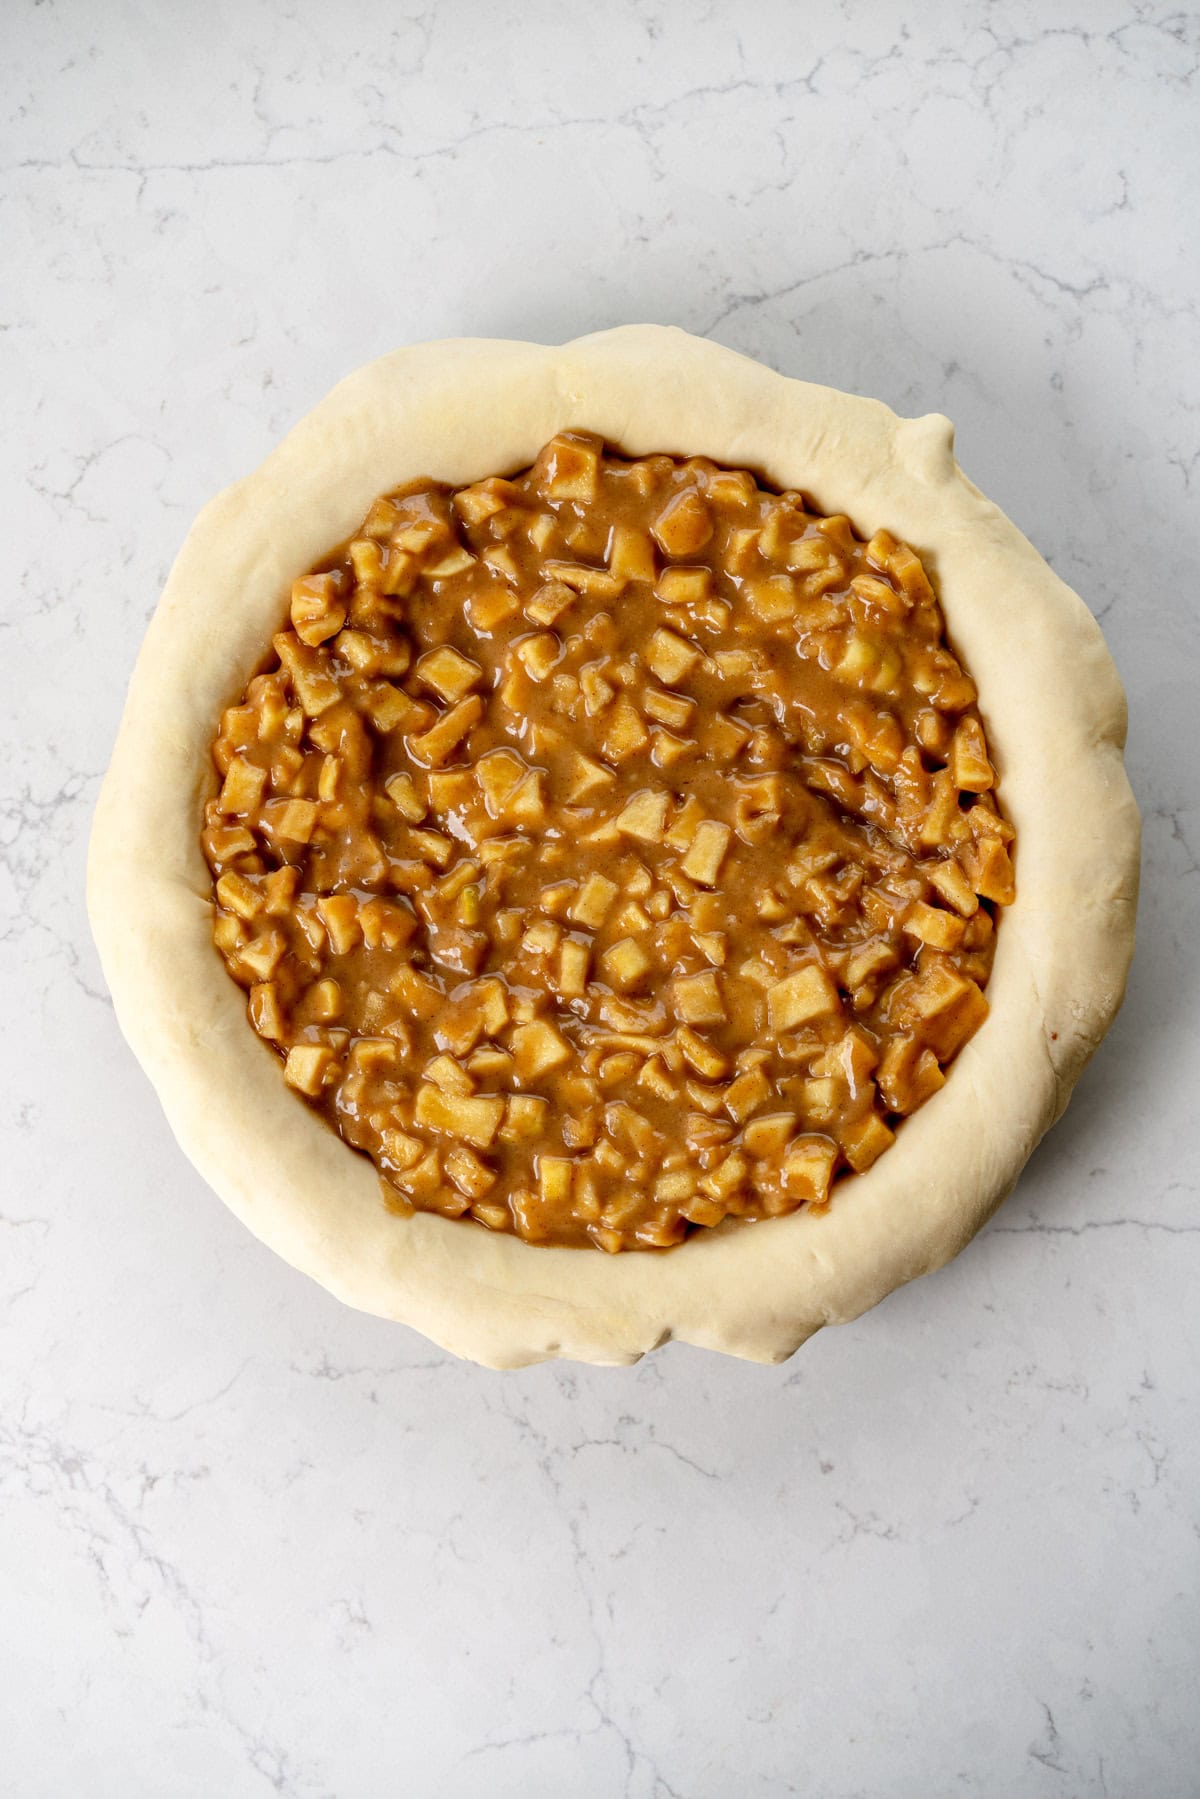
Add your filling. The Apple Pie Filling can be made ahead, and either frozen or chilled until ready to use.
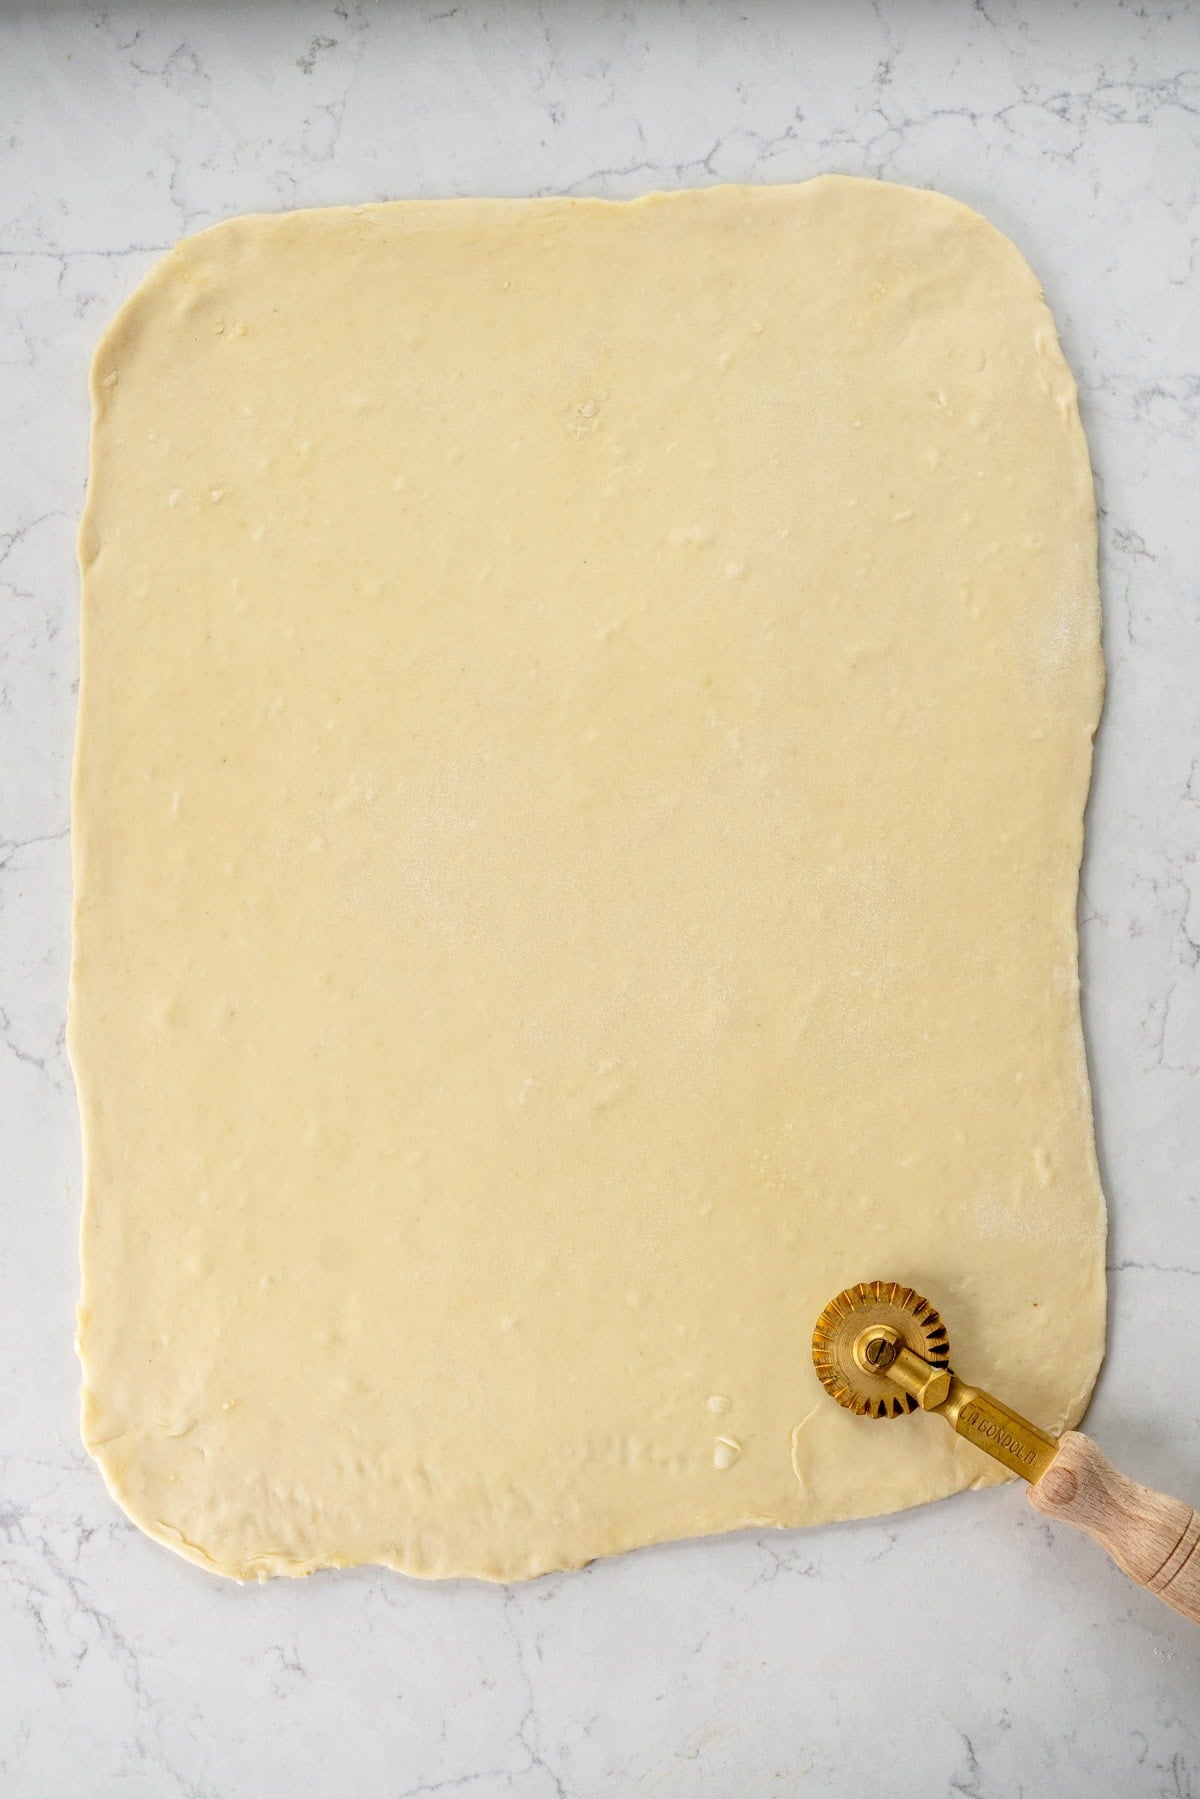
Roll out the second piece of dough - you can see that I choose to do it in a rectangle as I find it easier to make strips. Others prefer to do this in a circle, you do you. Remember that this will be forming the lattice so will have some overlap so it is ok to roll this one a little thinner than the base.
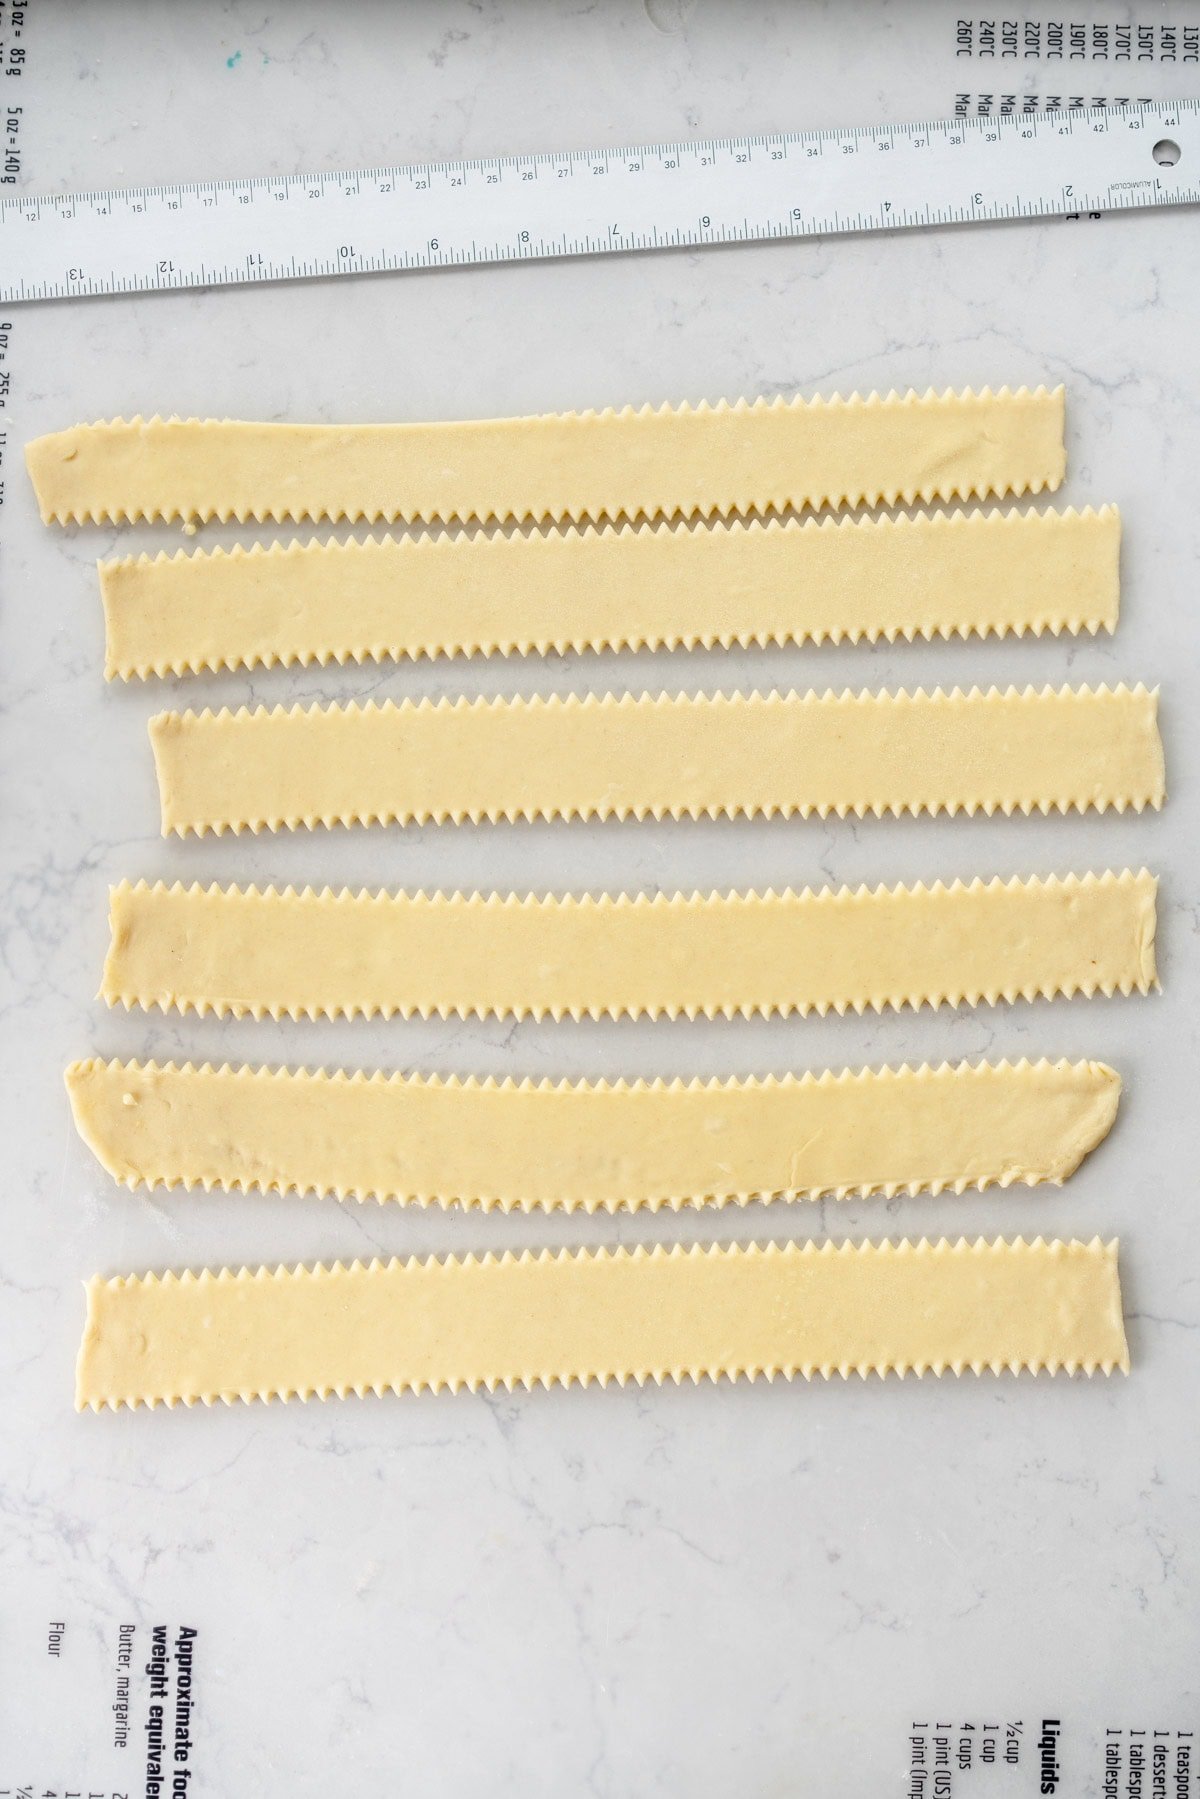
Cut Strips. I use a ruler to cut my strips as it makes it really easy - for this pie I just made them the thickness of the ruler, and used a fluted cutter to cut them. If you find that your crust isn't cutting cleanly, pop the pieces into the fridge on a parchment paper lined baking sheet to firm up before continuing to cut.
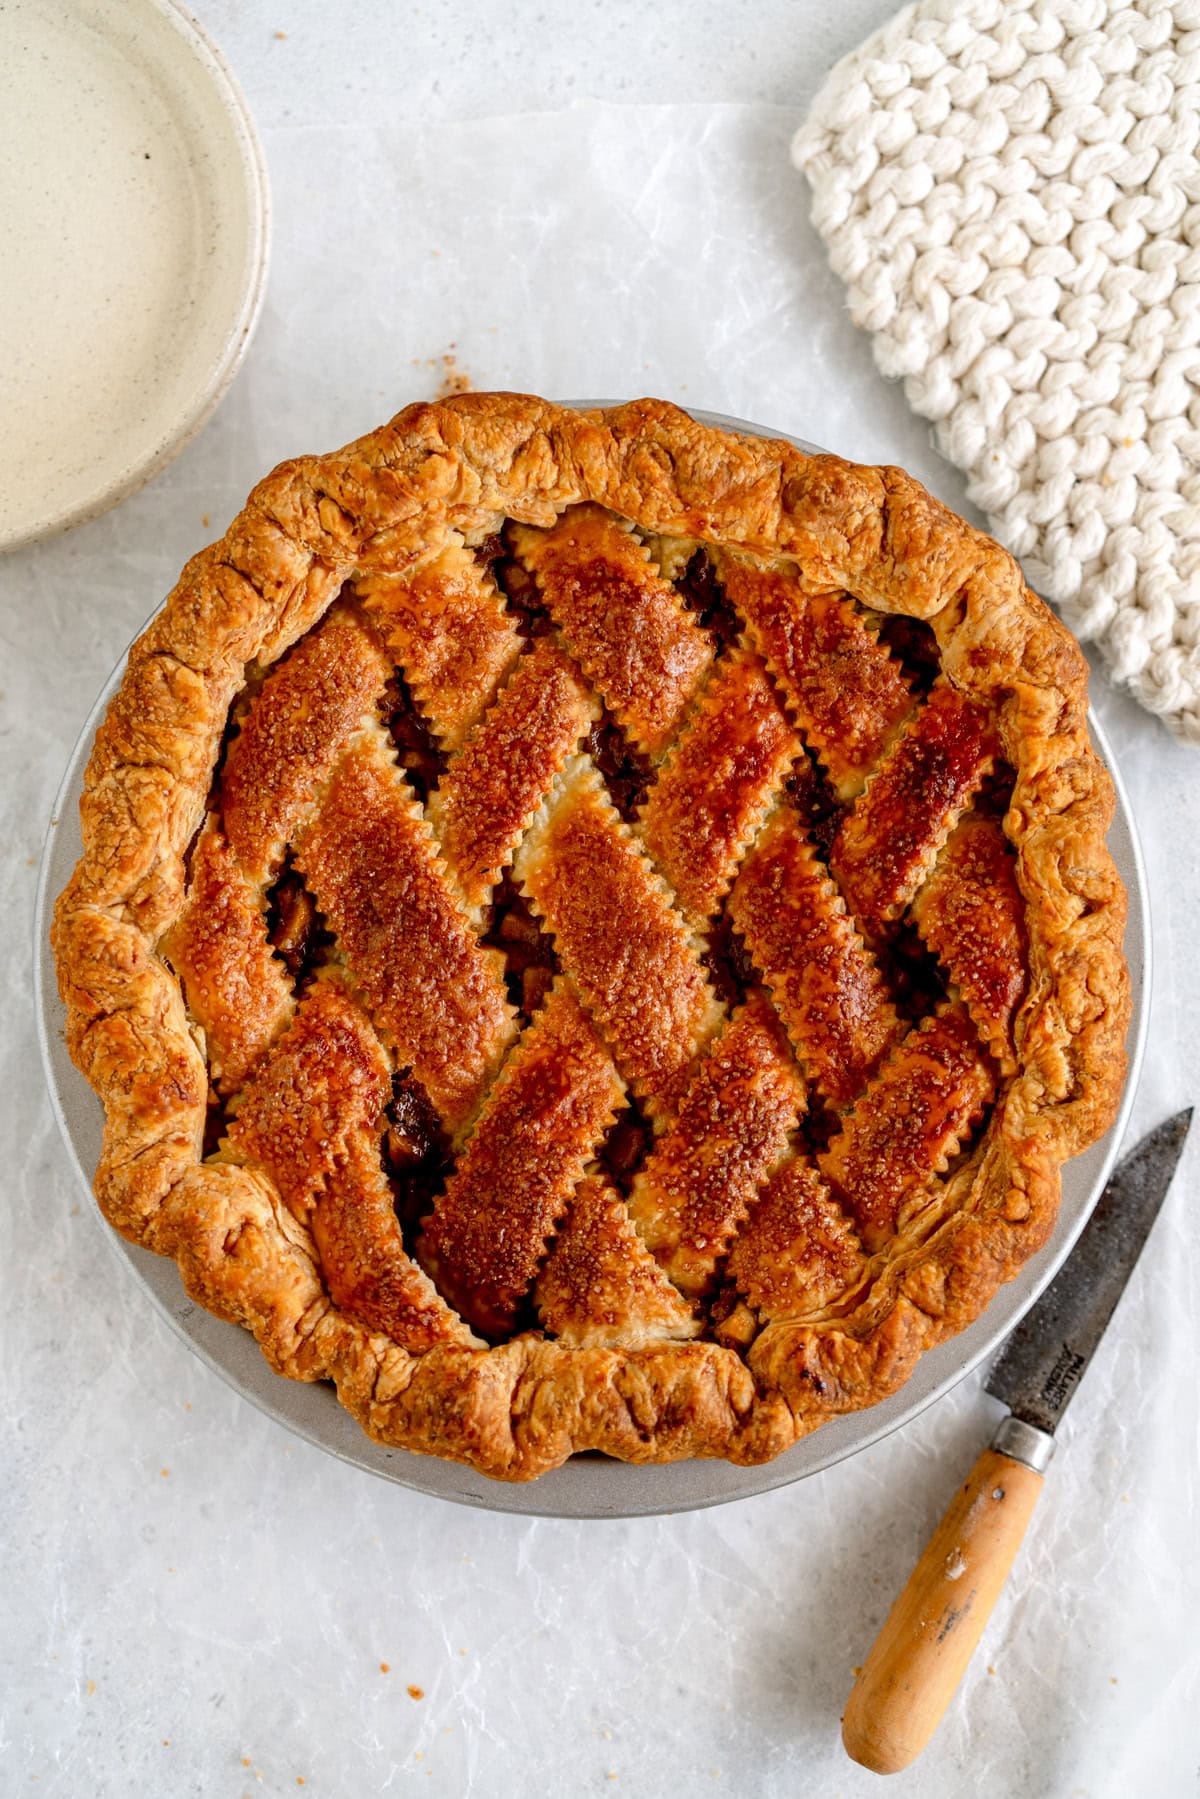
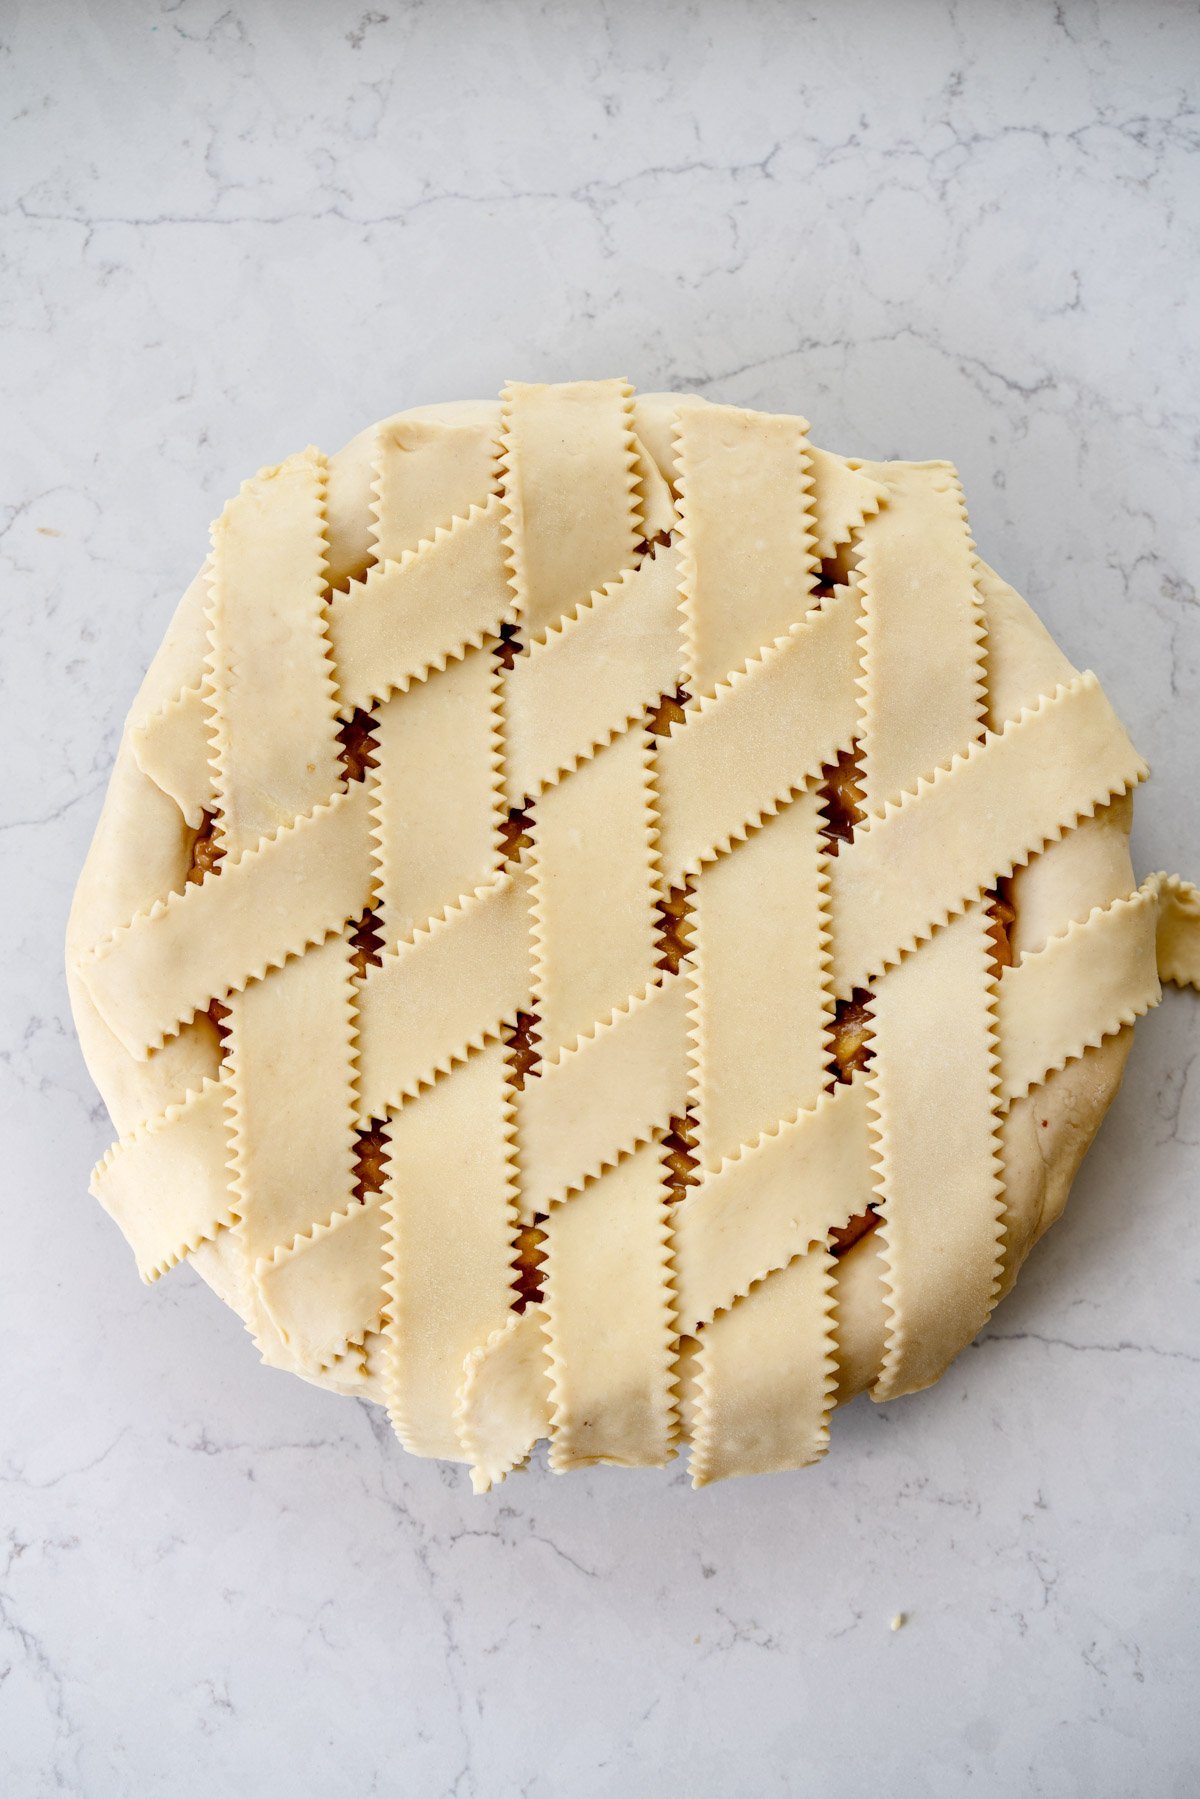
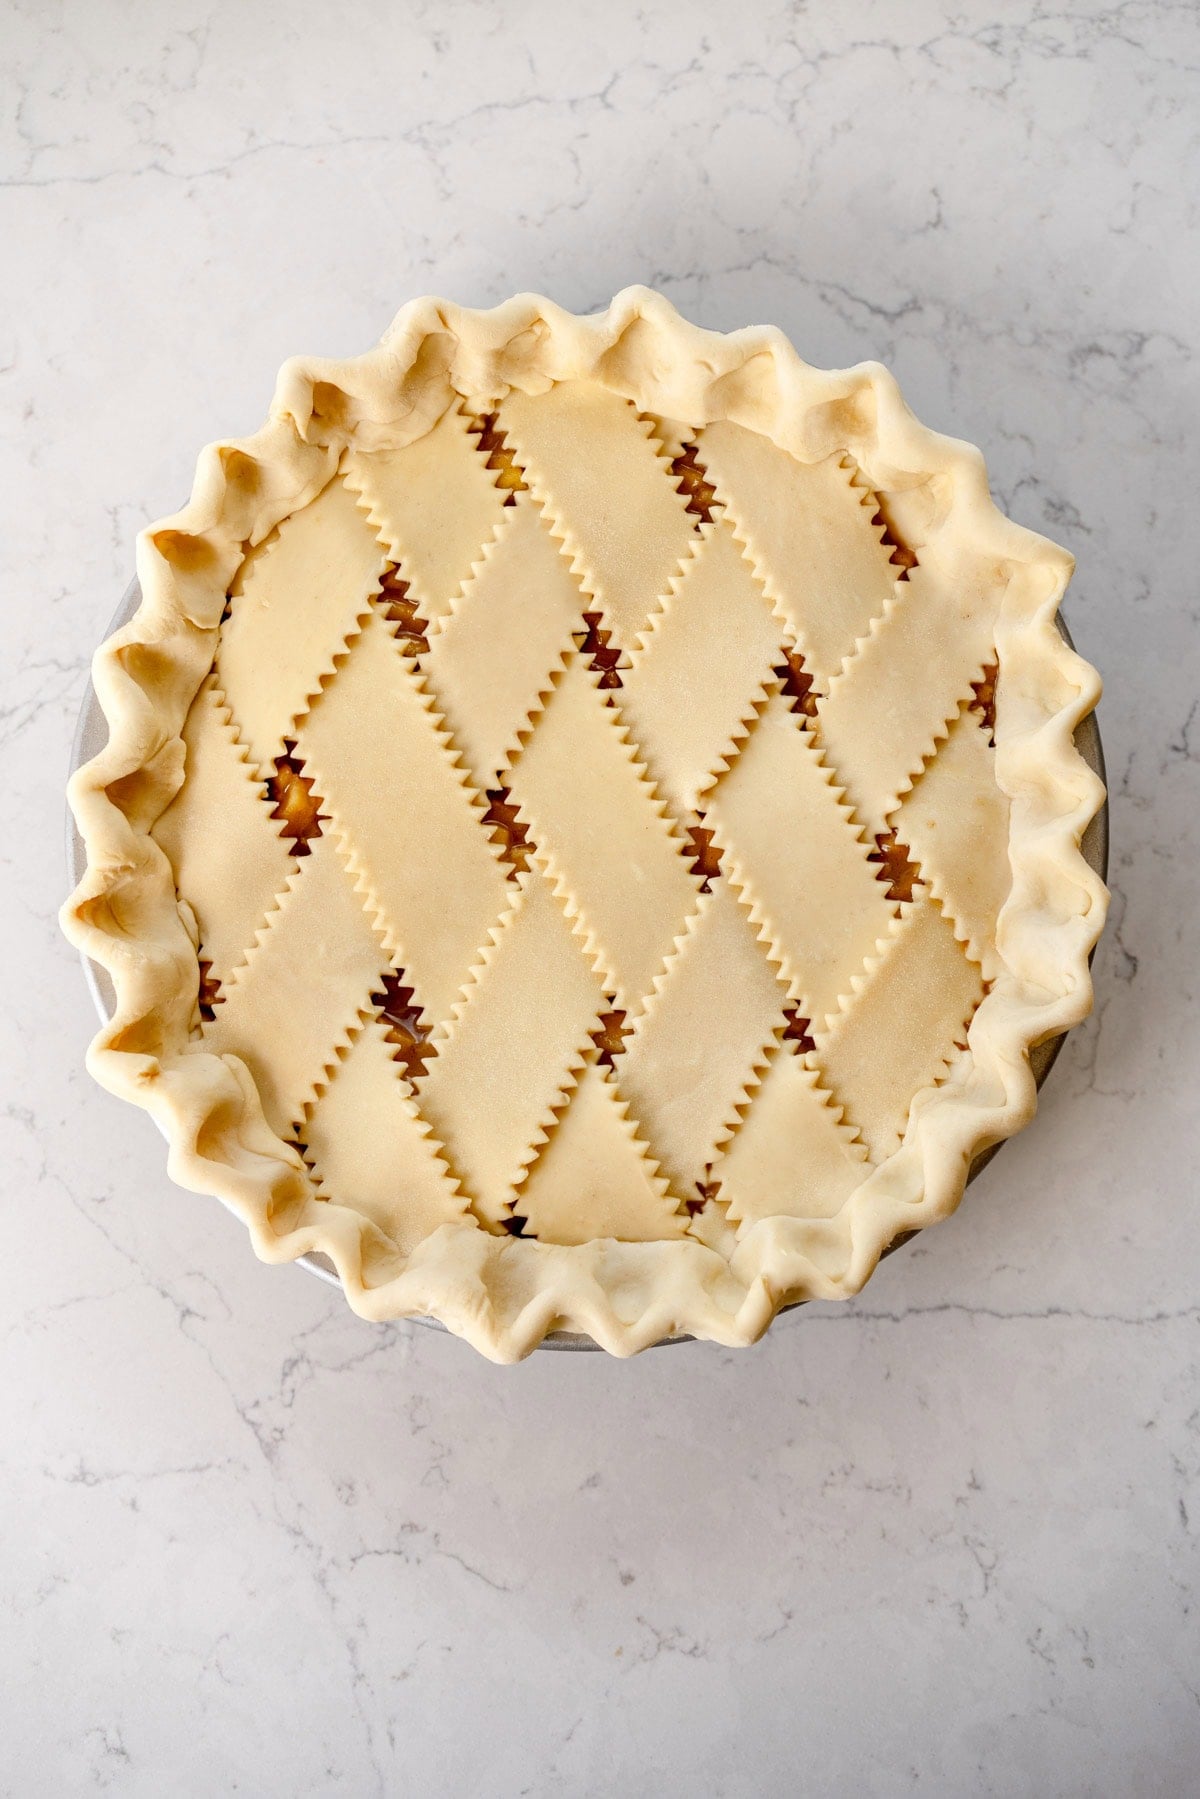
Lattice. You can do whatever you like here - I went for a classic lattice, but offset some of the strips rather than keeping them perpendicular to the vertical strips. Remember that you will be folding the edge over onto itself so it is ok if you don't get the lattice right the way to the edges.

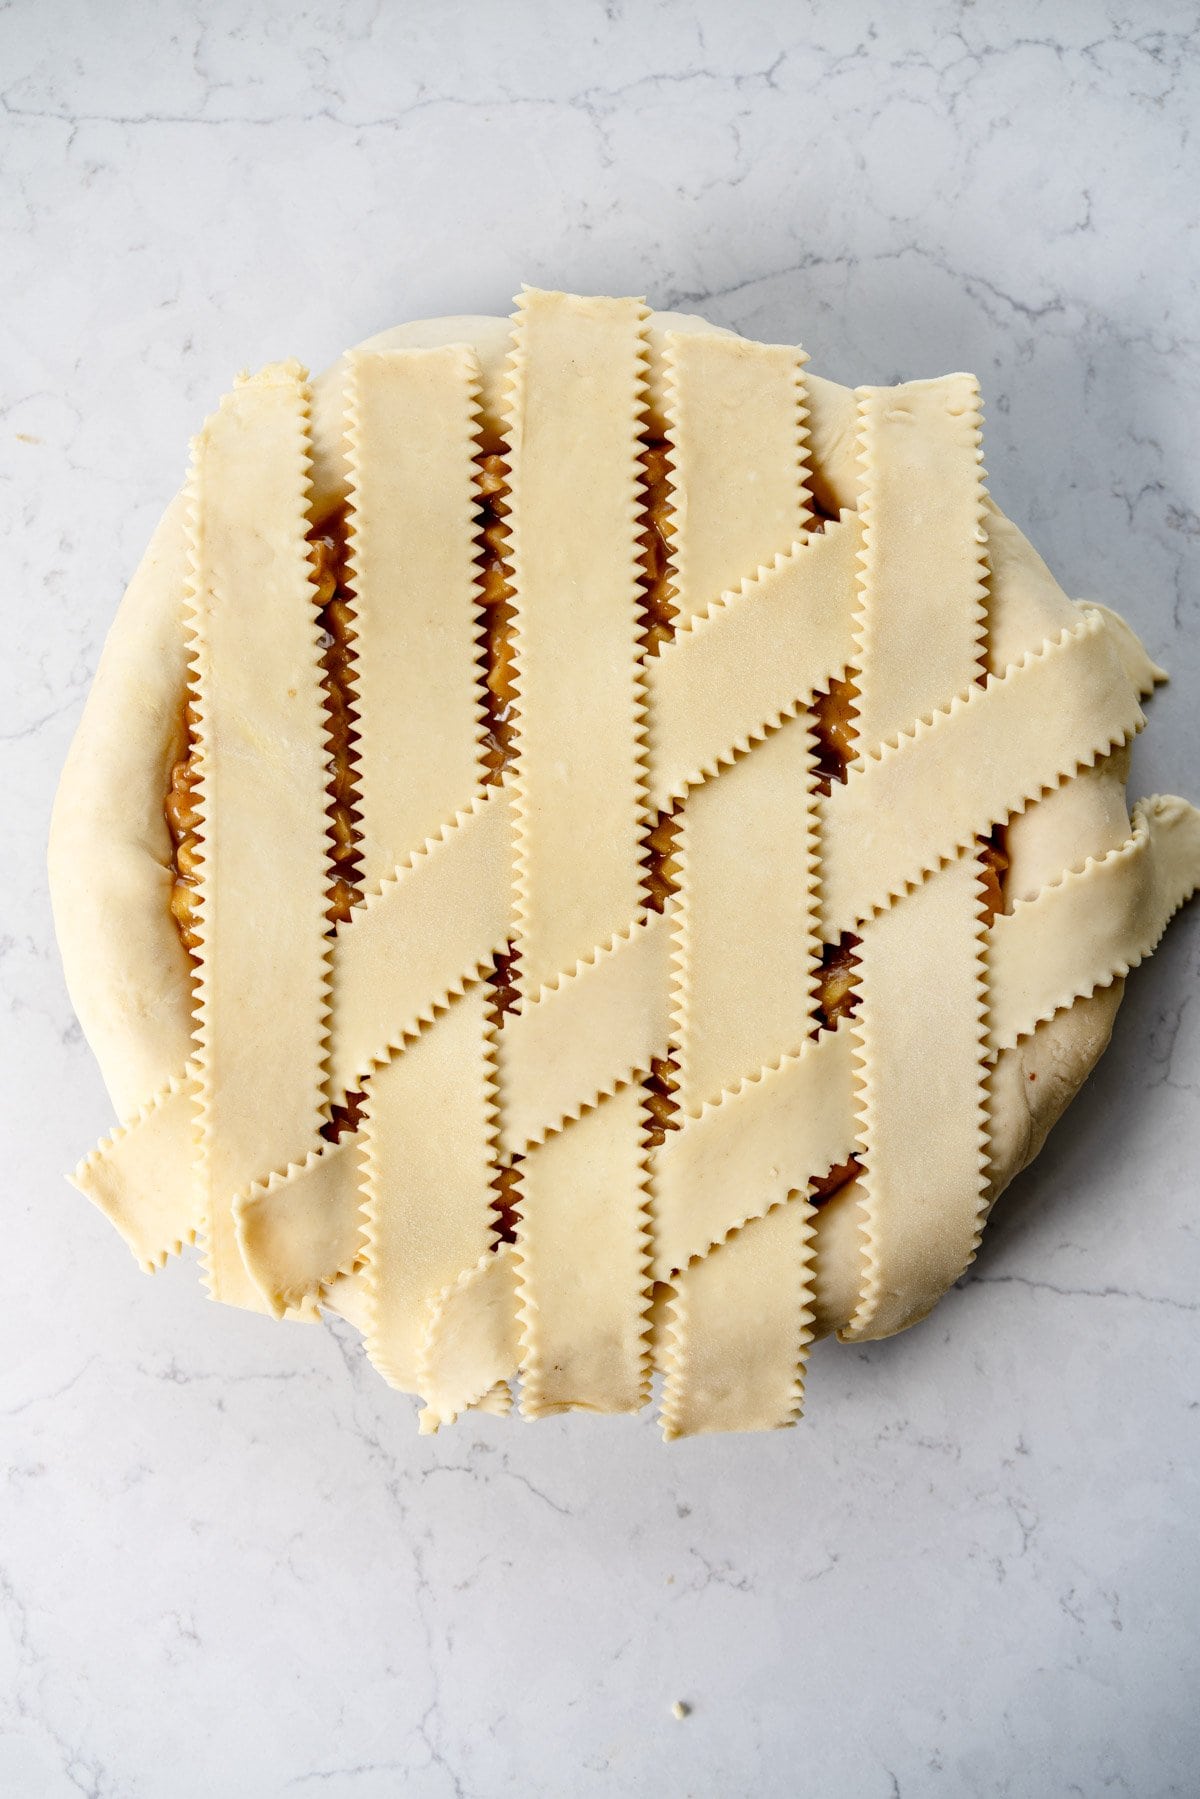
Chill it if it gets tricky to work with. If at any time the pie crust feels like it is getting tricky to work with, just pop it back into the fridge for 10-15 minutes.
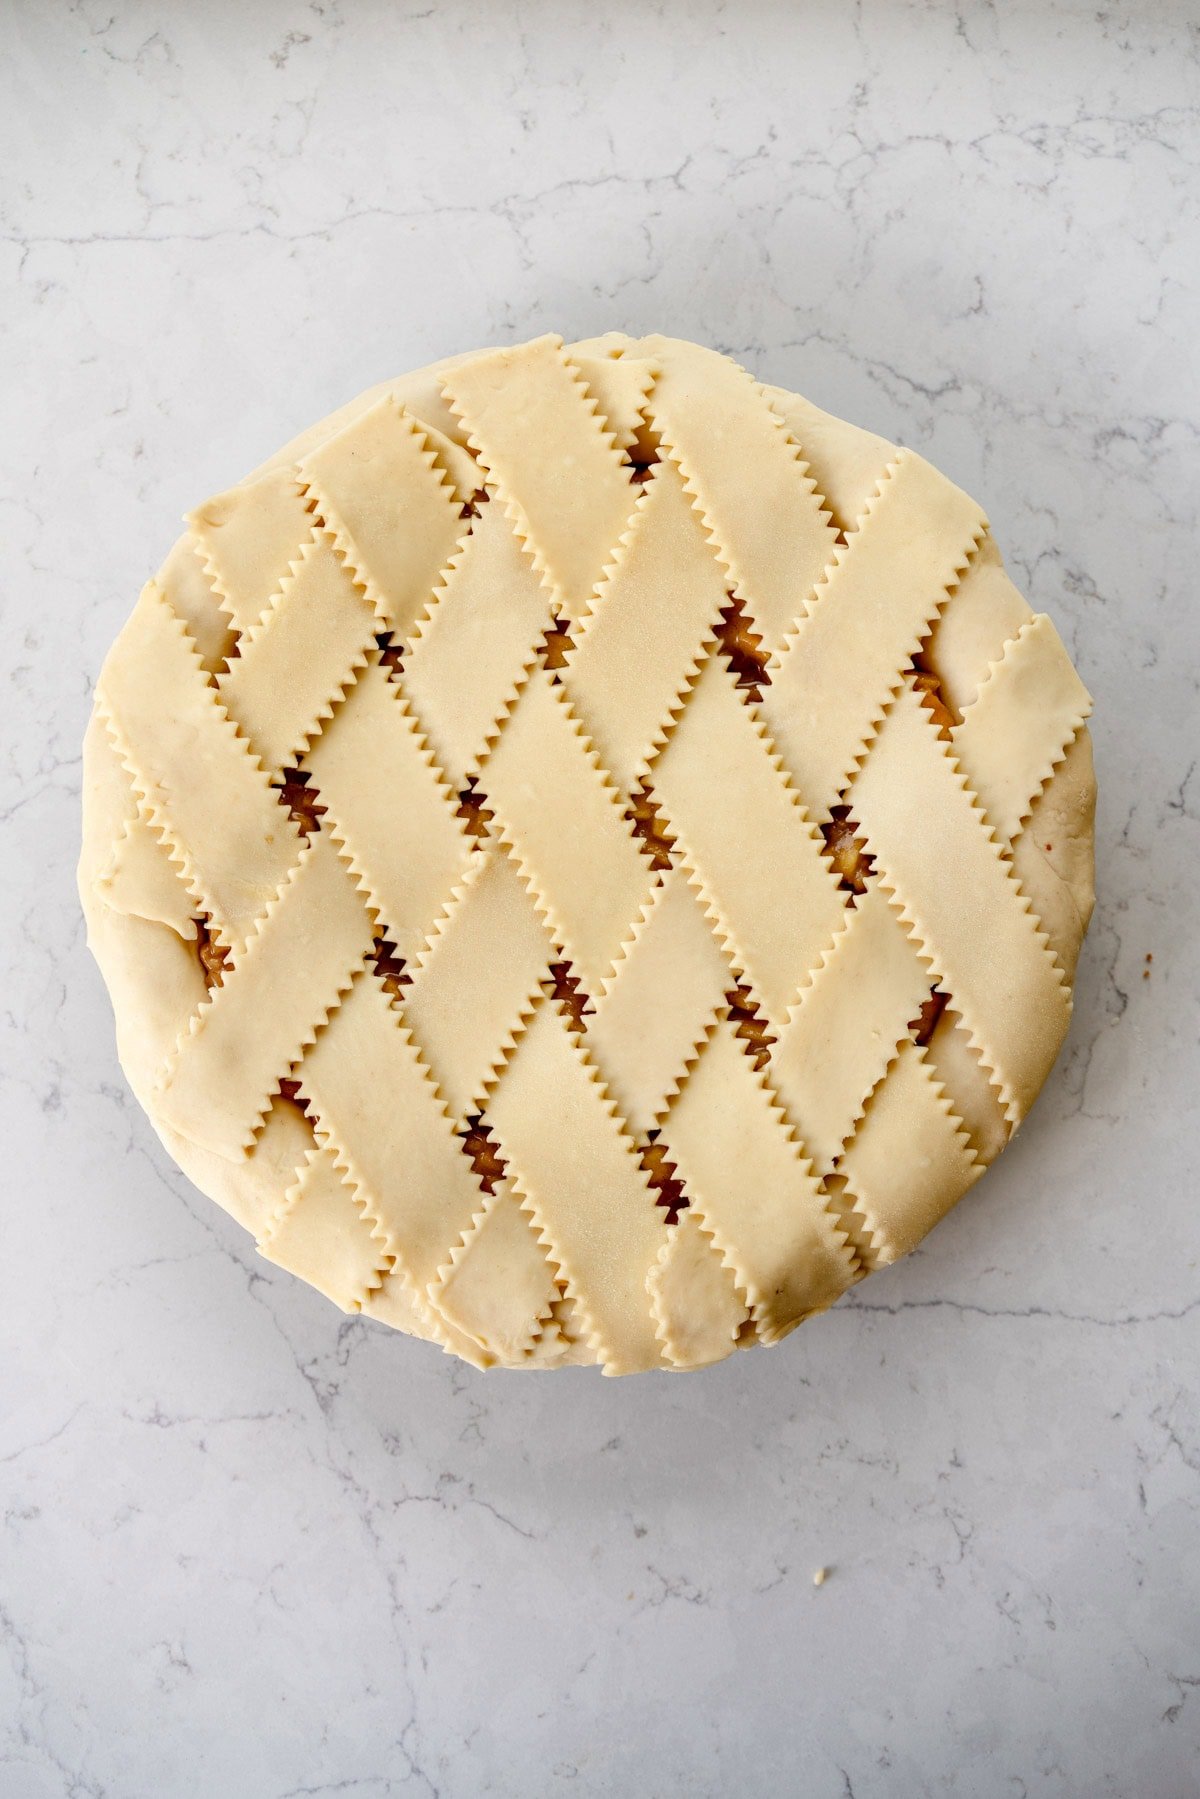
Trim. You want to trim the edge of the crust and the lattice so that they are flush and you don't have bits poking out.
Fold over the edge. I find this part kind of tricky but with my pie crust it is going to probably puff up in the oven because of how flaky it is and because of the crust being thicker, the puff is going to distort the edge crust so don't stress this part too much. Fold the crust toward the middle of the pie, using the bottom crust to tuck in any edges of the lattice strips. I like to then chill it again here before crimping.
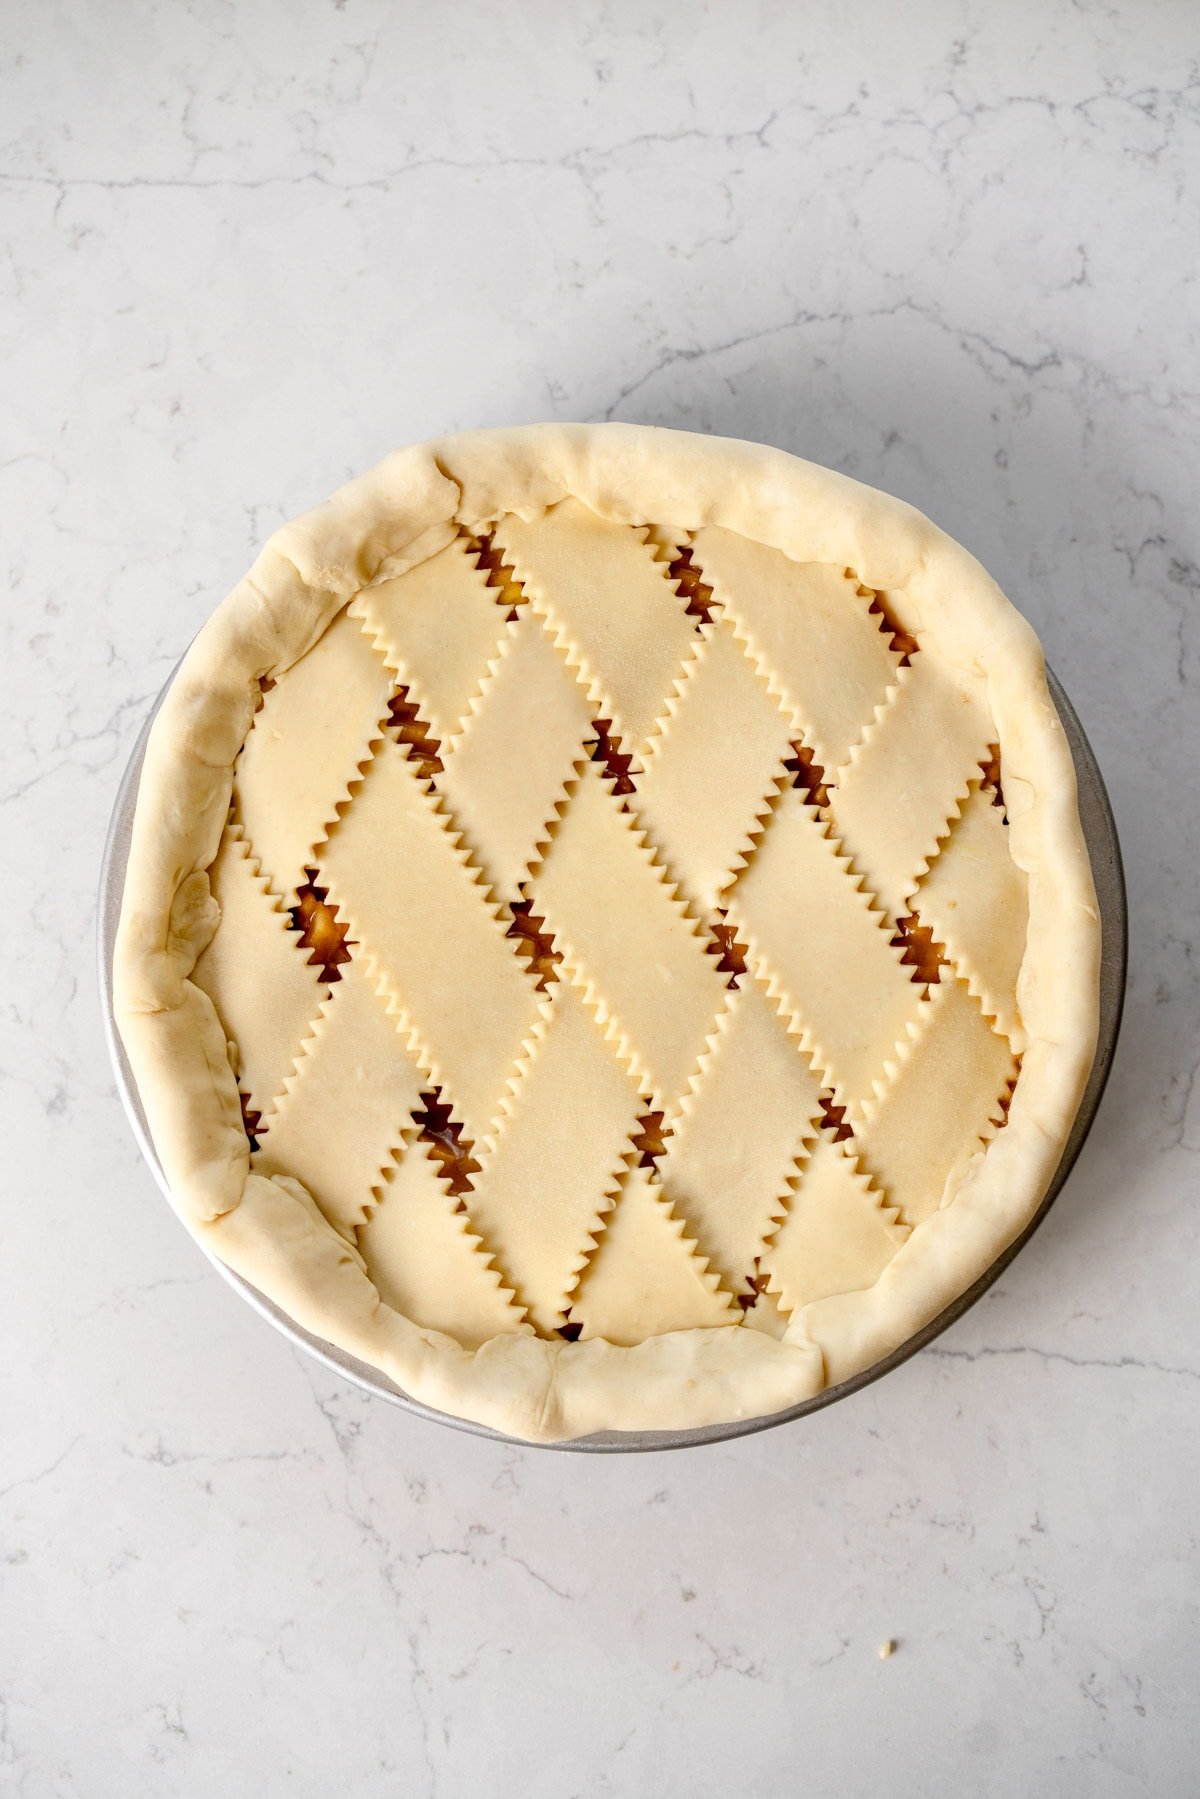
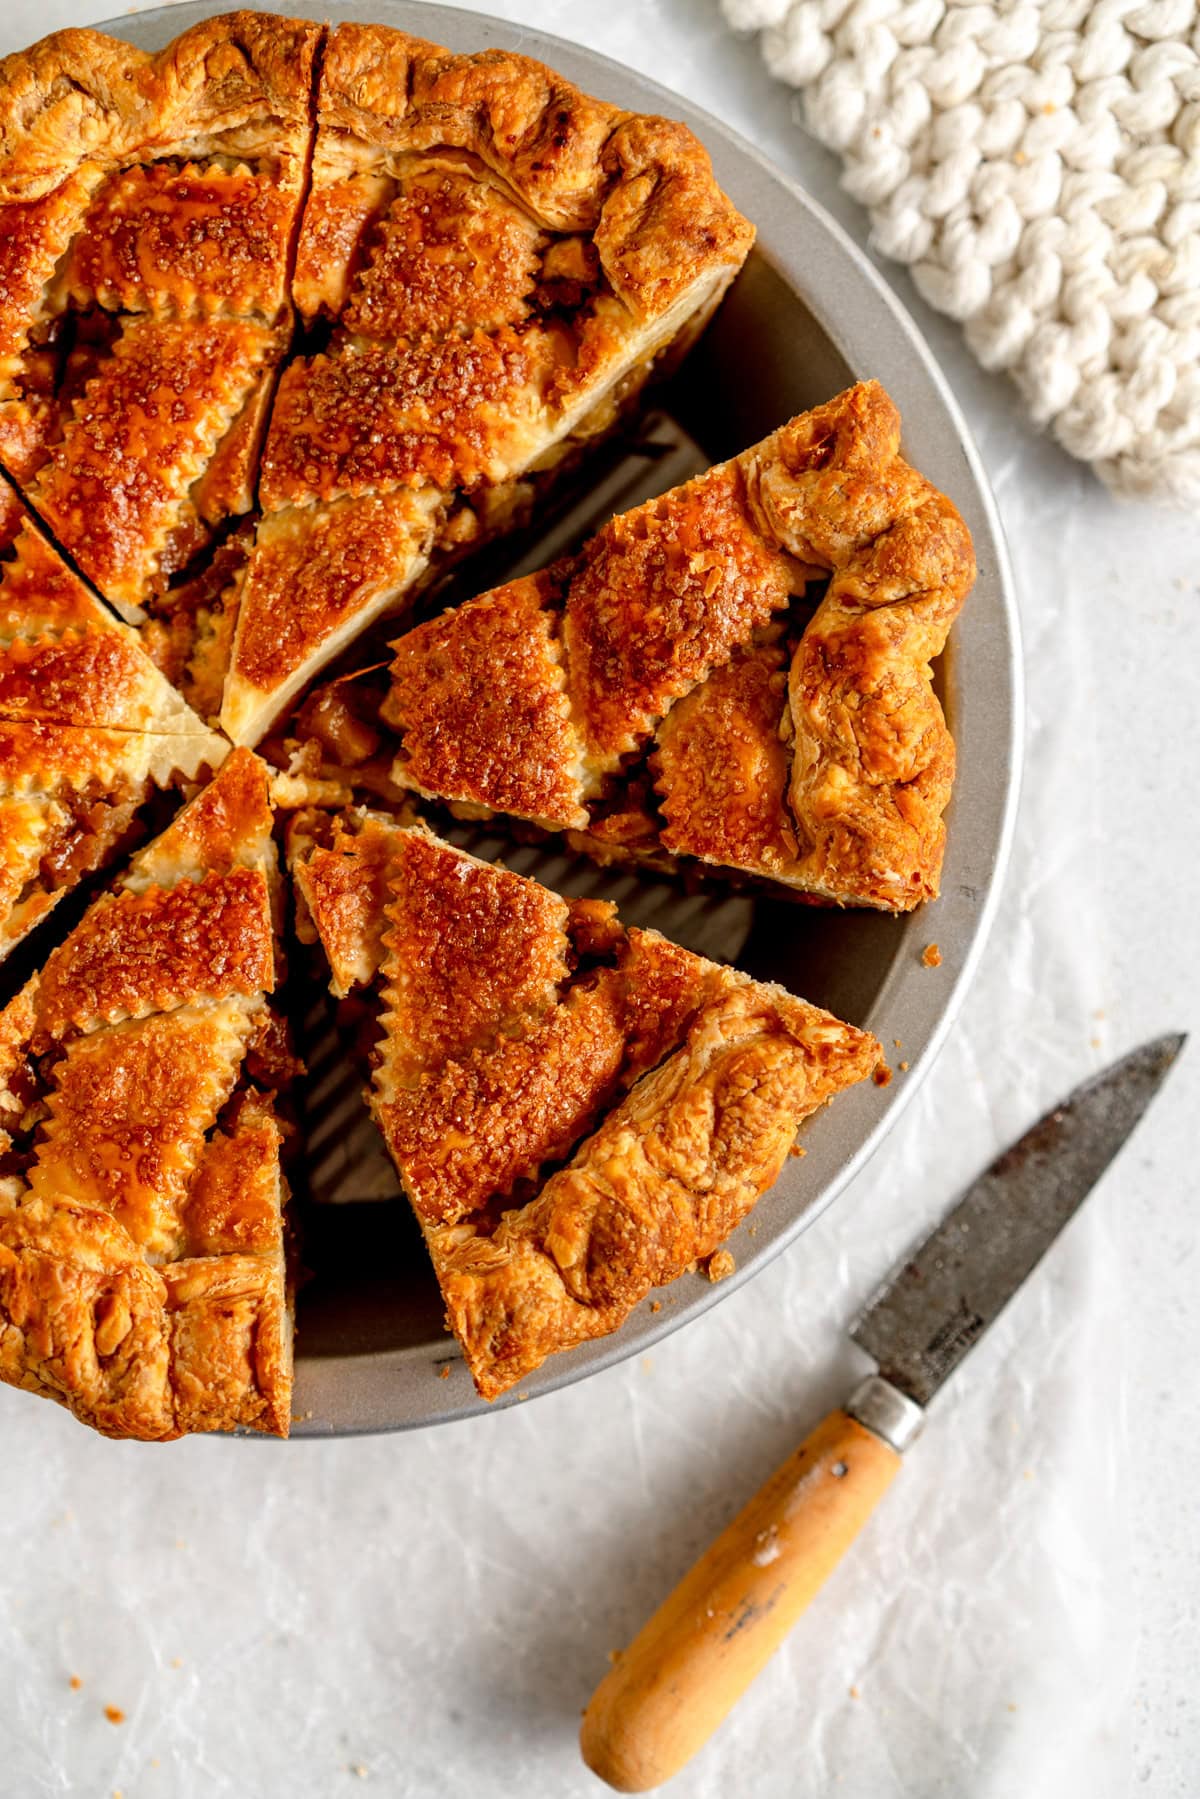
Crimp as you like. Again, this is going to probably get a bit wonky in the oven so don't stress it. I just did a basic thumb and finger crimp. If you don't want to crimp at all, you can trim the edge of the pie flush with the edge of the pan.
That's it, you just assembled a lattice top pie! It does take some practice, but it is very fun and delicious practice!
❤️ Made this recipe and love it? ❤️
I would LOVE for you to leave me a review and star rating below to let me know how you liked it! Also, please make sure to tag me on Instagram!
Answers to your baking questions
Over the years, many of you have asked me questions about:
- baking in grams
- adjusting oven temperatures
- what kind of salt to use
- and many more!
I've curated and answered them all for your easy reference in this frequently asked questions post!
Classic Apple Pie with Cooked Filling - A Step by Step Guide
- Prep Time: 1 hour
- Cook Time: 1 hour 30 minutes
- Total Time: 3 hours
- Yield: 8 servings 1x
- Category: Pie
- Method: Baking
- Cuisine: American
Description
This is my classic apple pie with a buttery homemade pie crust and a gooey cooked apple pie filling. Keep it simple or add a fancy lattice - this is the perfect apple pie! Precooking the pie filling takes the guesswork out of making apple pie, and means you will have a perfectly set filling. My Apple Pie is the perfect make-ahead dessert.
Ingredients
Pie Crust
- One batch of my homemade pie crust, one half shaped into a disc and the other half shaped into a rectangle.
Filling
- One batch of Stovetop Apple Pie Filling, cooled to room temperature or stored in the fridge if you have made it ahead of time.
To Finish
- Egg wash - 1 egg whisked with 1 tablespoon water
- Raw / Turbinado sugar for sprinkling
Instructions
ASSEMBLY
- I like to make my pie crust at least 2 hours ahead or overnight to allow it to rest.
- On a lightly floured surface, roll the disc into a circle slightly larger than your pie dish. You want it to be approximately ⅛ inch (3mm) in thickness. Line a 9" pie dish, leaving the extra dough overhanging. Trim the dough so there is about 1 inch overlapping the edge of your dish. Place in the fridge while you prepare the lattice.
- Roll out the second piece of dough (the rectangle) into a rough rectangle approximately ⅛ inch thick. Use a pastry cutter to cut strips for your lattice. I used a fluted cutter.
- Place your strips onto a parchment paper lined baking sheet and store in the fridge until ready to use. Press together the scraps and re-roll, these are good for extra lattice strips if you need them.
- Add the cooled apple pie filling to the crust lined pie pan, smoothing down with the back of a spoon or an offset spatula to get rid of any air pockets.
- Arrange the strips of pie dough on the top of the pie, weaving into your desired lattice. Place into the fridge for 10 minutes to help set up.
- To crimp the pie, trim the bottom crust and the top lattice strips so they are even - leave some overhang for crimping but make sure that there is an even amount of dough extending around the edge of the pan. Fold the crust over onto itself toward the middle of the pie, tucking it gently against itself to form an even edge. Pinch gently to help it stay together.
- Crimp the crust as desired - I find when it is a thicker crust it is easier to do a larger crimp.
- Rest the pie in the fridge for at least 30 minutes. While the pie is resting in the fridge, preheat the oven to 425°f/ 220°c. Place a baking tray in the bottom third of the oven.
- Brush the latticed part of the pie with egg wash (no need to do the edge as this gets nice and brown), and sprinkle the egg washed parts liberally with raw sugar. Bake at 425˚f / 220˚c for 20 minutes, or until the pastry is set and beginning to go golden. Reduce the temperature 375°f / 190°c, and bake until the pastry is deeply golden and the filling is bubbling, 45 to 60 minutes. If at any time you are worried that it is browning too much, cover the edges of the pie with foil to form a shield.
- Remove from the oven and leave to cool on a wire rack until the pie is room temperature or slightly warm.
- Store leftovers lightly covered at room temperature for up to 2 days or in an airtight container in the fridge for up to 4 days. Reheat leftovers before eating if desired.
Notes
This whole pie can be made ahead of time if you like, and stored lightly covered at room temperature. To refresh it before eating, warm in a 325°f / 165°c oven lightly covered in foil until warmed through. It is also delicious eaten at room temperature.
I use a 9" non-stick pie pan made by USA Pan.
Comments
Nancy C says
Just a quick thank you for posting this classic recipe using your make ahead apple pie filling. Now I have all the info required today for a successful bake! Can’t wait to get busy on this today!
caribou says
Thanks so much for posting the detail on the lattice. It's something i've always had trouble with, seeing the photos is very helpful.
Nancy C says
You should make this pie!! It was so easy to do ahead! We traveled by car for 2 days to spend Thanksgiving with family and I was charged with making pies. One apple and one pumpkin. I was so excited to find this make ahead filling and then Erin even posted the full process making my life so much easier from start to finish. The family gobbled it up. The apples were the perfect consistency and the sweetness and spice level were also right on the money. I will definitely be making this over and over again.
Gwenyth says
Beautiful lattice apple pie for our Christmas lunch. We are celebrating on the 23rd to accommodate the shift working members. I made the filling ahead of time and froze it. The lattice work was not as daunting as anticipated, although a tiny bit thick in the center. That will be the piece for the crust lovers. Beautiful pie with excellent filling.
Jennifer says
Easy to follow recipe and delicious result! I got lots of compliments for the pie!