
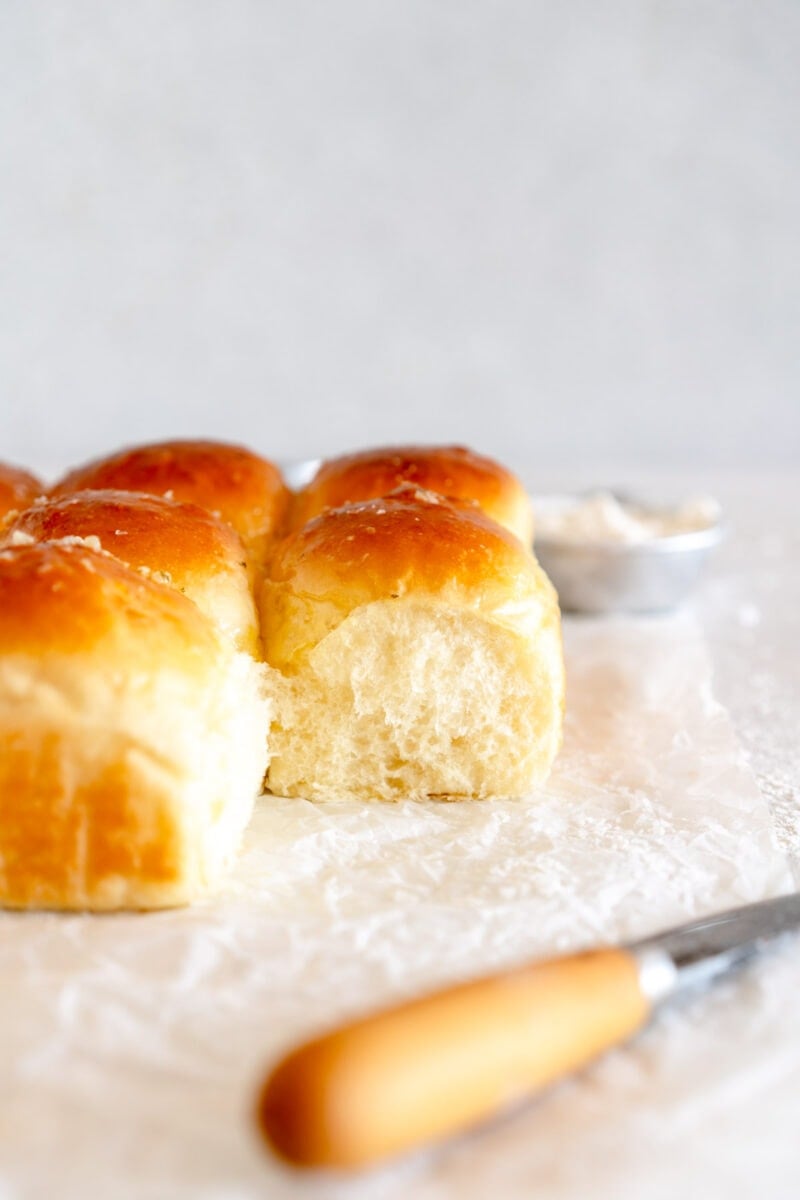
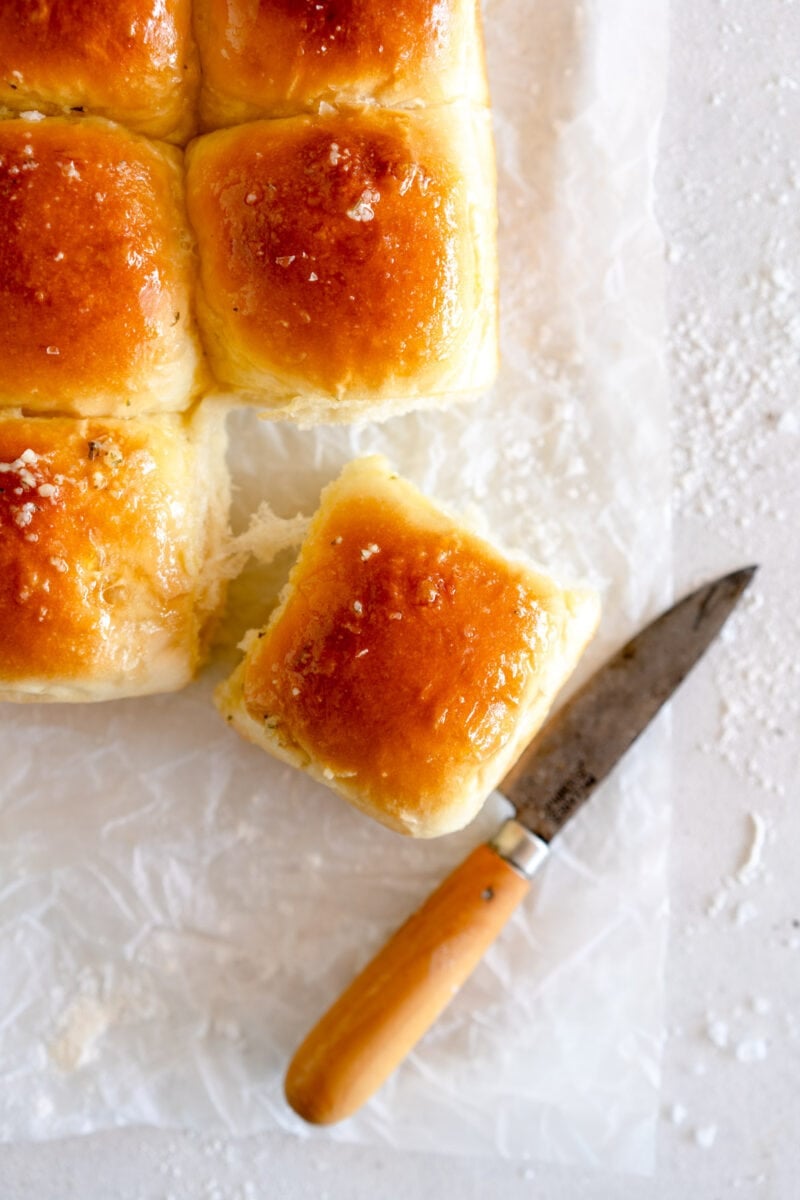
Small batch dinner rolls are super easy to make and a great no mixer dinner roll recipe. This Tangzhong based dough can be made by hand. This small batch bread recipe makes nine dinner rolls.
Small Batch Dinner Roll Recipe
Hi hi! Just popping in to share the recipe for these no mixer, small batch dinner rolls. I have a bunch of bread roll recipes on my site - these garlic butter dinner rolls, and these burger buns, which have a super versatile dough that can be used for iced buns and garlic knots.
However, both those recipes need a mixer, and I wanted to develop a small batch baking recipe that ticked all the boxes - super soft small batch dinner rolls, that are just as soft as those recipes made in a mixer. I know not everyone has access to a stand mixer, and sometimes it is so nice to just make things by hand and from scratch.
These dinner rolls are super soft, super squishy, and just so, so good. I have made them a bunch of times over the last few weeks, testing different recipe variations, and I can confirm that this is a keeper of a recipe - a great one to have in your back pocket if you don't have a mixer, or are end up somewhere without one and want a dinner roll fix.


How to make no mixer dinner rolls
This small batch dinner roll recipe is made by hand - so you have to play the role of the mixer here. It is not a no knead recipe. Someone has to develop the gluten to get that perfectly soft dinner roll, and if it is not the mixer, it is your arms. All up there is about 10 minutes of kneading in this recipe.
I love making things by hand, particularly bread, as it allows you to see all the different phases that the dough goes through as it develops. Even if you do have a mixer I encourage you to try some bread recipes by hand occasionally as it is so interesting to see all the things that happen that we might sometimes miss in the mixer!
- Make the Tangzhong. This dough is tangzhong based, which involves cooking flour and water together to form a roux.
- Add remaining ingredients. Put the tangzhong into a bowl and add cold milk to help cool down the mixture. Add all the remaining ingredients except for the butter. Mix to form a shaggy dough which is starting to show structure.
- Autolyse. This isn't a long autolyse - it is really just a quick rest for the dough to help the flour to hydrate. Leave the bowl covered to sit for 10 minutes, just to help the dough start to build strength.
- Add the butter. Add the soft butter and mix it in.
- Knead the dough. This part takes about 10 minutes and will be a bit of a process. The dough will look super sloppy to start with, then will come together and develop strength. A bench scraper / dough knife is helpful here to help scoop up any butter that is on your surface and add back into the dough until you finish kneading.
- Leave to rise. Place the dough into a bowl and cover, then leave to rise. This takes anywhere between 1 to 1 ½ hours depending on the environment and how warm your kitchen is.
- Shape the buns. Divide and shape the buns, and snuggle them into the pan, cover, and leave to rise again until perfectly puffy.
- Bake. Egg wash the buns, then bake until golden brown. Leave to cool slightly and enjoy!

The role of Tangzhong in bread dough
The Tangzhong method is an Asian Technique, and involves cooking part of the flour and water in a bread recipe to form a thick paste, or a roux. The process of making the Tangzhong gelatanises some of the starch in the flour. This means the flour is able to absorb a lot more water, and also holds onto it throughout the dough making process. This gives an incredibly soft bread which stays soft a lot longer than other bread does. Tangzhong (which is a Chinese word) is made by cooking the liquid and flour together, while the Yudane method (which is Japanese) involves adding boiling liquid to the flour and leaving it to set overnight. The benefit of using a roux means that the bread dough can stay 'lean' - so very little added fat etc but still stay extremely tender and soft.
I used this method recently in my hot cross bun recipe and loved how stretchy and smooth it made the dough, and had been meaning to work on a burger bun recipe for a while, so here we are! The Tangzhong means the bread stays soft for a long time, which means these keep and freeze super well

How to shape dinner rolls
Shaping dinner rolls or bread rolls can take a little bit of practice to get the hang of it, but it is super fun to do once you do get it nailed. Here is how I do it.
- Divide your dough up into however many pieces you are working with.
- Lightly flour. I prefer to use a tiny bit of bench flour just to help make the rolls nice and tight.
- Working with one piece of dough at a time, flatten the dough and then shape it into a ball by tucking all the edges into the middle.
- Turn the piece of dough over so the seam is on the bottom, and using your hand as a claw shape, using a cupping motion, roll the dough into a tight ball.
- Repeat with the other pieces of dough, then place under a piece of plastic wrap to rest.
- Give them a quick re roll - this tightens up the dough ball and gives the rolls a nice shape.
- If any bubbles show up on the surface when the dough is proofing, lightly pop them with a skewer to let the air out before they go into the oven.
How can you tell when bread dough is properly proofed?
It is important that when you make bread you go by how the dough is behaving and not just the time in the recipe. While the recipe is a good general guide, the starting temperature of your dough and also the weather and temperature of your room can affect how fast it rises.
The best way to tell that dough for these small batch dinner rolls is ready to bake is to poke it gently with your finger. If it springs back straight away it is not yet ready. If your finger leaves a small indentation which springs back slightly, then you know that it is ready to bake. Remember to preheat your oven about 30 minutes before you think your dough will be ready in order to give it time to properly preheat. There is nothing worse than realising your buns are ready to bake and having a cold oven. If this does happen though just pop them into the fridge so that they don't over proof while you preheat your oven.

What happens if my rolls are under / over proofed?
Sometimes this happens, and it's a huge bummer. Either you leave them proofing too long, or you forget about your buns rising, and they over proof. This means the yeast produces all the gas it is capable of making while doing the second proof and it has nothing to give in the oven. It's sad but it happens.
If you have over proofed your buns, they will probably deflate while egg washing them. Then, over proofed dough doesn't do much in the oven as there is no gas to rise the bread. They should still taste fine they might just be a bit saggy.
If you under proof your bread, it will not spring up properly in the oven. This will mean your rolls are a little dense. Make sure to do the poke test when testing for proofing - if the dough bounces straight back, it is not yet risen enough.
Substituting active dry yeast for instant yeast in a recipe.
This recipe uses instant yeast, which does not need to be activated. However if you only have active dry then you can easily substitute that, you will just need to take a quick extra step to activate. What you need to do is pop the warm tangzhong in your stand mixer bowl as usual, then add the milk and sugar. If I am activating the yeast I prefer to use room temperature or slightly lukewarm milk instead of cold. Stir around then leave to sit for 5-10 minutes until foamy. Then proceed with the rest of the recipe!


How to make dinner rolls ahead of time
If you wanted to prepare these dinner rolls ahead, there are a few ways to do so. To make the dinner rolls from start to finish takes about four hours with two room temperature rises, so make sure you account for that if you are doing it all in one go.
- Make the dough ahead of time. You can do the first rest overnight and then shape and bake the dinner rolls the next day. To do this, make the dough, place in the bowl you are using to rise it, then leave it to sit on the counter for 30 minutes. This helps to kick start the rise. Once the 30 minutes are up, transfer to the fridge for at least a few hours, or an overnight rest. The dough will need a little longer for the second rise time to account for the colder dough temperature so make sure that you account for that.
- Bake the rolls ahead of time and re warm. These rolls are best eaten on the day that they are made. If you wanted to make them ahead of time and eat later in the day, you can bake as directed (do not brush them with butter or finish with salt yet), then when you are ready to eat, cover the pan and warm the rolls in a 350°f / 180°c oven for about 10 minutes. Remove and finish with butter and salt.

Can dinner rolls be frozen?
I haven't tried freezing these small batch dinner rolls, but I have frozen a lot of my other bread recipes once baked and they freeze perfectly. To freeze, place the rolls in an airtight container or ziploc bag and freeze for up to 2 months. Defrost at room temperature then refresh in the oven or microwave before eating. I often prefer to toast rolls that I have defrosted, just to help them feel extra fresh.
Can this dinner roll recipe be scaled?
Yes, this recipe scales super well - you could double it and bake the rolls in a 9x13" pan. If you wanted to make the rolls a different size, weigh the dough and divide by the quantity of rolls you want. This will give you an idea of what weight to make the balls of dough.
If you wanted to bake these separately so they are more of a burger bun shape than dinner rolls all squished together, space out evenly on a lined baking sheet.
This dough is super versatile, so scale as you like!
FAQ for Small Batch Dinner Rolls
- What tools and equipment do you use?
You can see a full list of all the tools I use here
- Which pan did you use?
I made these in an 8" square pan, lined with parchment paper. - Can this recipe be made in a stand mixer?
Yes, if you want to make the recipe in a stand mixer, just follow the instructions (you can skip the 5 minute rest period), then mix on medium speed using the dough hook until the dough is smooth and developed, 10-12 minutes. - Is the milk powder in the recipe compulsory?
If you don't have milk powder, you can just leave it out. It helps contribute to the softness of the dough, but if you don't have any, then it will still be ok. I use whole milk powder but skim works too. - What is bread flour?
Bread flour is a higher protein flour, often called high grade or strong flour. It helps with gluten development, to make these dinner rolls soft and squishy but the dough strong enough to work with. It is important to use the right kind of flour for these dinner rolls as a flour with lower protein development will not be strong enough.


For more small batch recipes, check out:
❤️ Made this recipe and love it? ❤️
I would LOVE for you to leave me a review and star rating below to let me know how you liked it! Also, please make sure to tag me on Instagram!
Answers to your baking questions
Over the years, many of you have asked me questions about:
- baking in grams
- adjusting oven temperatures
- what kind of salt to use
- and many more!
I've curated and answered them all for your easy reference in this frequently asked questions post!
Recipe For Small Batch Dinner Rolls
Print
Small Batch Dinner Rolls
- Prep Time: 1 hour
- Cook Time: 30 minutes
- Total Time: 4 hours
- Yield: 9 rolls 1x
- Category: Bread
- Method: Baking
- Cuisine: American
Description
Small batch dinner rolls are super easy to make and a great no mixer dinner roll recipe. This Tangzhong based dough can be made by hand. This small batch bread recipe makes nine dinner rolls.
Ingredients
Tangzhong
- 20g bread flour
- 95g whole milk
Dinner Roll Dough
- 130g whole milk, cold
- 270g bread flour
- 20g milk powder
- 15g granulated sugar
- 5g instant yeast
- 3g salt
- 50g unsalted butter, at room temperature, cut into pieces.
Egg wash: 1 egg whisked with 1 tablespoon water, alternatively you can use milk or cream
To finish: Melted butter and flaky sea salt (optional)
Instructions
TANGZHONG
- Combine the milk and bread flour in a medium saucepan. Place over medium heat and cook, stirring continuously, until the mixture thickens into a paste. Remove from heat and transfer to a medium bowl.
DINNER ROLL DOUGH
- Add the cold milk to the tangzhong and mix to combine. Check with your finger that it is not too hot (it should be cool or lukewarm). Add the flour, milk powder, sugar, yeast, and salt. Bring together to form a shaggy dough, then cover with a tea towel or a plate and leave to sit for 5 minutes. This step helps the flour to hydrate a little and makes the dough a little easier to work with.
- Add the butter to the bowl and mix to bring together. Turn out the dough onto a clean work surface, and using your hands and a bench scraper when needed, knead the dough for about 10 minutes. It will be super sloppy at first and you may need to scrape the bench a few times to bring the dough together, but keep kneading - it will come together. Knead until a soft, smooth dough forms, that when pressed lightly with a finger, leaves an indentation that starts to spring back.
- Shape the dough into a ball and transfer to a buttered bowl. Cover the bowl with plastic wrap and leave in a warm spot until doubled in size, 1 to 1 ½ hours.
- Grease and line an 8” (20cm) square pan. Turn the dough out onto a lightly floured surface and divide into 9 pieces, each weighing about 65g each. Working with one piece of dough at a time, flatten out the piece of dough, then tuck up into a ball, then turn the ball seam side down and roll into a tight ball by cupping your hand to create a 'claw' shape, using the tension from the counter to roll the dough tightly. Place to the side and cover lightly with plastic wrap. Repeat with the remaining pieces of dough, grouping the balls together on your counter with a little space between them so they don't touch.
- Leave the buns to rest for 10 minutes, then give them a quick roll to tighten them back up. Arrange them evenly in the pan. Alternatively you can space them out individually on a sheet pan.
- Cover the buns either with a lid, or some lightly greased plastic wrap, or place a second sheet pan upside down over the top to act as a lid. Leave the buns to rise again for about 45 minutes to an hour. You want them to puff up and double in size, and when you press lightly on one, it should leave a small indentation that doesn't quite spring back. Remember that rising time depends on your environment so go by how the dough is looking, rather than a rising time.
- While the dough is rising, preheat the oven to 350°f / 180°c. Brush the rolls with the egg wash (if you don't want to use egg wash you can use milk). Bake for 18-20 minutes, until golden brown on top. Remove from the oven and leave to cool slightly in the pan before transfer to a wire rack and allowing to cool completely.
- Store leftovers in an airtight container at room temperature. Refresh before eating
Comments
Sonia Coombes says
I make bread quite often, from sourdough to tortillas. This recipe beats Parker House rolls by far. I don't have a stand mixer anymore, but I actually love kneading by hand. I've used this recipe from dinner rolls, hamburger buns,hotdog buñs and today I'm going to try icing buns. Amazing technique for super soft great tasting bread. I used 2% milk, with great results. Thank you for sharing.
Liv says
The best dinner roll recipe. I wanted to make sliders but the local supermarket didn’t have any buns the right size. Cloudy Kitchen recipe to the rescue! I had all the ingredients already. IThey turned out perfectly. Great instructions. I doubled the recipe and used my stand mixer. Two days later they’re still fluffy and delicious.
Sunny says
Would love to try these but we can not use milk powder can I substitute with something else?
Thanks!
Erin Clarkson says
Hi, you can just leave it out!
Pam says
I have made this twice now. This recipe makes dinner rolls that are soft and substantial at the same, and they are tasty! I used KA bread flour and wished I used a bit more salt, but that's personal. My hand-kneading is still improving, so I used (the other KA) stand mixer, but it was not straightforward. Note for those who use a stand mixer: I hand-kneaded until the ball came together well enough to mass around the dough hook, then I ran it until it was elastic, in my case, 15 minutes. After that, all good.
AM says
hello! these are amazing buns, do you think they would turn out using gluten free flour?
Erin Clarkson says
Hi, no they won't!
Gabrielle says
Made these for thanksgiving, they turned out amazing, like restaurant quality! Thank you!
Vashti says
Made these the other day for dinner. I have bad wrists so used a stand mixer to make the dough and they turned out amazing. Super soft and fluffy! Will definitely be making them again soon.
Kylie says
Made these for Christmas day lunch, to rave reviews. Thanks for this recipe! Easy to follow and yields beautiful results.
shelby says
lovely and scaled up so well!
Abbie P says
These are so yummy and soft , they stay great for a few days too. Amazing rolls
Kathleen says
I have been so excited to try these. I made them today but they didn’t rise. Not sure what I did wrong. Was my initial mixture too cold?
Erin Clarkson says
Hi! Make sure that your yeast isn't expired!
Joy Reynosa says
Oh my goodness!! I made these for the first time & they came out so fluffy & delicious! Thank you so much for putting your recipe out!! I admit I cursed an awful lot cause in the US, we don't go by grams.I had to research & convert. But all worked out & I will absolutely make these again. Delicious!!!
Erin Clarkson says
Happy you loved them! Lots of people use grams in the US - I lived there for 7 years and had no issues whatsoever finding scales. They are a great thing to own!
Jennifer Chen says
Hi! Thanks for sharing this recipe! Seems suitable to manage for a bread novice like me.
If I don’t have milk powder at home, is there an alternative to this?
Erin Clarkson says
Hi! you can just leave it out 🙂
Jane says
So bloody delicious - squishy and soft, managed to make really yum bums for our last minute burgers. Better than shop ones!
Anna White says
These rolls were great! I made them the morning of Thanksgiving for my small family gathering and they were ready well before lunch. I didn't even break out my big mixer, since Erin said it was manageable by hand. Kneading this smaller size recipe is totally doable.
The texture was perfect and they baked up nice & shiny with the egg wash! I could easily double next time, for a larger crowd.
Maddy says
I make these rolls for every single holiday meal and they are the number one thing requested by my entire family. They are foolproof and absolutely delicious! Won't even try another recipe at this point
Katie says
Made these for a dinner and they were a massive hit. I found them pretty easy to make personally, I went full send and quadrupled the batch, they came out great. Soft, fluffy, delicious and very forgiving of me cooking them in all sorts of pans and arrangements to get them cooked in one go. I made the dough the night before and popped it in the fridge, worked really nicely for me. Definitely keeping this recipe in the back pocket! Sadly I was in an unusual house and their oven had a hot corner, but even the darker ones tasted absolutely fine.
Jessa says
I have baked these twice now. Once for thanksgiving and a double batch for Christmas. Both time turned out perfectly. All of Erin’s recipes do… she’s magic!
Delaney says
I made this recipe for Christmas Day and they were a huge hit. So simple and so impressive. I made them again on Boxing Day to have leftover Christmas ham rolls. Perfection!
Doris Nyffenegger says
Incredibly light fluffy texture - so delicious!! Great for breakfast, lunch or dinner. These are great fun to bake - perfect instructions, easy to follow, amazing result 👌
Lisa Cook says
Absolutely fabulous recipe. They’re so soft, fluffy and buttery. I’ve made these rolls twice now and my husband has requested that I never use another recipe.