


Homemade Focaccia is super easy. This no knead focaccia comes together quickly and and requires no special equipment. Homemade Focaccia Bread has a crisp outside and a soft inside. This easy Focaccia recipe super versatile, you can finish it however you like, or change up the schedule to suit - either a same day focaccia recipe, or an easy overnight focaccia.

Hi! Just popping in to share this recipe with you today for this easy focaccia bread recipe! I spent the last few weeks testing this focaccia bread recipe and all the different variations for you and I am so excited to share!
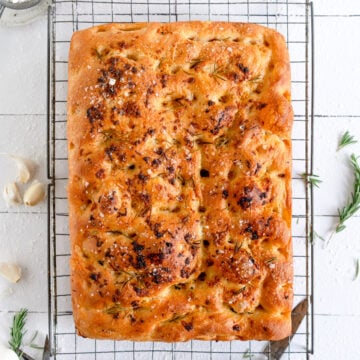
The focaccia dough comes together super quickly. It can be kept in the fridge for a long period of time to work with your schedule. I topped it with a simple garlic and rosemary topping, but you can finish this any way that you like. This is a great base no knead focaccia dough recipe and I can't wait to play around with it more to come up with more flavour and topping combinations. This easy focaccia is great for any occasion, but also makes a great sandwich bread or as an accompaniment to soups.


Sample Schedules for making no knead Focaccia Bread
I tested a bunch of different ways of making this focaccia dough, with cold and room temperature rises. The options you have after making the dough are:
- Refrigerator first rise and room temperature second rise - This is my preferred method for making focaccia and the one that I have written in the recipe. Make the dough and then place it in the fridge for at least 12 hours, and up to two days. Then, transfer to the pan and do the second rise at room temperature. This will take anywhere from about 2 hours to up to 3 ½ to 4 hours. You need to watch the dough carefully. 3 hours seemed to be the sweet spot for me when testing.
- Room temperature first rise and refrigerator second rise - This is a great option if you need the focaccia earlier the next day and don't have time to wait for it to take 3 hours to rise. Do the first rise at room temperature (about an hour and a half). Then, transfer the dough to the pan, cover with plastic wrap, and place into the fridge overnight. The next day, pull the dough out from the fridge and leave to stand on the counter while the oven preheats, just to warm the dough slightly before dimpling, topping, and baking.
- Room temperature first rise and room temperature second rise - The first rise will take about an hour to an hour and a half. Then transfer the dough to the pan and do a second rise, which should take anywhere between 40 minutes to an hour. Preheat the oven soon after putting the dough into the pan to ensure that it is ready when you are ready to bake.


Baker's Percentage and Calculating Hydration in Recipes
This is a fairly high hydration dough - it is 89% hydration. Bread baking will sometimes use Baker's Percentages to determine things like hydration. Baker's Percentages are the weight of each ingredient, relative to the weight of flour. To calculate the percentage, you divide the weight of the ingredient by the weight of the flour.
Therefore, the hydration (amount of water) in a recipe is calculated by dividing the weight of the water (535g) by the weight of the flour (600g). So, the hydration of this bread is 89%.


Can I use sourdough starter in my focaccia?
Yes - if you wanted to use some sourdough discard in your focaccia bread (rather than using the sourdough to leaven the focaccia, it just provides flavour and is a great way to use up discard). To do this you replace some of the flour and water in the dough recipe with some sourdough starter.
For example, we want to add in 150g sourdough discard - we would leave out 75g of water and 75g flour, provided that your starter is at 100% hydration (equal parts flour and water).
The new quantites are for making sourdough discard focaccia:
- 300g bread flour
- 225g All-purpose flour
- 460g water
- 150g sourdough discard at 100% hydration.
All the other quantites are the same. Add the sourdough discard along with the water and olive oil.

❤️ Made this recipe and love it? ❤️
I would LOVE for you to leave me a review and star rating below to let me know how you liked it! Also, please make sure to tag me on Instagram!
Answers to your baking questions
Over the years, many of you have asked me questions about:
- baking in grams
- adjusting oven temperatures
- what kind of salt to use
- and many more!
I've curated and answered them all for your easy reference in this frequently asked questions post!
Easy Focaccia Bread (No Knead)
- Prep Time: 12 hours
- Cook Time: 30 minutes
- Total Time: 12 hours 30 minutes
- Yield: One 9"x13" pan of focaccia 1x
- Category: Bread
- Method: Baking
- Cuisine: Italian
Description
This simple focaccia bread recipe is super easy. It comes together quickly and and requires no special equipment. This Focaccia Bread has a crisp outside and a soft inside, and is super versatile - you can finish it however you like!
Ingredients
Focaccia Dough
- 300g Bread Flour
- 300g All-Purpose Flour
- 14g salt
- 7g (2 tsp) instant yeast
- 4g (1 tsp) sugar
- 20g extra virgin olive oil
- 535g lukewarm water
- Extra Oil for greasing the dough and pan
Garlic and Rosemary Topping
- 50g extra virgin olive oil
- 4 cloves garlic, finely minced or grated on a microplane
- Leaves from 1 sprig rosemary, or to taste
- Flaky sea salt for sprinkling, optional
- A few turns of black pepper for finishing, optional
Instructions
FOCACCIA DOUGH
- In a large bowl, combine the bread flour, all-purpose flour, Kosher salt, yeast, and sugar. Add the extra virgin olive oil and water, and mix with a spatula until a shaggy dough forms and there are no dry parts. The dough is wet and sticky. This is normal. The water quantity is correct. Don't freak out, you will be fine.This is normal. Super wet dough = super fluffy focaccia. The pan is there to provide structure when it bakes, so it's ok that it's wet and sticky! It might look a bit different to mine but if you have weighed your ingredients, all will be ok, promise.
- Cover the bowl with a tea towel and leave to stand for 5 minutes.
- Perform a set of stretch and folds on the dough. To do this, wet your hands, then take a section of the dough and stretch it up and fold it onto itself. Rotate the bowl 90° and repeat the process. Repeat this two more times until you have gone around the bowl, then do one more set of four stretch and folds around the bowl (a total of 8 stretch and folds). Cover the bowl with the tea towel and leave to sit for 2 minutes.
- Repeat the stretch and folding and resting process two more times, for a total of three rounds of stretch and folds, each two minutes apart.
- Drizzle the surface of the dough with a little olive oil, and turn the dough over in the bowl to coat. Cover the bowl with plastic wrap or a lid (to make sure it doesn't dry out), then place in the fridge overnight, a minimum of 12 hours but up to 2 days. (see sample schedule in body of the post for instructions on alternative rising).
- Generously drizzle a 9"x13" (23cmx33cm) non stick baking pan with olive oil. (see notes on using a pan that isn't nonstick). Turn the risen dough out into the pan and turn it to fully coat it in the oil. Shape into a rough rectangle shape by pressing it down with your oiled fingers and tucking edges and corners in if needed. Leave to sit for 5 minutes to relax.
- Gently spread the dough toward the edges of the pan using your oiled fingers. It does not have to reach all the way - just encourage it to spread out slightly more.
- Drizzle the surface of the dough with a little more olive oil so that it does not dry out.
- Leave the pan in a warm spot, uncovered, to rise, until doubled in size, puffy, and jiggly, anywhere from 2 to 4 hours depending on your environment. When it is ready to bake, it will leave a small indentation that slowly springs back when gently pressed with a finger. Toward the end of the rising process, preheat the oven to 450°f / 230°c (conventional, not fan), and arrange a rack in the middle of the oven.
- Combine the 50g extra virgin olive oil and minced garlic in a small bowl, and mix to combine. Spoon over the surface of the dough.
- Oil your fingers and use them to dimple the dough all over, pressing your fingers almost to the bottom of the pan. Bubbles will form in the dough - do not pop them, just leave them be.
- Sprinkle with the rosemary, flaky sea salt, and pepper.
- Immediately transfer to the oven and bake for 25 to 30 minutes, or until golden brown on the surface and pulling away from the sides of the pan.
- Remove from the oven and allow to stand for 5 minutes then transfer to a wire rack to prevent the bottom from getting soggy.
- Leave to cool then slice into pieces using a bread knife. Store leftovers lightly wrapped at room temperature.
Notes
The water quantity is correct. Don't freak out, you will be fine.The dough is wet and sticky. This is normal. The water quantity is correct. Don't freak out, you will be fine. It might look a bit different to the video too - don't worry! Focaccia is meant to be sticky, the pan does all the work holding it in, you'll be just fine!
Please see "Sample Schedule" in the body of the blog post for variations on rising time and temperature.
This is the pan that I use for making focaccia - it is so great and nothing sticks! Using a nonstick pan is very important or your focaccia may stick. You can line it with a layer of parchment if you are worried, or add some butter first and then olive oil for insurance but your best bet is to use something nonstick and metal.
To make the focaccia a little thinner to get a thin and crispy situation, scale the recipe by about ⅔ and bake in a quarter sheet pan, or leave the recipe whole, and bake in a half sheet pan for a larger scale, thinner focaccia.
I recently tried making my focaccia recipe in Texas muffin pans and it worked out great - a full recipe of focaccia makes 9 Focaccia 'muffins'. To make in muffin pans, divide the risen dough into 9 portions (about 125g each), and place into the oiled muffin tin cavities. Rise as directed (it may take a little less time), then dimple and bake for about 20 minutes at the temperature directed in the recipe. Check after 20 minutes and bake until you have reached your desired level of doneness. I tried making them in regular sized muffin pans but didn't like it as much as I felt that they dried out.
To make tomato focaccia: Roast 800g cherry or grape tomatoes, 10-12 garlic cloves, a sprig of rosemary in olive oil on a sheet pan at 325°f / 160°c for an hour, shaking the pan occasionally. The tomatoes will cook down and the garlic cloves will soften. Allow to cool, then place onto the top of the dough before dimpling, along with some of the oil. Bake as per the recipe.
To make Onion and Potato Focaccia: Caramelise about 700g thinly sliced onion on medium to low heat, stirring often, until brown and jammy. I have a guide for caramelised onions if you need a recipe. Alternatively use a caramelised onion jam or relish. Spread the risen and dimpled dough with the caramelised onion, then top with about 120g thinly sliced potato which has been tossed with a little olive oil, chopped rosemary, salt and pepper. Bake as directed - the potato will get slightly crispy on top.
To make olive focaccia: Top the dough with chopped olives of your choice (add as many as you want, measure with your heart), then dimple as directed. You can add chunks of feta in here too.
To make everything bagel focaccia: Make the dough as directed, but after the autolyse phase (where you leave it to stand for 5 minutes), mix in 160g finely chopped white or brown onion, and 3 tablespoon everything but the bagel seasoning. Mix in well then continue with the stretch and folds. You can also use scallions (spring onions) in the place of onion. Before baking, either before or after dimpling, sprinkle 1 tablespoon everything seasoning over the bread.
To make Parsley oil (or other herb oil) focaccia: Make a parsley oil - rough recipe (please excuse the cups!) is the leaves of a large ish bunch of parsley (if you grab the stems of the bunch it should be about a fist full), blended well with about 1 cup of olive oil 1-2 cloves of garlic, the zest of 1 lemon, and about 2-3 tablespoon lemon juice. Blend in a high speed blender or using an immersion blender, then adjust to taste with salt, pepper, and more lemon juice or oil. Use the parsley oil to coat the bottom of the pan when you add the dough in, then add more on top before dimpling. Store the parsley oil in an airtight container in the fridge - we have it on top of soup or bread or part of a salad dressing and it is so good!
To make Cheeseburger Focaccia: I make a cheeseburger pizza all the time and we had leftover ingredients from making burgers the other night so I cheeseburgered my focaccia. Brown off about 250g ground beef / beef mince, browning well. Sprinkle with salt and set aside on a paper towel to cool. For a vegetarian option, you can brown off finely chopped mushrooms - you may need more as they shrink down. To make cheeseburger focaccia, top the risen dough with either caramelized onions (notes in the caramelised onion topping above), or an onion relish or jam, which is what I use if I haven't made onions. Follow with about 150g shredded low moisture mozzarella cheese, then the browned meat, then another 50g mozzarella cheese (I just grated 200g cheese and divided it up, no need to measure the portions). Dimple and bake as directed. When baked, finish with pickles and burger sauce of your choice.
To make butternut, goat's cheese, brown butter and sage focaccia: Make the focaccia as usual up to the second rise, then before putting in the oven top with 300g (approximate, add more if you like) roasted butternut or pumpkin cubes, and about 150g crumbled chevre goat's cheese (feta would be good too). Add salt and pepper and bake as directed. While the focaccia is in the oven, melt about 150g butter (I use salted) in a small frying pan. When the butter is melted, add a big handful of fresh sage leaves and continue to cook, stirring often, until the butter has browned and the sage leaves are crispy. Transfer to a bowl to stop the cooking process. Once the focaccia has come out of the oven, leave it to stand for 5-10 minutes before topping with the brown butter mixture. If you are making it ahead, leave off the brown butter and sage mixture until just before serving so that it doesn't go soggy. You may be best to remove the bread from the pan before adding the brown butter sage so that it doesn't cause sticking.
To make Focaccia Rolls: Make the dough with all bread flour and use 500g water - this makes the dough a little less wet and much easier to shape. I have done it as written in the recipe with all bread flour and it works fine too. After the first rise, heavily oil your baking pan. Turn out the dough onto a lightly oiled surface and divide into 12 pieces using a scale - they should be about 90g each. Shape each into a ball by using the counter to create tension - by slapping the edge of the dough down onto the counter and folding the dough over to form a ball (there is a video of this on my instagram page if you need a visual), then place into the pan. It doesn't need to be perfect! Leave to rise and then dimple and bake as written in the recipe. I finished mine with the garlic butter from my garlic knots recipe.
For mushroom, tomato and ricotta focaccia (thin base): I made the dough across two 9x13" pans so it was half the height it usually was. It took some time to spread into the pan - gently spread it, then leave it for 10-15 min then try again once it has relaxed. I then rose it as directed, which took less time. I then dimpled the dough and topped with tomato passata, a little shredded mozzarella, sliced portobello mushrooms, more mozzarella, then dolloped ricotta over the top of the cheese. I then baked as directed, and scattered fresh basil over before serving. Make sure to watch your baking time, mine took just over 20 minutes.
For Apple Pie Focaccia: Make and rise the dough as directed, then before baking spread half a batch of my apple pie filling over the dough and dimple. Make sure you pop any big bubbles that pop up as I didn't and the sugar on the dough can cause dark patches. Bake as directed but drop the oven temp to 220°c (NOT fan) - watch carefully. Once out of the oven leave to stand in the pan for 10 minutes then transfer to a wire rack over a sheet pan. Make a glaze with 200g powdered sugar and about 40g milk, and mix until you have your desired consistency - I had a little bit of brown butter left over from something else so I mixed that in too. Spread over the surface of the warm bread then use a pastry brush to brush over the top and sides of the bread. Leave to cool so the glaze can set, or eat it warm if you like - the apple filling will be quite loose until it cools.
To make Pepperoni Focaccia: I did a single batch of dough in a half sheet pan (so it is much thinner) and then topped with seasoned crushed tomatoes (or Pizza sauce), grated mozzarella and pepperoni and baked as directed (it took a tiny bit longer than a regular focaccia)
Focaccia freezes very well - I left the toppings off the top just so that the salt didn't make the bread go soggy, as salt draws out moisture. I just finished it with olive oil. I froze the baked focaccia in a ziploc bag. You can bring to room temperature and then refresh in a 350°f / 180°c oven to warm it through before serving.
Comments
Sophie says
I LOVE this focaccia recipe. It is foolproof and produces the most delicious pillowy focaccia. Couldn’t be easier. I usually bake it in a very large cast iron pan and quarter the loaf to freeze in pieces. Freezes beautifully.
Jill says
Amazing focaccia! Best recipe I’ve ever tried for it, magnificent crumb structure. My partner loves it too. We’re on west coast of Scotland and it’s a stormy grey day but this bread has brought us joy!
Erin Clarkson says
Yay! It's disgusting here and I wish I had some!
Lilly says
First time making focaccia and it was SO easy and more importantly so so delicious!!! Will definitely be making it again. Thanks heaps.
Jess says
This recipe is amazing. Have made it twice and both times it worked so well! Delicious 🙂
Mara says
This was amazing! So easy and really delicious. A great use of all the instant yeast and bread flour that i've accumulated over quarantine
Amanda says
This recipe is ridiculously delicious and so doable for the anyone of all skill levels. I've never made any kind of bread or pastry so wasn't sure how I'd go but it worked first go. Of course, because Erin's instructions along with instagram videos are second to none. Thank you for making baking so accessible, fun and delicious!
Abigail Glover says
Awesome simple to follow recipe with a great result!
Long time baker, but I rarely do bread and so pleased I chose this recipe!
Rose and baked perfectly - will definitely make again!
Erin says
Ah yay so happy you love!
Kathy D says
I’ve been baking for many years and this is by far THE best Focaccia I’ve ever made. I’ll be making this over and over again. Sorry I didn’t get a pic because it was picture perfect! Thank you for sharing and I can’t wait to see what you do now that you are Home.
Erin says
Yayyyy I am so so happy you loved!
Kathy DeStadio says
Erin, I just used your focaccia recipe to make pizza. I made two 9x13” pizzas. I baked them without until turning brown. Took them out and topped them with my pizza toppings and baked them for 10 more minutes. It made the yummiest pizza. I will make your focaccia over and over again. Thank you for sharing such a great recipe.
Allana says
This was my first time making bread, and I was so happy with how it turned out! The recipe was easy to follow too - thanks Erin! I have a dodgy tin so I coated it in oil and butter to be sure it didn't stick, and it gave it a lovely crispy base. So good!
Shadi_faleel says
Hey Erin
If anyone planning to make a Foccacia, This recipe will make their day.
Nelle says
This recipe is a DREAM. So simple & loved being able to do an overnight rise to make it feel like even less work. I generally find focaccia pretty underwhelming, but this was like the best deep dish pizza crust I’ve ever had. I topped mine with garlic oil, soffritto seasoning, caramelized onion cheddar, & capocollo & it was absolutely divine.
Erin says
Yayyy so happy you loved!
Isabella says
Hey Erin - Love love love this recipe! It's truly the best and works perfectly every time. Usually i go for the fridge then room temp rise per the main recipe but was thinking of swapping it around. If i do, does the second rise in the fridge strictly have to be overnight? Or could i stretch it out to two nights (like you can when doing it the other way around)?
Thanks!
Isabella
Erin says
Hi! ahhh I haven't tried it that way sorry! You could and see if it would work but I'm not 100% sure. I don't see why not, but just haven't done it for myself so can't be certain
Isabella says
Can confirm - it worked and was a fluffy as ever 😀
Erin says
Yay this is so good to know, thank you!
Rula Jamous says
Fantastic recipe! So clear and easy to follow. I had 100% success following this recipe and it was my first time baking Focaccia bread. Thank you Erin for your wonderful content! I will be making this again for sure.
Jenn S says
I did the double room temp raise, because I woke up knowing that I HAD to have Foccacia the same day (cravinnggggg), and it worked out well. It really is a unique bread dough, super light and fluffy and sticky, unlike anything I have made before, but just as the instructions say, trust in the dough and it comes out perfectly. I did half with garlic and rosemary, and half with just salt, so I had some more freedom with seasoning and dips. I did the proofs in a moist cold oven to speed it up, and it still puffed up amazingly with beautiful bubbles. So much better than my local pizzeria. I can't wait to pair it with some juicy roasted tomatoes. This was so easy, no machine, no wrist aching kneading. A beginner can make this and still come off looking like a super fancy baker.
Erin Clarkson says
Yay I am so happy you loved it! 🙂
Jenn S says
Update. Ate the whole thing by myself in 3 days. Apparently it’s a great breakfast, dinner and afternoon snack. Can’t wait to try the other variations.
Amy says
This was an easy recipe to make and it turned out beautifully! Crunch outside, soft and springy on the inside. It paired perfectly with a pot of chicken soup. I just love your recipes and that they are in grams! Thank you!
Stef says
I tried this recipe and had it proof overnight in the fridge. The bread turned out perfectly. All in family enjoyed it. Thank you.
Moira says
I've tried this recipe 4 times now, and each time it has been absolutely delicious! I've tried the shorter rise, the overnight rise, and the 2 day rise. This is going to be something I make regularly.
Chris says
Hi, if I half the recipe using a 10"×6" pan, how long should I bake?
Erin Clarkson says
probably about the same time - just keep a close eye!
Goria Britton says
Where is the nutrition information? When I click on the print and select the options link, there is a nutrition field which is filled in with a check-mark but I do not see the nutrition information.
Erin Clarkson says
Hi! I keep this a safe space from diet culture so I don't list nutrition information on my site. You are welcome to calculate that yourself, but it is not something that I list with my recipes
Renae says
Such a forgiving recipe. I kneaded at the wrong time, put the toppings on in the wrong order (not sure if I was having a stroke that day) but it a still worked out perfectly.
Erin Clarkson says
Hahahahah so happy to hear!
Cate says
This is such a great recipe - it’s truely delicious and I love its simplicity. Impossible to screw it up. I’ve made it about a dozen times now and have also passed it on to a bunch of friends who have had great success with it. Thank you!
Anna says
I absolutely love this recipe and I get fantastic results every time, Erin writes such clear instructions and has so many helpful tips for different proving methods. My loved ones request this one frequently, so thank you so much for giving me such a foolproof foccacia recipe!
Julie says
This is a perfect focaccia! The instructions were very detailed and easy to follow. Upon serving the focaccia, my husband asked “you made this?!” I think that’s a great compliment for CloudyKitchen’s recipe!
Dawn says
Cloudy Kitchen recipes are a SURE THING! This was the best focassia recipe I have ever made! The tips were very useful and the bread was to die for- what a crowd-pleaser! 💯
Marisa says
Holy Moly, this is a great recipe. Followed it 100%, and it came out WONDERFUL!
Erin says
Stupid easy! Instructions brilliantly clear and really appreciate the warning that it will look bad, just keep going. My lasagna was taking up the 9*13 so I ended up splitting the dough, used 8*8, baked half using the room temperature method, then did the fridge proof and had fresh focaccia two days in a row. 10/10 recommend.
Mikenzie W. says
This was my first attempt at focaccia bread, it turned out so good! My family loved it! I didn't have a dark nonstick pan so I just used a parchment lined glass pyrex 9x13 and it still turned out so good. Would definitely recommend this recipe!
Gail says
I cut the recipe in half, and it came out spectacularly. I finally found my perfect soft as a pillow focaccia. Thank you!
Marissa says
I've done this a few times and I really appreciate the fact that I get consistently good results, no matter which rise schedule I follow. This is because the recipe is so well written. I already had a scale but Erin taught me to how to rely on it and I haven't looked back. I don't even try recipes that aren't written by weight anymore because I don't trust them to turn out. Thank you for helping make a novice like me more and more confident in the kitchen. My latest batch was topped with roasted garlic and cherry tomatoes and it was divine.
Jessica says
This recipe is so. damn. good. It's fool-proof and makes a THICC, pillowy, fluffy, moist focaccia that stays moist for a few days, although it's best fresh. Straight out of the oven, it's crispy on all the sides and on top, with a beautifully fluffy interior and a lovely EVOO aroma. It also requires very very minimal work and time commitment, the least of all the focaccia recipes I've tried. This is definitely going to be a staple! I'm excited to try it with sourdough discard. My freezer is going to be full of focaccia LOL Thank you Erin!
Nicole Young says
Tried the recipe twice now and came out perfect and delicious each time. It’s now my family’s favorite bread recipe. What was great was all the useful info on technique and tips. As someone who has started bread baking in the past year this went a long way for easing my fear at trying a new recipe. I even halved it and it worked well
Erin Clarkson says
So so happy you loved! x
Reilly says
I have made this recipe about ten times now and it’s always a success. I love the simplicity of ingredients and all the FAQs you provide. Using my scale to measure ingredients makes life so much easier for me and it’s accurate every single time. My husband is always excited when he sees me making his favorite focaccia.
Sarah Shannon says
I've made this recipe 5 times now and it just keeps getting better!! Followed it exactly as stated and it never fails. Thank you!!
Erin Clarkson says
Yay you are so welcome!
Steve says
Hands down one of my favorite recipes for one of my favorite breads.
Brooke says
Due to timing I had to do a room temp first prove, then a 6 hour cold prove, I was worried it wasn't going to be long enough but it worked out perfectly - my kids even commented on how good the crumb was because it was so much nicer than my usual foccacia recipe!
Camille says
Hi Erin! I'm making this recipe for the 3rd time and I'm SO excited to eat it tomorrow. Always amazing! Quick question for you - other "no knead" recipes I've made typically have the folds further apart (~30 min rather than your 2 min here). Could you explain the reason for the rapid folds rather than spreading it out?
Thanks, can't wait to keep baking from your website! (Custard Squares are next up on the list... :))
Erin Clarkson says
Hi! You're just building a little strength before it goes into the fridge so it's fine to do them all close together! Focaccia doesn't need the structure something like a loaf does so it's not as important!
V says
Made this today. Sooooo good. Best ever really! Great recipe! Felt compelled to leave a review
Erin Clarkson says
Thank you so much!
Fabrice Vermeer says
I just made this and O M G the texture and flavour are amazing! I halved the recipe and only used AP flour as it’s all I had on hand and turned out incredible, crust outside and soft inside.
Can’t wait to try other toppings!
Bronwyn says
This delicious focaccia is a winner every-time. So moist and easy to make. Love it!
Erin Clarkson says
Hiiii! So happy you love x
Eve M says
Turned out so well! First time I've ever made focaccia so I was a bit nervous but it was incredibly easy and tasted soooo good. I didn't have fresh rosemary so used dried, but otherwise followed the recipe exactly as written and it was a doddle 🙂 Will absolutely be making this again.
Emi says
Everything I make of Erins comes out amazing. Her fool proof recipes are greatly appreciated and it’s always delicious. Thanks again Erin!
Erin Clarkson says
So happy you loved!
Grace says
Came out amazing. Followed the recipe exactly! Can’t wait to make it again!
Renae says
This recipe is idiot proof. I am the idiot that could not follow the steps in the right order but it somehow still worked out perfectly. A massive win! Easy, tasty and adaptive.
Claire says
LOVE LOVE LOVE this recipe! Super easy to make and it turns out so well every time. Nice and crispy on the edges and soft and delicious on the inside. This has become a staple in our house.
Dee says
Love love love! this is so easy and my go to for focaccia and looks impressive too!
Nancy says
The only focaccia recipe l’ll use!! So easy and versatile. I’ve made it as regular focaccia (it froze well!), as Detroit style pizza, and as tomato pie (the Philly kind) and it’s been incredible every time. Highly recommend! Very easy. Can’t beat the jiggles.
Laura says
I made this using the same-day ferment/proof/bake schedule, and it was so delicious and so easy. The bread was super tender and light, but the crust was so nice and crisp where I wanted it to be. Will make a million times, I’m sure!
Christel says
I’ve made this twice now and it’s turned out perfect both times. It got rave reviews from everyone at family dinner last night. I definitely have this on my “easy things I make for pot luck that make people go wow” list so I’m sure it will be made many more times.
Ashleigh says
Such an easy and satisfying recipe (both to make and eat!) - this is now a staple in our house. Love it!
Rowena says
Always amazing! This recipe is a favourite in my household.
Stevie says
So easy and soooo satisfying to jiggle the dough.
Will defs make again and again!
Emma Hobbs says
Love love love this bread.
If it’s just to go with dinner then I halve the recipe and it’s perfect. If entertaining I go the whole hog. Only problem is I can’t stop eating once I start! Have had great success with overnight rise or just room temp both rises. Favourite foccacia!