
These Anzac Brownie Bars are a combination of chewy Anzac biscuit, and fudgy chocolate brownie. They are super easy to make, and a fun twist on a classic.

Hi hi! Just popping in to share this recipe for Anzac Biscuit brownie bars! This recipe is a mash up of my Anzac biscuit recipe, which is super popular on my baking blog, topped with a layer of my super fudgy homemade brownie.
This recipe came about when I was trying to make a 'brittle' version of my Anzac biscuit recipe, but couldn't get them to where I wanted. I baked them into a pan, and the recipe was *fine*, but just needed something.
So, to combat this, I popped a thin layer of my brownie batter on the top, and this turned out to be a very, very good decision. The chewy Anzac biscuit base is the perfect textural contrast to the fudgy brownie top.
If you would like another great classic New Zealand recipe (and a way to use up golden syrup), check out my ginger crunch recipe!
I know that making brown butter can be intimidating. Don't be scared, I will hold your hand the whole way through in my post and you'll be nailing it in no time: Brown Butter 101: The Ultimate Guide


Using Golden Syrup in baking
You will notice that this recipe uses Golden Syrup - which is a sugar cane based syrup, similar in consistency to corn syrup but with a completely different taste - it has a toasty flavour and is one of my favourite things to use in recipes.
The role of golden syrup in Anzac biscuits is to provide that chewy and toasty flavour. If you cannot find golden syrup, you can use honey instead. I used to get my golden syrup online when I was in the US - if you have some that needs using up, check out my golden syrup recipes!
How to cut Brownies Cleanly
While these also have the Anzac biscuit base, the thin layer of fudgy brownie on top can be a little messy to cut - unless you chill it, and then you will be fine.
I like to wait until the brownies have cooled slightly, then pop them in the fridge until cooled completely (if you are worried about them being too warm on the fridge shelf, I place a small oven rack in the fridge too just to protect it)
My Top Brownie Tips
- Get all my tips and tricks on how to get the perfect crinkly brownie top in my fudgy homemade brownie recipe.
- Plus, follow this easy Instagram video tutorial to cleanly cut homemade brownies!


❤️ Made this recipe and love it? ❤️
I would LOVE for you to leave me a review and star rating below to let me know how you liked it! Also, please make sure to tag me on Instagram!
Answers to your baking questions
Over the years, many of you have asked me questions about:
- baking in grams
- adjusting oven temperatures
- what kind of salt to use
- and many more!
I've curated and answered them all for your easy reference in this frequently asked questions post!

Anzac Biscuit Brownie Bars
- Prep Time: 30 minutes
- Cook Time: 1 hour
- Total Time: 4 hours
- Yield: 20 servings 1x
- Category: Brownie
- Method: Baking
- Cuisine: New Zealand
Description
These Anzac Brownie Bars are a combination of chewy Anzac biscuit, and fudgy chocolate brownie. They are super easy to make, and a fun twist on a classic.
Ingredients
Anzac Biscuit Base
- 150g unsalted butter, cold from the fridge is fine
- 40g golden syrup
- 30g water
- ¾ tsp baking soda
- 135g all-purpose flour
- 50g desiccated coconut
- 110g Old-fashioned oats (Rolled Oats)
- 130g brown sugar
- 90g caster sugar
- ½ tsp salt
Brownie Topping
- 135g dark chocolate (I used 72%), coarsely chopped
- 120g unsalted butter, cold from the fridge is fine
- 10g dutch process cocoa
- 2 large eggs (100g not including the shell)
- 135g caster sugar
- 65g brown sugar
- ¼ tsp vanilla
- ¼ tsp salt
- 65g all-purpose flour
Instructions
ANZAC BISCUIT BASE
- Preheat the oven to 325°f / 160°c Grease and line a 9x13" (20cm x 30cm) baking pan with parchment paper, leaving some overhanging to help remove the brownie later.
- Place the butter in a medium saucepan, and place over medium heat. Cook until the butter has melted, and then continue to cook, swirling the pan often, until the butter foams and turns golden brown and nutty - this should take 3-4 minutes. Transfer to a bowl and allow to cool slightly.
- Weigh out 115g (see Notes section below) of the brown butter and place into a small saucepan.
- Add the Golden Syrup and water, and place over a low heat, stirring frequently, until smooth and melted together.
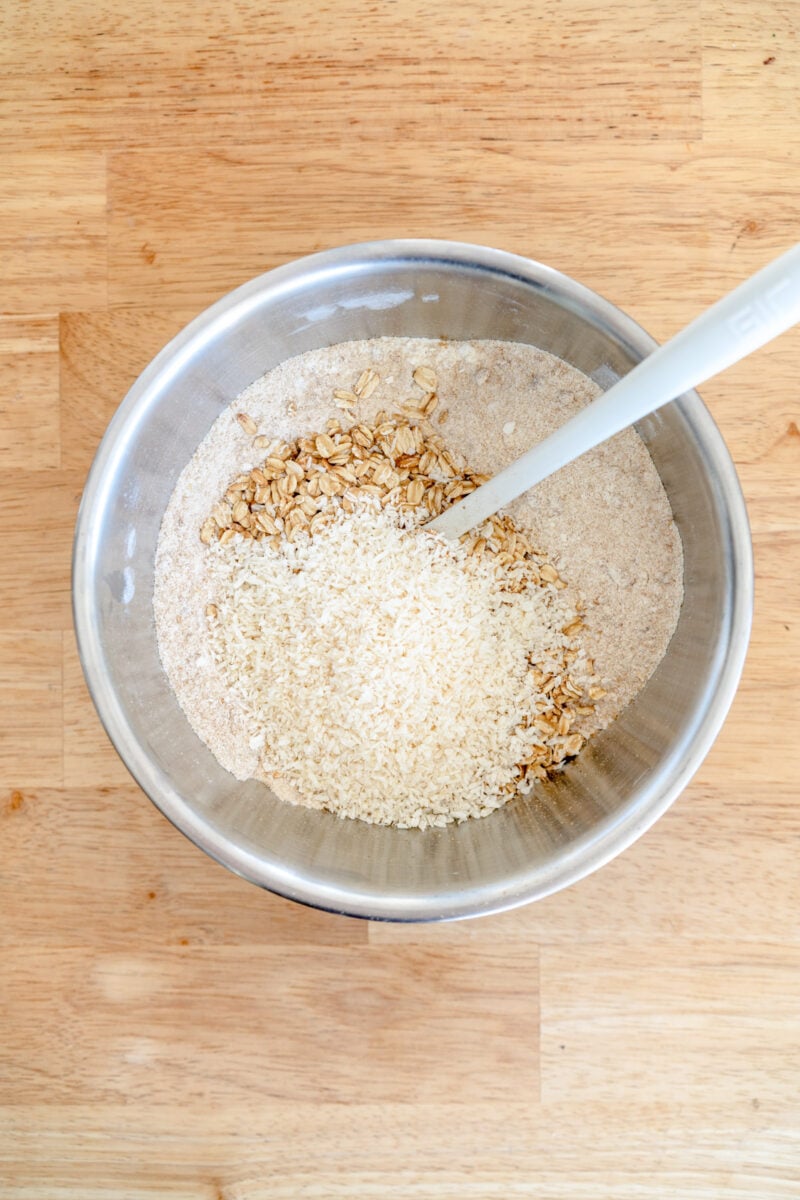
- While the wet ingredients are heating up, in a large bowl, combine the flour, coconut, oats, brown sugar, caster sugar, and salt. Mix until full incorporated.
- Once the butter and golden syrup is smooth and combined, remove from the heat and add the baking soda, mixing well to incorporate (it will foam up a little). Pour into the dry ingredients and stir with a spatula until well combined.
- Transfer the base mixture to the prepared pan, and smooth out (it will be quite thin). I like to use an offset spatula or my hands. Make sure that it is evenly spread out.
- Bake the Anzac biscuit base for 20 minutes, until golden brown. Remove from the oven and allow to cool completely (this step can be done a day ahead and stored covered with plastic wrap).
BROWNIE TOPPING
- Preheat the oven to 350°f/180°c.
- In a heatproof bowl over a pan of simmering water (make sure the bowl does not touch the water), combine the dark chocolate and butter. Heat, stirring frequently, until the chocolate and butter are melted and the mixture is smooth. Alternatively you can do this step in the microwave - microwave for 30 second increments, stirring well after each until the mixture is smooth and combined.
- Sift the cocoa powder over top of the chocolate and butter mixture and stir until well combined.
- In a large bowl, combine the eggs, caster sugar, and brown sugar. Mix on medium to high speed with an electric handheld mixer for 2-3 minutes until the mixture has lightened and increased in volume. This step can also be done in a stand mixer using the whisk attachment.
- Add the chocolate mixture and mix to combine. Add the salt and vanilla and mix until incorporated.
- Add the flour and incorporate by hand until the mixture is smooth and does not have any lumps.
- Pour the batter over the cooled Anzac base, then leave to sit for a few minutes, then bang on the counter to help remove any big bubbles.
- Bake the brownie slice for 20 to 25 minutes, until the top and edges are set.
- Remove from the oven and allow to cool, then transfer to the fridge and allow to chill completely.
- Remove from the pan using the overhanging parchment, and slice into pieces using a sharp knife, wiping between cuts.
- Store leftovers in an airtight container in the fridge for up to a week.
Notes
- You may notice that there are two quantities of butter in the recipe - the initial quantity of butter, then a second measurement in the method which is the quantity of brown butter. The larger initial quantity is to account for water loss when browning - read more about that in my FAQ. You may have a tiny bit leftover - I use it to put on toast!
- Can I use salted butter?
Yes - if you don't have unsalted butter that is totally fine - just hold back a little on the salt content in the brownie batter. - Do I have to use caster sugar?
No - you can use regular granulated sugar if you like. In New Zealand, our sugar is much coarser, so I call for caster sugar in the recipe. However if you are in the US or you have finer sugar, regular granulated is fine. Either work great in the recipe, caster just dissolves better when being whipped with the eggs to form that crackly top. Another reason why baking with grams is the best - 200g of sugar is 200g sugar.
Comments
stacy says
making these now!
caribou says
these are delicious!
Lun says
So the brownie topping doesn't have any baking powder or soda in it?
Erin Clarkson says
Nope!
Kim says
I anxious to try this! I have an opened can of golden syrup and was looking for recipes to help use it up. One question, desiccated coconut...can I use unsweetened shredded coconut in place of desiccated? Is desiccated coconut a finer texture? If so, would it help to run it through the food processor?
Erin Clarkson says
Hi! It should be fine seeing as it's all contained in the pan! You can always process it if you're concerned
Donna says
Due to anaphylactic allergy, do you think I could substitute no egg replacer for eggs? I understand it will change it somewhat. I have to bake everything gluten free in my house as my daughter can't have gluten, eggs & ALL nuts/seeds. Your recipe looks yummy!
Erin Clarkson says
I'm not sure sorry! I don't have any experience with egg replacer
Susan Oher says
Absolutely delicious! I cut them into quite small squares and served them at an art opening - they were gone in no time and I loved eves-dropping when people told their friends how delicious they were!
Hannah Hunt says
These are ammmmmmazing 100/10 - Will be making again!!
Marise says
I made these and they are delicious. I found the recipe easy to follow although there’s no way I was completely cooling them before I cut them! A bit more work than an Anzac biscuit but it was next level Anzac. I have now hidden them from the kids.
Charle says
It’s outstanding!! Did it two ways one with brownie topper yum!! And then just with choc icing because I ran out of time. A winning recipe that’s “going straight to the pool room” aka print out is now stuck in my fav recipe folder. Thanks heaps! Delicious 🤤
Jenn Ulsh says
While I haven't made this recipe yet, it would be a lot easier for me if the measurements weren't in metric ...
Erin Clarkson says
Ah yes sorry I forgot that my free blog only exists to suit you specifically, my mistake. You are welcome to google the equivalents.
Sarah says
Well said, Erin!! I’ve followed your blog for years and want to say thank you for your consistent and well researched recipes and for providing these in metric measurements! I live in England and don’t understand the insistence of (some) Americans on using cups. They’re inaccurate, inconsistent, and make loads of washing up?
Clare says
I made a batch of this to put on a shared picnic table at an organised swim. It was absolutely delicious, the brownie was perfectly fudgy and the Anzac layer lovely and chewy. It soon disappeared!
Libby Cullen says
Yet another amazing recipe on this blog, thank you Erin! I made this yesterday and it was absolutely delicious. The anzac base is such a great addition to the brownie and they go perfectly together. The recipe was clear and easy to follow (yay for grams!!!). Would 10/10 recommend and had loads of guests ask for the recipe so it's going to be on my to-bake list again soon for sure.
Lauren says
I have made this recipe twice and perfect both times. Chewy Anzac base, slightly fudgy brownie on top and I found the recipe so easy to follow with no obscure ingredients. Absolute crowd pleaser at work.
Lisa says
I made this yesterday for Anzac Day and boy was it a hit! I’m not usually a fan of brownies in general but this combo was absolutely delicious. The middle bits were fudgey brownie with the Anzac texture base and the edges were a slightly more firm so it was a real crowd pleaser. Easy to make, very little fuss 😀
Karissa says
Can I use white chocolate and replace the cocoa with extra flour?
Erin Clarkson says
I don't think it's a straight sub sorry and would be far too sweet
Audrey Ting says
These are incredible! I make a batch every few weeks and freeze them in bite sized pieces for lunchboxes or a quick sweet hit. Totally worth the effort. It’s definitely another family staple and a big tick from big and little kids alike 🙂
L R says
Second time making these and they are SO GOOD!! Amazing recipe works perfectly. I will be thinking about these until I make them again. Thank you for sharing
Briar Williams says
I have made this recipe a number of times and it never fails. It's such a delicious combo and really easy to make. Have shared the recipe with a number of people as it's always so popular. Thanks Erin!
Melissa says
I love Anzac biscuits and who doesn't love brownie so made this recipe over the weekend. I thought it would be a hit for the school lunch box. I delivered the baking to family tonight and Luca scoffed two pieces. His mother send me a text "No wonder Luca scoffed these, blimin delicious and a tiny bit dangerous. Great recipe, will make again and I'm sure they will freeze well.
Evann says
I made these bars last night. My husband took one bite, pulled my ring off my finger, got down on one knee, and proposed to me all over again. To say he loved them is an understatement.
Rosie says
The expected guests didn’t end up coming over, more for me!! Suckers
Nadine says
These are delicious!
Meg says
I was skeptical about the brownie going with the Anzac base but I was absolutely proven wrong. Delicious!!
Georgia B says
I couldn't stop thinking about this recipe so I made these brownies at the weekend - so delicious! They didn't last long 🙂
Cloudy Kitchen is my new go-to as everything I've made has worked so well. Really appreciate Erin's notes and visuals which are super helpful. The brown butter post is 👌🏼
Hazel McGibbon says
This is yet another flawless recipe. So easy to make and tastes amazing. Love the crunch of the anzac base to this brownie.
Thank you so much for all the time and effort you put into these recipes. Takes all the guesswork out of trying new recipes.