Description
Ever been intimidated by frosting a cake? Don't be! My Ultimate guide on how to frost a cake will walk you through the process of making a layer cake step-by-step - I promise once you know what you are doing, it's much easier than you think! I have been doing it this way for years.
Ingredients
Cake
- Cake of your choice, baked, cooled, and levelled, either at room temperature, chilled (my preference), or frozen and left at room temp for about 30 minutes before assembly
Frosting
- Frosting of your choice (I like Swiss Meringue Buttercream for more fancy detail work), or my Classic Vanilla Buttercream Frosting or Chocolate Buttercream Frosting are both good options.
Instructions
This is a step-by-step guide to use for reference - for more detail, please use the instructions in the body of the blog post.
- Place something between the cake board or plate you are using and the turntable - I like to use a damp paper towel.
- Look at your cake layers and find which one has the neatest bottom side - I like to put the top layer of my cake on upside down so that I have a nice flat surface to use as the top of my cake.
- Get everything ready. I like to get all my tools out, and transfer some of the frosting to a piping bag if I am making a buttercream dam.
- Make sure that there is enough space in your fridge to place the cake once you have finished it - I also like to do this before I start so I am not playing fridge tetris.
- Secure the first layer of the cake to the plate or cake board using a little buttercream. Add buttercream - the amount you use will depend whether you are adding a filling or not. I like to use a cookie scoop to portion it out so that there is an even amount in between layers.
- No filling - Add your buttercream to the cake layer, and spread it smooth using an offset spatula.
- Filling - Add a little buttercream to the cake layer, spread it smooth using an offset spatula, and then add a buttercream 'dam' to the cake, piping a circle of buttercream with your piping bag. Smooth it down on the inside edge of the dam to help it adhere to the cake. Add filling if you are using.
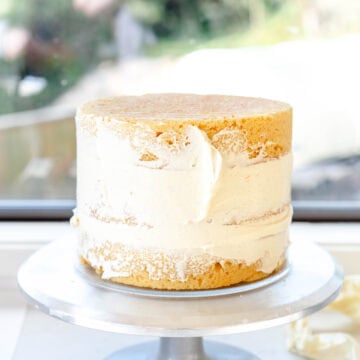
- Add the second layer of cake (If this is the top layer make sure you put it on upside down), and secure to the bottom layer with a layer of frosting (see images). I like to smooth it off with my offset spatula or scraper.
- Continue the filling and stacking process until your cake is fully stacked. Don't forget to seal the layers on as you go.
- Place the top layer on upside down. Add buttercream to the top of the cake and smooth using your offset spatula. Remember you are doing the crumb coat first, so it doesn't have to be a thick layer of buttercream. I like to get the top of the cake smooth and then work on the sides. Don't worry about the edges yet - they come after the sides are done.
- Add buttercream to the outside of the cake using your offset spatula. Again remember you are doing a crumb coat so this can be a thin coating.
- Smooth using your cake scraper. The buttercream will work its way up the sides of the cake toward the top edge. Once the sides are smooth, you can use your offset spatula to sharpen the edges of the cake - hold it at a slight angle and pull it toward the inside edge of the cake to give a sharp edge.
- Chill your crumb coated cake for at least 15 minutes (I like to do 30 if I can) to give the buttercream enough time to set properly.
- Once the crumb coated cake has chilled it is time to add the final layer of buttercream. I like to do the top first again, adding buttercream and smoothing it on using the offset spatula.
- Add a thicker layer of buttercream to the sides of the cake. Once it is all covered, smooth with your scraper. There will likely be a few holes and uneven bits - these can be fixed later.
- Patch up any bits, and do another pass with your scraper until you are happy with how smooth it is.
- If you would like to if you have a metal scraper, you can warm it up by running it under hot water and then dry it off and use the slightly warm scraper to do your final pass on the frosting - be aware this doesn't work with every kind of frosting as it will cause dark patches on chocolate buttercream etc. If you are concerned, test it on some of the frosting in the bowl.
- Once the sides are smooth, finish off the top edge by using the offset spatula, or you can leave it rustic (I often like to do it this way as it gives a nice looking edge and means that you don't have to worry about a super smooth edge)
- Finish the cake as desired - using piping, sprinkles, decorations, etc etc.
- Give your cake at least a few hours to chill before serving or transporting to allow it to fully set.
- Cake is fine to be stored uncovered in the fridge before serving for up to a few days (As long as you are comfortable with how smelly your fridge is), and once cut, store in an airtight container in the fridge.
Notes
To cut a layer cake cleanly: I like to use a sharp knife, and warm it under hot water then dry it so that it is dry but warm. Cut as desired, wiping the blade between cuts.