Description
These easy, fudgy, Nutella Brownies are a great twist on the classic fudgy brownie. With chunks of chocolate hazelnut spread throughout and swirled on top these are a super easy way to mix up your brownie game!
Ingredients
Scale
Brownie Base
- 135g dark chocolate (I used 72%), coarsely chopped
- 120g unsalted butter, cold from the fridge is fine
- 10g dutch process cocoa or regular unsweetened cocoa, sifted
- 2 large eggs (about 100g not including shells)
- 135g caster sugar (granulated sugar works fine but will not give the super glossy brownie top, see notes)
- 65g light or dark brown sugar
- ¼ tsp salt
- ¼ tsp vanilla extract or vanilla bean paste
- 65g all-purpose flour, sifted
Nutella
- 150g Nutella or Chocolate Hazelnut Spread of your choice, for adding into the brownie
- 80g Nutella or Chocolate Hazelnut Spread of your choice, for swirling on the top
Instructions
- Preheat the oven to 350°f / 180°c. Grease and line a 9” (23cm) square pan with parchment paper, making sure the parchment extends over the sides of the pan to form a ‘sling’. Clip down with binder clips if desired.
- In a heatproof bowl over a pan of simmering water (make sure the bowl does not touch the water), combine the dark chocolate and butter. Heat, stirring frequently, until the chocolate and butter are melted and the mixture is smooth. Alternatively you can do this step in the microwave - microwave for 30 second increments, stirring well after each until the mixture is smooth and combined.
- Sift the cocoa powder over top of the chocolate and butter mixture and stir until well combined.
- In a large bowl, combine the eggs, granulated sugar, and brown sugar. Mix on medium to high speed with an electric handheld mixer for 2-3 minutes until the mixture has lightened and increased in volume. This step can also be done in a stand mixer using the whisk attachment.
- Add the chocolate mixture and mix to combine. Add the salt and vanilla and mix until incorporated.
- Add the flour and incorporate by hand until the mixture is smooth and does not have any lumps.
- Transfer the batter to the prepared pan, and tap the pan on the counter a few times to ensure there are no air bubbles. Leave to sit for a minute or two then bang again to ensure there are no bubbles.
- Place the 150g measure of Nutella into a piping bag. If it is cool and you are worried you will have a hard time piping it, you can warm it slightly in the microwave before adding to the bag.
- Snip a small hole off the end of the piping bag.
- Use the piping bag to add 'blobs' of Nutella to the brownie - place the tip just under the surface of the brownie and squeeze until a small amount comes out. Repeat this process until the brownie is filled with blobs of Nutella and you have used it all up.
- Using a spoon, gently cover any Nutella sticking out (this is an optional step, it just makes it a little cleaner for adding the decoration - you do not have to be perfect here)
- To add the feathering, place the 80g Nutella into a piping bag or ziploc bag and snip a small hole in the end.
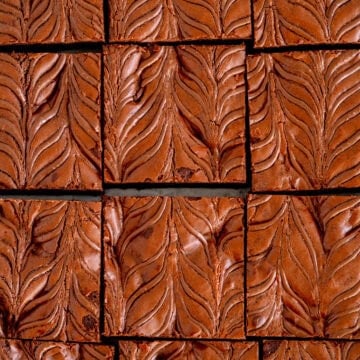
- Pipe horizontal lines of Nutella across the surface of the brownie, fairly close together (see images in the blog post).
- Using a sharp paring knife or a skewer, drag the point of the knife vertically through the lines of Nutella, alternating upwards and downwards in direction and wiping the blade between each pass. This will give you your feathered look.
- Bake the brownies for 22 to 28 minutes, checking after 20 minutes. You are looking for the edges and top of the brownie to be set, and when a skewer is inserted in the middle, it should come out with a few moist crumbs attached. You are best to lean toward under baking than over baking.
- Remove the brownies from the oven and place the pan on a wire rack. Leave to cool in the pan then remove using the parchment paper sling. Slice using a sharp knife - I prefer to chill my brownies before slicing them to get a super clean look.
- Store leftovers in an airtight container at room temperature for up to four days or in the fridge for up to a week.
Notes
Do I have to use Caster Sugar?
No - you can use regular granulated sugar if you like. In New Zealand, our sugar is much coarser, so I call for caster sugar in the recipe. However if you are in the US or you have finer sugar, regular granulated is fine. Either work great in the recipe, caster just dissolves better when being whipped with the eggs to form that crackly top. Another reason why baking with grams is the best - 200g of sugar is 200g sugar.